本文主要是介绍【python1】图像操作,验证码识别,拼接/保存器,字符分割识别,移动物检测,ckpt转pb,keras_yolov3_gpu训练自己数据集,希望对大家解决编程问题提供一定的参考价值,需要的开发者们随着小编来一起学习吧!
文章目录
- 1.图像操作
- 1.1 安装
- 1.2 画图
- 1.3 几何变换
- 位计算
- 遮挡
- 通道切分合并
- 金字塔
- 缩放
- 平移
- 旋转
- 仿射变换
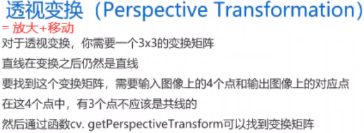
- 透视变换
- 1.4 形态学
- 1.5 模糊(平滑)
- 1.6 色彩空间转换
- 1.7 二值化
- 1.8 图像梯度
- 1.9 canny边缘检测
- 1.10 视频操作
- 读取摄像头视频
- 读取视频文件
- 视频写入
- 视频提取指定颜色
- 1.11 直方图
- 1.12 模板匹配
- 1.13 直线/圆/轮廓检测
- 2.数字验证码识别
- 3.图像拼接/保存器
- 4.字符分割识别
- 5.移动物检测
- 5.1 帧间差分法
- 5.2 相机捕捉照片
- 5.3 MindVision品牌的相机
- 5.4 无品牌相机,大多数有相机的电脑
- 6.ckpt转pb文件
- 7.Keras_Yolov3_GPU训练自己数据集
- 7.1 数据准备
- 挑选像素足够的图片
- 数据标注及检查
- 图像压缩
- 划分训练集和测试集
- 7.2 模型训练
- 7.3 模型测试
- 单张图
- 视频
- 多张图
1.图像操作
1.1 安装
pip install opencv-python(opencv-contrib-python是扩展模块,pytesseract是OCR)。如果cv.不提醒代码提示功能,ctrl+左键就可以查看源码,xxx\Anaconda3\Lib\site-packages\cv2\__init__.py中删除原来程序,写入下段程序:
import sys
import os
import importlib
os.environ["PATH"] += os.pathsep + os.path.dirname(os.path.realpath(__file__))
from .cv2 import *
globals().update(importlib.import_module('cv2.cv2').__dict__)
1.2 画图
import numpy as np
import cv2
import matplotlib.pyplot as plt
def show(image):plt.imshow(image)plt.axis('off')plt.show()
image = np.zeros((300,300,3),dtype='uint8')
show(image)

green = (0,255,0)  # opencv:RGB
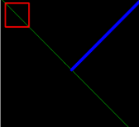
cv2.line(image,(0,0),(300,300),green) # 左上角(0,0),右下角(300,300)
show(image)

blue = (0,0,255)
cv2.line (image,(300,0),(150,150),blue,5)  # 这里5为粗细,默认为1
show(image)

red = (255,0,0)
cv2.rectangle(image,(10,10),(60,60),red,2) # 2改则为-1则为红色实心填充矩形
show(image)
(cx,cy)=image.shape[1]//2,image.shape[0]//2  # 宽/2,高/2,则为圆心
white = (255,255,255)
for r in range(0,151,15): #0到150,151取不到,步长15cv2.circle(image,(cx,cy),r,white,2)
show(image)
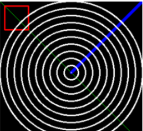
image = np.zeros((300,300,3),dtype='uint8')
for i in range(10):radius=np.random.randint(5,20) # 半径取值color=np.random.randint(0,255,size=(3,)).tolist() # tolist()变列表[],颜色取值pt=np.random.randint(0,300,size=(2,)) # 圆心取值cv2.circle(image,tuple(pt),radius,color,-1) # 画图
show(image)

image = cv2.imread('C:/Users/yuta/Desktop/img3/20190720072950_000256_cc8cdaa6430.JPG')
image = cv2.cvtColor(image, cv2.COLOR_BGR2RGB)
show(image)

1.3 几何变换
# -*- encoding: utf-8 -*-
# -*- coding=GBK -*-
import cv2
import os
import numpy as np
import matplotlib as plt
import matplotlib.pyplot as plt
for imgname in os.listdir("C:/Users/yuta/Desktop/img3"):imgpath = "C:/Users/yuta/Desktop/img3/"+imgnameprint(imgpath)src = cv2.imread(imgpath)a = cv2.flip(src,1) # 水平翻转b = cv2.flip(src, 0) # 垂直翻转c = cv2.flip(src, -1) # 水平+垂直d = src[200:,150:-150]  # 剪裁,x方向:200到最后,y方向:150到 下往上150cv2.imshow('input image', b)cv2.waitKey(0)
M = np.ones(src.shape,dtype='uint8')*100 # 生成和图片形状相同并且全为100的数据e = cv2.add(src,M) # 所有像素加100,往255白发展,调亮度f = cv2.subtract(src, M)cv2.imshow('input image', e)cv2.waitKey(0)
# 图像加法
print(cv2.add(np.unit8([200]),np.uint8([100]))) #输出[[255]],图像范围0-255,300也转为255
# 普通加法
print(np.unit8([200])+np.uint8([100]))  #[44],unit8也0-255,加到255重新记为1
# 图像减法
print(cv2.subtract(np.uint8([50]),np.uint8([100]))) #输出[[0]],图像范围0-255,-50转为0
# 普通减法
print(np.uint8([50])-np.unit8([100])) #输出[206]
位计算
rectangle = np.zeros((300,300,3),dtype='uint8')white = (255,255,255)cv2.rectangle(rectangle,(25,25),(275,275),white,-1) # (25,25)初始,(275,275)终止,-1填充cv2.imshow('input image', rectangle)cv2.waitKey(0)

与:有0为0,或:有1为1,异或:同0

circle = np.zeros((300,300,3),dtype='uint8')white = (255, 255, 255)cv2.circle(circle,(150,150),150,white,-1) # (150,150)圆心,150半径cv2.imshow('input image', circle)cv2.waitKey(0)

g = cv2.bitwise_and(rectangle,circle) # AND与,有0变0即有黑变黑h = cv2.bitwise_or(rectangle,circle) # OR或,有白变白i = cv2.bitwise_xor(rectangle,circle) # XOR异或,黑白变白,黑黑和白白变黑cv2.imshow('input image', g)cv2.waitKey(0)

遮挡
mask = np.zeros(src.shape,dtype='uint8') white = (255,255,255)cv2.rectangle(mask,(50,50),(250,350),white,-1) # 创建黑色遮挡cv2.imshow('input image', mask)cv2.waitKey(0)

masked = cv2.bitwise_and(src, mask)cv2.imshow('input image', masked)cv2.waitKey(0)

通道切分合并
(R,G,B) = cv2.split(src) #cv2.imshow('input image',G),分开就是三张单通道黑白,print(R.shape)merged = cv2.merge([R,G,B]) cv2.imshow('input image', merged) #产生彩色原图cv2.waitKey(0)
金字塔


imgpath = "C:/Users/yuta/Desktop/img3/20190720072950_000256_cc8cdaa64390.JPG"
src1 = cv2.imread(imgpath)
for i in range(3):src1=cv2.pyrDown(src1)  #不能j=print(src1.shape)cv2.imshow('input image',src1) # 生成3张大小不同图cv2.waitKey(0)
down_image1 = cv2.pyrDown(src1)
down_image2 = cv2.pyrDown(down_image1)
up_image = cv2.pyrUp(down_image2)
laplacian = down_image1-up_imagecv2.imshow('input image',laplacian)
cv2.waitKey(0)

缩放




平移


旋转


仿射变换


透视变换



1.4 形态学
腐,膨。 开,闭,开闭。 白帽,黑帽


kernel1=cv2.getStructuringElement(cv2.MORPH_RECT,(5,5))
kernel2=cv2.getStructuringElement(cv2.MORPH_ELLIPSE,(5,5))
kernel3=cv2.getStructuringElement(cv2.MORPH_CROSS,(5,5))
erosion = cv2.erode(src1,kernel1) # 腐蚀cv2.imshow('input image',erosion)
cv2.waitKey(0)

for i in range(3):erosion = cv2.erode(src1, kernel1,iterations=i+1)cv2.imshow('input image', erosion) #三次腐蚀颜色越来越深cv2.waitKey(0)
for i in range(3):dilation= cv2.dilate(src1, kernel1,iterations=i+1) #膨胀dilate,取得是局部最大值cv2.imshow('input image', dilation) #三次膨胀颜色越来越白cv2.waitKey(0)
kernel1=cv2.getStructuringElement(cv2.MORPH_RECT,(5,5))
opening = cv2.morphologyEx(src1,cv2.MORPH_OPEN,kernel1) # 开运算:先腐蚀后膨胀
closing = cv2.morphologyEx(src1,cv2.MORPH_CLOSE,kernel1) # 闭运算:先膨胀后腐蚀cv2.imshow('input image', opening)
cv2.waitKey(0)
opening = cv2.morphologyEx(src1,cv2.MORPH_OPEN,kernel1) # 开闭运算
closing = cv2.morphologyEx(opening,cv2.MORPH_CLOSE,kernel1)
cv2.imshow('input image', closing)
cv2.waitKey(0)

gradient = cv2.morphologyEx(src1,cv2.MORPH_GRADIENT,kernel1)cv2.imshow('input image', gradient)
cv2.waitKey(0)


blackhat = cv2.morphologyEx(src1,cv2.MORPH_BLACKHAT,kernel1)cv2.imshow('input image', blackhat)
cv2.waitKey(0)

1.5 模糊(平滑)
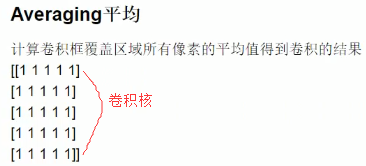
kernelsizes = [(3,3),(9,9),(15,15)] # 越大越模糊
plt.figure(figsize = (15,15))
src1 = cv2.cvtColor(src1, cv2.COLOR_BGR2RGB)
for i,kernel in enumerate (kernelsizes):plt.subplot(1,3,i+1)blur = cv2.blur(src1,kernel) # 平均平滑plt.axis('off')plt.title('Blurred'+str(kernel)) # 设置标题plt.imshow(blur)
plt.show()


kernelsizes = [(3,3),(9,9),(15,15)]
plt.figure(figsize = (15,15))
src1 = cv2.cvtColor(src1, cv2.COLOR_BGR2RGB)
for i,kernel in enumerate (kernelsizes):plt.subplot(1,3,i+1)blur = cv2.GaussianBlur(src1,kernel,0) # 0为标准差plt.axis('off')plt.title('Blurred'+str(kernel))plt.imshow(blur)
plt.show()


plt.figure(figsize = (15,15))
src1 = cv2.cvtColor(src1, cv2.COLOR_BGR2RGB)
for i,kernel in enumerate ((3,9,15)):plt.subplot(1,3,i+1)blur = cv2.medianBlur(src1,kernel)plt.axis('off')plt.title('Blurred'+str(kernel))plt.imshow(blur)
plt.show()


params = [(11,21,7),(11,41,21),(15,75,75)]
plt.figure(figsize = (15,15))
src1 = cv2.cvtColor(src1, cv2.COLOR_BGR2RGB)
for i,(diameter,sigmaColor,sigmaSpace) in enumerate (params): # 邻域直径,灰度值相似性高斯滤波函数标准差,空间高斯函数标准差plt.subplot(1,3,i+1)blur = cv2.bilateralFilter(src1,diameter,sigmaColor,sigmaSpace) #平均平滑plt.axis('off')plt.title('Blurred'+str((diameter,sigmaColor,sigmaSpace)))plt.imshow(blur)
plt.show()

1.6 色彩空间转换

(B,G,R) = cv2.split(src1)
zeros = np.zeros(src1.shape[:2],dtype='uint8') #src1.shape[:2]和src1宽高一样cv2.imshow('input image', cv2.merge([zeros,G,zeros]))
cv2.waitKey(0)


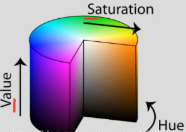
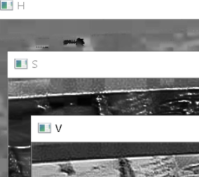
hsv = cv2.cvtColor(src1,cv2.COLOR_BGR2HSV)
zeros = np.zeros(src1.shape[:2],dtype='uint8')
for(name,chan) in zip(('H','S','V'),cv2.split(hsv)):cv2.imshow(name,chan)cv2.waitKey(0)
cv2.destroyAllWindows()

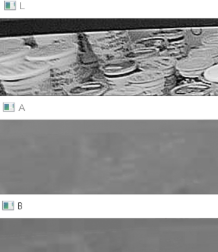
lab = cv2.cvtColor(src1,cv2.COLOR_BGR2LAB)
zeros = np.zeros(src1.shape[:2],dtype='uint8')
for (name,chan) in zip(('L','A','B'),cv2.split(lab)):cv2.imshow(name,chan) #缩进
cv2.waitKey(0)

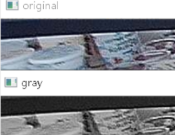
gray = cv2.cvtColor(src1,cv2.COLOR_BGR2GRAY)cv2.imshow('original',src1)
cv2.imshow('gray',gray)
cv2.waitKey(0)
1.7 二值化

gray =cv2.cvtColor(src1,cv2.COLOR_BGR2GRAY)
plt.imshow(gray,'gray') # plt显示要加‘gray’
plt.axis('off')
plt.show()

ret1,thresh1 = cv2.threshold(gray,127,255,cv2.THRESH_BINARY) #127阈值
ret2,thresh2 = cv2.threshold(gray,127,255,cv2.THRESH_BINARY_INV)
ret3,thresh3 = cv2.threshold(gray,127,255,cv2.THRESH_TRUNC)
ret4,thresh4 = cv2.threshold(gray,127,255,cv2.THRESH_TOZERO)
ret5,thresh5 = cv2.threshold(gray,127,125,cv2.THRESH_TOZERO_INV)
titles = ['original','BINARY','BINARY_INV','TRUNC','TOZERO','TOZERO_INV']
src1 = [gray,thresh1,thresh2,thresh3,thresh4,thresh5]
plt.figure(figsize=(15,5))
for i in range(6):plt.subplot(2,3,i+1)plt.imshow(src1[i],'gray')plt.title(titles[i])plt.axis('off')
plt.show()

#下面为遮挡,白色部分显示原图即提取。将阈值调小显示更好,但太小黑色背景会有白色噪声点
cv2.imshow('mask',cv2.bitwise_and(src1,src1,mask=thresh1))
cv2.waitKey(0)

ret1,thresh1 = cv2.threshold(gray,0,255,cv2.THRESH_BINARY | cv2.THRESH_OTSU) # 0阈值自动
ret2,thresh2 = cv2.threshold(gray,0,255,cv2.THRESH_BINARY_INV | cv2.THRESH_OTSU)
print('ret1',ret1)
print('ret2',ret2)plt.imshow(thresh1,'gray')
plt.axis('off')
plt.show()
plt.imshow(thresh2,'gray')
plt.axis('off')
plt.show()

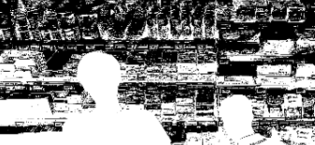

image = cv2.cvtColor(src1,cv2.COLOR_BGR2GRAY) # 变灰度图
image = cv2.medianBlur(image,5) # 中值滤波
ret,th1 = cv2.threshold(image,127,255,cv2.THRESH_BINARY) # 普通二值化
th2 = cv2.adaptiveThreshold(image,255,cv2.ADAPTIVE_THRESH_MEAN_C,cv2.THRESH_BINARY,11,3) # 平均值阈值
th3 = cv2.adaptiveThreshold(image,255,cv2.ADAPTIVE_THRESH_GAUSSIAN_C,cv2.THRESH_BINARY,11,3) # 高斯阈值titles = ['original','Global','Thresholding','adaptive Mean Thresholding','Adaptive Gaussian Thresholding']
images = [image,th1,th2,th3]
plt.figure(figsize=(10,5))
for i in range(4):plt.subplot(2,2,i+1)plt.imshow(images[i],'gray')plt.axis('off')plt.title(titles[i])
plt.show()

1.8 图像梯度


def gradient(image):image = cv2.cvtColor(image,cv2.COLOR_RGB2GRAY)laplacian = cv2.Laplacian(image,cv2.CV_64F) #cv2.CV_64F输出图像的深度(数据类型),64位float类型,因为梯度可能是正或负sobelx = cv2.Sobel(image,cv2.CV_64F,1,0,ksize=3) #1,0表示在X方向求一阶导数,最大可以求2阶导数sobely = cv2.Sobel(image,cv2.CV_64F,0,1,ksize=3) #0,1表示在y方向求一阶导数,最大可以求2阶导数titles = ['Original','Laplacian','SobelX','SobelY']images = [image,laplacian,sobelx,sobely]plt.figure(figsize=(10,5))for i in range(4):plt.subplot(2,2,i+1)plt.imshow(images[i],'gray')plt.title(titles[i])plt.axis('off')plt.show()
gradient(src1)

1.9 canny边缘检测


def edge_detection(image,minVal=100,maxVal=200):image = cv2.cvtColor(image,cv2.COLOR_BGR2GRAY)edges = cv2.Canny(image,minVal,maxVal)plt.imshow(edges,'gray')plt.axis('off')plt.show()
edge_detection(src1)
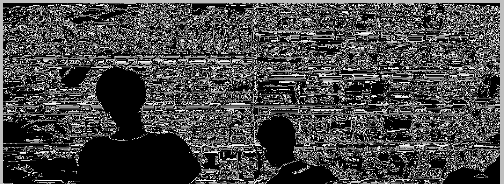
image = cv2.cvtColor(src1,cv2.COLOR_BGR2GRAY)
image = cv2.GaussianBlur(image,(3,3),0)
Value = [(10,150),(100,200),(180,230)]
plt.figure(figsize=(20,5))
for i,(minVal,maxVal) in enumerate(Value):plt.subplot(1,3,i+1)edges = cv2.Canny(image,minVal,maxVal)edges= cv2.GaussianBlur(edges,(3,3),0)plt.imshow(edges,'gray')plt.title(str((minVal,maxVal)))plt.axis('off')
plt.show()

def auto_canny(image,sigma=0.33):v=np.median(image)lower = int(max(0,(1.0-sigma)*v))upper = int(min(255,(1.0+sigma)*v))edged = cv2.Canny(image,lower,upper)print(lower,upper)return edged
edges = auto_canny(src1)
edges = cv2.GaussianBlur(edges,(3,3),0)
plt.imshow(edges,'gray')
plt.axis('off')
plt.show()

1.10 视频操作
读取摄像头视频
cap = cv2.VideoCapture(0)
while(True):ret,frame = cap.read()  #ret读取成功True或失败False,frame读取到的图像内容,读取一帧数据gray = cv2.cvtColor(frame,cv2.COLOR_BGR2GRAY)cv2.imshow('frame',gray) #或('frame',frame)if cv2.waitKey(1) & 0xff == ord('q'): #waitKey功能是不断刷新图像,单位ms,返回值是当前键盘按键值。ord返回对应的ASCII数值break
cap.release()
cv2.destroyAllWindows()
读取视频文件


cap = cv2.VideoCapture('D:/KK_Movies/kk 2019-09-21 11-29-04.mp4')
fps = cap.get(cv2.CAP_PROP_FPS) # 视频每秒传输帧数
frame_width = int(cap.get(cv2.CAP_PROP_FRAME_WIDTH)) # 视频图像宽度
frame_height = int(cap.get(cv2.CAP_PROP_FRAME_HEIGHT))  # 视频图像长度
print(fps)
print(frame_width)
print(frame_height)while(True):ret,frame = cap.read() if ret != True:breakcv2.imshow('frame',frame)if cv2.waitKey(25)&0xff == ord('q'): # 25变大视频播放变慢break
cap.release()
cv2.destroyAllWindows()
视频写入

cap = cv2.VideoCapture('D:/KK_Movies/kk 2019-09-21 11-29-04.mp4')
fps = cap.get(cv2.CAP_PROP_FPS)
frame_width = int(cap.get(cv2.CAP_PROP_FRAME_WIDTH))
frame_height = int(cap.get(cv2.CAP_PROP_FRAME_HEIGHT))
print(fps)
print(frame_width)
print(frame_height)fourcc = cv2.VideoWriter_fourcc(*'XVID')
out = cv2.VideoWriter('C:/Users/yuta/Desktop/333/1.avi',fourcc,fps,(frame_width,frame_height))
while(True):ret,frame = cap.read()if ret == True:#frame = cv2.flip(frame,1)out.write(frame)cv2.imshow('frame',frame)if cv2.waitKey(25)&0xff == ord('q'):breakelse:break
out.release()
cap.release()
cv2.destroyAllWindows()
视频提取指定颜色
# 色彩空间转为hsv和inrange函数从视频中提取指定颜色
# 并将其置为白,其余置为黑,实现跟踪某一颜色
import cv2 as cv
import numpy as np
def nextrace_object_demo():capture = cv.VideoCapture("E:/1.mp4")#导入视频while True:ret, frame = capture.read()if ret == False:breakhsv = cv.cvtColor(frame, cv.COLOR_BGR2HSV)#上一行将frame视频一帧图转为hsv色彩空间
#如下设置绿色的范围,跟踪视频中的绿色,调节图像颜色信息(H)、饱和度(S)、亮度(V)区间lower_hsv = np.array([35, 43, 46])#设置过滤的绿色的低值,可查看下表upper_hsv = np.array([77, 255, 255])#设置过滤的绿色的高值mask = cv.inRange(hsv, lowerb=lower_hsv, upperb=upper_hsv)#用inRange函数提取指定颜色范围,这里对hsv来处理,得到二值图#dst = cv.bitwise_and(frame,frame,mask=mask)#cv.imshow("mask",dst)cv.imshow("video", frame)cv.imshow("mask", mask)if cv.waitKey(50) & 0xFF == ord('q'):breaknextrace_object_demo()
cv.waitKey(0)
cv.destroyAllWindows()

下图为#两行用bitwise_and输出

可以通过下表对应颜色的数值过滤其他颜色,HSV颜色对应RGB的分量范围:

import cv2 as cv
import numpy as np
src = cv.imread("E:/images/demo.JPG")
cv.namedWindow("input image", cv.WINDOW_NORMAL)
cv.imshow('input image',src)
# 通道分离,输出三个单通道图片
b, g, r = cv.split(src)  # 将彩色图像分割成3个通道
cv.imshow("blue", b)
cv.imshow("green", g)
cv.imshow("red", r)# 通道合并
src = cv.merge([b, g, r])
cv.imshow("merge image", src)# 修改某个通道的值,[:, :, 0]为第一个通道,[:, :, 1]为第二个通道
src[:, :, 2] = 100
cv.imshow("changed image", src)cv.waitKey(0)
cv.destroyAllWindows()

1.11 直方图
# -*- coding: utf-8 -*-
import cv2 as cv
import matplotlib.pyplot as plt
def plot_demo(image):  #x轴为像素点取值,y轴为像素点个数plt.figure(figsize = (5,3))plt.hist(image.ravel(), 256, [0, 256])#image.ravel()将图像展开,256为bins数量,[0, 256]为范围plt.ylim([0, 20000])plt.title('123')plt.show()
def image_hist(image):color = ('blue', 'green', 'red')for i, color in enumerate(color):# 计算出直方图,calcHist(images, channels, mask, histSize(有多少个bin), ranges)hist = cv.calcHist(image, [i], None, [256], [0, 256])print(hist.shape)plt.plot(hist, color=color)plt.xlim([0, 256])plt.show()#上面为绘制图片直方图,下面是直方图应用
def equalHist_demo(image):gray = cv.cvtColor(image,cv.COLOR_BGR2GRAY)
#下行 `全局`直方图均衡化,提升对比度(默认提升),只能是灰度图像用于增强图像对比度,即黑的更黑,白的更白dst = cv.equalizeHist(gray)cv.imshow("equalHist_demo", dst)
#下行`局部`直方图均衡化,自定义,clipLimit是对比度的大小,tileGridSize是每次处理块的大小clahe = cv.createCLAHE(clipLimit=2.0, tileGridSize=(8, 8))clahe_dst = clahe.apply(gray)cv.imshow("clahe", clahe_dst)src = cv.imread("E:\images/demo.jpg")
cv.imshow("yuantu", src)plot_demo(src)
image_hist(src)
equalHist_demo(src)cv.waitKey(0)
cv.destroyAllWindows()

1.12 模板匹配
# -*- coding: utf-8 -*-
import cv2 as cv
import numpy as np
# 模板匹配,就是在整个图像区域发现与给定子图像匹配的小块区域,
# 需要模板图像T和待检测图像-源图像S
# 工作方法:在待检测的图像上,从左到右,从上倒下计算模板图像与重叠子图像匹配度,
# 匹配度越大,两者相同的可能性越大。
def template_demo():tpl = cv.imread("E:\images/4.jpg")target = cv.imread("E:\images/3.jpg")cv.imshow("template", tpl)cv.imshow("target", target)methods = [cv.TM_SQDIFF_NORMED, cv.TM_CCORR_NORMED, cv.TM_CCOEFF_NORMED]  #上行参数三种模板匹配方法th, tw = tpl.shape[:2] #模板的高宽for md in methods:print(md)result = cv.matchTemplate(target, tpl, md)  # 得到匹配结果min_val, max_val, min_loc, max_loc = cv.minMaxLoc(result)if md == cv.TM_SQDIFF_NORMED: #cv.TM_SQDIFF_NORMED最小时最相似,其他最大时最相似tl = min_locelse:tl = max_locbr = (tl[0] + tw, tl[1] + th)  # br为右下角坐标=tl为左上角坐标+宽高cv.rectangle(target, tl, br, (0, 0, 255), 2) # (0, 0, 255)为红色,2为线宽,绘到target上。cv.imshow("match-"+np.str(md), target)template_demo()cv.waitKey(0)
cv.destroyAllWindows()

1.13 直线/圆/轮廓检测
霍夫变换:目的是通过投票程序在特定类型的形状内找到对象的不完美实例。这个投票程序是在一个参数空间中进行的,在这个参数空间中,候选对象被当作所谓的累加器空间中的局部最大值来获得。Hough变换主要优点是能容忍特征边界描述中的间隙,并且相对不受图像噪声的影响。
霍夫直线变换:1.Hough Line Transform用来做直线检测
2.前提条件:边缘检测已完成
3.平面空间到极坐标空间转换
# -*- coding: utf-8 -*-
import cv2 as cv
import numpy as np
def line_detection(image):gray = cv.cvtColor(image, cv.COLOR_BGR2GRAY)edges = cv.Canny(gray, 50, 150, apertureSize=3)#Canny做梯度窗口大小apertureSize=3#cv2.HoughLines()返回值就是(ρ,θ)。ρ 的单位是像素,θ 的单位是弧度。#这个函数的第一个参数是一个二值化图像,所以在进行霍夫变换之前要首先进行二值化,或者进行 Canny边缘检测。#第二和第三个值分别代表 ρ 和 θ 的精确度。第四个参数是阈值,只有累加其中的值高于阈值时才被认为是一条直线,#也可以把它看成能检测到的直线的最短长度(以像素点为单位)。lines = cv.HoughLines(edges, 1, np.pi/180, 80)#'NoneType' object is not iterable:没有检测到直线,lines为空,进入for循环发生错误:调整上面第四个参数。for line in lines:print(type(lines))rho, theta = line[0]a = np.cos(theta)b = np.sin(theta)x0 = a * rhoy0 = b * rhox1 = int(x0 + 1000*(-b))y1 = int(y0 + 1000*(a))x2 = int(x0 - 1000*(-b))y2 = int(y0 - 1000*(a))cv.line(image, (x1, y1), (x2, y2), (0, 0, 255), 2) # 2为像素宽cv.imshow("line_detection", image)def line_detection_possible_demo(image):gray = cv.cvtColor(image, cv.COLOR_BGR2GRAY)edges = cv.Canny(gray, 50, 150, apertureSize=3)lines = cv.HoughLinesP(edges, 1, np.pi / 180, 80, minLineLength=50, maxLineGap=10)for x1, y1, x2, y2 in lines[0]:cv.line(image, (x1, y1), (x2, y2), (255, 0, 0), 2)cv.imshow('line_detection_possible_demo', image)def detection_circles_demo(image):dst = cv.pyrMeanShiftFiltering(image, 10, 100)#均值迁移,sp,sr为空间域核与像素范围域核半径gray = cv.cvtColor(dst, cv.COLOR_BGR2GRAY)circles = cv.HoughCircles(gray, cv.HOUGH_GRADIENT, 1, 20, param1=40, param2=30, minRadius=0, maxRadius=0)#上面1为dp步长,20为最小距离,圆心小于20为一个圆。circles = np.uint16(np.around(circles))print(circles.shape)for i in circles[0,:]:  # draw the outer circlecv.circle(image, (i[0], i[1]), i[2], (0, 255, 0), 2) # draw the center of the circlecv.circle(image, (i[0], i[1]), 2, (255, 0, 0), 3)  # 画圆心cv.imshow('detected circles', image)def main():src = cv.imread("E:\images/dave.png")cv.imshow("demo",src)line_detection(src)line_detection_possible_demo(src)img = cv.imread("E:\images/circle.png")detection_circles_demo(img)cv.waitKey(0)cv.destroyAllWindows()if __name__ == '__main__':main()

2.数字验证码识别
pip install pytesseract。错误:pytesseract.pytesseract.TesseractNotFoundError: tesseract is not installed or it’s not in your path
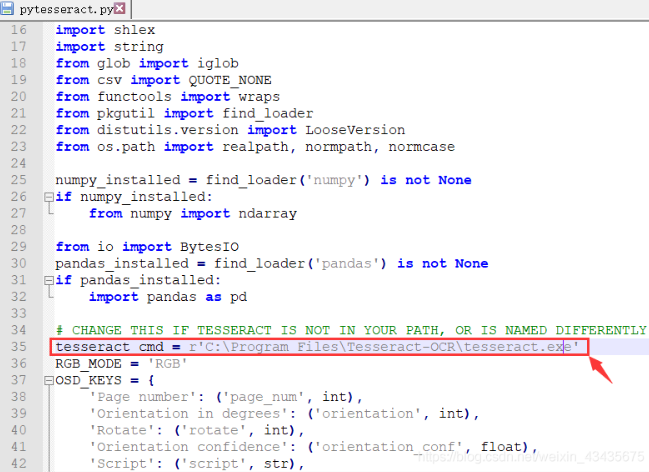
解决:C:\Users\yuta\Anaconda3\Lib\site-packages\pytesseract中pytesseract.py改路径保存:下载tesseract.exe地址:https://github.com/tesseract-ocr/tesseract/wiki 选择系统对应版本下载安装,默认安装在C:\Program Files
import cv2 as cv
import numpy as np
from PIL import Image
import pytesseract as tess
"""
预处理-去除干扰线和点
不同的结构元素中选择
Image和numpy array相互转换
识别和输出
"""
def recognition_demo(image):gray = cv.cvtColor(image, cv.COLOR_BGR2GRAY)ret, binary = cv.threshold(gray, 0, 255, cv.THRESH_BINARY_INV | cv.THRESH_OTSU)cv.imshow("binary", binary)kernel = cv.getStructuringElement(cv.MORPH_RECT, (4, 4))bin1 = cv.morphologyEx(binary,cv.MORPH_OPEN, kernel=kernel)cv.imshow("bin1", bin1)textImage = Image.fromarray(bin1)text = tess.image_to_string(textImage)print("The result:", text)def main():src = cv.imread("E:\images\yzm.jpg")cv.imshow("demo",src)recognition_demo(src)cv.waitKey(0)cv.destroyAllWindows()if __name__ == '__main__':main()

3.图像拼接/保存器
# -*- coding: utf8 -*-
import cv2
img_head = cv2.imread('C:/Users/yuta/Desktop/6/20190924153611.jpg')  #读取头像和国旗图案
img_flag = cv2.imread('C:/Users/yuta/Desktop/6/timg (2).jpg')
w_head, h_head = img_head.shape[:2]  #获取头像和国旗图案宽度
w_flag, h_flag = img_flag.shape[:2]
print(w_head)
print(h_head)
print(w_flag)
print(h_flag)
scale = w_head / w_flag / 4  #计算图案缩放比例
print(scale)img_flag = cv2.resize(img_flag, (0, 0), fx=scale, fy=scale) #缩放图案
w_flag, h_flag = img_flag.shape[:2] #获取缩放后新宽度for c in range(0, 3): #按3个通道合并图片img_head[w_head - w_flag:, h_head - h_flag:, c] = img_flag[:, :, c]
cv2.imwrite('new_head.jpg', img_head)
import threading
from queue import Queue
import os
import numpy as np
from PIL import Image
import time
import logging# 获取异常消息的字符串
import sys
import traceback
def get_exception_string():exc_type, exc_value, exc_traceback = sys.exc_info()exception_list = traceback.format_exception(exc_type, exc_value, exc_traceback)exception_string = ''.join(exception_list)return exception_stringclass ImageSaver(threading.Thread):""" 多线程的图像文件保存器类"""def __new__(cls):""" 重写new方法,实现单实例的效果"""if not hasattr(cls, '_instance'):father_class = super(ImageSaver, cls)cls._instance = father_class.__new__(cls)self = cls._instancesuper(ImageSaver, self).__init__()self.queue = Queue()self.start()return cls._instancedef save_image(self, argument_1, imageFilePath):"""argument_1可以是Image库的图像对象,或者numpy库的ndarray(rgb通道顺序)imageFilePath必须是字符串"""if isinstance(argument_1, np.ndarray):image = Image.fromarray(argument_1)else:image = argument_1put_tuple = (image, imageFilePath)self.queue.put(put_tuple)def run(self):""" 多线程的主要循环运行内容"""while True:try:if not self.queue.empty():image, imageFilePath = self.queue.get()dirPath, imageFileName = os.path.split(imageFilePath)if not os.path.isdir(dirPath):os.makedirs(dirPath)image.save(imageFilePath)except Exception as e:exception_string = get_exception_string()logging.error(exception_string)logging.error('保存到此路径时出错: %s' %imageFilePath)time.sleep(0.0001)
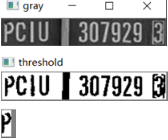
如下以灰度图读入图片,中值滤波,形态学闭操作,二值化。

4.字符分割识别
import cv2
#1111111111111111、读取图像,并把图像转换为灰度图像并显示
img = cv2.imread("D:/xunlei/2.png")  # 读取图片
img_gray = cv2.cvtColor(img, cv2.COLOR_BGR2GRAY)  # 转换了灰度化
cv2.imshow('gray', img_gray)  # 显示图片
cv2.waitKey(0)#1111111111111112、将灰度图像二值化,设定阈值是100
img_thre = img_gray
cv2.threshold(img_gray, 100, 255, cv2.THRESH_BINARY_INV, img_thre)
cv2.imshow('threshold', img_thre)
cv2.waitKey(0)#111111111111111113、保存黑白图片
cv2.imwrite('thre_res.png', img_thre)#11111111111111114、分割字符
white = []  # 记录每一列的白色像素总和
black = []  # ..........黑色.......
height = img_thre.shape[0]
width = img_thre.shape[1]
white_max = 0
black_max = 0
# 计算每一列的黑白色像素总和
for i in range(width):s = 0  # 这一列白色总数t = 0  # 这一列黑色总数for j in range(height):if img_thre[j][i] == 255:s += 1if img_thre[j][i] == 0:t += 1white_max = max(white_max, s)black_max = max(black_max, t)white.append(s)black.append(t)print(s)print(t)
arg = False  # False表示白底黑字;True表示黑底白字
if black_max > white_max:arg = True# 分割图像
def find_end(start_):end_ = start_ + 1for m in range(start_ + 1, width - 1):if (black[m] if arg else white[m]) > (0.95 * black_max if arg else 0.95 * white_max):  # 0.95这个参数请多调整,对应下面的0.05end_ = mbreakreturn end_n = 1
start = 1
end = 2
while n < width - 2:n += 1if (white[n] if arg else black[n]) > (0.05 * white_max if arg else 0.05 * black_max):# 上面这些判断用来辨别是白底黑字还是黑底白字# 0.05这个参数请多调整,对应上面的0.95start = nend = find_end(start)n = endif end - start > 5:cj = img_thre[1:height, start:end]cv2.imshow('caijian', cj)cv2.waitKey(0)
5.移动物检测
5.1 帧间差分法
1.使用opencv展示图像
import cv2
def cv2_display(image_ndarray):windowName = 'display'cv2.imshow(windowName, image_ndarray)# 按Esc键或者q键可以退出循环pressKey = cv2.waitKey(0)if 27 == pressKey or ord('q') == pressKey:cv2.destroyAllWindows()
2.加载2张图片文件为图像数据
image_ndarray_1 = cv2.imread('../resources/1.jpg')
image_ndarray_2 = cv2.imread('../resources/2.jpg')
2.1 展示原始图像数据
# 按Esc键或者q键可以退出cv2显示窗口
cv2_display(image_ndarray_1)
cv2_display(image_ndarray_2)
3.图像处理
def get_processedImage(image_ndarray):# 对拍摄图像进行图像处理,先转灰度图,再进行高斯滤波。image_ndarray_1 = cv2.cvtColor(image_ndarray, cv2.COLOR_BGR2GRAY)# 用高斯滤波对图像处理,避免亮度、震动等参数微小变化影响效果filter_size = 7image_ndarray_2 = cv2.GaussianBlur(image_ndarray_1, (filter_size, filter_size), 0)return image_ndarray_2
image_ndarray_1_2 = get_processedImage(image_ndarray_1)
image_ndarray_2_2 = get_processedImage(image_ndarray_2)
3.1 展示处理后的图像数据
cv2_display(image_ndarray_1_2) # 展示处理后的图像数据
cv2_display(image_ndarray_2_2)
4.图像相减
absdiff_ndarray = cv2.absdiff(image_ndarray_1_2, image_ndarray_2_2)
cv2_display(absdiff_ndarray) # 展示相减后的图像数据
5.图像二值化
result_1 = cv2.threshold(absdiff_ndarray, 25, 255, cv2.THRESH_BINARY)
type(result_1) # 输出tuple
len(result_1) # 输出2
type(result_1[0]) # 输出float
result_1[0]  # 输出25.0
type(result_1[1])  # 输出numpy.ndarray
result_1[1].shape  # 输出(960, 1280)
cv2_display(result_1[1])
threshhold_ndarray = result_1[1]
5.1 显示二值化后的图像
cv2_display(threshhold_ndarray)
6.获取轮廓列表,并做响应操作
contour_list = cv2.findContours(threshhold_ndarray, cv2.RETR_EXTERNAL, cv2.CHAIN_APPROX_SIMPLE)[0]
import datetime image_ndarray_3 = image_ndarray_2.copy()
for contour in contour_list:# 对于较小矩形区域,选择忽略if cv2.contourArea(contour) < 2000:continueelse:x1, y1, w, h = cv2.boundingRect(contour)x2, y2 = x1 + w, y1 + hleftTop_coordinate = x1, y1rightBottom_coordinate = x2, y2bgr_color = (0, 0, 255)thickness = 2cv2.rectangle(image_ndarray_3, leftTop_coordinate, rightBottom_coordinate, bgr_color, thickness)text = "Find motion object! x=%d, y=%d" %(x1, y1)print(text)
cv2.putText(image_ndarray_3, text, (10, 50), cv2.FONT_HERSHEY_SIMPLEX, 1, bgr_color, thickness)
time_string = datetime.datetime.now().strftime("%A %d %B %Y %I:%M:%S%p")
_ = cv2.putText(image_ndarray_3, time_string, (10, 100), cv2.FONT_HERSHEY_SIMPLEX, 1, bgr_color, thickness)

6.1 根据轮廓绘制方框后,显示图像
cv2_display(image_ndarray_3)
5.2 相机捕捉照片
# 导入常用的库
import os
import cv2
# 导入MindVision品牌的相机库mvsdk
import mvsdk# 相机持续拍摄并保存照片
def get_capturedImage(imageFilePath=None):if not imageFilePath:imageFilePath = '../resources/temp.jpg'device_list = mvsdk.CameraEnumerateDevice()if len(device_list) == 0:return Nonedevice_info = device_list[0]cameraIndex = mvsdk.CameraInit(device_info, -1, -1)capability = mvsdk.CameraGetCapability(cameraIndex)mvsdk.CameraSetTriggerMode(cameraIndex, 0)# 加载相机配置文件configFilePath = '../resources/camera.Config'assert os.path.exists(configFilePath), 'please check if exists %s'%configFilePathmvsdk.CameraReadParameterFromFile(cameraIndex, configFilePath)# 获取相机拍摄照片的预处理mvsdk.CameraPlay(cameraIndex)FrameBufferSize = capability.sResolutionRange.iWidthMax * capability.sResolutionRange.iHeightMax * 3FrameBuffer_address = mvsdk.CameraAlignMalloc(FrameBufferSize, 16)RawData, FrameHead = mvsdk.CameraGetImageBuffer(cameraIndex, 2000)mvsdk.CameraImageProcess(cameraIndex, RawData, FrameBuffer_address, FrameHead)mvsdk.CameraReleaseImageBuffer(cameraIndex, RawData)# 把文件路径转换为绝对文件路径imageFilePath_1 = os.path.abspath(imageFilePath)status = mvsdk.CameraSaveImage(cameraIndex, imageFilePath_1, FrameBuffer_address, FrameHead, mvsdk.FILE_JPG, 100)if status != mvsdk.CAMERA_STATUS_SUCCESS:print('ID为%d的相机拍摄并保存照片失败!!!')is_successful = Falseelse:print('ID为%d的相机保存照片至路径:%s' %(cameraIndex, imageFilePath_1))is_successful = True# 关闭相机、释放帧缓存mvsdk.CameraUnInit(cameraIndex)mvsdk.CameraAlignFree(FrameBuffer_address)

5.3 MindVision品牌的相机
import os
import cv2
# 导入MindVision品牌的相机库mvsdk
import mvsdk# 相机持续拍摄并保存照片
# 如果没有使用MindVision品牌相机,需要修改此函数内容
def get_capturedImage(cameraIndex):imageFilePath = '../resources/temp.jpg'capability = mvsdk.CameraGetCapability(cameraIndex)mvsdk.CameraSetTriggerMode(cameraIndex, 0)# 加载相机配置文件configFilePath = '../resources/camera.Config'assert os.path.exists(configFilePath), 'please check if exists %s'%configFilePathmvsdk.CameraReadParameterFromFile(cameraIndex, configFilePath)# 获取相机拍摄照片的预处理mvsdk.CameraPlay(cameraIndex)frameBufferSize = capability.sResolutionRange.iWidthMax * capability.sResolutionRange.iHeightMax * 3frameBufferAddress = mvsdk.CameraAlignMalloc(frameBufferSize, 16)rawData, frameHead = mvsdk.CameraGetImageBuffer(cameraIndex, 2000)mvsdk.CameraImageProcess(cameraIndex, rawData, frameBufferAddress, frameHead)mvsdk.CameraReleaseImageBuffer(cameraIndex, rawData)# 把文件路径转换为绝对文件路径imageFilePath_1 = os.path.abspath(imageFilePath)status = mvsdk.CameraSaveImage(cameraIndex, imageFilePath_1, frameBufferAddress, frameHead, mvsdk.FILE_JPG, 100)if status != mvsdk.CAMERA_STATUS_SUCCESS:print('ID为%d的相机拍摄并保存照片失败!!!')is_successful = Falseelse:is_successful = Trueimage_ndarray = cv2.imread(imageFilePath) if is_successful else Nonereturn image_ndarray# 对拍摄图像进行图像处理,先转灰度图,再进行高斯滤波。
def get_processedImage(image_ndarray):image_ndarray_1 = cv2.cvtColor(image_ndarray, cv2.COLOR_BGR2GRAY)# 用高斯滤波对图像处理,避免亮度、震动等参数微小变化影响效果filter_size = 15image_ndarray_2 = cv2.GaussianBlur(image_ndarray_1, (filter_size, filter_size), 0)return image_ndarray_2# 获取表示当前时间的字符串
import time
def get_timeString():now_timestamp = time.time()now_structTime = time.localtime(now_timestamp)timeString_pattern = '%Y %m %d %H:%M:%S'now_timeString = time.strftime(timeString_pattern, now_structTime)return now_timeString# 根据两张图片的不同,在第2张图上绘制不同位置的方框、日期时间
def get_drawedDetectedImage(first_image_ndarray, second_image_ndarray):if second_image_ndarray is None or first_image_ndarray is None:return Nonefirst_image_ndarray_2 = get_processedImage(first_image_ndarray)second_image_ndarray_2 = get_processedImage(second_image_ndarray)# cv2.absdiff表示计算2个图像差值的绝对值absdiff_ndarray = cv2.absdiff(first_image_ndarray_2, second_image_ndarray_2)# cv2.threshold表示设定阈值做图像二值化threshold_ndarray = cv2.threshold(absdiff_ndarray, 25, 255, cv2.THRESH_BINARY)[1]# cv2.dilate表示图像膨胀dilate_ndarray = cv2.dilate(threshold_ndarray, None, iterations=2)# cv2.findContours表示找出图像中的轮廓contour_list = cv2.findContours(threshold_ndarray, cv2.RETR_EXTERNAL, cv2.CHAIN_APPROX_SIMPLE)[0]copy_image_ndarray = second_image_ndarray.copy()for contour in contour_list:if cv2.contourArea(contour) < 2000:continueelse:x1, y1, w, h = cv2.boundingRect(contour)x2, y2 = x1 + w, y1 + hleftTop_coordinate = x1, y1rightBottom_coordinate = x2, y2bgr_color = (0, 0, 255)thickness = 2cv2.rectangle(copy_image_ndarray, leftTop_coordinate, rightBottom_coordinate, bgr_color, thickness)time_string = get_timeString()text = '在时刻%s 发现运动物体! x=%d, y=%d' %(time_string, x1, y1)print(text)time_string = get_timeString()bgr_color = (0, 0, 255)thickness = 2cv2.putText(copy_image_ndarray, time_string, (10,50), cv2.FONT_HERSHEY_SIMPLEX, 1, bgr_color, thickness)return copy_image_ndarray# 使用cv2库展示图片
def show_image(image_ndarray):  windowName = 'display'cv2.imshow(windowName, image_ndarray)# 主函数
from sys import exit
if __name__ == '__main__':# 获取相机设备的信息device_list = mvsdk.CameraEnumerateDevice()if len(device_list) == 0:print('没有连接MindVision品牌的相机设备')exit()device_info = device_list[0]cameraIndex = mvsdk.CameraInit(device_info, -1, -1)# 开始用相机监控first_image_ndarray = Nonewhile True:second_image_ndarray = get_capturedImage(cameraIndex)drawed_image_ndarray = get_drawedDetectedImage(first_image_ndarray, second_image_ndarray)if drawed_image_ndarray is not None:show_image(drawed_image_ndarray)# 在展示图片后,等待1秒,接收按键pressKey = cv2.waitKey(1)# 按Esc键或者q键可以退出循环if 27 == pressKey or ord('q') == pressKey:cv2.destroyAllWindows()  break# 随着时间推移,当前帧作为下一帧的前一帧first_image_ndarray = second_image_ndarray# 关闭相机mvsdk.CameraUnInit(cameraIndex)
5.4 无品牌相机,大多数有相机的电脑
# 导入常用的库
import cv2
import time
import os# 对拍摄图像进行图像处理,先转灰度图,再进行高斯滤波。
def get_processedImage(image_ndarray):image_ndarray_1 = cv2.cvtColor(image_ndarray, cv2.COLOR_BGR2GRAY)# 用高斯滤波对图像处理,避免亮度、震动等参数微小变化影响效果filter_size = 21image_ndarray_2 = cv2.GaussianBlur(image_ndarray_1, (filter_size, filter_size), 0)return image_ndarray_2# 获取表示当前时间的字符串
import time
def get_timeString():now_timestamp = time.time()now_structTime = time.localtime(now_timestamp)timeString_pattern = '%Y %m %d %H:%M:%S'now_timeString = time.strftime(timeString_pattern, now_structTime)return now_timeString# 根据两张图片的不同,在第2张图上绘制不同位置的方框、日期时间
def get_drawedDetectedImage(first_image_ndarray, second_image_ndarray):if second_image_ndarray is None or first_image_ndarray is None:return Nonefirst_image_ndarray_2 = get_processedImage(first_image_ndarray)second_image_ndarray_2 = get_processedImage(second_image_ndarray)# cv2.absdiff表示计算2个图像差值的绝对值absdiff_ndarray = cv2.absdiff(first_image_ndarray_2, second_image_ndarray_2)# cv2.threshold表示设定阈值做图像二值化threshold_ndarray = cv2.threshold(absdiff_ndarray, 25, 255, cv2.THRESH_BINARY)[1]# cv2.dilate表示图像膨胀dilate_ndarray = cv2.dilate(threshold_ndarray, None, iterations=2)# cv2.findContours表示找出图像中的轮廓contour_list = cv2.findContours(threshold_ndarray, cv2.RETR_EXTERNAL, cv2.CHAIN_APPROX_SIMPLE)[0]copy_image_ndarray = second_image_ndarray.copy()height, width, _ = copy_image_ndarray.shapecontour_minArea = int(height * width * 0.001)for contour in contour_list:if cv2.contourArea(contour) < contour_minArea:continueelse:x1, y1, w, h = cv2.boundingRect(contour)x2, y2 = x1 + w, y1 + hleftTop_coordinate = x1, y1rightBottom_coordinate = x2, y2bgr_color = (0, 0, 255)thickness = 2cv2.rectangle(copy_image_ndarray, leftTop_coordinate, rightBottom_coordinate, bgr_color, thickness)time_string = get_timeString()text = '在时刻%s 发现移动物体! x=%d, y=%d' %(time_string, x1, y1)print(text)time_string = get_timeString()bgr_color = (0, 0, 255)thickness = 2cv2.putText(copy_image_ndarray, time_string, (10,50), cv2.FONT_HERSHEY_SIMPLEX, 1, bgr_color, thickness)return copy_image_ndarray# 主函数
from sys import exit
if __name__ == '__main__':cameraIndex = 0# 实例化视频流对象camera = cv2.VideoCapture(cameraIndex)is_successful, first_image_ndarray = camera.read()if not is_successful:print("相机未成功连接,可能原因:1.相机不支持cv2库直接调用;2.如果有多个相机,设置正确的cameraIndex")exit()while True:is_successful, second_image_ndarray = camera.read()windowName = 'cv2_display'drawed_image_ndarray = get_drawedDetectedImage(first_image_ndarray, second_image_ndarray)cv2.imshow(windowName, drawed_image_ndarray)# 在展示图片后,等待1秒,接收按键pressKey = cv2.waitKey(1)# 按Esc键或者q键可以退出循环if 27 == pressKey or ord('q') == pressKey:cv2.destroyAllWindows()  break# 随着时间推移,当前帧作为下一帧的前一帧first_image_ndarray = second_image_ndarray   # 关闭相机camera.release()
6.ckpt转pb文件
import tensorflow as tf
from tensorflow.python.framework import graph_util
from tensorflow.python import pywrap_tensorflowdef freeze_graph(input_checkpoint,output_graph):#指定输出的节点名称,该节点名称必须是原模型中存在的节点。直接用最后输出的节点,可以在tensorboard中查找到,tensorboard只能在linux中使用output_node_names = "SCORE/resnet_v1_101_5/cls_prob/cls_prob/scores,SCORE/resnet_v1_101_5/bbox_pred/BiasAdd/bbox_pred/scores,SCORE/resnet_v1_101_5/cls_pred/cls_pred/scores"saver = tf.train.import_meta_graph(input_checkpoint + '.meta', clear_devices=True) #通过 import_meta_graph 导入模型中的图----1graph = tf.get_default_graph() #获得默认的图input_graph_def = graph.as_graph_def() #返回一个序列化的图代表当前的图with tf.Session() as sess:saver.restore(sess, input_checkpoint) #通过 saver.restore 从模型中恢复图中各个变量的数据----2output_graph_def = graph_util.convert_variables_to_constants(  #通过 graph_util.convert_variables_to_constants 将模型持久化----3sess=sess,input_graph_def=input_graph_def, #等于:sess.graph_defoutput_node_names=output_node_names.split(","))  #如果有多个输出节点,以逗号隔开with tf.gfile.GFile(output_graph, "wb") as f: #保存模型f.write(output_graph_def.SerializeToString()) #序列化输出print("%d ops in the final graph." % len(output_graph_def.node)) #得到当前图有几个操作节点input_checkpoint='./checkpoints/res101_faster_rcnn_iter_70000.ckpt'
out_pb_path='./checkpoints/frozen_model.pb'reader = pywrap_tensorflow.NewCheckpointReader(input_checkpoint)
var_to_shape_map = reader.get_variable_to_shape_map()
for key in var_to_shape_map:  # Print tensor name and valuesprint("tensor_name: ", key)#print(reader.get_tensor(key))freeze_graph(input_checkpoint, out_pb_path)
7.Keras_Yolov3_GPU训练自己数据集
7.1 数据准备
https://github.com/qqwweee/keras-yolo3,8GB显存GTX1070,Windows会显存不足,mkdir n01440764创建文件夹n01440764。运命令tar -xvf n01440764.tar -C n01440764完成压缩文件的解压,其中-C参数后面必须为已经存在的文件夹,否则运行命令会报错。labelImg的下载地址:https://github.com/tzutalin/labelImg,在文件夹keras_YOLOv3中打开Terminal,运行下列命令:
1.加快apt-get命令的下载速度,需要做Ubuntu系统的换源:Ubuntu的设置Settings中选择Software & Updates,将Download from的值设置为http://mirrors.aliyun.com/ubuntu
2.运行命令sudo apt-get install pyqt5-dev-tools安装软件pyqt5-dev-tools。
3.运行命令cd labelImg-master进入文件夹labelImg-master。运行命令pip install -r requirements/requirements-linux-python3.txt安装软件labelImg运行时需要的库,如果已经安装Anaconda此步可能不用进行。
4.运行命令make qt5py3编译产生软件labelImg运行时需要的组件。python labelImg.py 运行打开labelImg软件。
挑选像素足够的图片
n01440764中有一部分图片像素不足416 * 416,不利于模型训练,新建_01_select_images.py:
1.可以选取文件夹n01440764中的200张像素足够的图片;
2.将选取的图片复制到在新文件夹selected_images中。
import os
import random
from PIL import Image
import shutil#获取文件夹中的文件路径
def getFilePathList(dirPath, partOfFileName=''):allFileName_list = list(os.walk(dirPath))[0][2]fileName_list = [k for k in allFileName_list if partOfFileName in k]filePath_list = [os.path.join(dirPath, k) for k in fileName_list]return filePath_list#获取一部分像素足够,即长,宽都大于416的图片
def generate_qualified_images(dirPath, sample_number, new_dirPath):jpgFilePath_list = getFilePathList(dirPath, '.JPEG')random.shuffle(jpgFilePath_list)if not os.path.isdir(new_dirPath):os.makedirs(new_dirPath)i = 0for jpgFilePath in jpgFilePath_list:image = Image.open(jpgFilePath)width, height = image.sizeif width >= 416 and height >= 416:i += 1new_jpgFilePath = os.path.join(new_dirPath, '%03d.jpg' %i)shutil.copy(jpgFilePath, new_jpgFilePath)if i == sample_number:break#获取数量为200的合格样本存放到selected_images文件夹中
generate_qualified_images('n01440764', 200, 'selected_images')
数据标注及检查
标签好200张图片,新建一个代码文件_02_check_labels.py,将下面一段代码复制到其中运行:
1.检查代码检查标记好的文件夹是否有图片漏标
2.检查标记的xml文件中是否有物体标记类别拼写错误
#获取文件夹中的文件路径
import os
def getFilePathList(dirPath, partOfFileName=''):allFileName_list = list(os.walk(dirPath))[0][2]fileName_list = [k for k in allFileName_list if partOfFileName in k]filePath_list = [os.path.join(dirPath, k) for k in fileName_list]return filePath_list#此段代码检查标记好的文件夹是否有图片漏标
def check_1(dirPath):jpgFilePath_list = getFilePathList(dirPath, '.jpg')allFileMarked = Truefor jpgFilePath in jpgFilePath_list:xmlFilePath = jpgFilePath[:-4] + '.xml'if not os.path.exists(xmlFilePath):print('%s this picture is not marked.' %jpgFilePath)allFileMarked = Falseif allFileMarked:print('congratulation! it is been verified that all jpg file are marked.')#此段代码检查标记的xml文件中是否有物体标记类别拼写错误
import xml.etree.ElementTree as ET
def check_2(dirPath, className_list):className_set = set(className_list)xmlFilePath_list = getFilePathList(dirPath, '.xml')allFileCorrect = Truefor xmlFilePath in xmlFilePath_list:with open(xmlFilePath) as file:fileContent = file.read()root = ET.XML(fileContent)object_list = root.findall('object')for object_item in object_list:name = object_item.find('name')className = name.textif className not in className_set:print('%s this xml file has wrong class name "%s" ' %(xmlFilePath, className))allFileCorrect = Falseif allFileCorrect:print('congratulation! it is been verified that all xml file are correct.')if __name__ == '__main__':dirPath = 'selected_images'className_list = ['fish', 'human_face'] # 自己写入,后set(className_list)生成集合{}check_1(dirPath)check_2(dirPath, className_list)
图像压缩
预先压缩好图像,模型训练时不用再临时改变图片大小,可加快模型训练速度。新建_03_compress_images.py:
1.将旧文件夹中的jpg文件压缩后放到新文件夹images_416x416。
2.将旧文件夹中的jpg文件对应的xml文件修改后放到新文件夹images_416x416。
#获取文件夹中的文件路径
import os
def getFilePathList(dirPath, partOfFileName=''):allFileName_list = list(os.walk(dirPath))[0][2]fileName_list = [k for k in allFileName_list if partOfFileName in k]filePath_list = [os.path.join(dirPath, k) for k in fileName_list]return filePath_list#生成新的xml文件
import xml.etree.ElementTree as ET
def generateNewXmlFile(old_xmlFilePath, new_xmlFilePath, new_size):new_width, new_height = new_sizewith open(old_xmlFilePath) as file:fileContent = file.read()root = ET.XML(fileContent)#获得图片宽度变化倍数,并改变xml文件中width节点的值width = root.find('size').find('width')old_width = int(width.text)width_times = new_width / old_widthwidth.text = str(new_width)#获得图片高度变化倍数,并改变xml文件中height节点的值height = root.find('size').find('height')old_height = int(height.text)height_times = new_height / old_heightheight.text = str(new_height)#获取标记物体的列表,修改其中xmin,ymin,xmax,ymax这4个节点的值object_list = root.findall('object')for object_item in object_list:bndbox = object_item.find('bndbox')xmin = bndbox.find('xmin')xminValue = int(xmin.text)xmin.text = str(int(xminValue * width_times))ymin = bndbox.find('ymin')yminValue = int(ymin.text)ymin.text = str(int(yminValue * height_times))xmax = bndbox.find('xmax')xmaxValue = int(xmax.text)xmax.text = str(int(xmaxValue * width_times))ymax = bndbox.find('ymax')ymaxValue = int(ymax.text)ymax.text = str(int(ymaxValue * height_times))tree = ET.ElementTree(root) # 初始化一个tree对象tree.write(new_xmlFilePath)#修改文件夹中的若干xml文件
def batch_modify_xml(old_dirPath, new_dirPath, new_size):xmlFilePath_list = getFilePathList(old_dirPath, '.xml')for xmlFilePath in xmlFilePath_list:xmlFileName = os.path.split(xmlFilePath)[1] #不同与str.split,os.path.split返回文件的路径[0]和文件名[1]new_xmlFilePath = os.path.join(new_dirPath, xmlFileName)generateNewXmlFile(xmlFilePath, new_xmlFilePath, new_size)#生成新的jpg文件
from PIL import Image
def generateNewJpgFile(old_jpgFilePath, new_jpgFilePath, new_size):old_image = Image.open(old_jpgFilePath)  new_image = old_image.resize(new_size, Image.ANTIALIAS) # new_size是(,),Image.ANTIALIAS表示高质量是一个参数new_image.save(new_jpgFilePath)#修改文件夹中的若干jpg文件
def batch_modify_jpg(old_dirPath, new_dirPath, new_size):if not os.path.isdir(new_dirPath):os.makedirs(new_dirPath)xmlFilePath_list = getFilePathList(old_dirPath, '.xml')for xmlFilePath in xmlFilePath_list:old_jpgFilePath = xmlFilePath[:-4] + '.jpg'jpgFileName = os.path.split(old_jpgFilePath)[1]new_jpgFilePath = os.path.join(new_dirPath, jpgFileName)generateNewJpgFile(old_jpgFilePath, new_jpgFilePath, new_size)if __name__ == '__main__':old_dirPath = 'selected_images'new_width = 416new_height = 416new_size = (new_width, new_height)new_dirPath = 'images_%sx%s' %(str(new_width), str(new_height))batch_modify_jpg(old_dirPath, new_dirPath, new_size)batch_modify_xml(old_dirPath, new_dirPath, new_size)
划分训练集和测试集
编辑类别文件resources/className_list.txt,每1行表示1个类别。运行命令python _04_generate_txtFile.py -dir images_416*416会划分训练集dataset_train.txt和测试集dataset_test.txt,_04_generate_txtFile.py代码如下:
import xml.etree.ElementTree as ET
import os
import argparse
from sklearn.model_selection import train_test_split# 从文本文件中解析出物体种类列表className_list,要求每个种类占一行
def get_classNameList(txtFilePath):with open(txtFilePath, 'r', encoding='utf8') as file:fileContent = file.read()    # strip()会把两头所有的空格、制表符和换行都去掉line_list = [k.strip() for k in fileContent.split('\n') if k.strip()!=''] className_list= sorted(line_list, reverse=False)return className_list  # 获取文件夹中的文件路径
import os
def get_filePathList(dirPath, partOfFileName=''):allFileName_list = list(os.walk(dirPath))[0][2]fileName_list = [k for k in allFileName_list if partOfFileName in k]filePath_list = [os.path.join(dirPath, k) for k in fileName_list]return filePath_list# 解析运行代码文件时传入的参数
import argparse
def parse_args():parser = argparse.ArgumentParser()parser.add_argument('-d', '--dirPath', type=str, help='文件夹路径', default='../resources/images_416x416')    parser.add_argument('-s', '--suffix', type=str, default='.JPG')parser.add_argument('-c', '--class_txtFilePath', type=str, default='../resources/category_list.txt')argument_namespace = parser.parse_args()return argument_namespace  # 主函数
if __name__ == '__main__':argument_namespace = parse_args()dataset_dirPath = argument_namespace.dirPathassert os.path.exists(dataset_dirPath), 'not exists this path: %s' %dataset_dirPath    suffix = argument_namespace.suffixclass_txtFilePath = argument_namespace.class_txtFilePath xmlFilePath_list = get_filePathList(dataset_dirPath, '.xml')className_list = get_classNameList(class_txtFilePath)train_xmlFilePath_list, test_xmlFilePath_list = train_test_split(xmlFilePath_list, test_size=0.1)dataset_list = [('dataset_train', train_xmlFilePath_list), ('dataset_test', test_xmlFilePath_list)]for dataset in dataset_list: #先第一个(),再第二个()txtFile_path = '%s.txt' %dataset[0] #dataset[0]表示'dataset_train'和'dataset_test'txtFile = open(txtFile_path, 'w') # txtFile就是dataset_train.txt和dataset_test.txt写在循环里     for xmlFilePath in dataset[1]:jpgFilePath = xmlFilePath.replace('.xml', '.JPG')txtFile.write(jpgFilePath)with open(xmlFilePath) as xmlFile:xmlFileContent = xmlFile.read()root = ET.XML(xmlFileContent)for obj in root.iter('object'):className = obj.find('name').textif className not in className_list:print('error!! className not in className_list')continueclassId = className_list.index(className)bndbox = obj.find('bndbox')bound = [int(bndbox.find('xmin').text), int(bndbox.find('ymin').text),int(bndbox.find('xmax').text), int(bndbox.find('ymax').text)]txtFile.write(" " + ",".join([str(k) for k in bound]) + ',' + str(classId))txtFile.write('\n')txtFile.close()

from os import listdir
from os.path import isfile, isdir, join
import random
path = './Annotations' # 里面全xml文件
files = listdir(path)
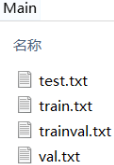
# print(files) #[、、、.xml]data_rate = {'test': 10, 'train': 60, 'val': 30
}test, train, validation = list(), list(), list()
for index, file_name in enumerate(files):rand = random.randint(1,100)filename = file_name.split('.')[0]if (rand <= 10):test.append(filename)elif (rand <= 70):train.append(filename)elif (rand <= 100):validation.append(filename)print('test: \n', test)
print('train: \n', train)
print('validation: \n', validation)with open('./Main/test.txt', 'w') as f: # 0.1for name in test:f.write(name+'\n')
with open('./Main/train.txt', 'w') as f: # 0.6for name in train:f.write(name+'\n')
with open('./Main/val.txt', 'w') as f:  # 0.3 for name in validation:f.write(name+'\n')
with open('./Main/trainval.txt', 'w') as f: # 0.9for name in train:f.write(name+'\n')for name in validation:f.write(name+'\n')
7.2 模型训练
文件夹keras-yolo3-master中打开终端Terminal,然后运行命令python _05_train.py即可开始训练。调整模型训练的轮次epochs需要修改代码文件_05_train.py的第85行fit_generator方法中的参数,即第90行参数epochs的值。_05_train.py代码如下:
# 导入常用的库
import os
import numpy as np
# 导入keras库
import keras.backend as K
from keras.layers import Input, Lambda
from keras.models import Model
# 导入yolo3文件夹中mode.py、utils.py这2个代码文件中的方法
from yolo3.model import preprocess_true_boxes, yolo_body, yolo_loss
from yolo3.utils import get_random_data# 从文本文件中解析出物体种类列表category_list,要求每个种类占一行
def get_categoryList(txtFilePath):with open(txtFilePath, 'r', encoding='utf8') as file:fileContent = file.read()line_list = [k.strip() for k in fileContent.split('\n') if k.strip()!='']category_list = sorted(line_list, reverse=False)return category_list    # 从表示anchor的文本文件中解析出anchor_ndarray
def get_anchorNdarray(anchor_txtFilePath): # anchor_txtFilePath是./model_data/yolo_anchors.txtwith open(anchor_txtFilePath) as file:anchor_ndarray = [float(k) for k in file.read().split(',')]return np.array(anchor_ndarray).reshape(-1, 2)# 创建YOLOv3模型,通过yolo_body方法架构推理层inference,配合损失函数完成搭建卷积神经网络。
def create_model(input_shape,anchor_ndarray,num_classes,load_pretrained=True,freeze_body=False,weights_h5FilePath='../resources/saved_models/trained_weights.h5'):K.clear_session() # get a new sessionimage_input = Input(shape=(None, None, 3))height, width = input_shapenum_anchors = len(anchor_ndarray)y_true = [Input(shape=(height // k,width // k,num_anchors // 3,num_classes + 5)) for k in [32, 16, 8]]model_body = yolo_body(image_input, num_anchors//3, num_classes)print('Create YOLOv3 model with {} anchors and {} classes.'.format(num_anchors, num_classes))if load_pretrained and os.path.exists(weights_h5FilePath):model_body.load_weights(weights_h5FilePath, by_name=True, skip_mismatch=True)print('Load weights from this path: {}.'.format(weights_h5FilePath))if freeze_body:num = len(model_body.layers)-7for i in range(num):model_body.layers[i].trainable = Falseprint('Freeze the first {} layers of total {} layers.'.format(num, len(model_body.layers)))model_loss = Lambda(yolo_loss,output_shape=(1,),name='yolo_loss',arguments={'anchors': anchor_ndarray,'num_classes': num_classes,'ignore_thresh': 0.5})([*model_body.output, *y_true])model = Model([model_body.input, *y_true], model_loss)return model# 调用此方法时,模型开始训练
def train(model,annotationFilePath,input_shape,anchor_ndarray,num_classes,logDirPath='../resources/saved_models/'):model.compile(optimizer='adam',loss={'yolo_loss': lambda y_true, y_pred: y_pred})# 划分训练集和验证集              batch_size = 8val_split = 0.05with open(annotationFilePath) as file:lines = file.readlines()np.random.shuffle(lines)num_val = int(len(lines)*val_split)num_train = len(lines) - num_valprint('Train on {} samples, val on {} samples, with batch size {}.'.format(num_train, num_val, batch_size))# 模型利用生成器产生的数据做训练model.fit_generator(data_generator(lines[:num_train], batch_size, input_shape, anchor_ndarray, num_classes),steps_per_epoch=max(1, num_train // batch_size),validation_data=data_generator(lines[num_train:], batch_size, input_shape, anchor_ndarray, num_classes),validation_steps=max(1, num_val // batch_size),epochs=1000,initial_epoch=0)# 当模型训练结束时,保存模型if not os.path.isdir(logDirPath):os.makedirs(logDirPath)model_savedPath = os.path.join(logDirPath, 'trained_weights.h5')model.save(model_savedPath)# 图像数据生成器
def data_generator(annotation_lines, batch_size, input_shape, anchors, num_classes):n = len(annotation_lines)np.random.shuffle(annotation_lines)i = 0while True:image_data = []box_data = []for b in range(batch_size):i %= nimage, box = get_random_data(annotation_lines[i], input_shape, random=True)image_data.append(image)box_data.append(box)i += 1image_data = np.array(image_data)box_data = np.array(box_data)y_true = preprocess_true_boxes(box_data, input_shape, anchors, num_classes)yield [image_data, *y_true], np.zeros(batch_size)# 解析运行代码文件时传入的参数
import argparse
def parse_args():parser = argparse.ArgumentParser() parser.add_argument('-w', '--width', type=int, default=416)parser.add_argument('-he', '--height', type=int, default=416)parser.add_argument('-c', '--class_txtFilePath', type=str, default='../resources/category_list.txt')parser.add_argument('-a', '--anchor_txtFilePath', type=str, default='./model_data/yolo_anchors.txt')argument_namespace = parser.parse_args()return argument_namespace  # 主函数
if __name__ == '__main__':argument_namespace = parse_args()class_txtFilePath = argument_namespace.class_txtFilePathanchor_txtFilePath = argument_namespace.anchor_txtFilePathcategory_list = get_categoryList(class_txtFilePath)anchor_ndarray = get_anchorNdarray(anchor_txtFilePath)width = argument_namespace.widthheight = argument_namespace.heightinput_shape = (width, height) # multiple of 32, height and widthmodel = create_model(input_shape, anchor_ndarray, len(category_list))annotationFilePath = 'dataset_train.txt'train(model, annotationFilePath, input_shape, anchor_ndarray, len(category_list))
7.3 模型测试
已经训练好的模型权重文件:链接:https://pan.baidu.com/s/1gPkH_zdSS_Eu1V9hSb7MXA
提取码:a0ld , fish_weights.zip解压后,将文件trained_weights.h5放到文件夹saved_model中。
单张图
文件夹keras-yolo3-master中打开终端Terminal运行命令jupyter notebook,打开代码文件_07_yolo_test.ipynb如下:第1个代码块加载YOLOv3模型;第2个代码块加载测试集文本文件dataset_test.txt,并取出其中的图片路径赋值给变量jpgFilePath_list;第3个代码块是根据图片路径打开图片后,调用YOLO对象的detect_image方法对图片做目标检测。
from _06_yolo import YoloModel
yolo_model = YoloModel(weightsFilePath='saved_model/trained_weights.h5')
with open('dataset_test.txt') as file:line_list = file.readlines()
jpgFilePath_list = [k.split()[0] for k in line_list]
jpgFilePath_list
from PIL import Image
jpgFilePath = jpgFilePath_list[0]
image = Image.open(jpgFilePath)
yolo_model.detect_image(image)

视频
将图片合成为1部视频:文件夹keras-YOLOv3中打开Terminal,运行命令sudo apt-get install ffmpeg安装软件ffmpeg。继续在此Terminal中运行命令ffmpeg -start_number 1 -r 1 -i images_416x416/%03d.jpg -vcodec mpeg4 keras-yolo3-master/1.mp4,请读者确保当前Terminal所在目录中有文件夹images_416x416。
ffmpeg命令参数解释:
1.-start_number,配合参数-i使用,默认为0,表示%03d索引开始的数字;
2.-r,表示视频的帧数,即一秒取多少张图片制作视频;
3.-i,input的简写,表示制作视频的图片路径;
4.-vcodec,视频编码格式,mpeg4为常用的视频编码;
5.最后是输出文件保存的路径;
继续在此Terminal中运行命令pip install opencv-python安装opencv-python库。cd keras-yolo3-master,在此Terminal中运行命令python yolo_video.py --input 1.mp4 --output fish_output.mp4,表示对视频文件1.mp4做目标检测,并将检测结果保存为视频文件fish_output.mp4。YOLOv3模型速度很快,本案例中检测1张图片只需要0.05秒。如果不人为干预,完成1帧图片的目标检测后立即开始下1帧,速度过快,人眼看不清楚。本文作者修改了代码文件_06_yolo.py的第183行,使完成1帧的目标检测后停止0.5秒,这样视频的展示效果能够易于人眼接受。_06_yolo.py代码如下:

# -*- coding: utf-8 -*-
# 导入常用的库
import os
import time
import numpy as np
# 导入keras库
from keras import backend as K
from keras.layers import Input
# 导入yolo3文件夹中mode.py、utils.py这2个代码文件中的方法
from yolo3.model import yolo_eval, yolo_body
from yolo3.utils import letterbox_image
# 导入PIL画图库
from PIL import Image, ImageFont, ImageDraw# 通过种类的数量,每个种类对应的颜色,颜色变量color为rgb这3个数值组成的元祖
import colorsys
def get_colorList(category_quantity):hsv_list = []for i in range(category_quantity):hue = i / category_quantitysaturation = 1value = 1hsv = (hue, saturation, value)hsv_list.append(hsv)colorFloat_list = [colorsys.hsv_to_rgb(*k) for k in hsv_list]color_list = [tuple([int(x * 255) for x in k]) for k in colorFloat_list]return color_list# 定义类YoloModel
class YoloModel(object):defaults = {"weights_h5FilePath": '../resources/trained_weights.h5',"anchor_txtFilePath": 'model_data/yolo_anchors.txt',"category_txtFilePath": '../resources/category_list.txt',"score" : 0.3,"iou" : 0.35,"model_image_size" : (416, 416) #must be a multiple of 32}@classmethoddef get_defaults(cls, n):if n in cls.defaults:return cls.defaults[n]else:return 'Unrecognized attribute name "%s"' %n# 类实例化方法def __init__(self, **kwargs):self.__dict__.update(self.defaults) # set up default valuesself.__dict__.update(kwargs) # and update with user overridesself.category_list = self.get_categoryList()self.anchor_ndarray = self.get_anchorNdarray()self.session = K.get_session()self.boxes, self.scores, self.classes = self.generate()# 从文本文件中解析出物体种类列表category_list,要求每个种类占一行def get_categoryList(self):with open(self.category_txtFilePath, 'r', encoding='utf8') as file:fileContent = file.read()line_list = [k.strip() for k in fileContent.split('\n') if k.strip()!='']category_list= sorted(line_list, reverse=False)return category_list    # 从表示anchor的文本文件中解析出anchor_ndarraydef get_anchorNdarray(self):with open(self.anchor_txtFilePath, 'r', encoding='utf8') as file:number_list = [float(k) for k in file.read().split(',')]anchor_ndarray = np.array(number_list).reshape(-1, 2)return anchor_ndarray# 加载模型def generate(self):# 在Keras中,如果模型训练完成后只保存了权重,那么需要先构建网络,再加载权重num_anchors = len(self.anchor_ndarray)num_classes = len(self.category_list)self.yolo_model = yolo_body(Input(shape=(None, None, 3)),num_anchors//3,num_classes)self.yolo_model.load_weights(self.weights_h5FilePath)# 给不同类别的物体准备不同颜色的方框category_quantity = len(self.category_list)self.color_list = get_colorList(category_quantity)# 目标检测的输出:方框box,得分score,类别classself.input_image_size = K.placeholder(shape=(2, ))boxes, scores, classes = yolo_eval(self.yolo_model.output,self.anchor_ndarray,category_quantity,self.input_image_size,score_threshold=self.score,iou_threshold=self.iou)return boxes, scores, classes# 检测图片def detect_image(self, image):startTime = time.time()# 模型网络结构运算所需的数据准备boxed_image = letterbox_image(image, tuple(reversed(self.model_image_size)))image_data = np.array(boxed_image).astype('float') / 255image_data = np.expand_dims(image_data, 0)  # Add batch dimension.# 模型网络结构运算out_boxes, out_scores, out_classes = self.session.run([self.boxes, self.scores, self.classes],feed_dict={self.yolo_model.input: image_data,self.input_image_size: [image.size[1], image.size[0]],K.learning_phase(): 0})# 调用ImageFont.truetype方法实例化画图字体对象font = ImageFont.truetype(font='font/FiraMono-Medium.otf',size=np.floor(2e-2 * image.size[1] + 0.5).astype('int32'))thickness = (image.size[0] + image.size[1]) // 300# 循环绘制若干个方框for i, c in enumerate(out_classes):# 定义方框上方文字内容predicted_class = self.category_list[c]score = out_scores[i]label = '{} {:.2f}'.format(predicted_class, score)# 调用ImageDraw.Draw方法实例化画图对象draw = ImageDraw.Draw(image)label_size = draw.textsize(label, font)box = out_boxes[i]top, left, bottom, right = boxtop = max(0, np.floor(top + 0.5).astype('int32'))left = max(0, np.floor(left + 0.5).astype('int32'))bottom = min(image.size[1], np.floor(bottom + 0.5).astype('int32'))right = min(image.size[0], np.floor(right + 0.5).astype('int32'))# 如果方框在图片中的位置过于靠上,调整文字区域if top - label_size[1] >= 0:text_region = np.array([left, top - label_size[1]])else:text_region = np.array([left, top + 1])# 方框厚度为多少,则画多少个矩形for j in range(thickness):draw.rectangle([left + j, top + j, right - j, bottom - j],outline=self.color_list[c])# 绘制方框中的文字draw.rectangle([tuple(text_region), tuple(text_region + label_size)],fill=self.color_list[c])draw.text(text_region, label, fill=(0, 0, 0), font=font)del draw# 打印检测图片使用的时间usedTime = time.time() - startTimeprint('检测这张图片用时%.2f秒' %(usedTime))return image# 关闭tensorflow的会话def close_session(self):self.session.close()# 对视频进行检测
def detect_video(yolo, video_path, output_path=""):import cv2vid = cv2.VideoCapture(video_path)if not vid.isOpened():raise IOError("Couldn't open webcam or video")video_FourCC    = int(vid.get(cv2.CAP_PROP_FOURCC))video_fps       = vid.get(cv2.CAP_PROP_FPS)video_size      = (int(vid.get(cv2.CAP_PROP_FRAME_WIDTH)),int(vid.get(cv2.CAP_PROP_FRAME_HEIGHT)))isOutput = True if output_path != "" else Falseif isOutput:print("!!! TYPE:", type(output_path), type(video_FourCC), type(video_fps), type(video_size))print(video_FourCC, video_fps, video_size)out = cv2.VideoWriter(output_path, video_FourCC, video_fps, video_size)accum_time = 0curr_fps = 0fps = "FPS: ??"prev_time = time.time()cv2.namedWindow("result", cv2.WINDOW_NORMAL)cv2.resizeWindow('result', video_size[0], video_size[1])while True:return_value, frame = vid.read()try:#图片第1维是宽,第2维是高,第3维是RGB#PIL库图片第三维是RGB,cv2库图片第三维正好相反,是BGRimage = Image.fromarray(frame[...,::-1])except Exception as e:breakimage = yolo.detect_image(image)result = np.asarray(image)curr_time = time.time()exec_time = curr_time - prev_timeprev_time = curr_timeaccum_time = accum_time + exec_timecurr_fps = curr_fps + 1if accum_time > 1:accum_time = accum_time - 1fps = "FPS: " + str(curr_fps)curr_fps = 0cv2.putText(result, text=fps, org=(3, 15), fontFace=cv2.FONT_HERSHEY_SIMPLEX,fontScale=0.50, color=(255, 0, 0), thickness=2)cv2.imshow("result", result[...,::-1])if isOutput:out.write(result[...,::-1])if cv2.waitKey(1) & 0xFF == ord('q'):breaksleepTime = 0.5time.sleep(sleepTime)yolo.close_session()
多张图
本节将前2节内容结合,直接读取文件夹的若干图片做检测并展示为视频。新建_08_detect_multi_images.py代码如下:
# 导入YOLO类
from _06_yolo import YoloModel
# 导入常用的库
from PIL import Image
import cv2
import os
import time
import numpy as np# 获取文件夹中的文件路径
def get_filePathList(dirPath, partOfFileName=''):all_fileName_list = next(os.walk(dirPath))[2]fileName_list = [k for k in all_fileName_list if partOfFileName in k]filePath_list = [os.path.join(dirPath, k) for k in fileName_list]return filePath_list# 对多张图片做检测,并保存为avi格式的视频文件
def detect_multi_images(weights_h5FilePath, imageFilePath_list, out_aviFilePath=None):yolo_model = YoloModel(weights_h5FilePath=weights_h5FilePath)windowName = 'detect_multi_images_result'cv2.namedWindow(windowName, cv2.WINDOW_NORMAL)width = 1000height = 618display_size = (width, height)cv2.resizeWindow(windowName, width, height)if out_aviFilePath is not None:fourcc = cv2.VideoWriter_fourcc('M', 'P', 'E', 'G')videoWriter = cv2.VideoWriter(out_aviFilePath, fourcc, 1.3, display_size)for imageFilePath in imageFilePath_list:image = Image.open(imageFilePath)out_image = yolo_model.detect_image(image)resized_image = out_image.resize(display_size, Image.ANTIALIAS)resized_image_ndarray = np.array(resized_image)#图片第1维是宽,第2维是高,第3维是RGB#PIL库图片第三维是RGB,cv2库图片第三维正好相反,是BGRcv2.imshow(windowName, resized_image_ndarray[..., ::-1])if out_aviFilePath is not None:videoWriter.write(resized_image_ndarray[..., ::-1])# 第1次按空格键可以暂停检测,第2次按空格键继续检测pressKey = cv2.waitKey(500)if ord(' ') == pressKey:cv2.waitKey(0)# 按Esc键或者q键可以退出循环if 27 == pressKey or ord('q') == pressKey:break# 退出程序时关闭模型、写入器、cv窗口        yolo_model.close_session()videoWriter.release()cv2.destroyAllWindows()# 解析运行代码文件时传入的参数
import argparse  # dirPath, image_suffix,  weights_h5FilePath,  imageFilePath_list,  out_aviFilePath
def parse_args(): parser = argparse.ArgumentParser()parser.add_argument('-d', '--dirPath', type=str, help='directory path', default='../resources/n01440764')parser.add_argument('--image_suffix', type=str, default='.JPEG')parser.add_argument('-w', '--weights_h5FilePath', type=str, default='../resources/trained_weights.h5')argument_namespace = parser.parse_args()return argument_namespace     # 主函数
if __name__ == '__main__':   argument_namespace = parse_args()dirPath = argument_namespace.dirPathimage_suffix = argument_namespace.image_suffixweights_h5FilePath = argument_namespace.weights_h5FilePathimageFilePath_list = get_filePathList(dirPath, image_suffix)out_aviFilePath = '../resources/fish_output_2.avi'  detect_multi_images(weights_h5FilePath, imageFilePath_list, out_aviFilePath)
删除了原作者代码中的以下功能:对YOLOv3_tiny的支持、检测时对多GPU的支持:

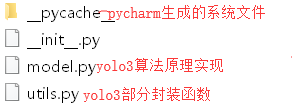
在model_data文件夹中如下:

在yolo3文件夹中如下:
这篇关于【python1】图像操作,验证码识别,拼接/保存器,字符分割识别,移动物检测,ckpt转pb,keras_yolov3_gpu训练自己数据集的文章就介绍到这儿,希望我们推荐的文章对编程师们有所帮助!


