本文主要是介绍Jetson nx(Jetpack4.6版本)保姆级教程安装安装d435i-SDK流程踩坑,以及安装realsense与code_utils与imu_utils并标定imu内参附上测试demo,希望对大家解决编程问题提供一定的参考价值,需要的开发者们随着小编来一起学习吧!
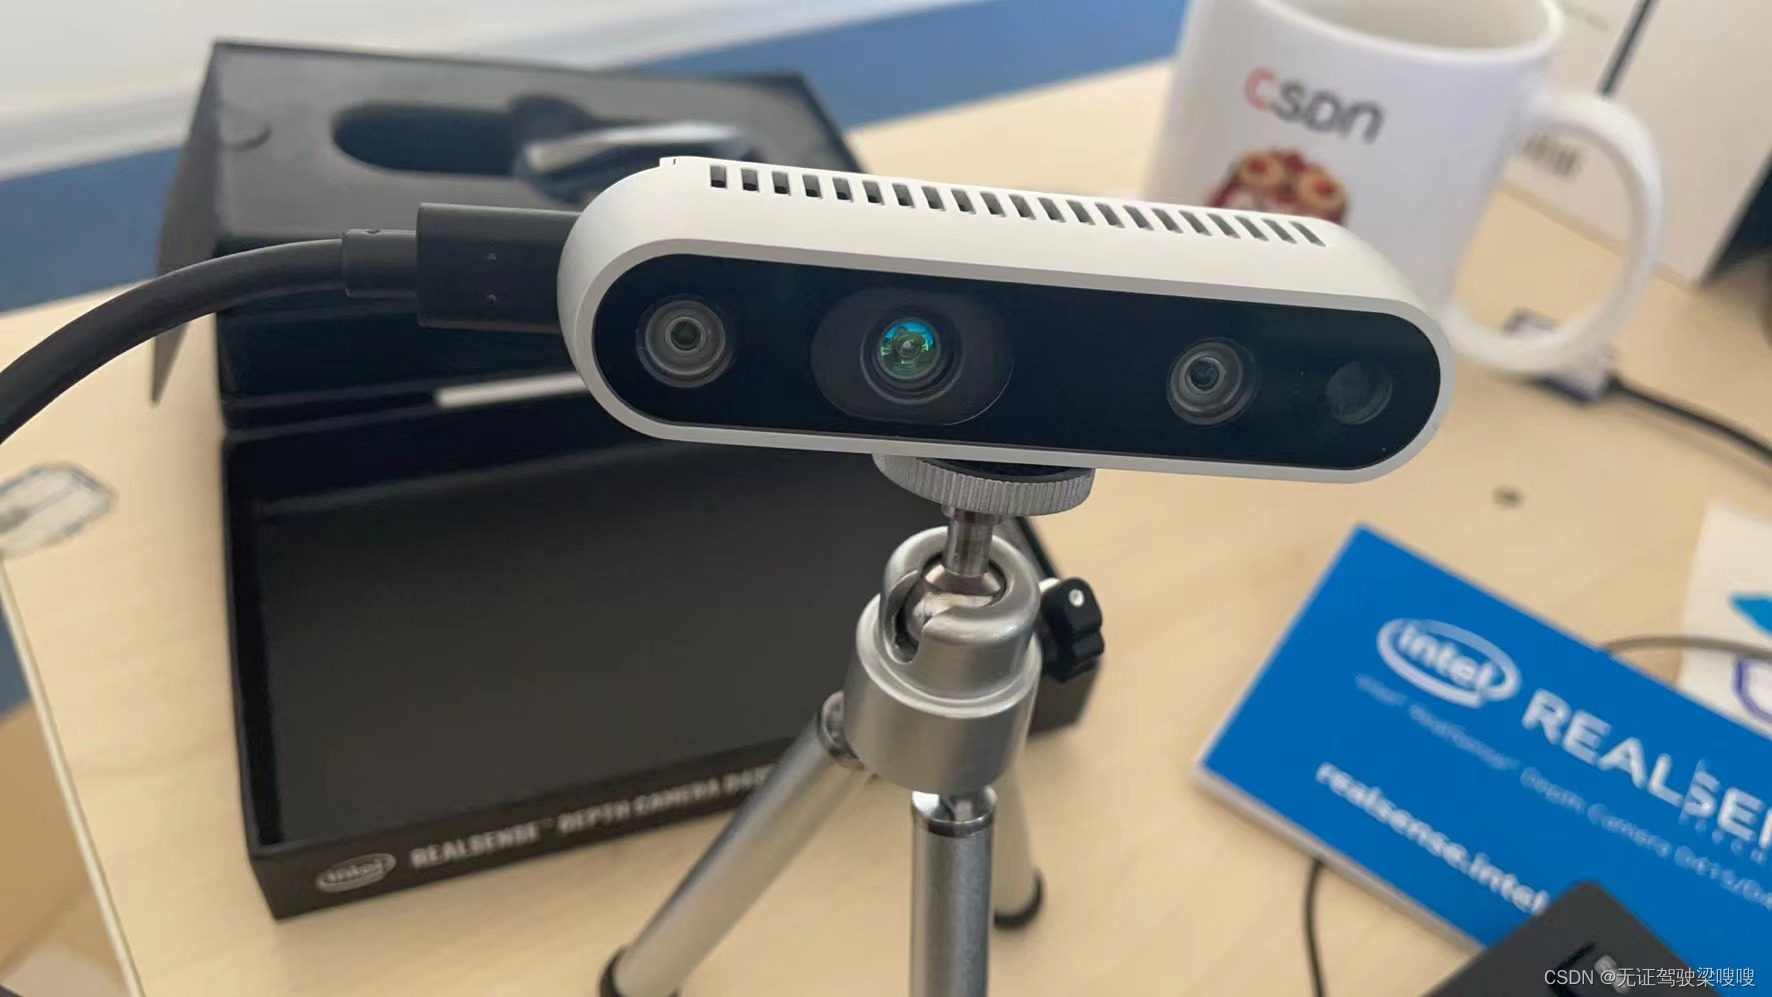
不知道啥时候自己能买得起这个相机,拍照留个纪念。
NVIDIA Jetson installation (intelrealsense.com)
固件跟新地址Firmware Update Tool (rs-fw-update) (intelrealsense.com)

安装IntelRealsense D435i驱动,注意该过程中不能接入摄像头:git clone https://github.com/jetsonhacks/installRealSenseSDK.git
cd installRealSenseSDK
./buildLibrealsense.sh
这里可以选择安装版本,默认为V2.5.0
### 一些可以参考的链接:https://github.com/IntelRealSense/librealsense/blob/master/doc/distribution_linux.md等待一个小时左右脚本才会运行结束,连接摄像头,先运行realsense-viewer查看摄像头能否正常使用。然后可以python3 然后import pyrealsense as rs查看是否安装正确。如果出现nomodule的报错则需要找到~/librealsense/build/wrappers/python该路径下的六个gnu文件,复制到 /usr/local/lib/python3.6中,我得设备python版本3.6,注意自己得环境
then find the pyrealsense2 in ~/librealsense/build/wrappers/python   copy the six file use following command
sudo mv ~/pyrealsense2/ /usr/local/lib/python3.6
nvidia@nvidia-desktop:~/librealsense/build/wrappers/python$ ls CMakeFiles pybackend2.cpython-36m-aarch64-linux-gnu.so pyrealsense2Config.cmake pyrealsense2.cpython-36m-aarch64-linux-gnu.so.2.50 cmake_install.cmake pybackend2.cpython-36m-aarch64-linux-gnu.so.2 pyrealsense2ConfigVersion.cmake pyrealsense2.cpython-36m-aarch64-linux-gnu.so.2.50.0 Makefile pybackend2.cpython-36m-aarch64-linux-gnu.so.2.50.0 pyrealsense2.cpython-36m-aarch64-linux-gnu.so我安装完sdk好像就自己生成这个目录了,但是还是拷贝了一下.so文件,该步骤结束后再编辑bashrc修改环境变量
export PYTHONPATH=$PYTHONPATH:/usr/local/lib/python3.6/pyrealsense2
添加这一行至bashrc中再source ~/.bashrc即可再import pyrealsense as rs查看是否安装正确
1、建立workspace,已经有的可以跳过可以参考安装ros教程先安装(9条消息) Jetson系列 安装ros自动化安装_无证驾驶梁嗖嗖的博客-CSDN博客_jetson 安装ros
mkdir -p ~/catkin_ws/src
cd ~/catkin_ws/src/
catkin_init_workspace
cd ..
catkin_make
echo "source ~/catkin_ws/devel/setup.bash" >> ~/.bashrc
source ~/.bashrc
2、在catkin_ws/src/下载源程序
cd src
git clone https://github.com/intel-ros/realsense.git
cd ..
catkin_make
CMake Error at /opt/ros/melodic/share/cv_bridge/cmake/cv_bridgeConfig.cmake:113 (message):Project 'cv_bridge' specifies '/usr/local/include/opencv' as an includedir, which is not found.  It does neither exist as an absolute directorynor in '${{prefix}}//usr/local/include/opencv'.  Check the issue tracker'https://github.com/ros-perception/vision_opencv/issues' and considercreating a ticket if the problem has not been reported yet.
Call Stack (most recent call first):/opt/ros/melodic/share/catkin/cmake/catkinConfig.cmake:76 (find_package)realsense-ros/realsense2_camera/CMakeLists.txt:11 (find_package)-- Configuring incomplete, errors occurred!
See also "/home/nvidia/catkin_ws/build/CMakeFiles/CMakeOutput.log".
See also "/home/nvidia/catkin_ws/build/CMakeFiles/CMakeError.log".
Invoking "cmake" failed
刚开始找得解决办法如下,这个可能是老版本得记录:
sudo vi /opt/ros/melodic/share/cv_bridge/cmake/cv_bridgeConfig.cmake真实解决办法如下:
将94和96行得opencv改成opencv4即可

CMake Error at /opt/ros/melodic/share/catkin/cmake/catkinConfig.cmake:83 (find_package):Could not find a package configuration file provided by"ddynamic_reconfigure" with any of the following names:ddynamic_reconfigureConfig.cmakeddynamic_reconfigure-config.cmakeAdd the installation prefix of "ddynamic_reconfigure" to CMAKE_PREFIX_PATHor set "ddynamic_reconfigure_DIR" to a directory containing one of theabove files.  If "ddynamic_reconfigure" provides a separate developmentpackage or SDK, be sure it has been installed.
Call Stack (most recent call first):realsense-ros/realsense2_camera/CMakeLists.txt:11 (find_package)-- Configuring incomplete, errors occurred!
See also "/home/nvidia/catkin_ws/build/CMakeFiles/CMakeOutput.log".
See also "/home/nvidia/catkin_ws/build/CMakeFiles/CMakeError.log".
Invoking "cmake" failed
解决办法如下:
sudo apt-get install ros-melodic-ddynamic-reconfigure... logging to /home/nvidia/.ros/log/bb471694-1c79-11ed-bb9d-48b02d359274/roslaunch-nvidia-desktop-9361.log
Checking log directory for disk usage. This may take a while.
Press Ctrl-C to interrupt
Done checking log file disk usage. Usage is <1GB.Resource not found: rgbd_launch
ROS path [0]=/opt/ros/melodic/share/ros
ROS path [1]=/home/nvidia/catkin_ws/src
ROS path [2]=/opt/ros/melodic/share
The traceback for the exception was written to the log file解决办法如下:
sudo apt-get install ros-melodic-rgbd-launch最终测试demo如下:
import pyrealsense2 as rs
import numpy as np
import cv2width = 640
height = 360pipeline = rs.pipeline()
config = rs.config()
config.enable_stream(rs.stream.depth, width, height, rs.format.z16, 30)
config.enable_stream(rs.stream.color, width, height, rs.format.bgr8, 30)profile = pipeline.start(config)depth_sensor = profile.get_device().first_depth_sensor()
depth_scale = depth_sensor.get_depth_scale()print("Depth Scale is: ", depth_scale)try:while True:frames = pipeline.wait_for_frames()depth_frame = frames.get_depth_frame()color_frame = frames.get_color_frame()if not depth_frame or not color_frame:continue# convert images to numpy arraysdepth_image = np.asanyarray(depth_frame.get_data())color_image = np.asanyarray(color_frame.get_data())depth_colormap = cv2.applyColorMap(cv2.convertScaleAbs(depth_image, alpha=0.03), cv2.COLORMAP_JET)depth = depth_image[320,240].astype(float)*depth_scalecv2.imshow('rgb', color_image)cv2.imshow('depth', depth_colormap)print(f'Depth: {depth} m')if cv2.waitKey(1) == ord("q"):break
finally:pipeline.stop()
到这里只是能打开无法获取imu,接着干
nvidia@nvidia-desktop:~$ rs-fw-update -s 135122074423 -f Signed_Image_UVC_5_12_13_50.binSearch for device with serial number: 135122074423Updating device:
Name: Intel RealSense D435I, serial number: 135122074423, update serial number: 134523064666, firmware version: 05.12.07.150, USB type: 3.2Firmware update startedFirmware update progress: 100[%]Firmware update done
如果就一个摄像头可以不加序列号 ,fuab3.0和固件改了还是没启动imu,再看看别的原因毕竟第一次用使用手册什么得也没用到,应该还是相机配置问题。
(15条消息) RealSense D435i + imu 标定 Ros Melodic_Y.Finn的博客-CSDN博客_d435i imu标定
(17条消息) Jetson Xavier NX+ubuntu18.04安装Ceres步骤记录_viai_youme的博客-CSDN博客
jetson c++: internal compiler error: Segmentation fault (program cc1plus) Please submit a full bug解决方法:sudo gedit /etc/security/limits.conf
修改了stack 为8192(8GB)
然后重启
make 成功
Jetson Xavier NX+ubuntu18.04安装Ceres步骤记录
mkdir ceres-bin
cd ceres-bin
cmake ../ceres-solver-1.14.0
make -j3
sudo make install
Segmentation fault (program cc1plus) when compile code with "ROS_ERROR_STREAM()" - ROS Answers: Open Source Q&A Forum
参考链接(https://www.cnblogs.com/long5683/p/13614352.html)
主要记录一下在jetson xavier上编译的时候由于opencv版本问题导致的错误以及解决方法:
主要流程见参考链接。其中会遇到三个错误:
1、在code_utils下面找到sumpixel_test.cpp,修改#include "backward.hpp"为
#include “code_utils/backward.hpp”2、在code_utils中的sumpixel_test.cpp和mat_io_test.cpp 中添加如下两行:
#define CV_LOAD_IMAGE_UNCHANGED -1
#define CV_LOAD_IMAGE_GRAYSCALE 0
#define CV_LOAD_IMAGE_UNCHANGED -1#define CV_LOAD_IMAGE_GRAYSCALE 03、在code_utils中的sumpixel_test.cpp中,将CV_MINMAX换成
NORM_MINMAX以上是我遇到的问题和解决方法。
注意code是否编译成功
nvidia@nvidia-desktop:~/catkin_ws/src$ ls
6.txt  CMakeLists.txt  code_utils-master  code_utils-master.zip  demo2.py  demo.py  imu.py  imu_utils-master.zip  realsense-ros
nvidia@nvidia-desktop:~/catkin_ws/src$ sudo mv code_utils-master code_utils
nvidia@nvidia-desktop:~/catkin_ws/src$ cd ..
nvidia@nvidia-desktop:~/catkin_ws$ catkin_make
Base path: /home/nvidia/catkin_ws
Source space: /home/nvidia/catkin_ws/src
Build space: /home/nvidia/catkin_ws/build
Devel space: /home/nvidia/catkin_ws/devel
Install space: /home/nvidia/catkin_ws/install
####
#### Running command: "cmake /home/nvidia/catkin_ws/src -DCATKIN_DEVEL_PREFIX=/home/nvidia/catkin_ws/devel -DCMAKE_INSTALL_PREFIX=/home/nvidia/catkin_ws/install -G Unix Makefiles" in "/home/nvidia/catkin_ws/build"
####
-- Using CATKIN_DEVEL_PREFIX: /home/nvidia/catkin_ws/devel
-- Using CMAKE_PREFIX_PATH: /home/nvidia/imu_catkin_ws/devel;/home/nvidia/catkin_ws/devel;/opt/ros/melodic
-- This workspace overlays: /home/nvidia/imu_catkin_ws/devel;/home/nvidia/catkin_ws/devel;/opt/ros/melodic
-- Found PythonInterp: /usr/bin/python2 (found suitable version "2.7.17", minimum required is "2")
-- Using PYTHON_EXECUTABLE: /usr/bin/python2
-- Using Debian Python package layout
-- Using empy: /usr/bin/empy
-- Using CATKIN_ENABLE_TESTING: ON
-- Call enable_testing()
-- Using CATKIN_TEST_RESULTS_DIR: /home/nvidia/catkin_ws/build/test_results
-- Found gtest sources under '/usr/src/googletest': gtests will be built
-- Found gmock sources under '/usr/src/googletest': gmock will be built
-- Found PythonInterp: /usr/bin/python2 (found version "2.7.17")
-- Using Python nosetests: /usr/bin/nosetests-2.7
-- catkin 0.7.29
-- BUILD_SHARED_LIBS is on
-- BUILD_SHARED_LIBS is on
-- ~~~~~~~~~~~~~~~~~~~~~~~~~~~~~~~~~~~~~~~~~~~~~~~~~
-- ~~  traversing 3 packages in topological order:
-- ~~  - realsense2_description
-- ~~  - code_utils
-- ~~  - realsense2_camera
-- ~~~~~~~~~~~~~~~~~~~~~~~~~~~~~~~~~~~~~~~~~~~~~~~~~
-- +++ processing catkin package: 'realsense2_description'
-- ==> add_subdirectory(realsense-ros/realsense2_description)
-- +++ processing catkin package: 'code_utils'
-- ==> add_subdirectory(code_utils)
-- Found OpenCV: /usr (found version "4.1.1")
-- Found installed version of Eigen: /usr/lib/cmake/eigen3
-- Found required Ceres dependency: Eigen version 3.3.4 in /usr/include/eigen3
-- Found required Ceres dependency: glog
-- Found installed version of gflags: /usr/lib/aarch64-linux-gnu/cmake/gflags
-- Detected gflags version: 2.2.1
-- Found required Ceres dependency: gflags
-- Found Ceres version: 1.14.0 installed in: /usr/local with components: [EigenSparse, SparseLinearAlgebraLibrary, LAPACK, SuiteSparse, CXSparse, SchurSpecializations, OpenMP, Multithreading]
-- +++ processing catkin package: 'realsense2_camera'
-- ==> add_subdirectory(realsense-ros/realsense2_camera)
-- Using these message generators: gencpp;geneus;genlisp;gennodejs;genpy
-- Create Release Build.
-- realsense2_camera: 3 messages, 1 services
-- Configuring done
-- Generating done
-- Build files have been written to: /home/nvidia/catkin_ws/build
####
#### Running command: "make -j2 -l2" in "/home/nvidia/catkin_ws/build"
/home/nvidia/catkin_ws/src/imu_utils/src/imu_an.cpp: In function ‘void writeData1(std::__cxx11::string, const std::vector<double>&, const std::vector<double>&)’:
/home/nvidia/catkin_ws/src/imu_utils/src/imu_an.cpp:68:19: error: aggregate ‘std::ofstream out_t’ has incomplete type and cannot be definedstd::ofstream out_t;^~~~~
/home/nvidia/catkin_ws/src/imu_utils/src/imu_an.cpp:69:19: error: aggregate ‘std::ofstream out_x’ has incomplete type and cannot be definedstd::ofstream out_x;^~~~~
/home/nvidia/catkin_ws/src/imu_utils/src/imu_an.cpp: In function ‘void writeData3(std::__cxx11::string, const std::vector<double>&, const std::vector<double>&, const std::vector<double>&, const std::vector<double>&)’:
/home/nvidia/catkin_ws/src/imu_utils/src/imu_an.cpp:90:19: error: aggregate ‘std::ofstream out_t’ has incomplete type and cannot be definedstd::ofstream out_t;^~~~~
/home/nvidia/catkin_ws/src/imu_utils/src/imu_an.cpp:91:19: error: aggregate ‘std::ofstream out_x’ has incomplete type and cannot be definedstd::ofstream out_x;^~~~~
/home/nvidia/catkin_ws/src/imu_utils/src/imu_an.cpp:92:19: error: aggregate ‘std::ofstream out_y’ has incomplete type and cannot be definedstd::ofstream out_y;^~~~~
/home/nvidia/catkin_ws/src/imu_utils/src/imu_an.cpp:93:19: error: aggregate ‘std::ofstream out_z’ has incomplete type and cannot be definedstd::ofstream out_z;^~~~~
/home/nvidia/catkin_ws/src/imu_utils/src/imu_an.cpp:103:32: warning: comparison between signed and unsigned integer expressions [-Wsign-compare]for ( int index = 0; index < gyro_ts_x.size( ); ++index )~~~~~~^~~~~~~~~~~~~~~~~~~
imu_utils/CMakeFiles/imu_an.dir/build.make:62: recipe for target 'imu_utils/CMakeFiles/imu_an.dir/src/imu_an.cpp.o' failed
make[2]: *** [imu_utils/CMakeFiles/imu_an.dir/src/imu_an.cpp.o] Error 1
解决方法添加头文件在报错文件内
#include <fstream>
到这里应该就差不多了明天继续补存测试
这篇关于Jetson nx(Jetpack4.6版本)保姆级教程安装安装d435i-SDK流程踩坑,以及安装realsense与code_utils与imu_utils并标定imu内参附上测试demo的文章就介绍到这儿,希望我们推荐的文章对编程师们有所帮助!


