本文主要是介绍DAIR-V2X-V 3D检测数据集 转为Kitti格式 | 可视化,希望对大家解决编程问题提供一定的参考价值,需要的开发者们随着小编来一起学习吧!
本文分享在DAIR-V2X-V数据集中,将标签转为Kitti格式,并可视化3D检测效果。

一、将标签转为Kitti格式
DAIR-V2X包括不同类型的数据集:
- DAIR-V2X-I
- DAIR-V2X-V
- DAIR-V2X-C
- V2X-Seq-SPD
- V2X-Seq-TFD
- DAIR-V2X-C-Example: google_drive_link
- V2X-Seq-SPD-Example: google_drive_link
- V2X-Seq-TFD-Example: google_drive_link

本文选择DAIR-V2X-V作为示例。
1、下载DAIR-V2X工程
DAIR-V2X开源地址:https://github.com/AIR-THU/DAIR-V2X
2、存放数据
可以将数据存放到data目录中,比如:data/DAIR-V2X-V/single-vehicle-side,里面包含两个关键目录和一个文件
calib/
label/
data_info.json
3、修复bug
在tools/dataset_converter/gen_kitti/label_json2kitti.py中的22行,将 i15 = str(-eval(item["rotation"])) 改为:
i15 = str(-float(item["rotation"]))如何不修改会报错的;
DAIR-V2X-gp/tools/dataset_converter/gen_kitti/label_json2kitti.py", line 22, in write_kitti_in_txt
i15 = str(-eval(item["rotation"]))
TypeError: eval() arg 1 must be a string, bytes or code object
将tools/dataset_converter/gen_kitti/label_json2kitti.py复制到根目录中,避免找不到tool库。
4、修改配置参数
label_json2kitti.py中,可以将rawdata_copy和kitti_pcd2bin注释掉。
这样节约时间,不用程序拷贝图像、点云数据,只需生成标签即可。
if __name__ == "__main__":print("================ Start to Convert ================")args = parser.parse_args()source_root = args.source_roottarget_root = args.target_rootprint("================ Start to Copy Raw Data ================")mdkir_kitti(target_root)# rawdata_copy(source_root, target_root)# kitti_pcd2bin(target_root)
5、转换数据
执行如下命令
python dair2kitti.py --source-root ./data/DAIR-V2X-V/single-vehicle-side --target-root ./data/DAIR-V2X-V/single-vehicle-side --split-path ./data/split_datas/single-vehicle-split-data.json --label-type camera --sensor-view vehicle
会打印信息
================ Start to Convert ================
================ Start to Copy Raw Data ================
================ Start to Generate Label ================
================ Start to Generate Calibration Files ================
15627 15627
================ Start to Generate ImageSet Files ================
查看目录:data/DAIR-V2X-V/single-vehicle-side,生成了3个目录
ImageSets
testing
training
其中,testing目录是空的
ImageSets目录包含:

training目录包含:
6、查看生成数据格式
查看calib中的相机标定文件,比如 000000.txt
P2: 3996.487567 0.0 955.58618 0.0 0.0 3963.430994 527.646219 0.0 0.0 0.0 1.0 0.0
P2: 3996.487567 0.0 955.58618 0.0 0.0 3963.430994 527.646219 0.0 0.0 0.0 1.0 0.0
P2: 3996.487567 0.0 955.58618 0.0 0.0 3963.430994 527.646219 0.0 0.0 0.0 1.0 0.0
P2: 3996.487567 0.0 955.58618 0.0 0.0 3963.430994 527.646219 0.0 0.0 0.0 1.0 0.0
R0_rect: 1 0 0 0 1 0 0 0 1
Tr_velo_to_cam: 0.006283 -0.999979 -0.001899 -0.298036 -0.005334 0.001865 -0.999984 -0.666812 0.999966 0.006293 -0.005322 -0.516927
Tr_velo_to_cam: 0.006283 -0.999979 -0.001899 -0.298036 -0.005334 0.001865 -0.999984 -0.666812 0.999966 0.006293 -0.005322 -0.516927
查看lable_2中的标签,比如 000000.txt
Car 0 0 0.33888581543844903 0 527.938232 69.723068 637.4556269999999 0.850836 4.337498 2.073565 -9.601712831407 0.8624079931420001 32.383280568744 1.615145
二、可视化3D框
使用Kitti的方式,实现可视化推理结果,上面生成的结果,和kitii标签格式是一致的。
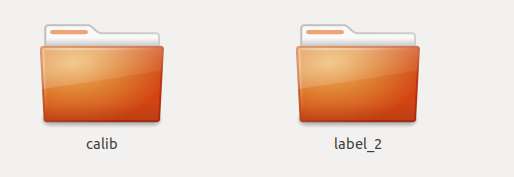
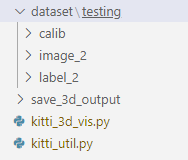
在新建一个vis目录包括:
dataset 存放相机标定数据、图片、标签
save_3d_output 存放可视化图片
kitti_3d_vis.py 可视化运行此代码
kitti_util.py 依赖代码
具体的目录结构:
主代码 kitti_3d_vis.py
# kitti_3d_vis.pyfrom __future__ import print_functionimport os
import sys
import cv2
import random
import os.path
import shutil
from PIL import Image
BASE_DIR = os.path.dirname(os.path.abspath(__file__))
ROOT_DIR = os.path.dirname(BASE_DIR)
sys.path.append(BASE_DIR)
sys.path.append(os.path.join(ROOT_DIR, 'mayavi'))
from kitti_util import *def visualization():import mayavi.mlab as mlabdataset = kitti_object(r'./dataset/')path = r'./dataset/testing/label_2/'Save_Path = r'./save_3d_output/'files = os.listdir(path)for file in files:name = file.split('.')[0]save_path = Save_Path + name + '.png'data_idx = int(name)# Load data from datasetobjects = dataset.get_label_objects(data_idx)img = dataset.get_image(data_idx)img = cv2.cvtColor(img, cv2.COLOR_BGR2RGB)calib = dataset.get_calibration(data_idx)print(' ------------ save image with 3D bounding box ------- ')print('name:', name)show_image_with_boxes(img, objects, calib, save_path, True)if __name__=='__main__':visualization()
依赖代码 kitti_util.py
# kitti_util.pyfrom __future__ import print_functionimport os
import sys
import cv2
import numpy as np
from PIL import Image
import matplotlib.pyplot as plt
BASE_DIR = os.path.dirname(os.path.abspath(__file__))
ROOT_DIR = os.path.dirname(BASE_DIR)
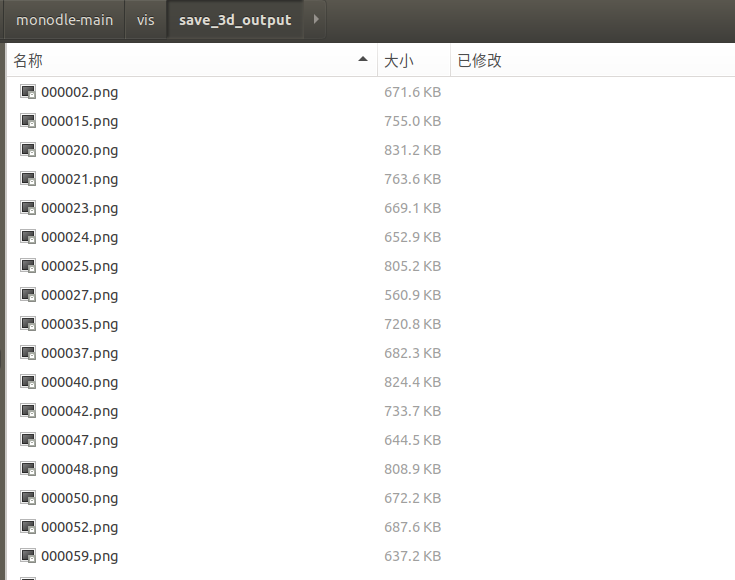
sys.path.append(os.path.join(ROOT_DIR, 'mayavi'))class kitti_object(object):def __init__(self, root_dir, split='testing'):self.root_dir = root_dirself.split = splitself.split_dir = os.path.join(root_dir, split)if split == 'training':self.num_samples = 7481elif split == 'testing':self.num_samples = 7518else:print('Unknown split: %s' % (split))exit(-1)self.image_dir = os.path.join(self.split_dir, 'image_2')self.calib_dir = os.path.join(self.split_dir, 'calib')self.label_dir = os.path.join(self.split_dir, 'label_2')def __len__(self):return self.num_samplesdef get_image(self, idx):assert(idx<self.num_samples) img_filename = os.path.join(self.image_dir, '%06d.png'%(idx))return load_image(img_filename)def get_calibration(self, idx):assert(idx<self.num_samples) calib_filename = os.path.join(self.calib_dir, '%06d.txt'%(idx))return Calibration(calib_filename)def get_label_objects(self, idx):# assert(idx<self.num_samples and self.split=='training') label_filename = os.path.join(self.label_dir, '%06d.txt'%(idx))return read_label(label_filename)def show_image_with_boxes(img, objects, calib, save_path, show3d=True):''' Show image with 2D bounding boxes '''img1 = np.copy(img) # for 2d bboximg2 = np.copy(img) # for 3d bboxfor obj in objects:if obj.type=='DontCare':continuecv2.rectangle(img1, (int(obj.xmin),int(obj.ymin)), (int(obj.xmax),int(obj.ymax)), (0,255,0), 2) # 画2D框box3d_pts_2d, box3d_pts_3d = compute_box_3d(obj, calib.P) # 获取3D框-图像(8*2)、3D框-相机坐标系(8*3)img2 = draw_projected_box3d(img2, box3d_pts_2d) # 在图像上画3D框if show3d:Image.fromarray(img2).save(save_path) # 保存带有3D框的图像# Image.fromarray(img2).show()else:Image.fromarray(img1).save(save_path) # 保存带有2D框的图像# Image.fromarray(img1).show()class Object3d(object):''' 3d object label '''def __init__(self, label_file_line):data = label_file_line.split(' ')data[1:] = [float(x) for x in data[1:]]# extract label, truncation, occlusionself.type = data[0] # 'Car', 'Pedestrian', ...self.truncation = data[1] # truncated pixel ratio [0..1]self.occlusion = int(data[2]) # 0=visible, 1=partly occluded, 2=fully occluded, 3=unknownself.alpha = data[3] # object observation angle [-pi..pi]# extract 2d bounding box in 0-based coordinatesself.xmin = data[4] # leftself.ymin = data[5] # topself.xmax = data[6] # rightself.ymax = data[7] # bottomself.box2d = np.array([self.xmin,self.ymin,self.xmax,self.ymax])# extract 3d bounding box informationself.h = data[8] # box heightself.w = data[9] # box widthself.l = data[10] # box length (in meters)self.t = (data[11],data[12],data[13]) # location (x,y,z) in camera coord.self.ry = data[14] # yaw angle (around Y-axis in camera coordinates) [-pi..pi]def print_object(self):print('Type, truncation, occlusion, alpha: %s, %d, %d, %f' % \(self.type, self.truncation, self.occlusion, self.alpha))print('2d bbox (x0,y0,x1,y1): %f, %f, %f, %f' % \(self.xmin, self.ymin, self.xmax, self.ymax))print('3d bbox h,w,l: %f, %f, %f' % \(self.h, self.w, self.l))print('3d bbox location, ry: (%f, %f, %f), %f' % \(self.t[0],self.t[1],self.t[2],self.ry))class Calibration(object):''' Calibration matrices and utils3d XYZ in <label>.txt are in rect camera coord.2d box xy are in image2 coordPoints in <lidar>.bin are in Velodyne coord.y_image2 = P^2_rect * x_recty_image2 = P^2_rect * R0_rect * Tr_velo_to_cam * x_velox_ref = Tr_velo_to_cam * x_velox_rect = R0_rect * x_refP^2_rect = [f^2_u, 0, c^2_u, -f^2_u b^2_x;0, f^2_v, c^2_v, -f^2_v b^2_y;0, 0, 1, 0]= K * [1|t]image2 coord:----> x-axis (u)||v y-axis (v)velodyne coord:front x, left y, up zrect/ref camera coord:right x, down y, front zRef (KITTI paper): http://www.cvlibs.net/publications/Geiger2013IJRR.pdfTODO(rqi): do matrix multiplication only once for each projection.'''def __init__(self, calib_filepath, from_video=False):if from_video:calibs = self.read_calib_from_video(calib_filepath)else:calibs = self.read_calib_file(calib_filepath)# Projection matrix from rect camera coord to image2 coordself.P = calibs['P2'] self.P = np.reshape(self.P, [3,4])# Rigid transform from Velodyne coord to reference camera coordself.V2C = calibs['Tr_velo_to_cam']self.V2C = np.reshape(self.V2C, [3,4])self.C2V = inverse_rigid_trans(self.V2C)# Rotation from reference camera coord to rect camera coordself.R0 = calibs['R0_rect']self.R0 = np.reshape(self.R0,[3,3])# Camera intrinsics and extrinsicsself.c_u = self.P[0,2]self.c_v = self.P[1,2]self.f_u = self.P[0,0]self.f_v = self.P[1,1]self.b_x = self.P[0,3]/(-self.f_u) # relative self.b_y = self.P[1,3]/(-self.f_v)def read_calib_file(self, filepath):''' Read in a calibration file and parse into a dictionary.'''data = {}with open(filepath, 'r') as f:for line in f.readlines():line = line.rstrip()if len(line)==0: continuekey, value = line.split(':', 1)# The only non-float values in these files are dates, which# we don't care about anywaytry:data[key] = np.array([float(x) for x in value.split()])except ValueError:passreturn datadef read_calib_from_video(self, calib_root_dir):''' Read calibration for camera 2 from video calib files.there are calib_cam_to_cam and calib_velo_to_cam under the calib_root_dir'''data = {}cam2cam = self.read_calib_file(os.path.join(calib_root_dir, 'calib_cam_to_cam.txt'))velo2cam = self.read_calib_file(os.path.join(calib_root_dir, 'calib_velo_to_cam.txt'))Tr_velo_to_cam = np.zeros((3,4))Tr_velo_to_cam[0:3,0:3] = np.reshape(velo2cam['R'], [3,3])Tr_velo_to_cam[:,3] = velo2cam['T']data['Tr_velo_to_cam'] = np.reshape(Tr_velo_to_cam, [12])data['R0_rect'] = cam2cam['R_rect_00']data['P2'] = cam2cam['P_rect_02']return datadef cart2hom(self, pts_3d):''' Input: nx3 points in CartesianOupput: nx4 points in Homogeneous by pending 1'''n = pts_3d.shape[0]pts_3d_hom = np.hstack((pts_3d, np.ones((n,1))))return pts_3d_hom# =========================== # ------- 3d to 3d ---------- # =========================== def project_velo_to_ref(self, pts_3d_velo):pts_3d_velo = self.cart2hom(pts_3d_velo) # nx4return np.dot(pts_3d_velo, np.transpose(self.V2C))def project_ref_to_velo(self, pts_3d_ref):pts_3d_ref = self.cart2hom(pts_3d_ref) # nx4return np.dot(pts_3d_ref, np.transpose(self.C2V))def project_rect_to_ref(self, pts_3d_rect):''' Input and Output are nx3 points '''return np.transpose(np.dot(np.linalg.inv(self.R0), np.transpose(pts_3d_rect)))def project_ref_to_rect(self, pts_3d_ref):''' Input and Output are nx3 points '''return np.transpose(np.dot(self.R0, np.transpose(pts_3d_ref)))def project_rect_to_velo(self, pts_3d_rect):''' Input: nx3 points in rect camera coord.Output: nx3 points in velodyne coord.''' pts_3d_ref = self.project_rect_to_ref(pts_3d_rect)return self.project_ref_to_velo(pts_3d_ref)def project_velo_to_rect(self, pts_3d_velo):pts_3d_ref = self.project_velo_to_ref(pts_3d_velo)return self.project_ref_to_rect(pts_3d_ref)def corners3d_to_img_boxes(self, corners3d):""":param corners3d: (N, 8, 3) corners in rect coordinate:return: boxes: (None, 4) [x1, y1, x2, y2] in rgb coordinate:return: boxes_corner: (None, 8) [xi, yi] in rgb coordinate"""sample_num = corners3d.shape[0]corners3d_hom = np.concatenate((corners3d, np.ones((sample_num, 8, 1))), axis=2) # (N, 8, 4)img_pts = np.matmul(corners3d_hom, self.P.T) # (N, 8, 3)x, y = img_pts[:, :, 0] / img_pts[:, :, 2], img_pts[:, :, 1] / img_pts[:, :, 2]x1, y1 = np.min(x, axis=1), np.min(y, axis=1)x2, y2 = np.max(x, axis=1), np.max(y, axis=1)boxes = np.concatenate((x1.reshape(-1, 1), y1.reshape(-1, 1), x2.reshape(-1, 1), y2.reshape(-1, 1)), axis=1)boxes_corner = np.concatenate((x.reshape(-1, 8, 1), y.reshape(-1, 8, 1)), axis=2)return boxes, boxes_corner# =========================== # ------- 3d to 2d ---------- # =========================== def project_rect_to_image(self, pts_3d_rect):''' Input: nx3 points in rect camera coord.Output: nx2 points in image2 coord.'''pts_3d_rect = self.cart2hom(pts_3d_rect)pts_2d = np.dot(pts_3d_rect, np.transpose(self.P)) # nx3pts_2d[:,0] /= pts_2d[:,2]pts_2d[:,1] /= pts_2d[:,2]return pts_2d[:,0:2]def project_velo_to_image(self, pts_3d_velo):''' Input: nx3 points in velodyne coord.Output: nx2 points in image2 coord.'''pts_3d_rect = self.project_velo_to_rect(pts_3d_velo)return self.project_rect_to_image(pts_3d_rect)# =========================== # ------- 2d to 3d ---------- # =========================== def project_image_to_rect(self, uv_depth):''' Input: nx3 first two channels are uv, 3rd channelis depth in rect camera coord.Output: nx3 points in rect camera coord.'''n = uv_depth.shape[0]x = ((uv_depth[:,0]-self.c_u)*uv_depth[:,2])/self.f_u + self.b_xy = ((uv_depth[:,1]-self.c_v)*uv_depth[:,2])/self.f_v + self.b_ypts_3d_rect = np.zeros((n,3))pts_3d_rect[:,0] = xpts_3d_rect[:,1] = ypts_3d_rect[:,2] = uv_depth[:,2]return pts_3d_rectdef project_image_to_velo(self, uv_depth):pts_3d_rect = self.project_image_to_rect(uv_depth)return self.project_rect_to_velo(pts_3d_rect)def rotx(t):''' 3D Rotation about the x-axis. '''c = np.cos(t)s = np.sin(t)return np.array([[1, 0, 0],[0, c, -s],[0, s, c]])def roty(t):''' Rotation about the y-axis. '''c = np.cos(t)s = np.sin(t)return np.array([[c, 0, s],[0, 1, 0],[-s, 0, c]])def rotz(t):''' Rotation about the z-axis. '''c = np.cos(t)s = np.sin(t)return np.array([[c, -s, 0],[s, c, 0],[0, 0, 1]])def transform_from_rot_trans(R, t):''' Transforation matrix from rotation matrix and translation vector. '''R = R.reshape(3, 3)t = t.reshape(3, 1)return np.vstack((np.hstack([R, t]), [0, 0, 0, 1]))def inverse_rigid_trans(Tr):''' Inverse a rigid body transform matrix (3x4 as [R|t])[R'|-R't; 0|1]'''inv_Tr = np.zeros_like(Tr) # 3x4inv_Tr[0:3,0:3] = np.transpose(Tr[0:3,0:3])inv_Tr[0:3,3] = np.dot(-np.transpose(Tr[0:3,0:3]), Tr[0:3,3])return inv_Trdef read_label(label_filename):lines = [line.rstrip() for line in open(label_filename)]objects = [Object3d(line) for line in lines]return objectsdef load_image(img_filename):return cv2.imread(img_filename)def load_velo_scan(velo_filename):scan = np.fromfile(velo_filename, dtype=np.float32)scan = scan.reshape((-1, 4))return scandef project_to_image(pts_3d, P):'''将3D坐标点投影到图像平面上,生成2D坐pts_3d是一个nx3的矩阵,包含了待投影的3D坐标点(每行一个点),P是相机的投影矩阵,通常是一个3x4的矩阵。函数返回一个nx2的矩阵,包含了投影到图像平面上的2D坐标点。'''''' Project 3d points to image plane.Usage: pts_2d = projectToImage(pts_3d, P)input: pts_3d: nx3 matrixP: 3x4 projection matrixoutput: pts_2d: nx2 matrixP(3x4) dot pts_3d_extended(4xn) = projected_pts_2d(3xn)=> normalize projected_pts_2d(2xn)<=> pts_3d_extended(nx4) dot P'(4x3) = projected_pts_2d(nx3)=> normalize projected_pts_2d(nx2)'''n = pts_3d.shape[0] # 获取3D点的数量pts_3d_extend = np.hstack((pts_3d, np.ones((n,1)))) # 将每个3D点的坐标扩展为齐次坐标形式(4D),通过在每个点的末尾添加1,创建了一个nx4的矩阵。# print(('pts_3d_extend shape: ', pts_3d_extend.shape))pts_2d = np.dot(pts_3d_extend, np.transpose(P)) # 将扩展的3D坐标点矩阵与投影矩阵P相乘,得到一个nx3的矩阵,其中每一行包含了3D点在图像平面上的投影坐标。每个点的坐标表示为[x, y, z]。pts_2d[:,0] /= pts_2d[:,2] # 将投影坐标中的x坐标除以z坐标,从而获得2D图像上的x坐标。pts_2d[:,1] /= pts_2d[:,2] # 将投影坐标中的y坐标除以z坐标,从而获得2D图像上的y坐标。return pts_2d[:,0:2] # 返回一个nx2的矩阵,其中包含了每个3D点在2D图像上的坐标。def compute_box_3d(obj, P):'''计算对象的3D边界框在图像平面上的投影输入: obj代表一个物体标签信息, P代表相机的投影矩阵-内参。输出: 返回两个值, corners_3d表示3D边界框在 相机坐标系 的8个角点的坐标-3D坐标。corners_2d表示3D边界框在 图像上 的8个角点的坐标-2D坐标。'''# compute rotational matrix around yaw axis# 计算一个绕Y轴旋转的旋转矩阵R,用于将3D坐标从世界坐标系转换到相机坐标系。obj.ry是对象的偏航角R = roty(obj.ry) # 3d bounding box dimensions# 物体实际的长、宽、高l = obj.l;w = obj.w;h = obj.h;# 3d bounding box corners# 存储了3D边界框的8个角点相对于对象中心的坐标。这些坐标定义了3D边界框的形状。x_corners = [l/2,l/2,-l/2,-l/2,l/2,l/2,-l/2,-l/2];y_corners = [0,0,0,0,-h,-h,-h,-h];z_corners = [w/2,-w/2,-w/2,w/2,w/2,-w/2,-w/2,w/2];# rotate and translate 3d bounding box# 1、将3D边界框的角点坐标从对象坐标系转换到相机坐标系。它使用了旋转矩阵Rcorners_3d = np.dot(R, np.vstack([x_corners,y_corners,z_corners]))# 3D边界框的坐标进行平移corners_3d[0,:] = corners_3d[0,:] + obj.t[0];corners_3d[1,:] = corners_3d[1,:] + obj.t[1];corners_3d[2,:] = corners_3d[2,:] + obj.t[2];# 2、检查对象是否在相机前方,因为只有在相机前方的对象才会被绘制。# 如果对象的Z坐标(深度)小于0.1,就意味着对象在相机后方,那么corners_2d将被设置为None,函数将返回None。if np.any(corners_3d[2,:]<0.1):corners_2d = Nonereturn corners_2d, np.transpose(corners_3d)# project the 3d bounding box into the image plane# 3、将相机坐标系下的3D边界框的角点,投影到图像平面上,得到它们在图像上的2D坐标。corners_2d = project_to_image(np.transpose(corners_3d), P);return corners_2d, np.transpose(corners_3d)def compute_orientation_3d(obj, P):''' Takes an object and a projection matrix (P) and projects the 3dobject orientation vector into the image plane.Returns:orientation_2d: (2,2) array in left image coord.orientation_3d: (2,3) array in in rect camera coord.'''# compute rotational matrix around yaw axisR = roty(obj.ry)# orientation in object coordinate systemorientation_3d = np.array([[0.0, obj.l],[0,0],[0,0]])# rotate and translate in camera coordinate system, project in imageorientation_3d = np.dot(R, orientation_3d)orientation_3d[0,:] = orientation_3d[0,:] + obj.t[0]orientation_3d[1,:] = orientation_3d[1,:] + obj.t[1]orientation_3d[2,:] = orientation_3d[2,:] + obj.t[2]# vector behind image plane?if np.any(orientation_3d[2,:]<0.1):orientation_2d = Nonereturn orientation_2d, np.transpose(orientation_3d)# project orientation into the image planeorientation_2d = project_to_image(np.transpose(orientation_3d), P);return orientation_2d, np.transpose(orientation_3d)def draw_projected_box3d(image, qs, color=(0,60,255), thickness=2):'''qs: 包含8个3D边界框角点坐标的数组, 形状为(8, 2)。图像坐标下的3D框, 8个顶点坐标。'''''' Draw 3d bounding box in imageqs: (8,2) array of vertices for the 3d box in following order:1 -------- 0/| /|2 -------- 3 .| | | |. 5 -------- 4|/ |/6 -------- 7'''qs = qs.astype(np.int32) # 将输入的顶点坐标转换为整数类型,以便在图像上绘制。# 这个循环迭代4次,每次处理一个边界框的一条边。for k in range(0,4):# Ref: http://docs.enthought.com/mayavi/mayavi/auto/mlab_helper_functions.html# 定义了要绘制的边的起始点和结束点的索引。在这个循环中,它用于绘制边界框的前四条边。i,j=k,(k+1)%4cv2.line(image, (qs[i,0],qs[i,1]), (qs[j,0],qs[j,1]), color, thickness)# 定义了要绘制的边的起始点和结束点的索引。在这个循环中,它用于绘制边界框的后四条边,与前四条边平行i,j=k+4,(k+1)%4 + 4cv2.line(image, (qs[i,0],qs[i,1]), (qs[j,0],qs[j,1]), color, thickness)# 定义了要绘制的边的起始点和结束点的索引。在这个循环中,它用于绘制连接前四条边和后四条边的边界框的边。i,j=k,k+4cv2.line(image, (qs[i,0],qs[i,1]), (qs[j,0],qs[j,1]), color, thickness)return image运行后会在save_3d_output中保存可视化的图像。
模型推理结果可视化效果:
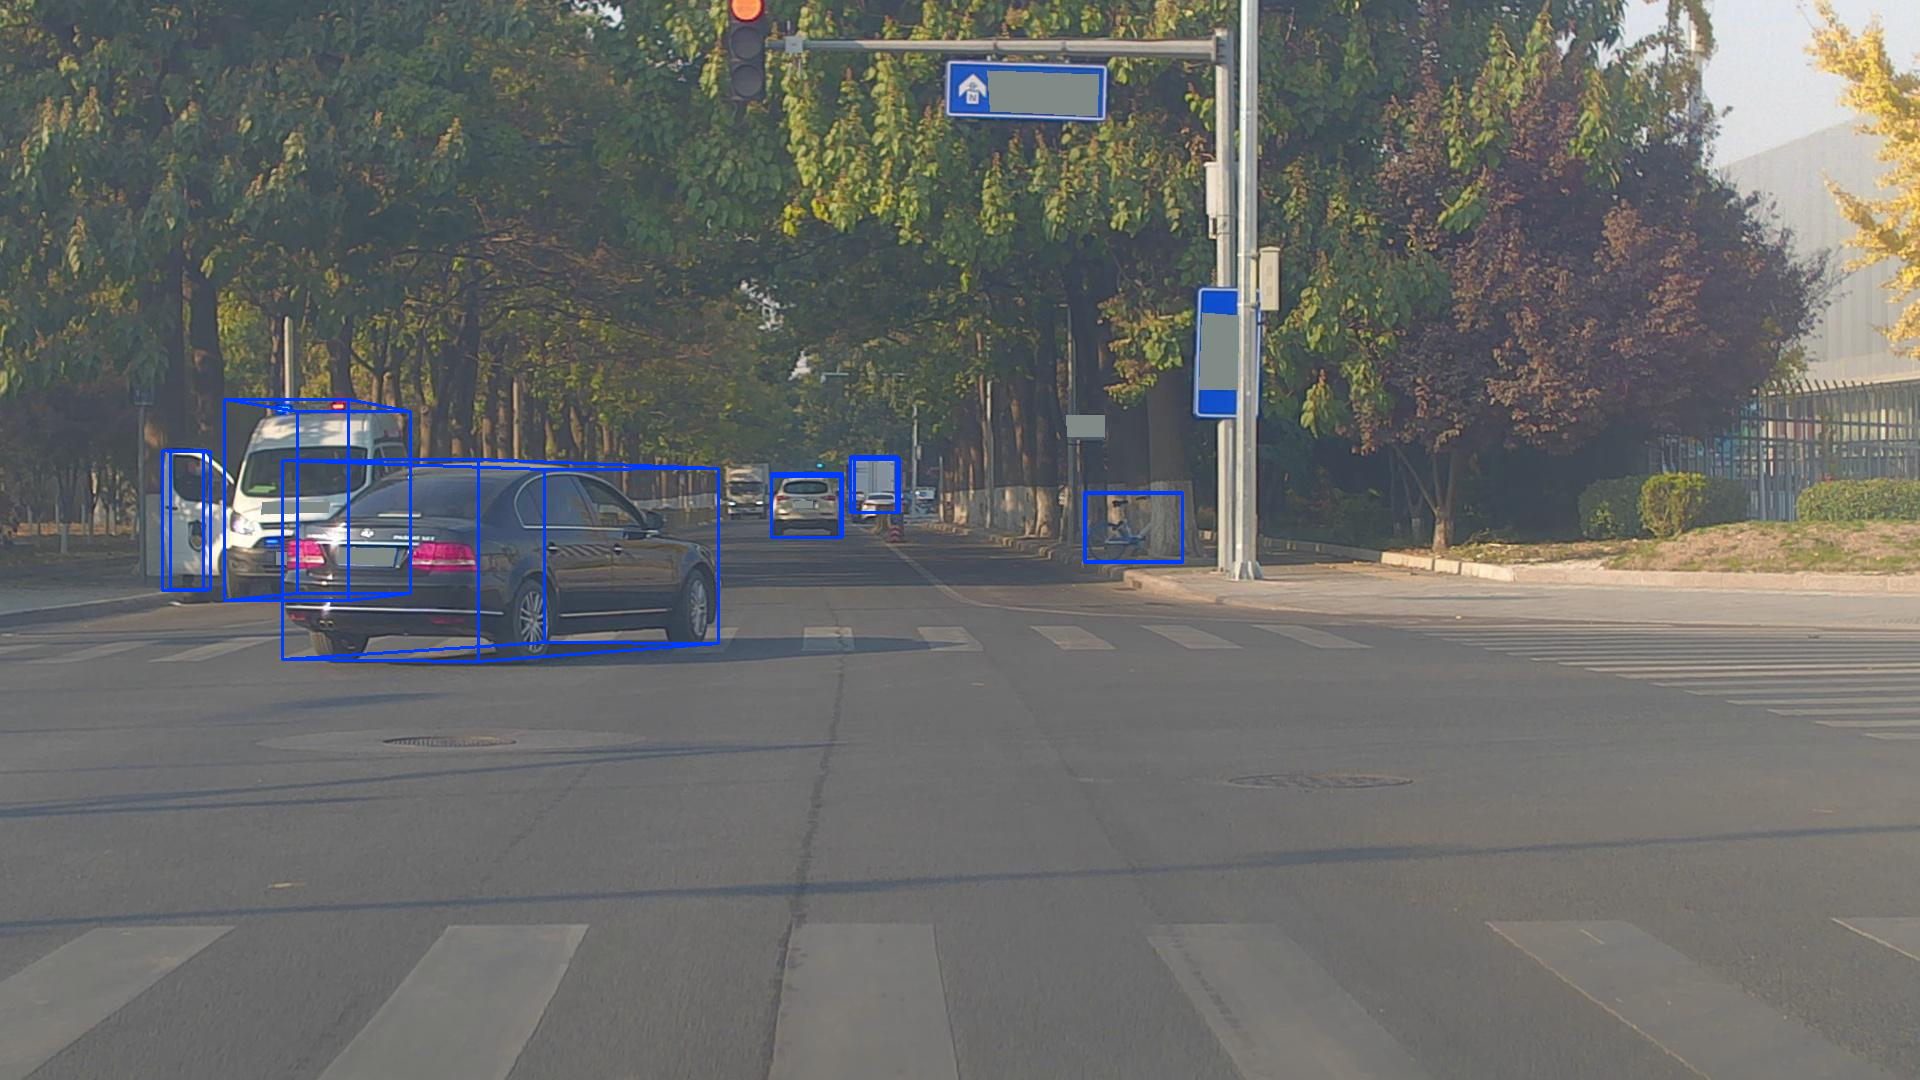


这个数据集的部分标签不准确!!!

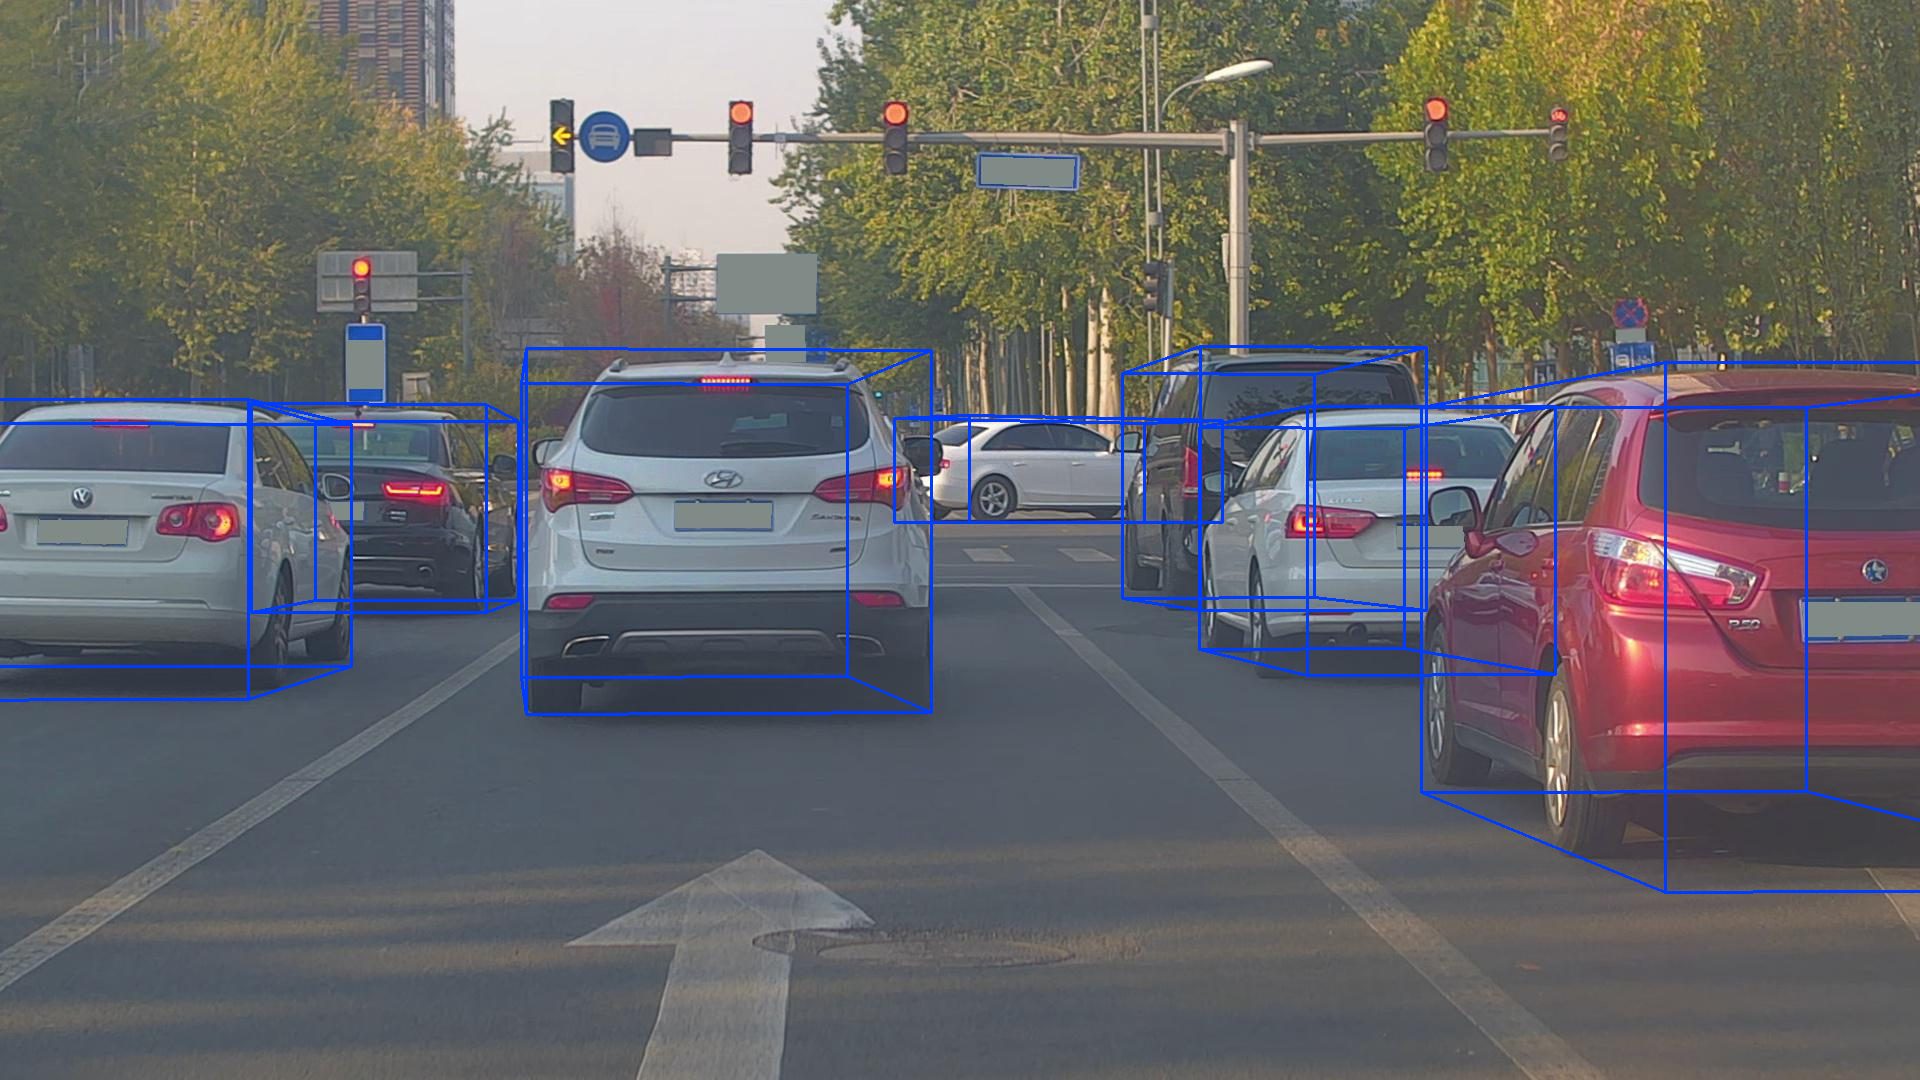
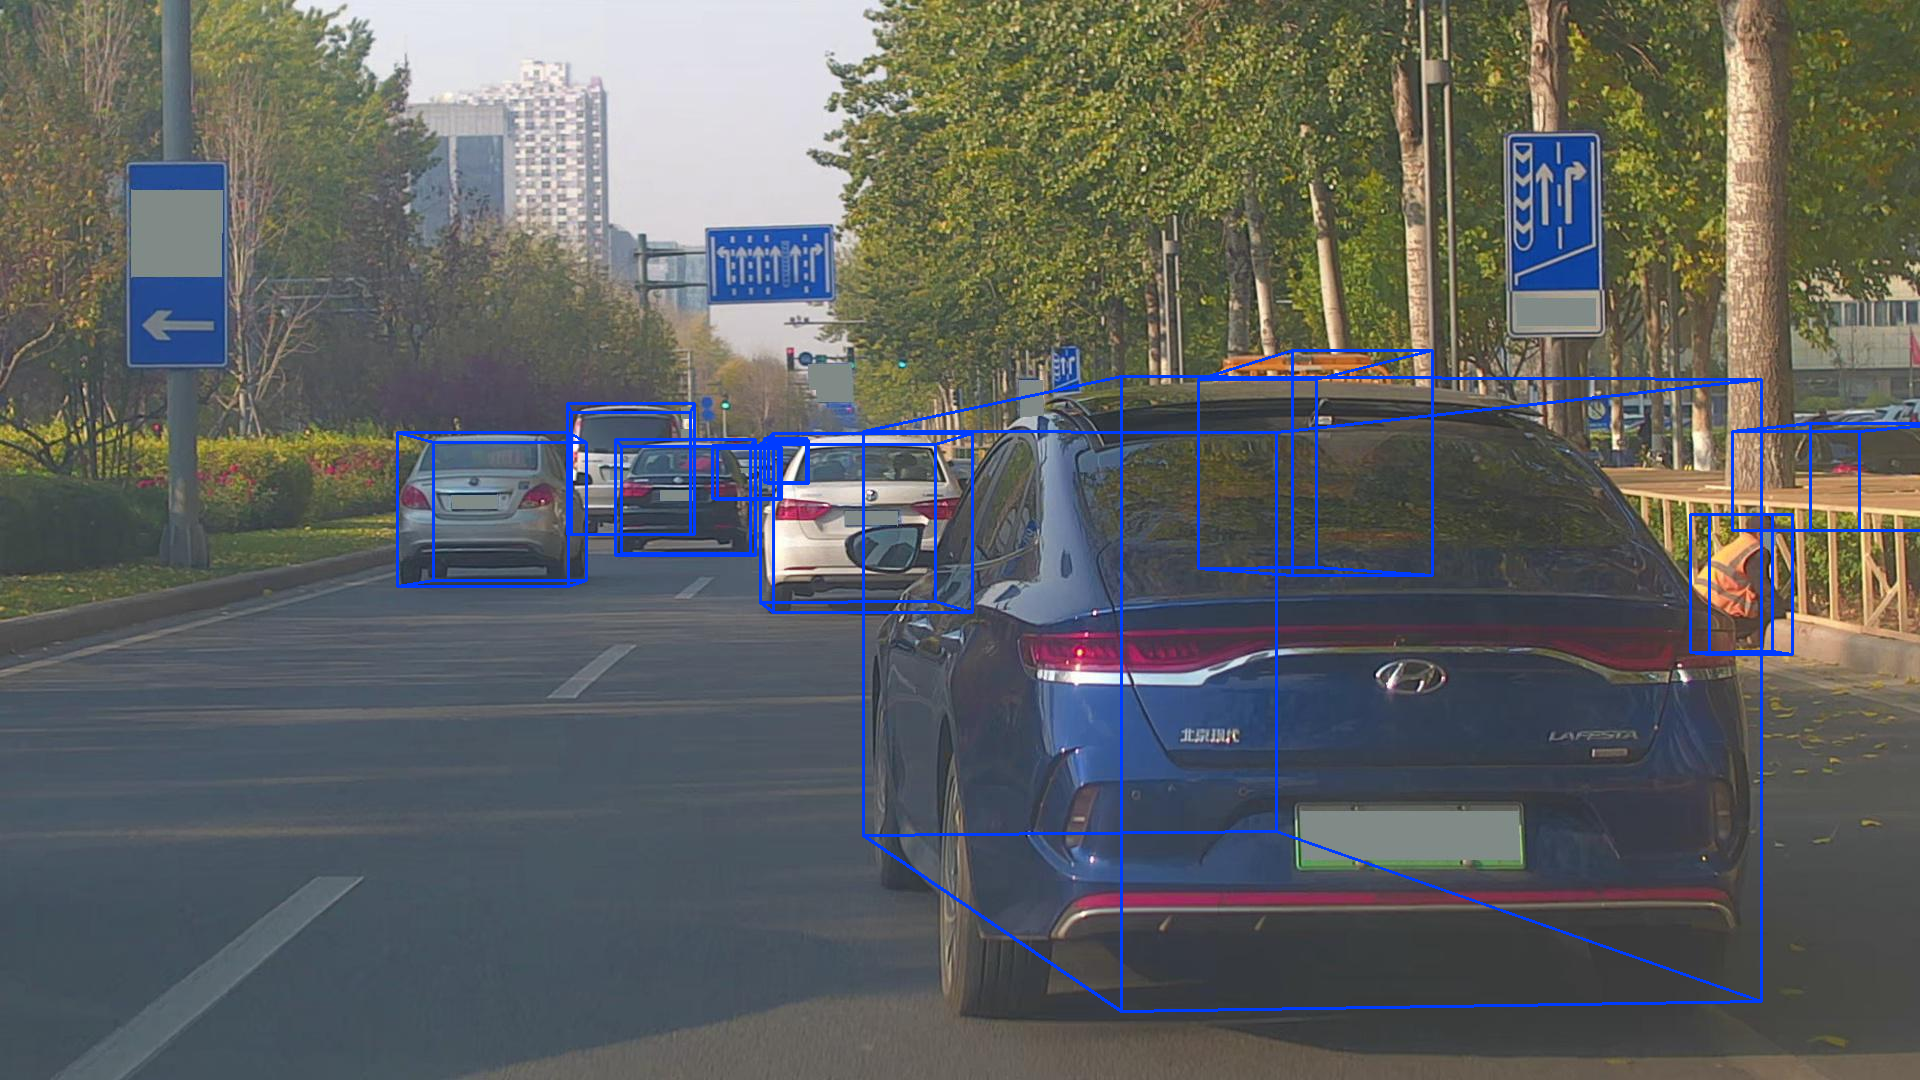
总结:有些失望,不准确的标签占比较大;本来还想着用它替换Kitti的数据集。
只能用来做预训练,或者人工挑选标签做数据清洗。
这篇关于DAIR-V2X-V 3D检测数据集 转为Kitti格式 | 可视化的文章就介绍到这儿,希望我们推荐的文章对编程师们有所帮助!


