本文主要是介绍Unity环绕物体的摄像机,添加了遮挡的适应,希望对大家解决编程问题提供一定的参考价值,需要的开发者们随着小编来一起学习吧!
第三人人称摄像机
支持的功能
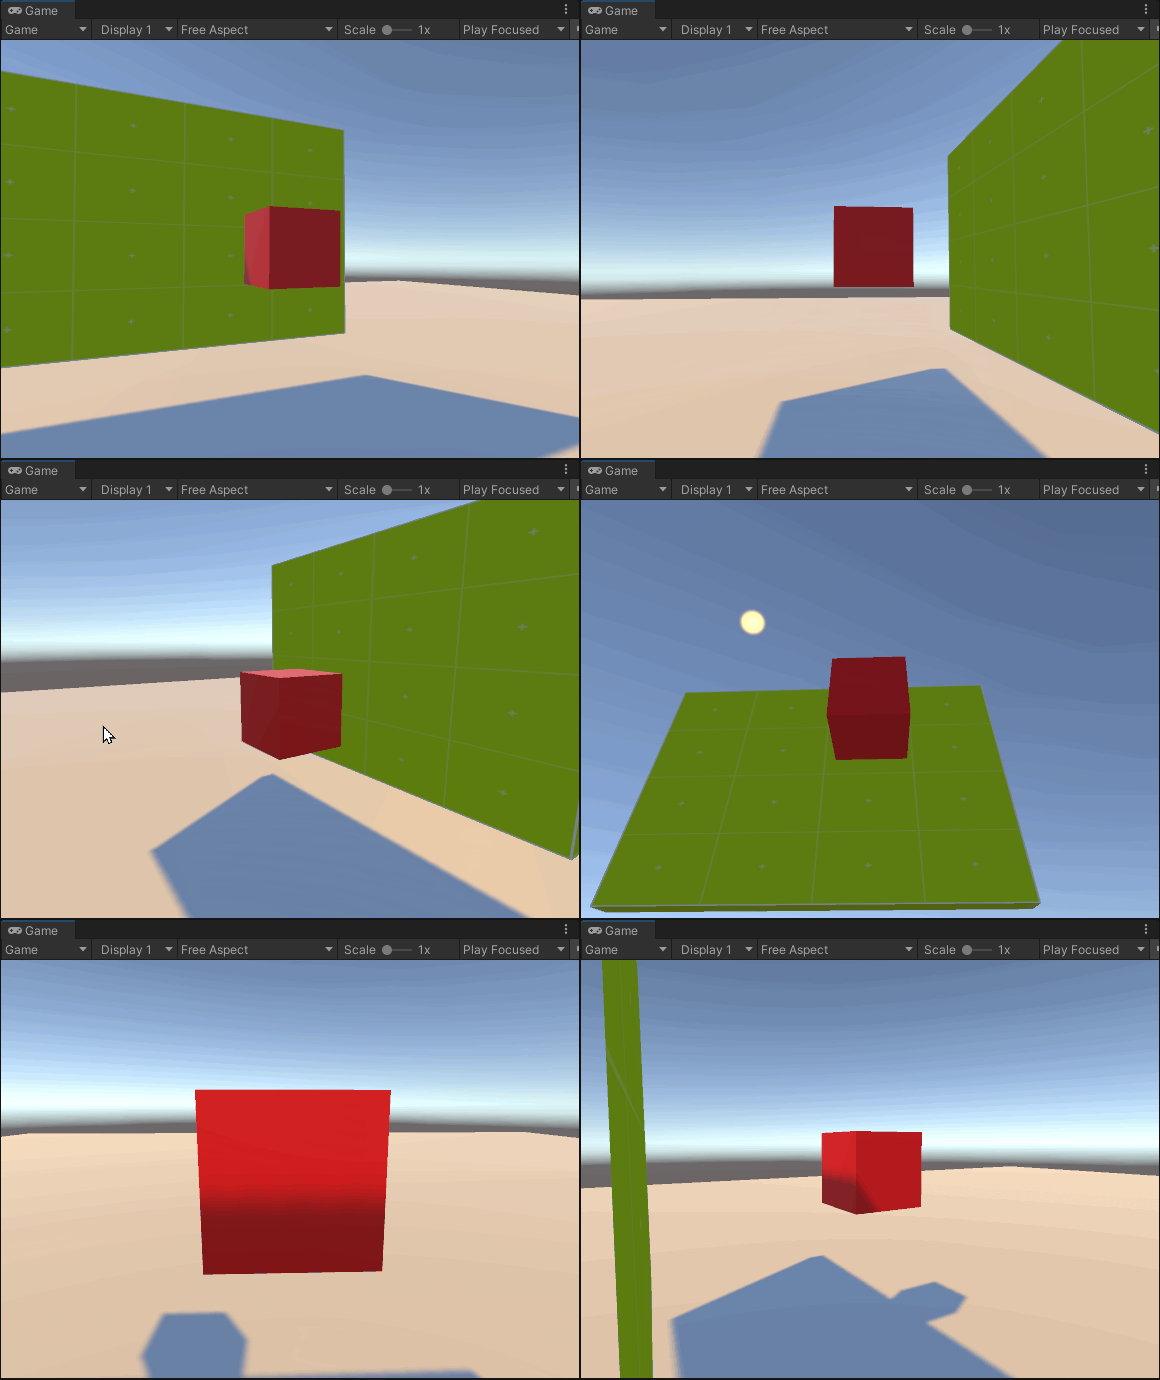
设定目标后使用鼠标可以环绕目标点旋转,且会进行遮挡的适配,当有遮挡的时候会移动差值移动到没有遮挡的位置。
使用方式
将vThirdPersonCamera 挂在与摄像机上然后为target赋值。
如果有需要检测遮挡的层级可以修改:cullingLayer。
vExtensions 创建并复制代码即可,工具类。
如果高度有偏移就修改:height

using Invector;
using UnityEngine;public class vThirdPersonCamera : MonoBehaviour
{#region inspector properties    public Transform target;[Tooltip("Leep的速度")]public float smoothCameraRotation = 12f;[Header("遮挡的层")] public LayerMask cullingLayer = 1 << 0;[Tooltip("Debug purposes, lock the camera behind the character for better align the states")]public bool lockCamera;[Header("Camera Input")]public string rotateCameraXInput = "Mouse X";public string rotateCameraYInput = "Mouse Y";[Header("向右偏移角度")]public float rightOffset = 0f;[Header("距离目标的距离")]public float defaultDistance = 2.5f;public float height = 1.4f;public float smoothFollow = 10f;public float xMouseSensitivity = 3f;public float yMouseSensitivity = 3f;public float yMinLimit = -40f;public float yMaxLimit = 80f;#endregion#region hide properties    [HideInInspector]public int indexList, indexLookPoint;[HideInInspector]public float offSetPlayerPivot;[HideInInspector]public string currentStateName;[HideInInspector]public Transform currentTarget;[HideInInspector]public Vector2 movementSpeed;private Transform targetLookAt;private Vector3 currentTargetPos;private Vector3 lookPoint;private Vector3 current_cPos;private Vector3 desired_cPos;private Camera _camera;private float distance = 5f;private float mouseY = 0f;private float mouseX = 0f;private float currentHeight;private float cullingDistance;private float checkHeightRadius = 0.4f;private float clipPlaneMargin = 0f;private float forward = -1f;private float xMinLimit = -360f;private float xMaxLimit = 360f;private float cullingHeight = 0.2f;private float cullingMinDist = 0.1f;#endregionprivate void Start(){Init();}private void Init(){if (target == null)return;_camera = GetComponent<Camera>();currentTarget = target;currentTargetPos = new Vector3(currentTarget.position.x, currentTarget.position.y + offSetPlayerPivot, currentTarget.position.z);targetLookAt = new GameObject("targetLookAt").transform;targetLookAt.position = currentTarget.position;targetLookAt.hideFlags = HideFlags.HideInHierarchy;targetLookAt.rotation = currentTarget.rotation;mouseY = currentTarget.eulerAngles.x;mouseX = currentTarget.eulerAngles.y;distance = defaultDistance;currentHeight = height;}private void FixedUpdate(){if (target == null || targetLookAt == null){return;}//收到鼠标的输入var Y = Input.GetAxis(rotateCameraYInput);var X = Input.GetAxis(rotateCameraXInput);//旋转摄像机RotateCamera(X, Y);CameraMovement();}private void SetMainTarget(Transform newTarget){target = newTarget;currentTarget = newTarget;mouseY = currentTarget.rotation.eulerAngles.x;mouseX = currentTarget.rotation.eulerAngles.y;Init();}/// <summary>/// Camera Rotation behaviour/// </summary>/// <param name="x"></param>/// <param name="y"></param>private void RotateCamera(float x, float y){// free rotation mouseX += x * xMouseSensitivity;mouseY -= y * yMouseSensitivity;movementSpeed.x = x;movementSpeed.y = -y;if (!lockCamera){mouseY = Invector.vExtensions.ClampAngle(mouseY, yMinLimit, yMaxLimit);mouseX = Invector.vExtensions.ClampAngle(mouseX, xMinLimit, xMaxLimit);}else{mouseY = currentTarget.root.localEulerAngles.x;mouseX = currentTarget.root.localEulerAngles.y;}}/// <summary>/// Camera behaviour/// </summary>    private void CameraMovement(){if (currentTarget == null)return;distance = Mathf.Lerp(distance, defaultDistance, smoothFollow * Time.deltaTime);cullingDistance = Mathf.Lerp(cullingDistance, distance, Time.deltaTime);var camDir = (forward * targetLookAt.forward) + (rightOffset * targetLookAt.right);camDir = camDir.normalized;var targetPos = new Vector3(currentTarget.position.x, currentTarget.position.y + offSetPlayerPivot, currentTarget.position.z);currentTargetPos = targetPos;desired_cPos = targetPos + new Vector3(0, height, 0);current_cPos = currentTargetPos + new Vector3(0, currentHeight, 0);RaycastHit hitInfo;ClipPlanePoints planePoints = _camera.NearClipPlanePoints(current_cPos + (camDir * (distance)), clipPlaneMargin);ClipPlanePoints oldPoints = _camera.NearClipPlanePoints(desired_cPos + (camDir * distance), clipPlaneMargin);//Check if Height is not blocked if (Physics.SphereCast(targetPos, checkHeightRadius, Vector3.up, out hitInfo, cullingHeight + 0.2f, cullingLayer)){var t = hitInfo.distance - 0.2f;t -= height;t /= (cullingHeight - height);cullingHeight = Mathf.Lerp(height, cullingHeight, Mathf.Clamp(t, 0.0f, 1.0f));}//Check if desired target position is not blocked       if (CullingRayCast(desired_cPos, oldPoints, out hitInfo, distance + 0.2f, cullingLayer, Color.blue)){distance = hitInfo.distance - 0.2f;if (distance < defaultDistance){var t = hitInfo.distance;t -= cullingMinDist;t /= cullingMinDist;currentHeight = Mathf.Lerp(cullingHeight, height, Mathf.Clamp(t, 0.0f, 1.0f));current_cPos = currentTargetPos + new Vector3(0, currentHeight, 0);}}else{currentHeight = height;}//Check if target position with culling height applied is not blockedif (CullingRayCast(current_cPos, planePoints, out hitInfo, distance, cullingLayer, Color.cyan)) distance = Mathf.Clamp(cullingDistance, 0.0f, defaultDistance);var lookPoint = current_cPos + targetLookAt.forward * 2f;lookPoint += (targetLookAt.right * Vector3.Dot(camDir * (distance), targetLookAt.right));targetLookAt.position = current_cPos;Quaternion newRot = Quaternion.Euler(mouseY, mouseX, 0);targetLookAt.rotation = Quaternion.Slerp(targetLookAt.rotation, newRot, smoothCameraRotation * Time.deltaTime);transform.position = current_cPos + (camDir * (distance));var rotation = Quaternion.LookRotation((lookPoint) - transform.position);transform.rotation = rotation;movementSpeed = Vector2.zero;}/// <summary>/// Custom Raycast using NearClipPlanesPoints/// </summary>/// <param name="_to"></param>/// <param name="from"></param>/// <param name="hitInfo"></param>/// <param name="distance"></param>/// <param name="cullingLayer"></param>/// <returns></returns>private bool CullingRayCast(Vector3 from, Invector.ClipPlanePoints _to, out RaycastHit hitInfo, float distance, LayerMask cullingLayer, Color color){bool value = false;if (Physics.Raycast(from, _to.LowerLeft - from, out hitInfo, distance, cullingLayer)){value = true;cullingDistance = hitInfo.distance;}if (Physics.Raycast(from, _to.LowerRight - from, out hitInfo, distance, cullingLayer)){value = true;if (cullingDistance > hitInfo.distance) cullingDistance = hitInfo.distance;}if (Physics.Raycast(from, _to.UpperLeft - from, out hitInfo, distance, cullingLayer)){value = true;if (cullingDistance > hitInfo.distance) cullingDistance = hitInfo.distance;}if (Physics.Raycast(from, _to.UpperRight - from, out hitInfo, distance, cullingLayer)){value = true;if (cullingDistance > hitInfo.distance) cullingDistance = hitInfo.distance;}return hitInfo.collider && value;}
}
using System;
using System.Collections.Generic;
using UnityEngine;namespace Invector
{public static class vExtensions{public static T[] Append<T>(this T[] arrayInitial, T[] arrayToAppend){if (arrayToAppend == null){throw new ArgumentNullException("The appended object cannot be null");}if ((arrayInitial is string) || (arrayToAppend is string)){throw new ArgumentException("The argument must be an enumerable");}T[] ret = new T[arrayInitial.Length + arrayToAppend.Length];arrayInitial.CopyTo(ret, 0);arrayToAppend.CopyTo(ret, arrayInitial.Length);return ret;}public static T[] vToArray<T>(this List<T> list){T[] array = new T[list.Count];if (list == null || list.Count == 0) return array;for (int i = 0; i < list.Count; i++){array[i] = list[i];}return array;}public static float ClampAngle(float angle, float min, float max){do{if (angle < -360)angle += 360;if (angle > 360)angle -= 360;} while (angle < -360 || angle > 360);return Mathf.Clamp(angle, min, max);}public static ClipPlanePoints NearClipPlanePoints(this Camera camera, Vector3 pos, float clipPlaneMargin){var clipPlanePoints = new ClipPlanePoints();var transform = camera.transform;var halfFOV = (camera.fieldOfView / 2) * Mathf.Deg2Rad;var aspect = camera.aspect;var distance = camera.nearClipPlane;var height = distance * Mathf.Tan(halfFOV);var width = height * aspect;height *= 1 + clipPlaneMargin;width *= 1 + clipPlaneMargin;clipPlanePoints.LowerRight = pos + transform.right * width;clipPlanePoints.LowerRight -= transform.up * height;clipPlanePoints.LowerRight += transform.forward * distance;clipPlanePoints.LowerLeft = pos - transform.right * width;clipPlanePoints.LowerLeft -= transform.up * height;clipPlanePoints.LowerLeft += transform.forward * distance;clipPlanePoints.UpperRight = pos + transform.right * width;clipPlanePoints.UpperRight += transform.up * height;clipPlanePoints.UpperRight += transform.forward * distance;clipPlanePoints.UpperLeft = pos - transform.right * width;clipPlanePoints.UpperLeft += transform.up * height;clipPlanePoints.UpperLeft += transform.forward * distance;return clipPlanePoints;}}public struct ClipPlanePoints{public Vector3 UpperLeft;public Vector3 UpperRight;public Vector3 LowerLeft;public Vector3 LowerRight;}
}这篇关于Unity环绕物体的摄像机,添加了遮挡的适应的文章就介绍到这儿,希望我们推荐的文章对编程师们有所帮助!


