本文主要是介绍8、在ubuntu16.04 、ROS下使用 rviz 显示octomap_sever 构建的三维栅格地图,希望对大家解决编程问题提供一定的参考价值,需要的开发者们随着小编来一起学习吧!
ROS下使用 rviz 显示octomap_sever 构建的三维栅格地图
本文是在安装完了octomap_sever 后(octomap_sever安装方法在这里:octomap_sever安装及demo、自己的pcd点云数据测试,基于八叉树的三维的栅格地图构建),使用ROS 自带的RVIZ显示自己的PCD点云文件构建的八叉树的教程。
1、安装octomap 在 rviz 中的插件:
sudo apt-get install ros-kinetic-octomap-rviz-plugins
安装后启动 Rviz,
roscore
新开一个终端:
rviz rviz
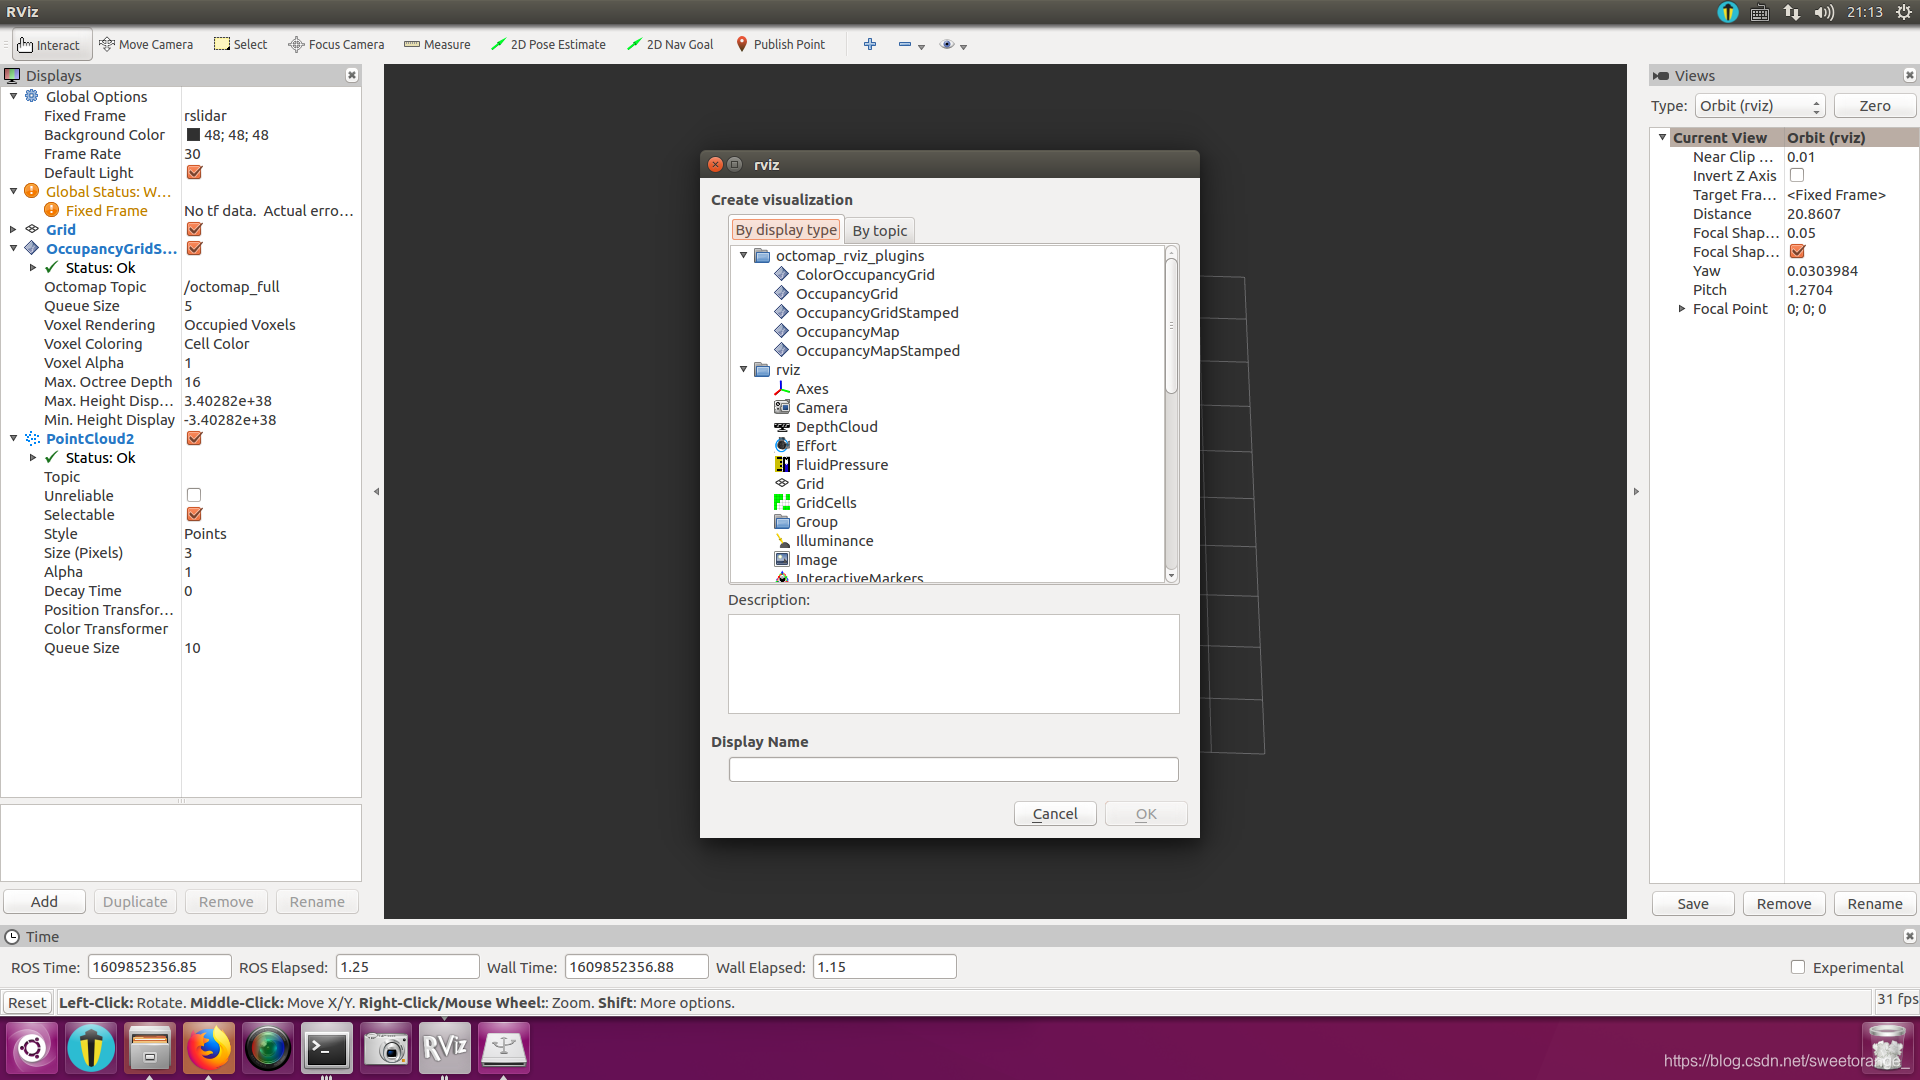
点击左下角的Add,会有如下样式:

2、编译代码:
mkdir pointcloud_rviz/srccd pointcloud_rviz/srcgit clone https://github.com/RuPingCen/publish_pointcloud.gitcd ..catkin_makesource devel/setup.bash
将文件夹data目录下的test.pcd文件放在catkin_ws目录下,并修改launch、publish_pointcloud.cpp文件指定test.pcd存放的目录。如果运行自己的pcd文件,也要做对应修改。
运行:roslaunch publish_pointcloud demo.launch

publish_pointcloud.cpp
/**
*
* 函数功能:读取pcl点云文件并发布到topic上去
*
*
* maker: crp
*/#include<iostream>
#include<string>
#include <stdlib.h>
#include <stdio.h>
#include <sstream>
#include <vector>#include<ros/ros.h>
#include<pcl/point_cloud.h>
#include<pcl_conversions/pcl_conversions.h>
#include<sensor_msgs/PointCloud2.h>
#include<pcl/io/pcd_io.h>using namespace std;int main (int argc, char **argv)
{  std::string topic,path,frame_id;int hz=5;ros::init (argc, argv, "publish_pointcloud");  ros::NodeHandle nh;  nh.param<std::string>("path", path, "/home/tianchengyuan/pointcloud_rviz/test.pcd");//上面这里的路径要按照自己catkin_ws下面的pcd 文件目录改一下,我的catkin_ws写成了pointcloud_rviz。nh.param<std::string>("frame_id", frame_id, "camera");nh.param<std::string>("topic", topic, "/pointcloud/output");nh.param<int>("hz", hz, 5);ros::Publisher pcl_pub = nh.advertise<sensor_msgs::PointCloud2> (topic, 10);  pcl::PointCloud<pcl::PointXYZ> cloud;  sensor_msgs::PointCloud2 output;  pcl::io::loadPCDFile (path, cloud);  pcl::toROSMsg(cloud,output);// 转换成ROS下的数据类型 最终通过topic发布output.header.stamp=ros::Time::now();output.header.frame_id  =frame_id;cout<<"path = "<<path<<endl;cout<<"frame_id = "<<frame_id<<endl;cout<<"topic = "<<topic<<endl;cout<<"hz = "<<hz<<endl;ros::Rate loop_rate(hz);  while (ros::ok())  {  pcl_pub.publish(output);  ros::spinOnce();  loop_rate.sleep();  }  return 0;
}
demo.launch:
在这里插入代码片<?xml version="1.0" encoding="UTF-8"?>
<launch><node name="publish_pointcloud" pkg="publish_pointcloud" type="publish_pointcloud"><param name="path" value="$(find publish_pointcloud)/test.pcd" type="str" /><param name="frame_id" value="camera" type="str" /><param name="topic" value="/pointcloud/output" type="str" /><param name="hz" value="2" type="int" /></node><!-- Load ocotmap launch --><include file="$(find publish_pointcloud)/launch/octomaptransform.launch" /><!-- RViz --><node pkg="rviz" type="rviz" name="$(anon rviz)" respawn="false" output="screen" args="-d $(find publish_pointcloud)/rviz/OctomapShow.rviz"/></launch> 
运行结果:

换个角度:

是不是还怪漂亮的,over!祝你成功!
参考博客:
1、Octomap 在ROS环境下实时显示
2、ROS 八叉树地图构建 - 安装 octomap 和 octomap_server 建图包!
这篇关于8、在ubuntu16.04 、ROS下使用 rviz 显示octomap_sever 构建的三维栅格地图的文章就介绍到这儿,希望我们推荐的文章对编程师们有所帮助!


