本文主要是介绍【UE4 RTS游戏】10-建筑跟随鼠标移动,希望对大家解决编程问题提供一定的参考价值,需要的开发者们随着小编来一起学习吧!
效果
步骤
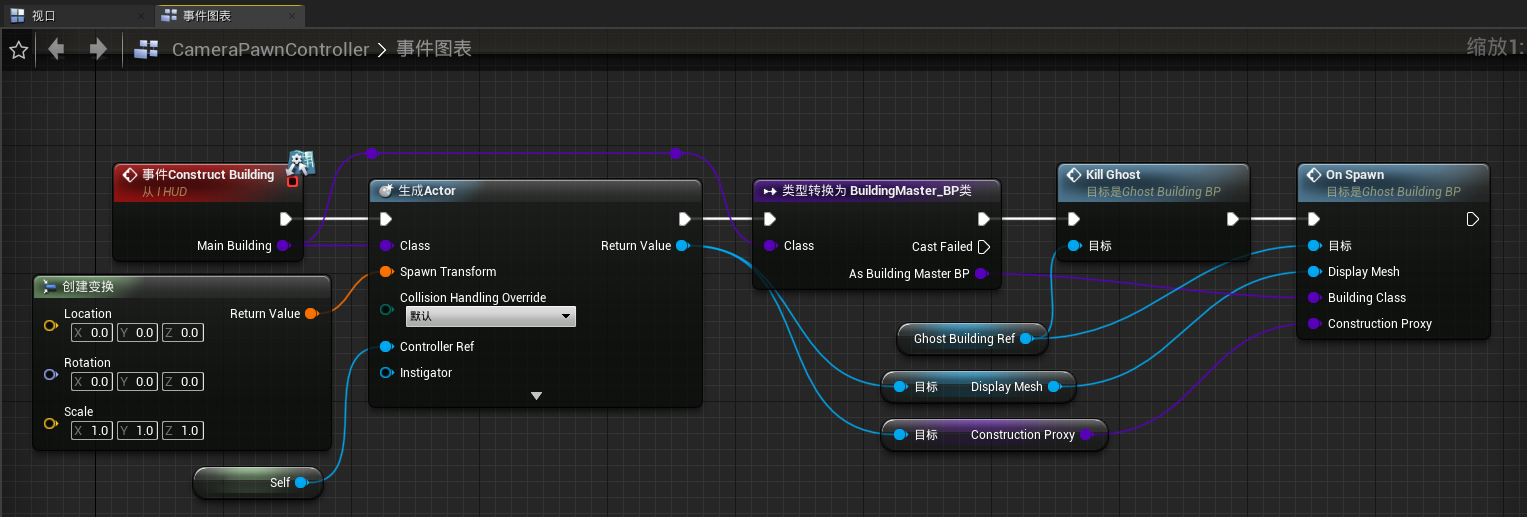
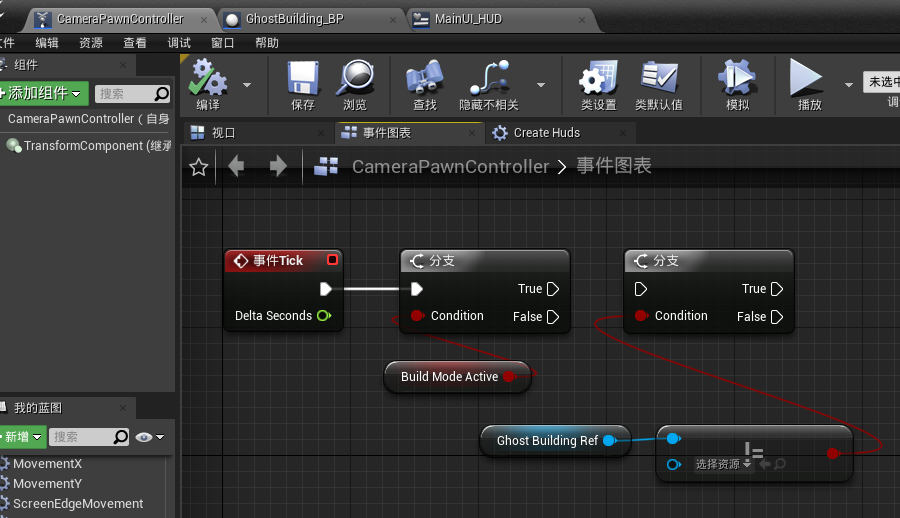
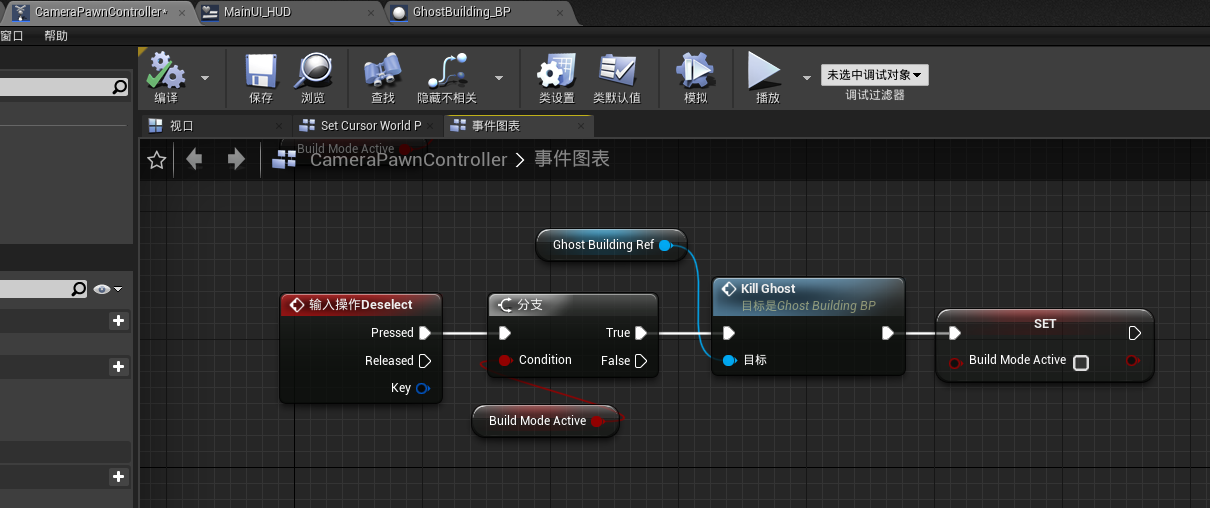
将“CameraPawnController”的事件图表中的如下节点进行剪切
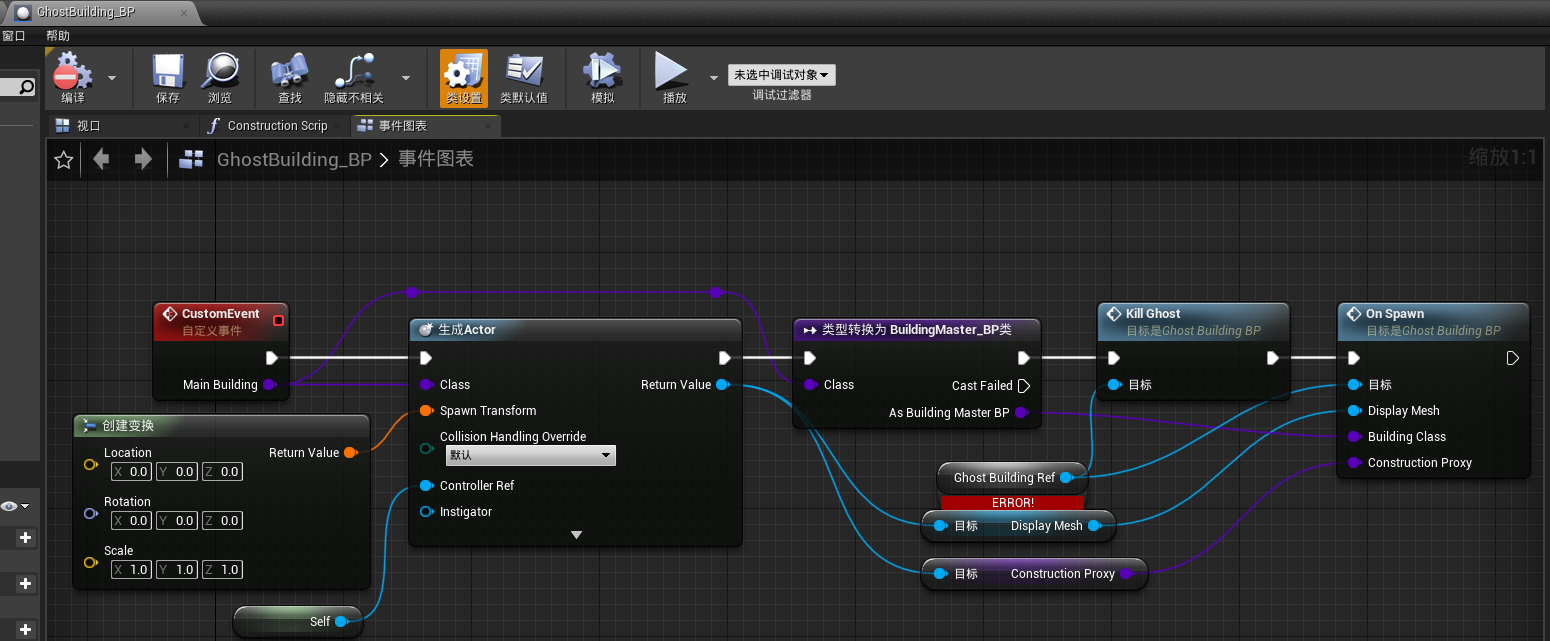
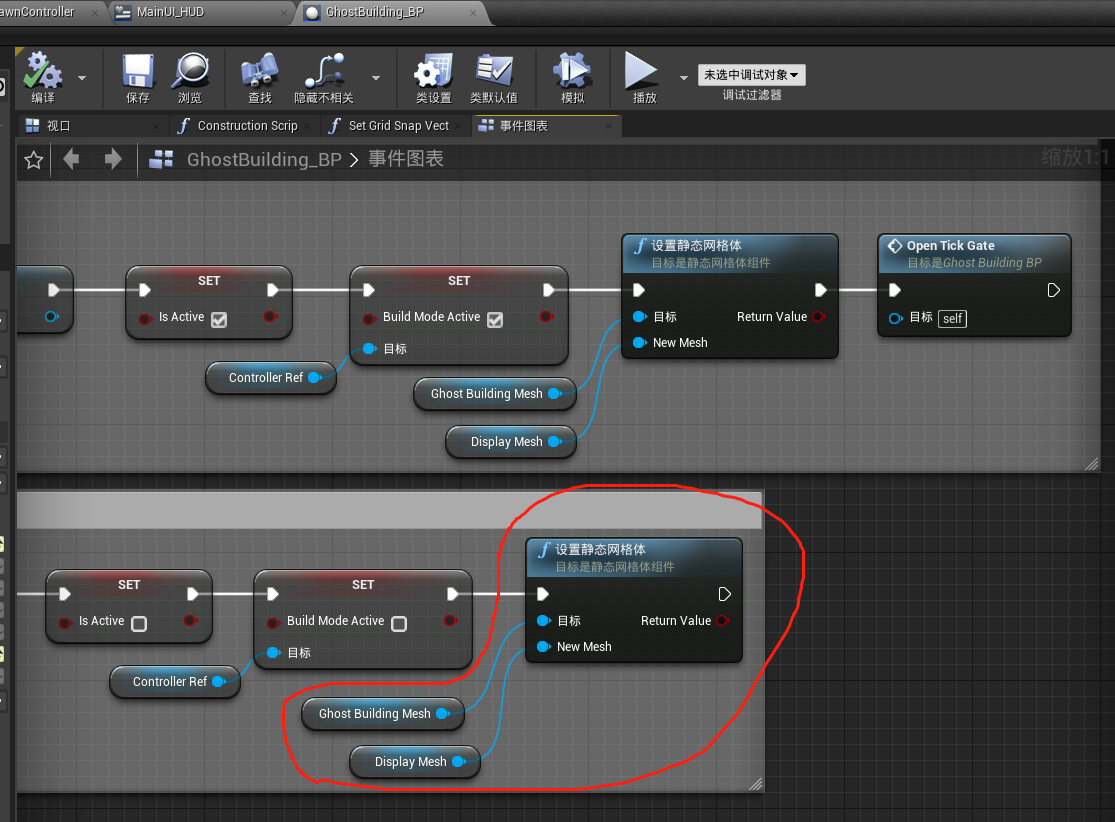
粘贴到“GhostBuilding_BP”中
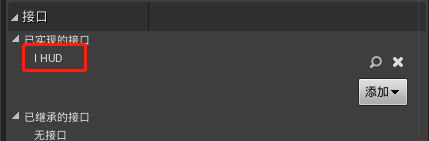
添加“I_HUD”接口
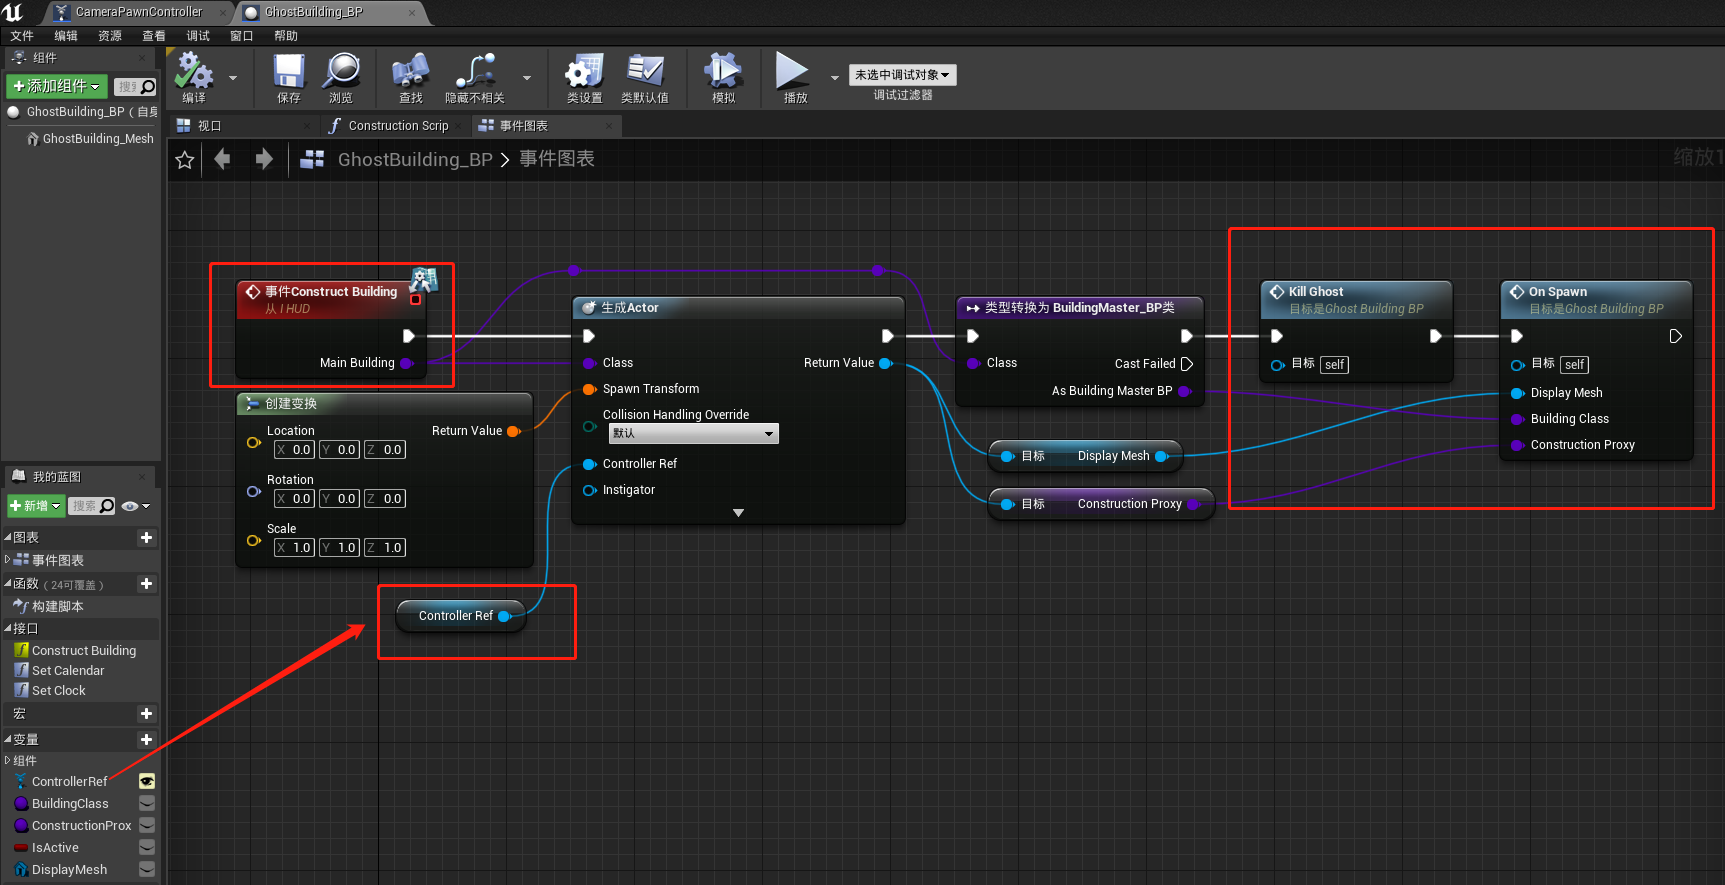
重新添加如下标注的节点
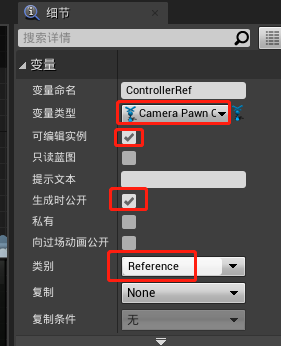
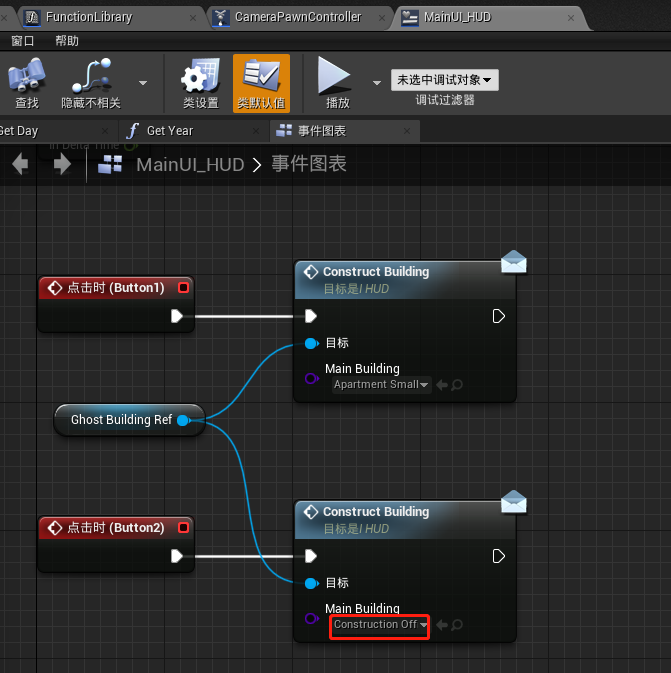
打开“MainUI_HUD”,添加一个变量,命名为“GhostBuildingRef”
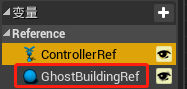
细节如下:
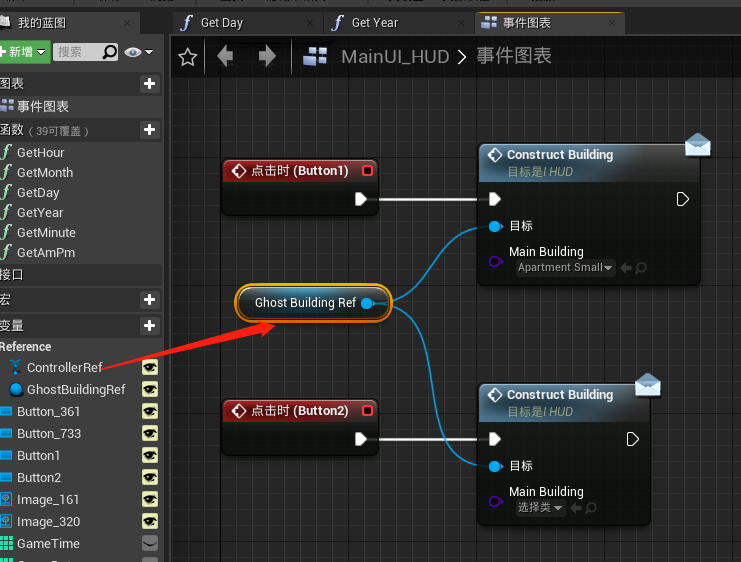
将事件图表中的“ControllerRef”替换为“GhostBuildingRef”
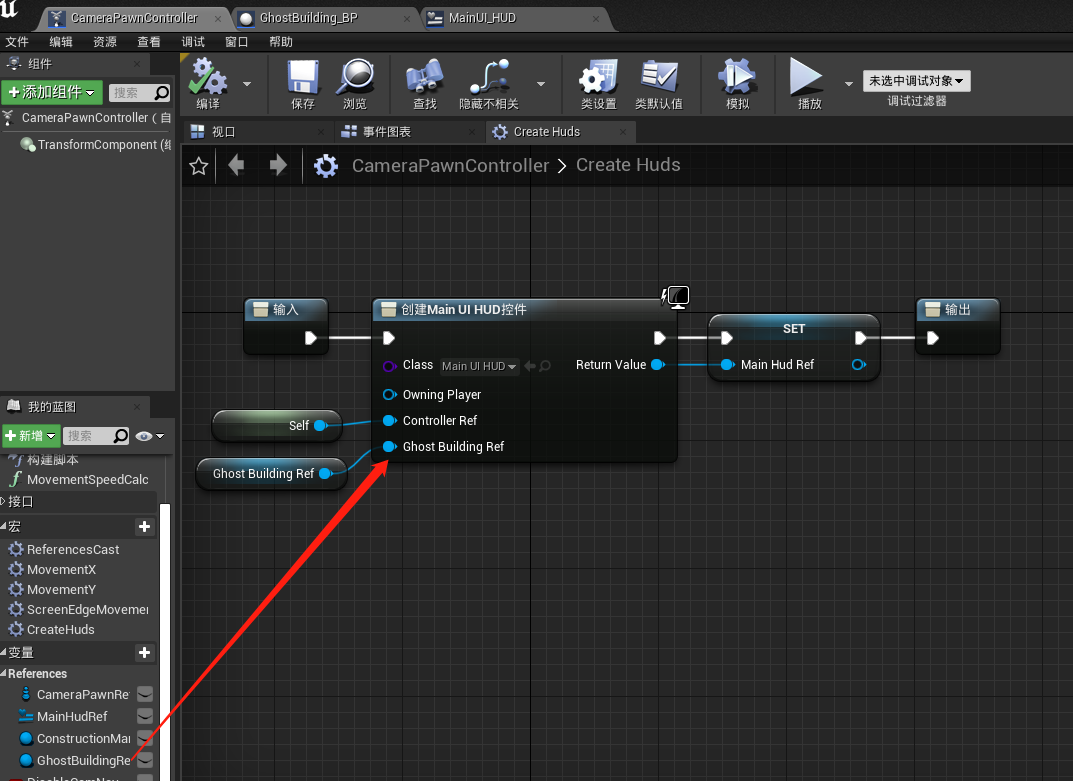
打开“CameraPawnController”的宏“CreateHUDs”,由于在“MainUI_HUD”添加了一个公开的变量,因此在使用“MainUI_HUD”时将“GhostBuildingRef”传入。
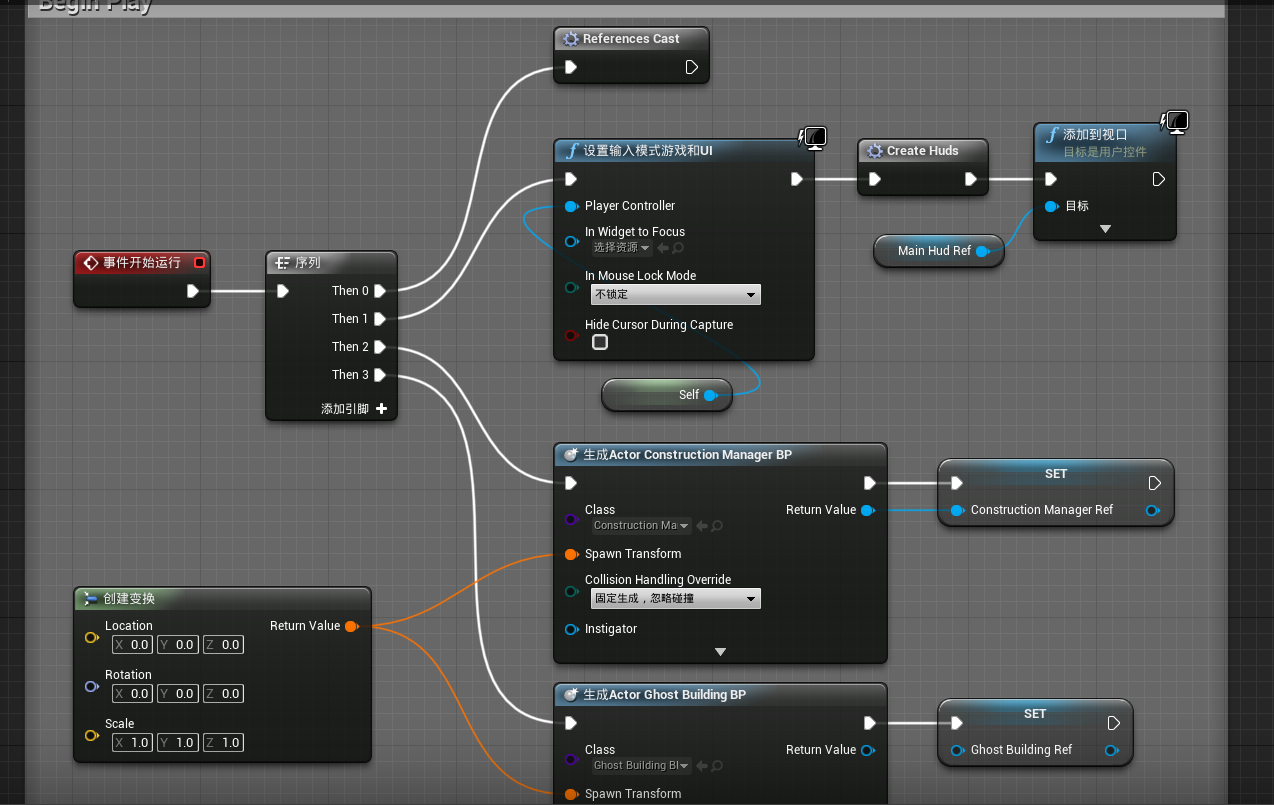
在“CameraPawnController”的事件图表中将序列引脚“Then 1”后的所有节点移至引脚“Then3”,之前“Then 2”、“Then 3”引脚后的节点移至“Then 1”、“Then 2”

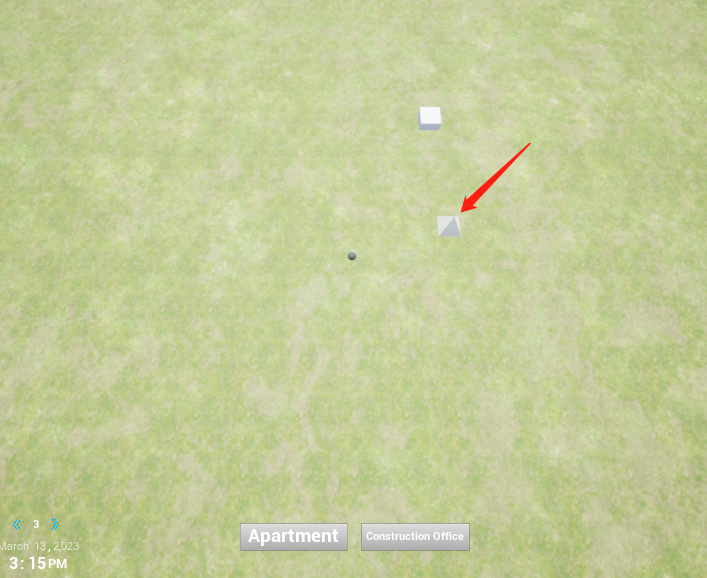
此时运行游戏点击按钮查看是否能成功生成建筑:
接下来我们希望实现在鼠标点击的位置来生成建筑的功能
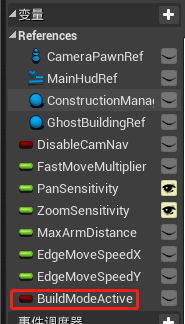
在“CameraPawnController”的事件图表中添加一个布尔型变量,命名为“BuildModeActive”
先创建如下节点:
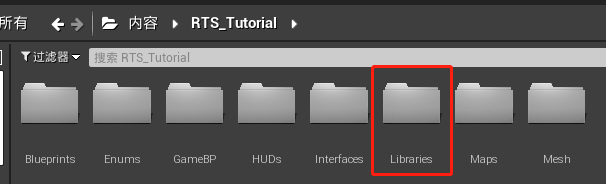
新建一个文件夹命名为“Library”
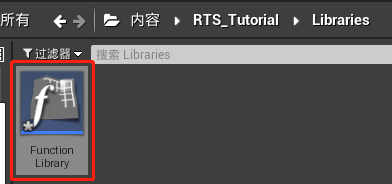
新建一个蓝图函数库

命名为“FunctionLibrary”
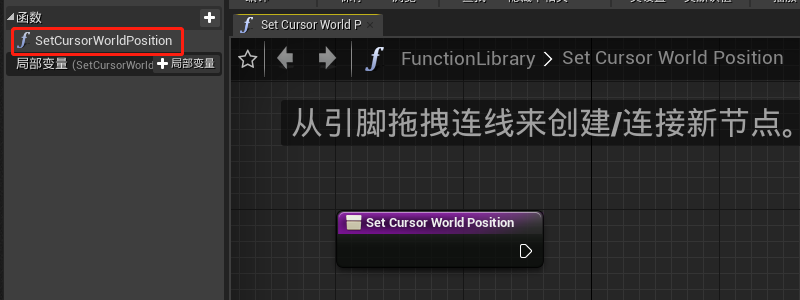
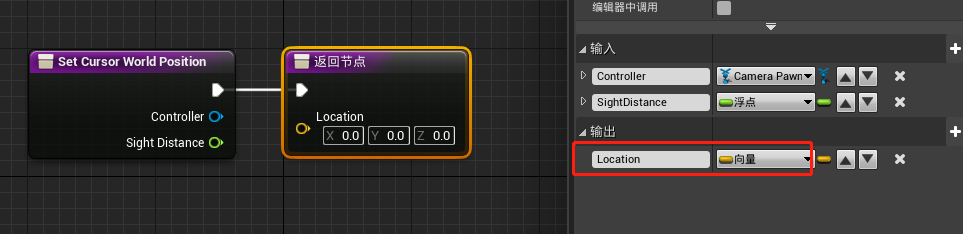
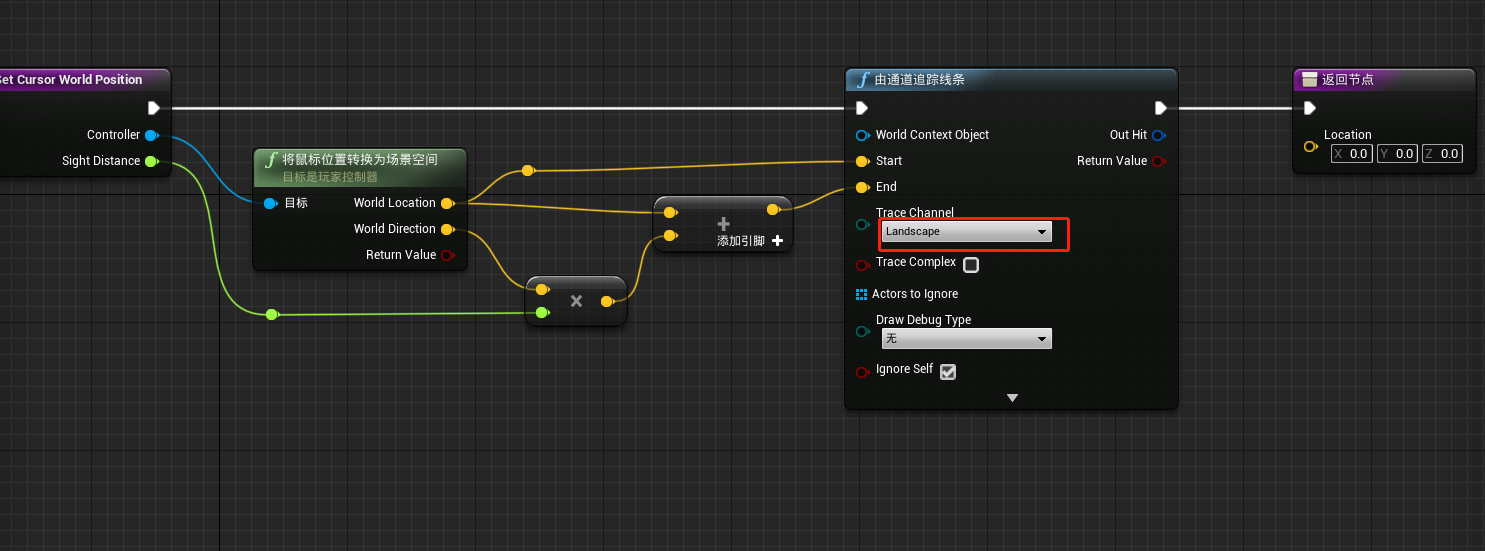
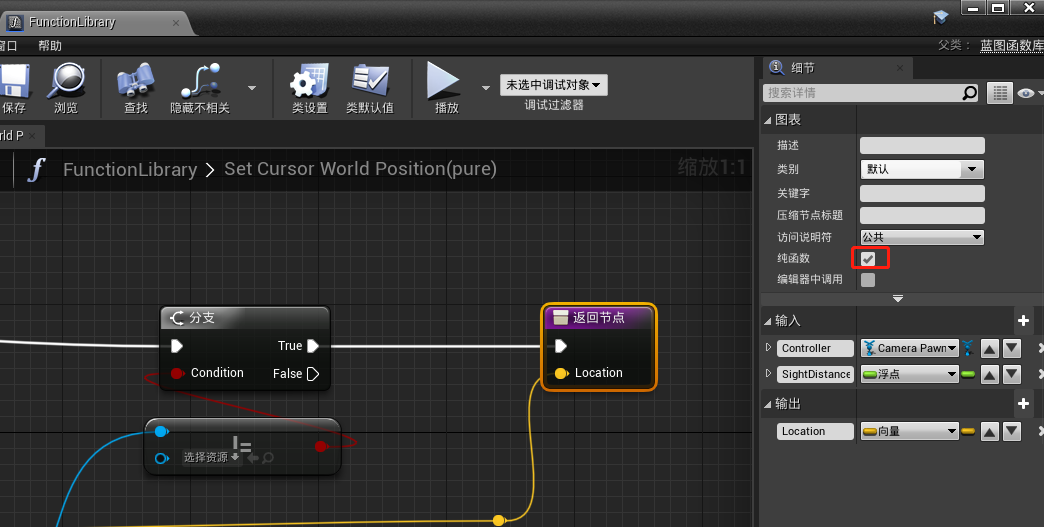
打开“FunctionLibrary”,将默认函数命名为“SetCursorWorldPosition”,该函数的功能就是计算出建筑生成的位置坐标
添加两个输入,一个命名为“Controller”,是CameraPawnController的对象引用;另一个是浮点类型,命名为“SightDistance”
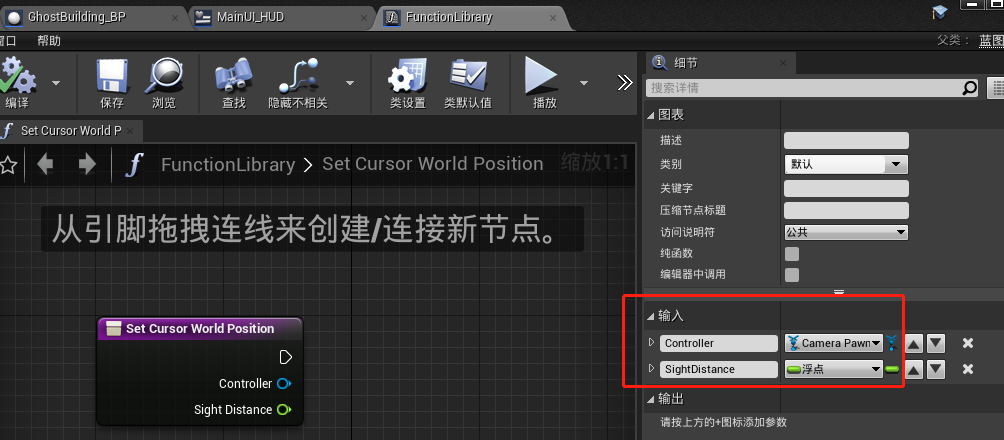
再添加一个输出,命名为“Location”,类型为向量
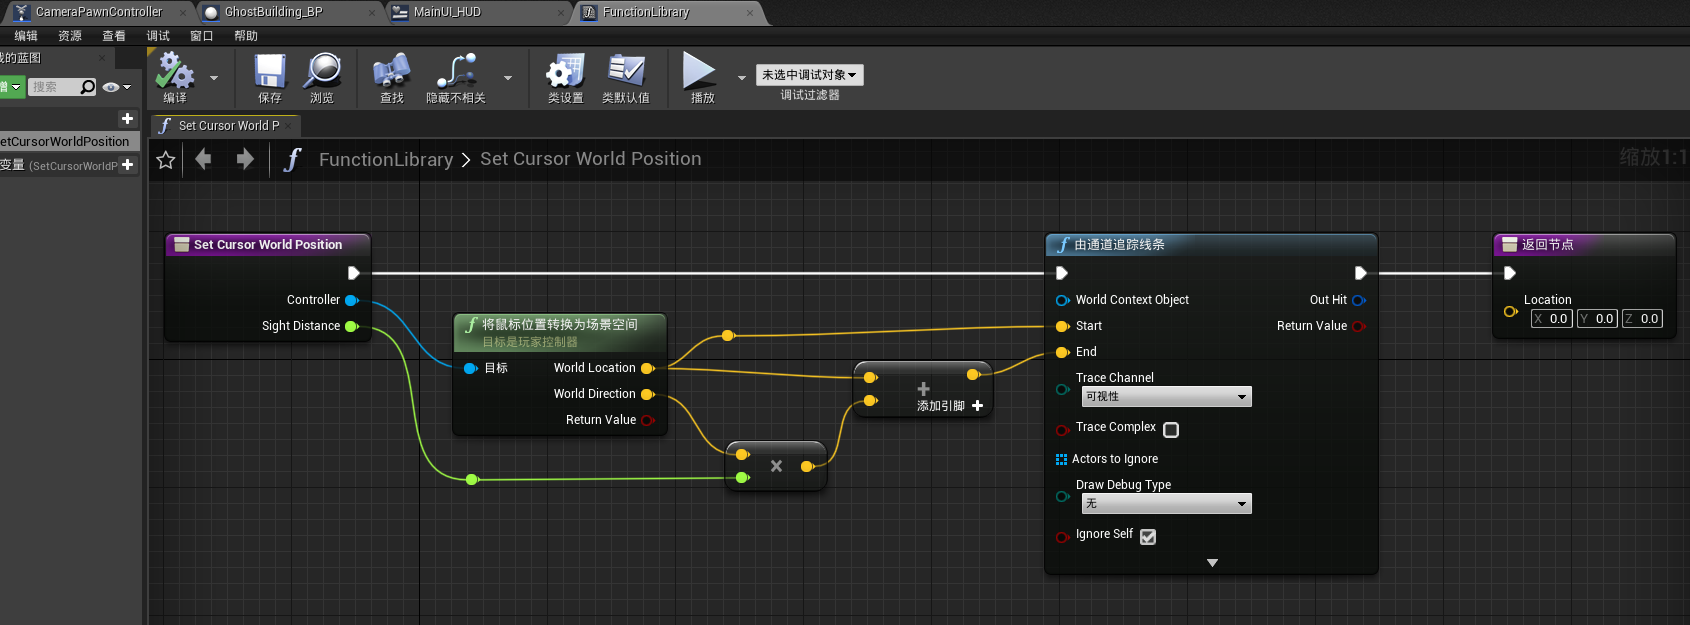
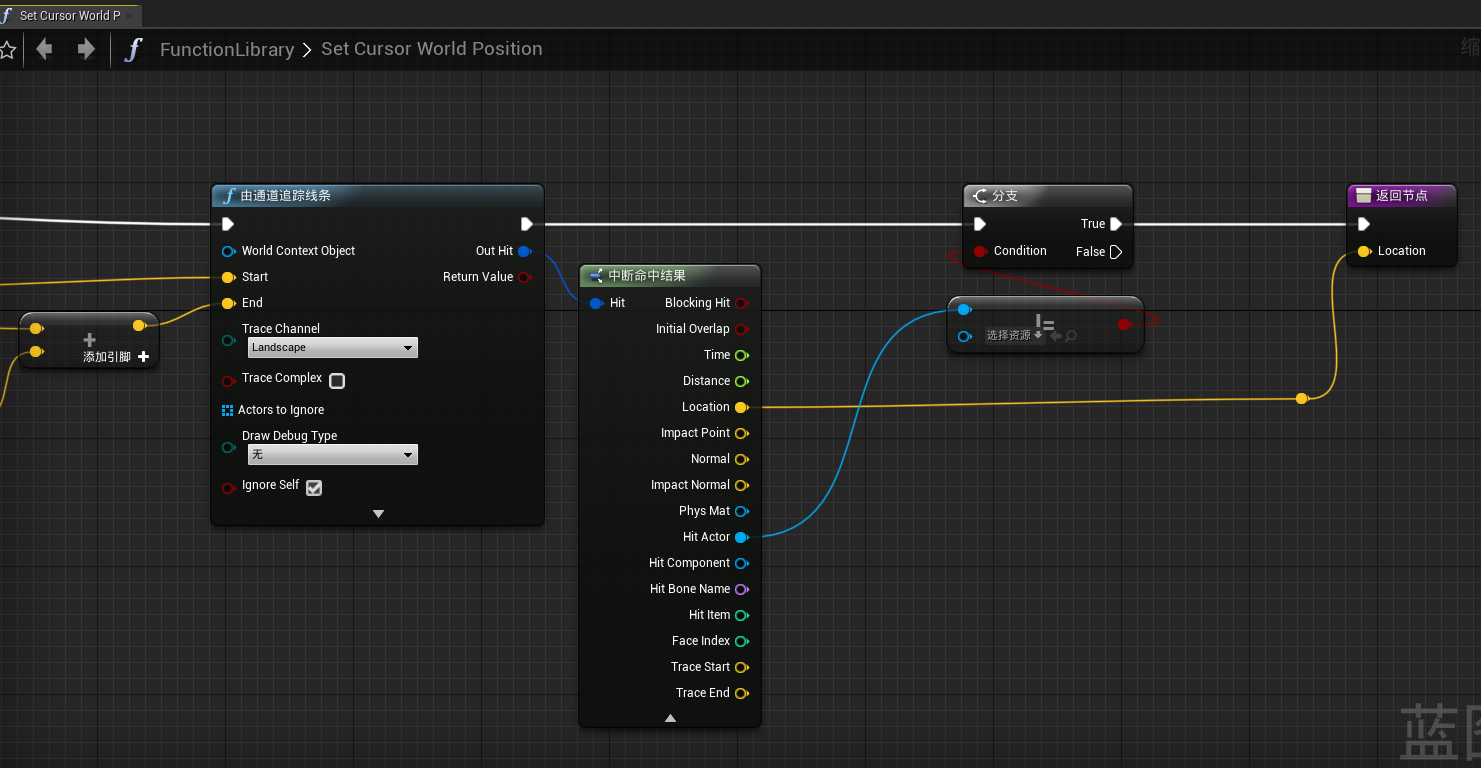
添加如下节点:
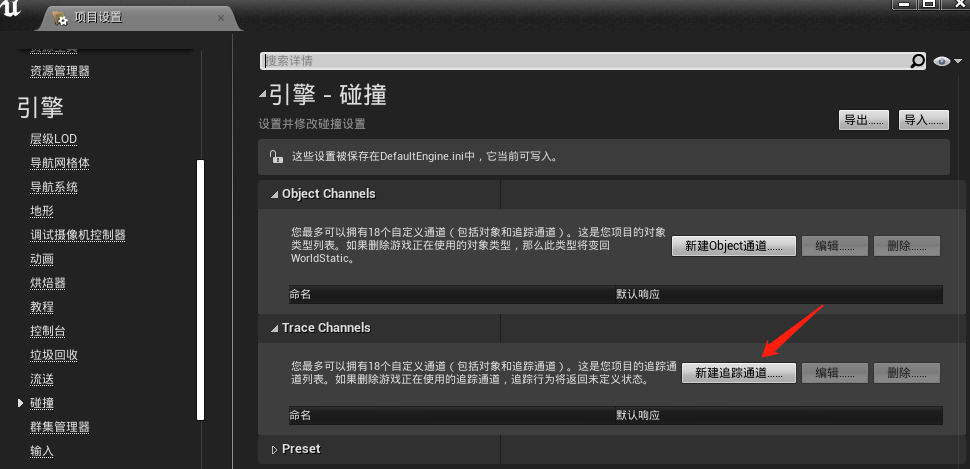
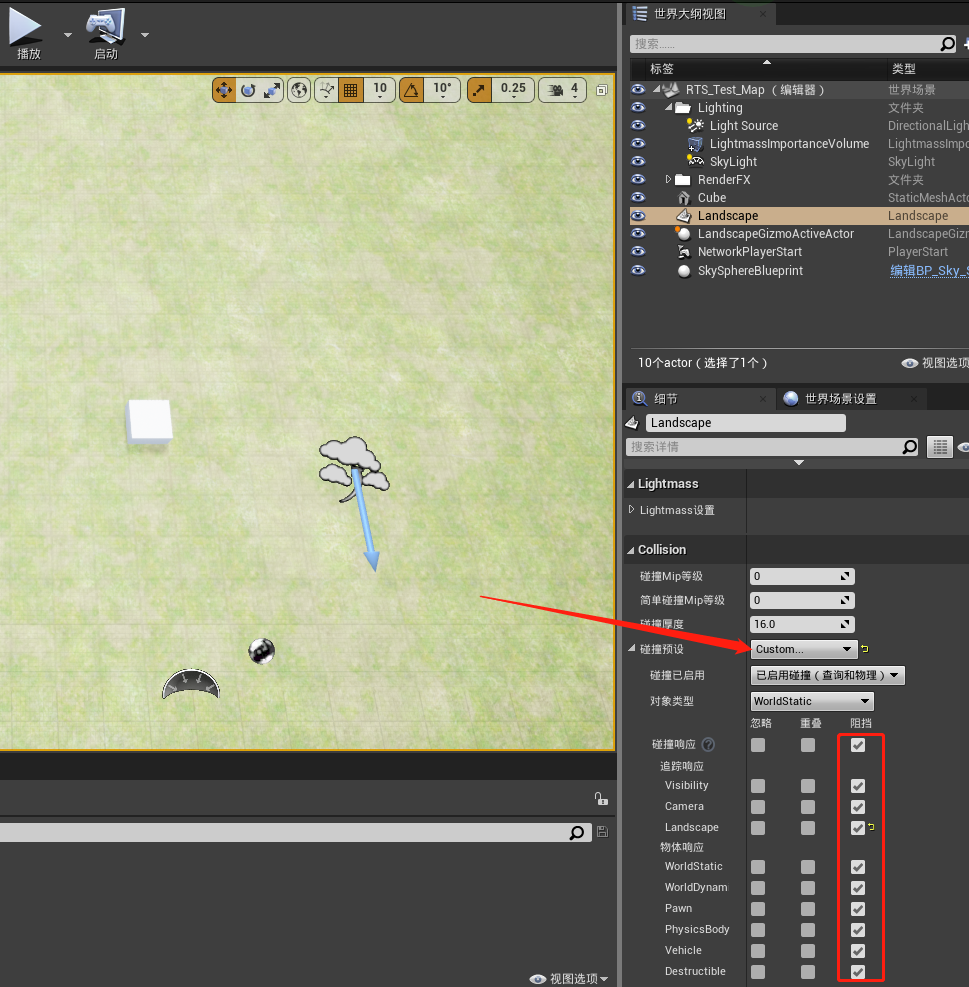
打开项目设置,点击新建追踪通道
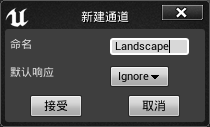
新通道命名为“Landscape”,默认响应为Ignore
在世界大纲中选中“Landscape”,碰撞预设改为“Custom”
再次打开“FunctionLibrary”,由通道追踪线条节点的 Trace Channel选择“Landscape”
继续完善:
设置为纯函数
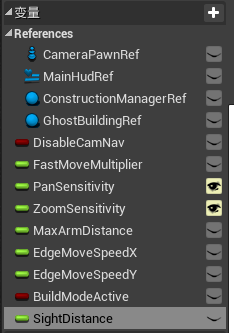
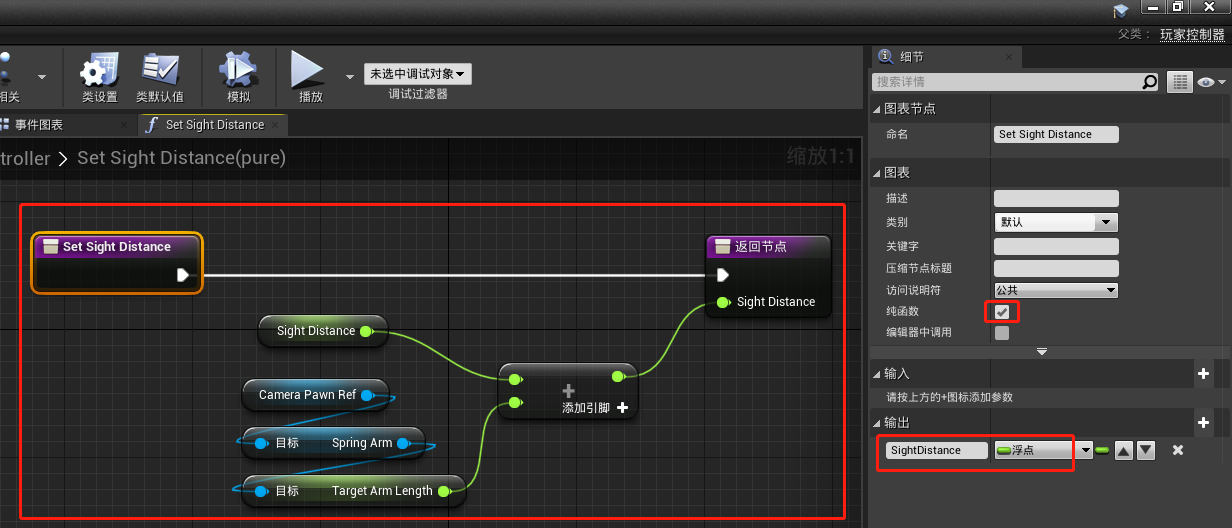
再次打开“CameraPawnController”,添加一个新函数“SetSightDistance”
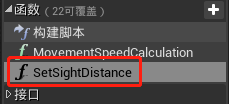
添加一个浮点型变量,命名为“SightDistance”,默认值设为1000
添加如下节点
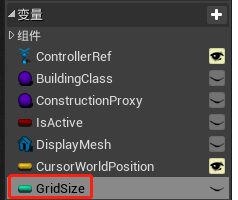
打开“GhostBuilding_BP”,添加一个可编辑的变量,命名为“CursorWorldPosition”

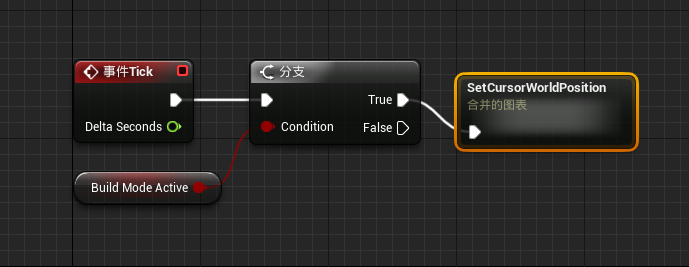
在“CameraPawnController”中添加如下节点
将如下选中的节点重叠到节点
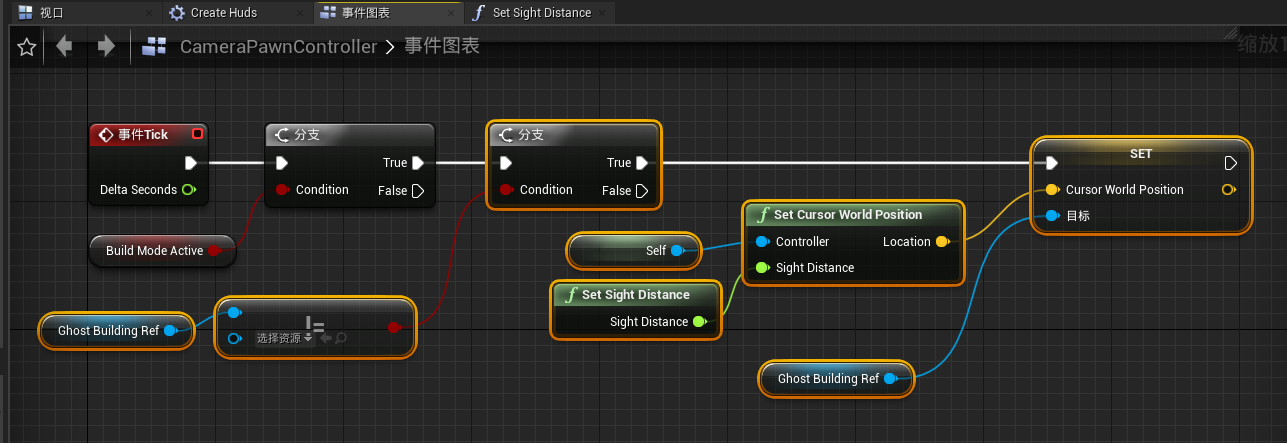
命名为“SetCursorWorldPosition”
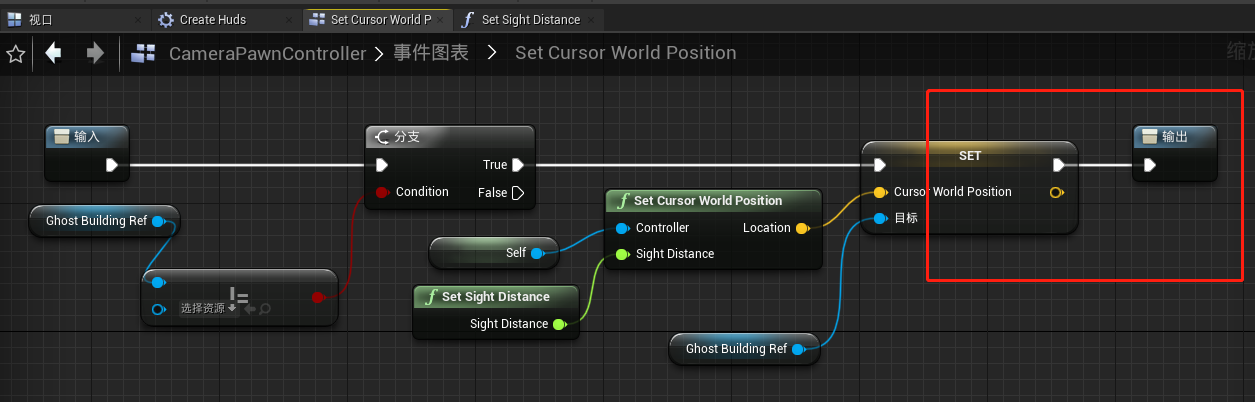
打开该重叠的节点,将结果连接至输出的节点
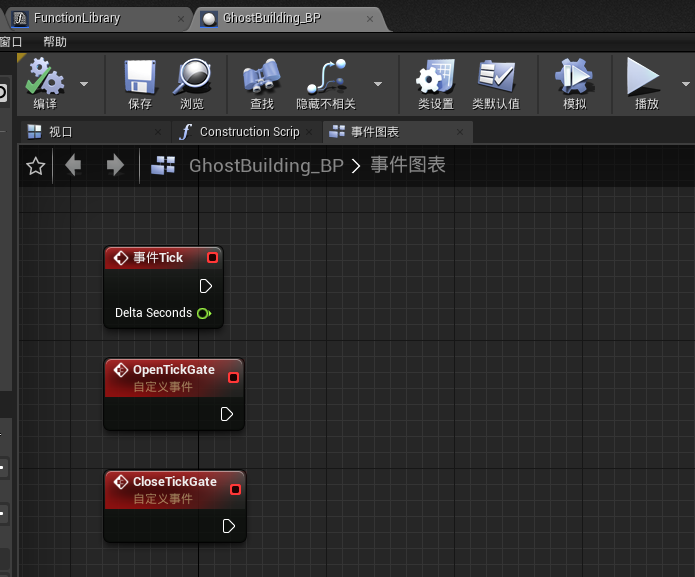
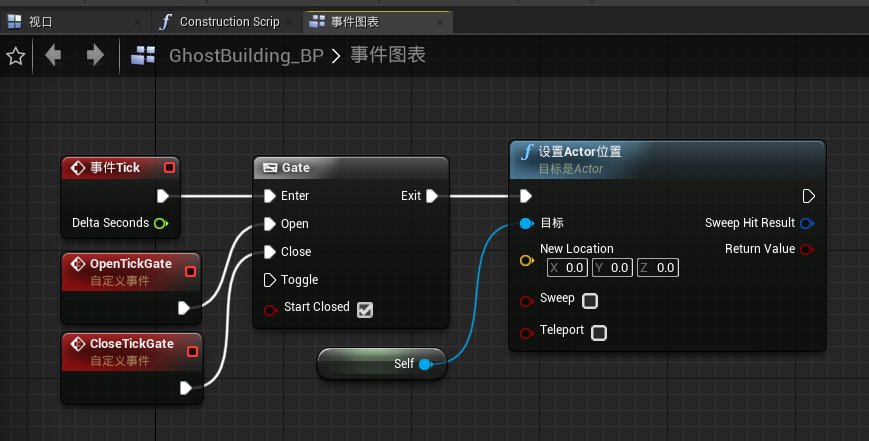
打开“GhostBuilding_BP”,在事件图表中添加一个 事件tick 节点和两个自定义事件节点,两个自定义事件分别命名为“OpenTickGate”和“CloseTickGate”
创建如下节点:
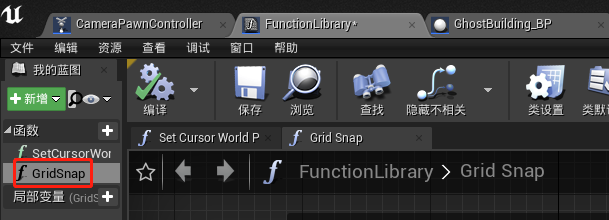
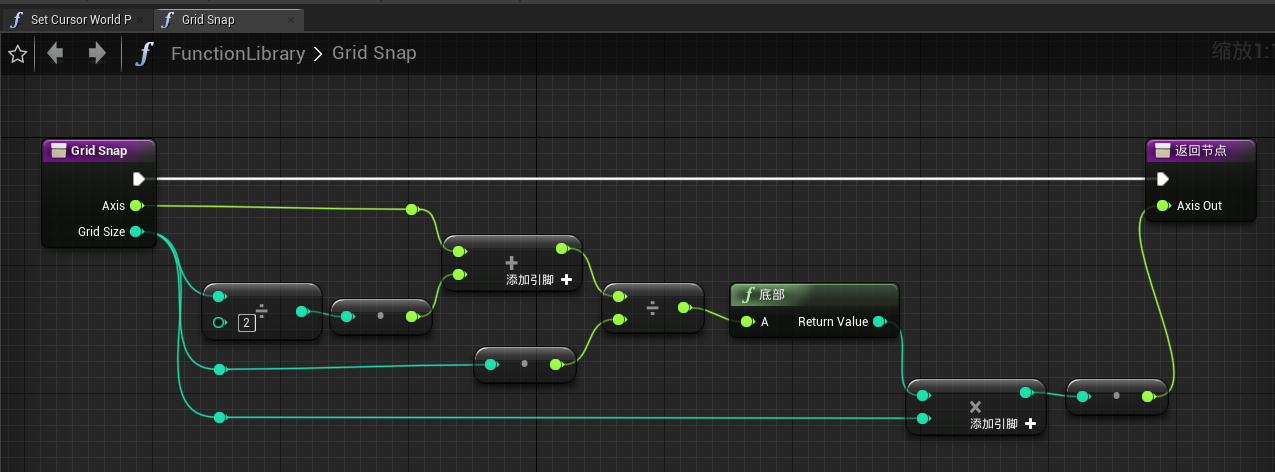
打开“FunctionLibrary”,新添加一个函数,命名为“GridSnap”
在该函数内部添加如下节点
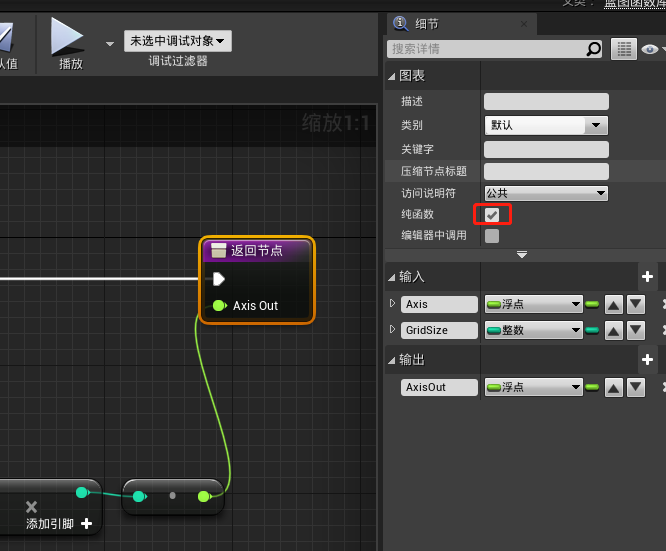
设置为纯函数:
回到“GhostBuilding_BP”添加一个新函数,命名为“SetGridSnapVector”

创建一个浮点型变量,命名为“GridSize”,默认值为50
在函数内部做如下操作:
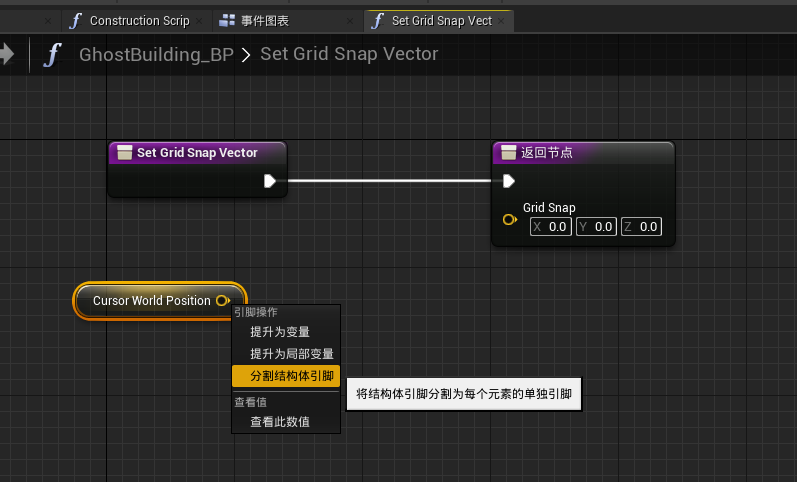
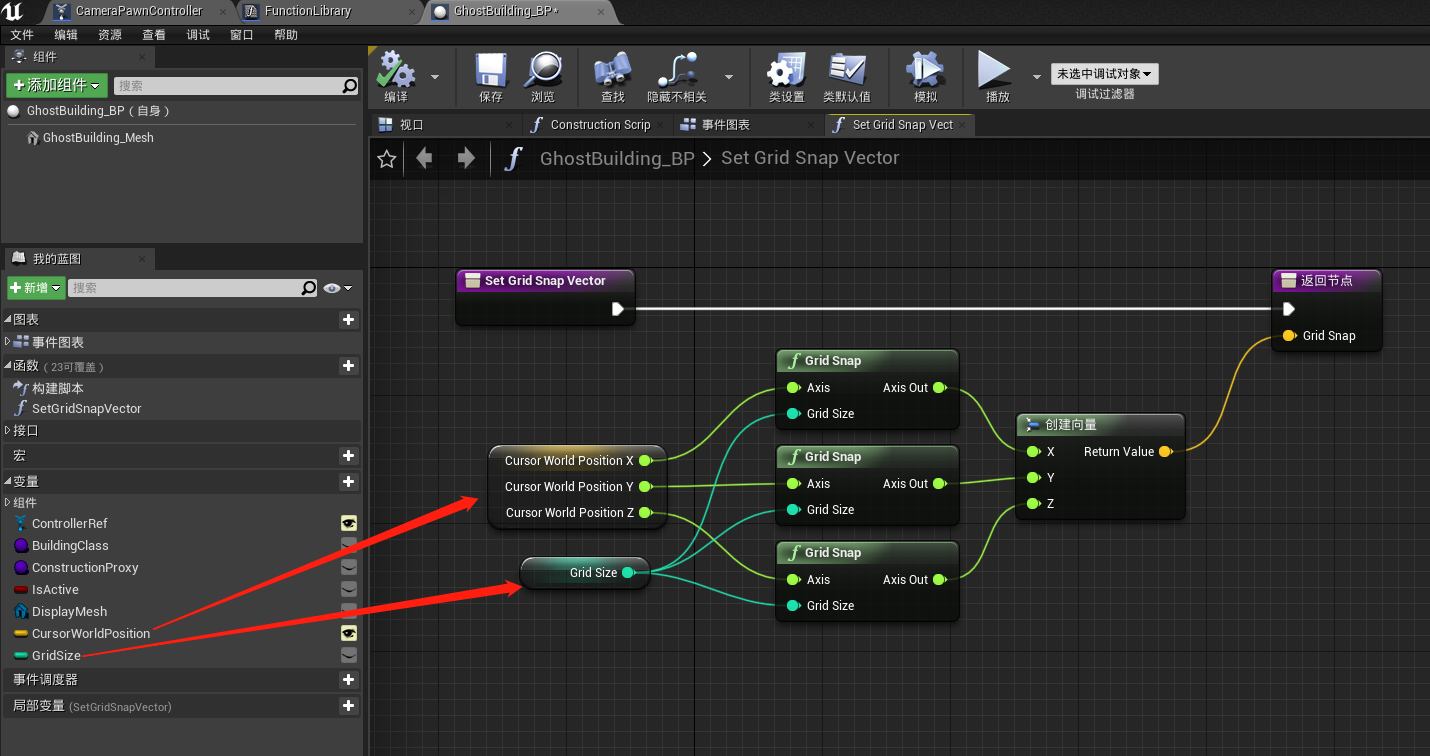
设置为纯函数

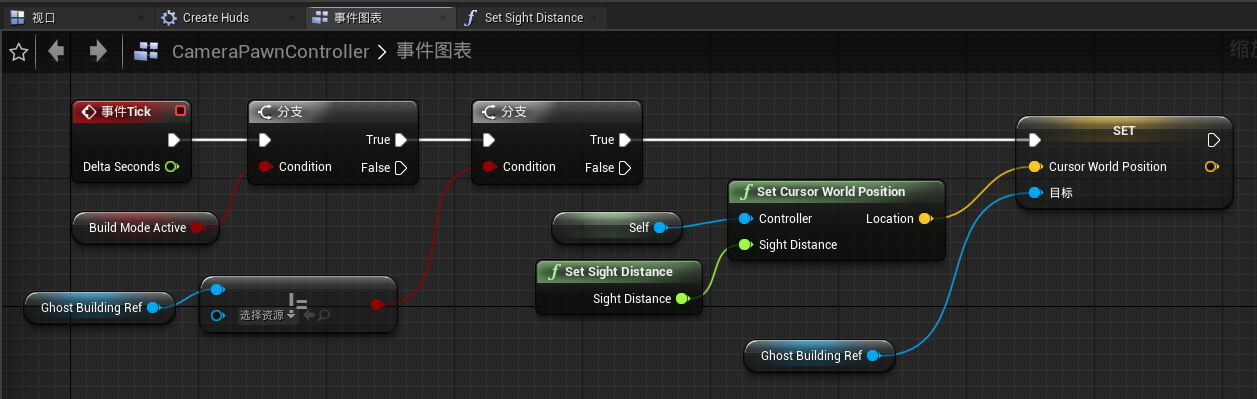
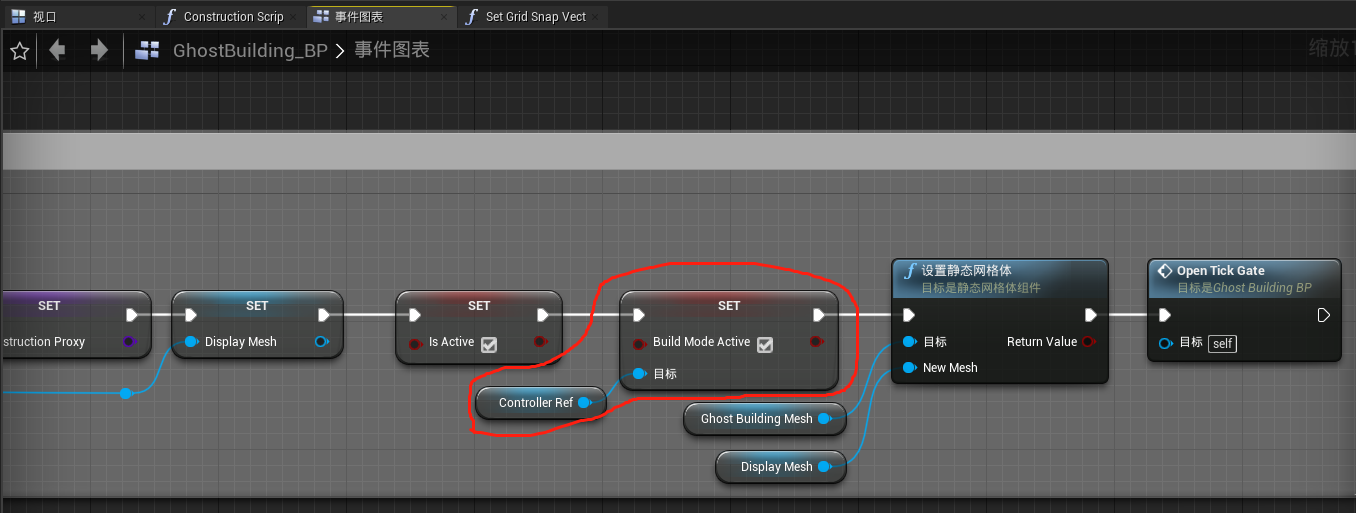
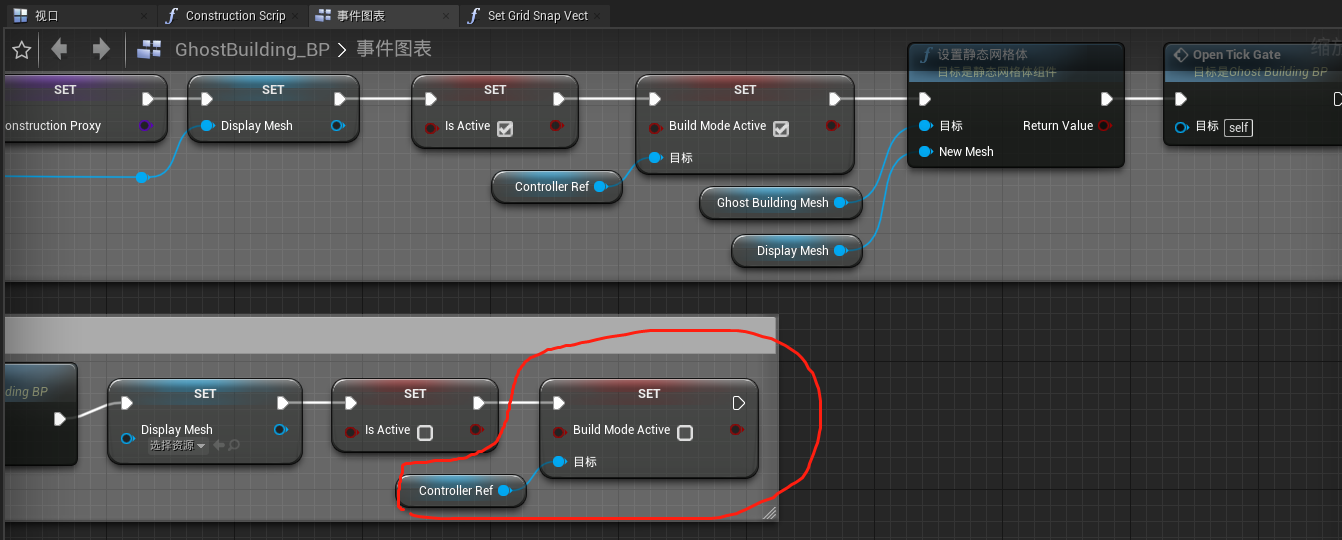
在事件图表中继续完善如下节点
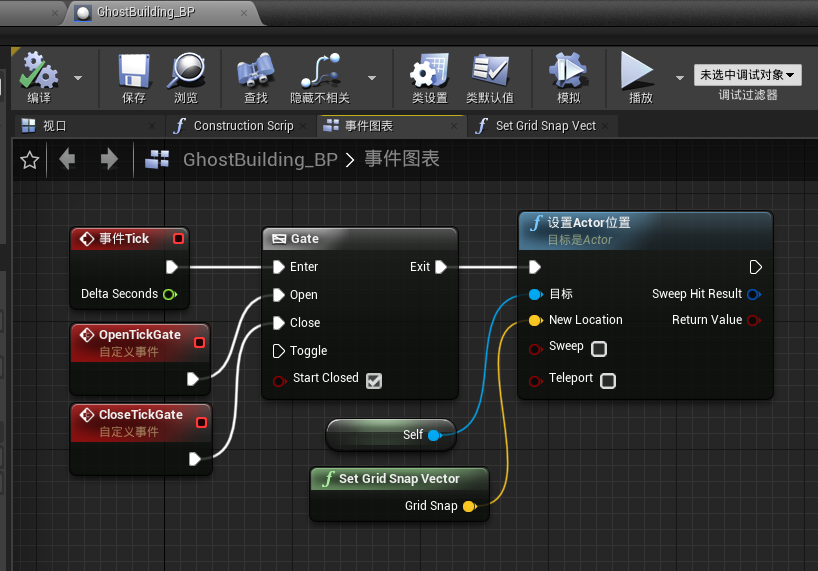
当执行“OnSpawn”事件时,执行“OpenTickGate”
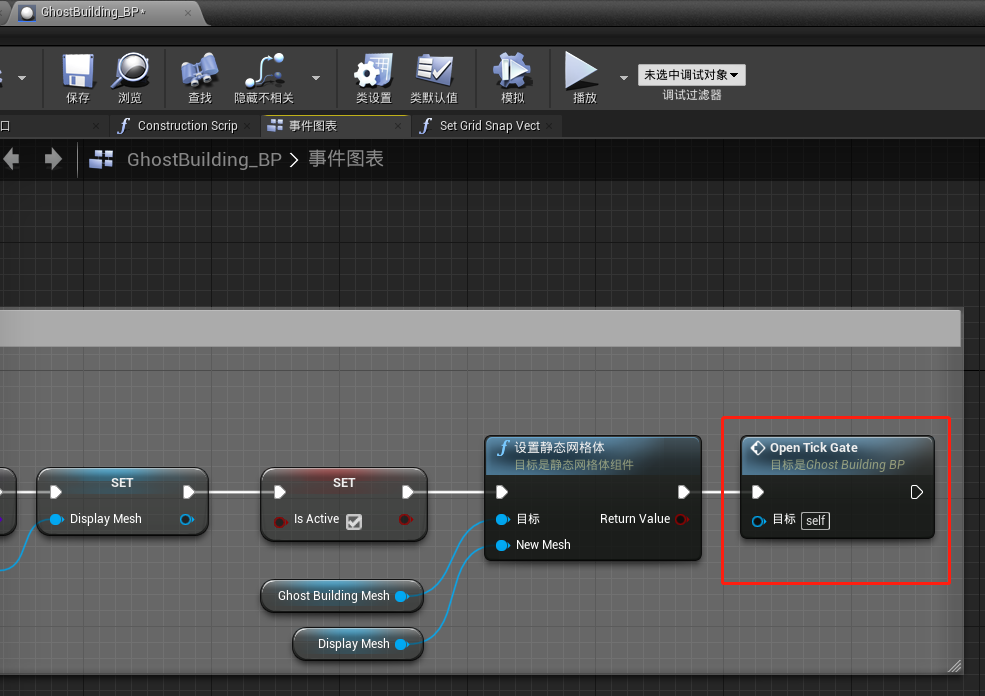
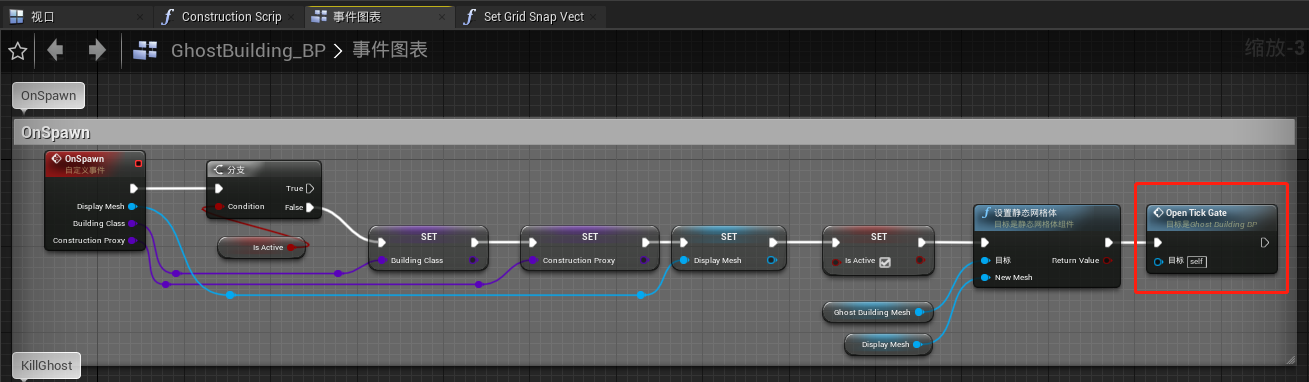
设置“BuildModeActive”为True
当执行“KillGhost”事件时,执行“CloseTickGate”
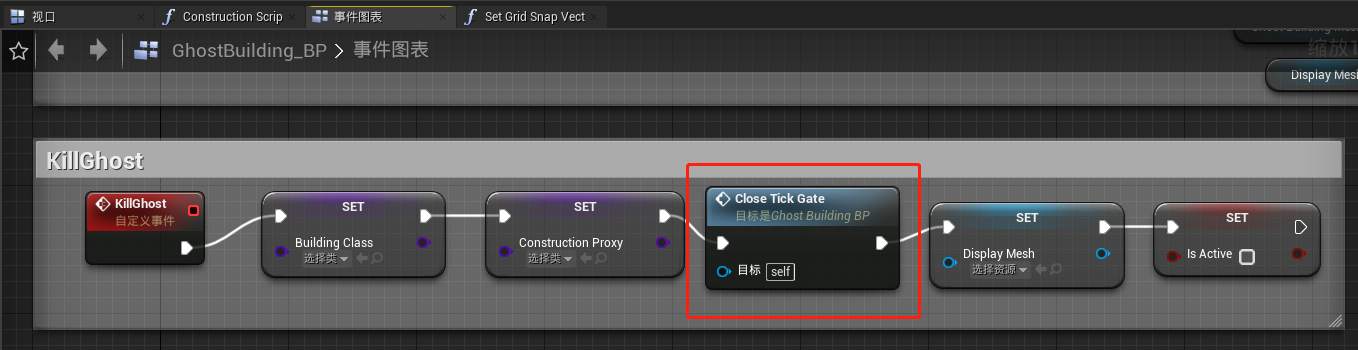
设置“BuildModeActive”为False
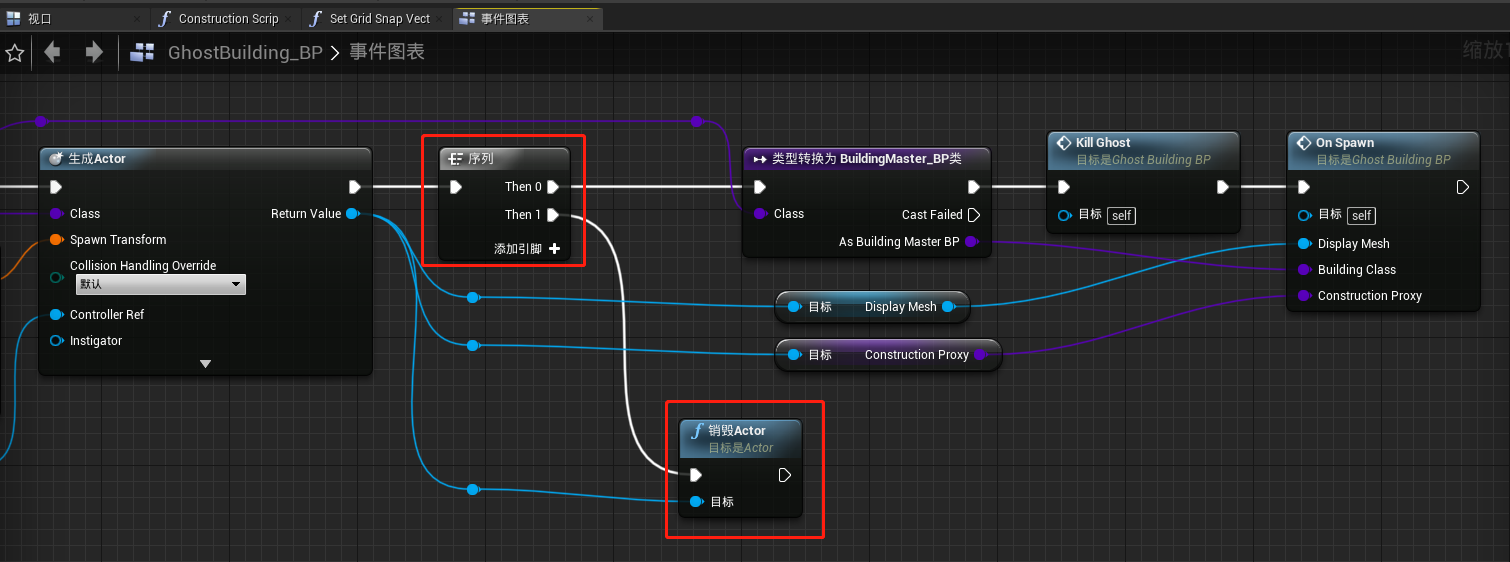
在事件“ConstructBuilding”的相关逻辑中添加如下节点:
此时可以看到如下效果:
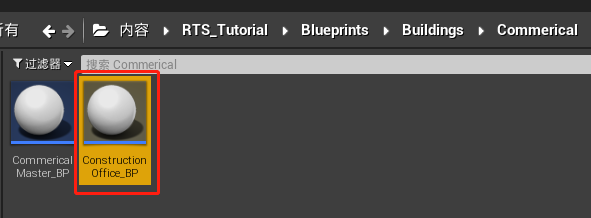
创建一个“CommercialMaster_BP”的子蓝图类,命名为“ConstructionOffice_BP”
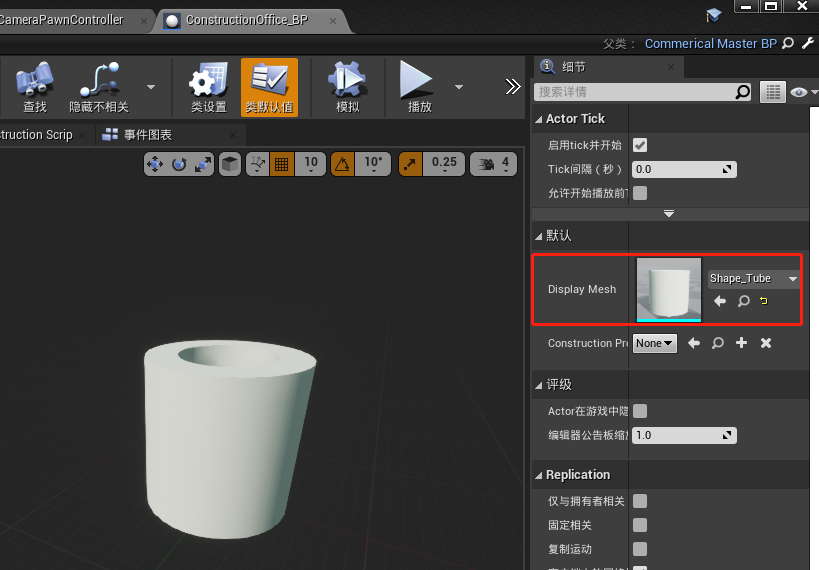
打开“ConstructionOffice_BP”,在类默认值中的DisplayMesh一项选择一个网格体
打开“MainUI_HUD”,在事件图表中MainBuilding选择“ConstructionOffice_BP”
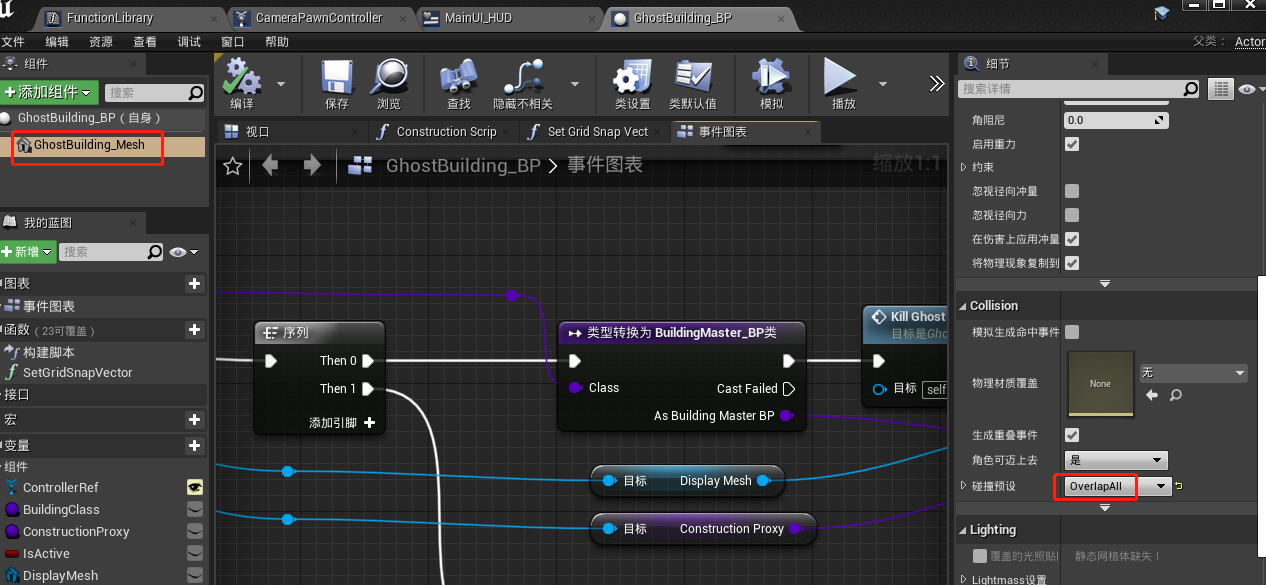
在“GhostBuilding_BP”中选中“GhostBuilding_Mesh”,碰撞预设一项选择为“OverlapAll”
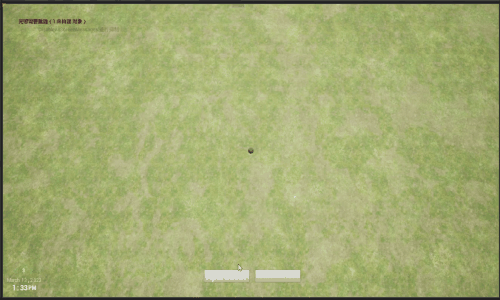
此时运行游戏效果如下:
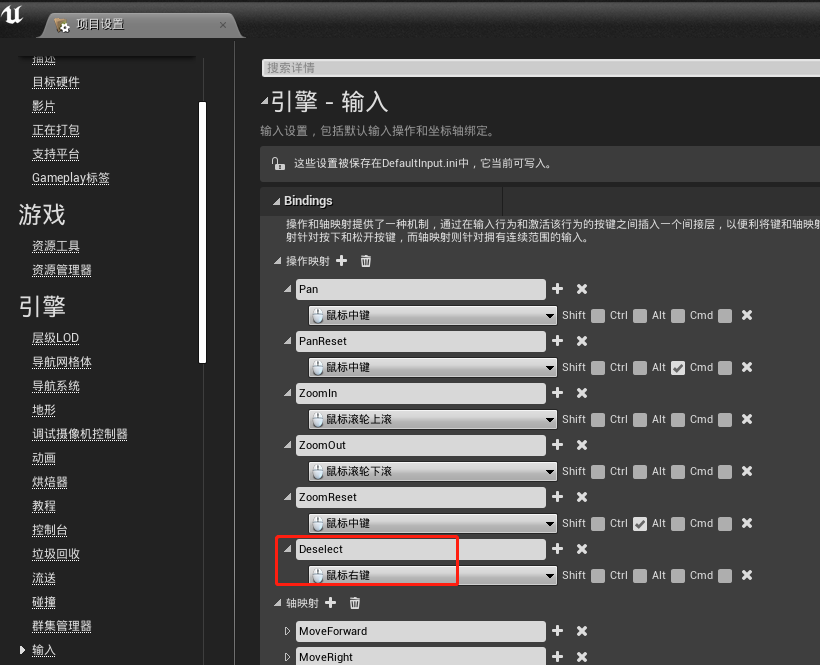
在项目设置中,添加一个操作映射
在“CameraPawnController”的事件图表中添加如下节点:
在“GhostBuilding_BP”中添加如下节点
运行游戏,效果如文章开头所示。
这篇关于【UE4 RTS游戏】10-建筑跟随鼠标移动的文章就介绍到这儿,希望我们推荐的文章对编程师们有所帮助!


