本文主要是介绍C#图像处理OpenCV开发指南(CVStar,09)——边缘识别之Scharr算法的实例代码,希望对大家解决编程问题提供一定的参考价值,需要的开发者们随着小编来一起学习吧!

1 边缘识别之Scharr算法
算法文章很多,不再论述。
1.1 函数原型
void Cv2.Scharr(src,dst,ddepth,dx,dy,scale,delta,borderType)
1.2 参数说明
- src 代表原始图像。
- dst 代表目标图像。
- ddepth 代表输出图像的深度。CV_16S
- dx 代表x方向上的求导阶数。
- dy 代表y方向上的求导阶数。
- scale 代表计算导数值时所采用的缩放因子,默认情况下该值是1,是没有缩放的。
- delta 代表加在目标图像dst上的值,该值是可选的,默认为0。
- borderType 代表边界样式。
2 核心代码
2.1 Scharr核心代码
public partial class CVUtility
{/// <summary>/// Scharr 边缘检测/// </summary>/// <param name="src"></param>/// <returns></returns>public static Mat Scharr(Mat src){// void Cv2.Scharr(src,dst,ddepth,dx,dy,scale,delta,borderType)// src 代表原始图像。// dst 代表目标图像。// ddepth 代表输出图像的深度。CV_16S// dx 代表x方向上的求导阶数。// dy 代表y方向上的求导阶数。// scale 代表计算导数值时所采用的缩放因子,默认情况下该值是1,是没有缩放的。// delta 代表加在目标图像dst上的值,该值是可选的,默认为0。// borderType 代表边界样式。Mat scharrx = new Mat();Cv2.Scharr(src: src,dst: scharrx,ddepth: MatType.CV_64F,xorder: 1,yorder: 0,scale: 1,delta: 0,borderType: BorderTypes.Default);Mat scharry = src.Scharr(MatType.CV_64F, 0, 1);Cv2.Scharr(src: src,dst: scharry,ddepth: MatType.CV_64F,xorder: 0,yorder: 1,scale: 1,delta: 0,borderType: BorderTypes.Default);Cv2.ConvertScaleAbs(scharrx, scharrx);Cv2.ConvertScaleAbs(scharry, scharry);Mat scharrxy = new Mat(scharrx.Size(), scharrx.Type());Cv2.AddWeighted(src1: scharrx,alpha: 0.5,src2: scharry,beta: 0.5,gamma: 0.0,dst: scharrxy,dtype: -1);return scharrxy;}
}
2.2 Scharr函数的使用
private void Scharr(object? sender, EventArgs? e)
{if (txtKSize.Text.Trim().Length < 1) { MessageBox.Show("KSize Required!"); return; }if (!int.TryParse(txtKSize.Text.Trim(), out int ksize)) { MessageBox.Show("Invalid KSize number!"); return; }if (ksize < 3 || ksize > 100) { MessageBox.Show("Invalid KSize number!"); return; }if ((ksize % 2) != 1) { MessageBox.Show("Odd number required for ksize!"); return; }Mat src = Cv2.ImRead(sourceImage);Mat dst = CVUtility.Scharr(src);picResult.Image = CVUtility.Mat2Bitmap(dst);PicAutosize(picResult);
}
2.3 完整Form1.cs
using OpenCvSharp;#pragma warning disable CS8602namespace Legal.Truffer.CVStar
{public partial class Form1 : Form{string[] ImgExtentions = {"*.*|*.*","JPEG|*.jpg;*.jpeg","GIF|*.gif","PNG|*.png","TIF|*.tif;*.tiff","BMP|*.bmp"};private int original_width { get; set; } = 0;private int original_height { get; set; } = 0;private string sourceImage { get; set; } = "";Panel? panelTop { get; set; } = null;Panel? panelBotton { get; set; } = null;PictureBox? picSource { get; set; } = null;PictureBox? picResult { get; set; } = null;Button? btnLoad { get; set; } = null;Button? btnSave { get; set; } = null;Button? btnFunction { get; set; } = null;Label? abKSize { get; set; } = null;TextBox? txtKSize { get; set; } = null;public Form1(){InitializeComponent();this.Text = "OPENCV C#编程入手教程 POWERED BY 深度混淆(CSDN.NET)";this.StartPosition = FormStartPosition.CenterScreen;GUI();this.Resize += FormResize;}private void FormResize(object? sender, EventArgs? e){if (this.Width < 200) { this.Width = 320; return; }if (this.Height < 200) { this.Height = 320; return; }GUI();}private void GUI(){if (panelTop == null) panelTop = new Panel();panelTop.Parent = this;panelTop.Top = 5;panelTop.Left = 5;panelTop.Width = this.Width - 26;panelTop.Height = 85;panelTop.BorderStyle = BorderStyle.FixedSingle;panelTop.BackColor = Color.FromArgb(200, 200, 255);if (panelBotton == null) panelBotton = new Panel();panelBotton.Parent = this;panelBotton.Top = panelTop.Top + panelTop.Height + 3;panelBotton.Left = 5;panelBotton.Width = panelTop.Width;panelBotton.Height = this.Height - panelBotton.Top - 55;panelBotton.BorderStyle = BorderStyle.FixedSingle;if (picSource == null) picSource = new PictureBox();picSource.Parent = panelBotton;picSource.Left = 5;picSource.Top = 5;picSource.Width = (panelBotton.Width - 10) / 2;picSource.Height = (panelBotton.Height - 10);picSource.BorderStyle = BorderStyle.FixedSingle;if (picResult == null) picResult = new PictureBox();picResult.Parent = panelBotton;picResult.Left = picSource.Left + picSource.Width + 5;picResult.Top = picSource.Top;picResult.Width = picSource.Width;picResult.Height = picSource.Height;picResult.BorderStyle = BorderStyle.FixedSingle;original_width = picSource.Width;original_height = picSource.Height;if (btnLoad == null) btnLoad = new Button();btnLoad.Parent = panelTop;btnLoad.Left = 5;btnLoad.Top = 5;btnLoad.Width = 90;btnLoad.Height = 38;btnLoad.Cursor = Cursors.Hand;btnLoad.Text = "Load";btnLoad.Click += Load_Image;btnLoad.BackColor = Color.LightCoral;if (btnSave == null) btnSave = new Button();btnSave.Parent = panelTop;btnSave.Left = panelTop.Width - btnSave.Width - 25;btnSave.Top = btnLoad.Top;btnSave.Width = 90;btnSave.Height = 38;btnSave.Cursor = Cursors.Hand;btnSave.Text = "Save";btnSave.Click += Save;btnSave.BackColor = Color.LightCoral;if (btnFunction == null) btnFunction = new Button();btnFunction.Parent = panelTop;btnFunction.Left = btnLoad.Left + btnLoad.Width + 5;btnFunction.Top = btnLoad.Top;btnFunction.Width = 120;btnFunction.Height = 38;btnFunction.Cursor = Cursors.Hand;btnFunction.Text = "Scharr";btnFunction.Click += Scharr;btnFunction.BackColor = Color.LightCoral;if (abKSize == null) abKSize = new Label();abKSize.Parent = panelTop;abKSize.Left = btnFunction.Left;abKSize.Top = btnFunction.Top + btnFunction.Height + 5;abKSize.Text = "KSIZE: ";if (txtKSize == null) txtKSize = new TextBox();txtKSize.Parent = panelTop;txtKSize.Left = abKSize.Left + abKSize.Width + 5;txtKSize.Top = abKSize.Top;txtKSize.Text = "3";PicAutosize(picSource);PicAutosize(picResult);}private void Load_Image(object? sender, EventArgs? e){OpenFileDialog openFileDialog = new OpenFileDialog();openFileDialog.Filter = String.Join("|", ImgExtentions);if (openFileDialog.ShowDialog() == DialogResult.OK){sourceImage = openFileDialog.FileName;picSource.Image = Image.FromFile(sourceImage);picResult.Image = picSource.Image;PicAutosize(picSource);PicAutosize(picResult);}}private void PicAutosize(PictureBox pb){if (pb == null) return;if (pb.Image == null) return;Image img = pb.Image;int w = original_width;int h = w * img.Height / img.Width;if (h > original_height){h = original_height;w = h * img.Width / img.Height;}pb.SizeMode = PictureBoxSizeMode.Zoom;pb.Width = w;pb.Height = h;pb.Image = img;pb.Refresh();}private void Save(object? sender, EventArgs? e){SaveFileDialog saveFileDialog = new SaveFileDialog();saveFileDialog.Filter = String.Join("|", ImgExtentions);if (saveFileDialog.ShowDialog() == DialogResult.OK){picResult.Image.Save(saveFileDialog.FileName);MessageBox.Show("Image Save to " + saveFileDialog.FileName);}}private void Scharr(object? sender, EventArgs? e){if (txtKSize.Text.Trim().Length < 1) { MessageBox.Show("KSize Required!"); return; }if (!int.TryParse(txtKSize.Text.Trim(), out int ksize)) { MessageBox.Show("Invalid KSize number!"); return; }if (ksize < 3 || ksize > 100) { MessageBox.Show("Invalid KSize number!"); return; }if ((ksize % 2) != 1) { MessageBox.Show("Odd number required for ksize!"); return; }Mat src = Cv2.ImRead(sourceImage);Mat dst = CVUtility.Scharr(src);picResult.Image = CVUtility.Mat2Bitmap(dst);PicAutosize(picResult);}}
}
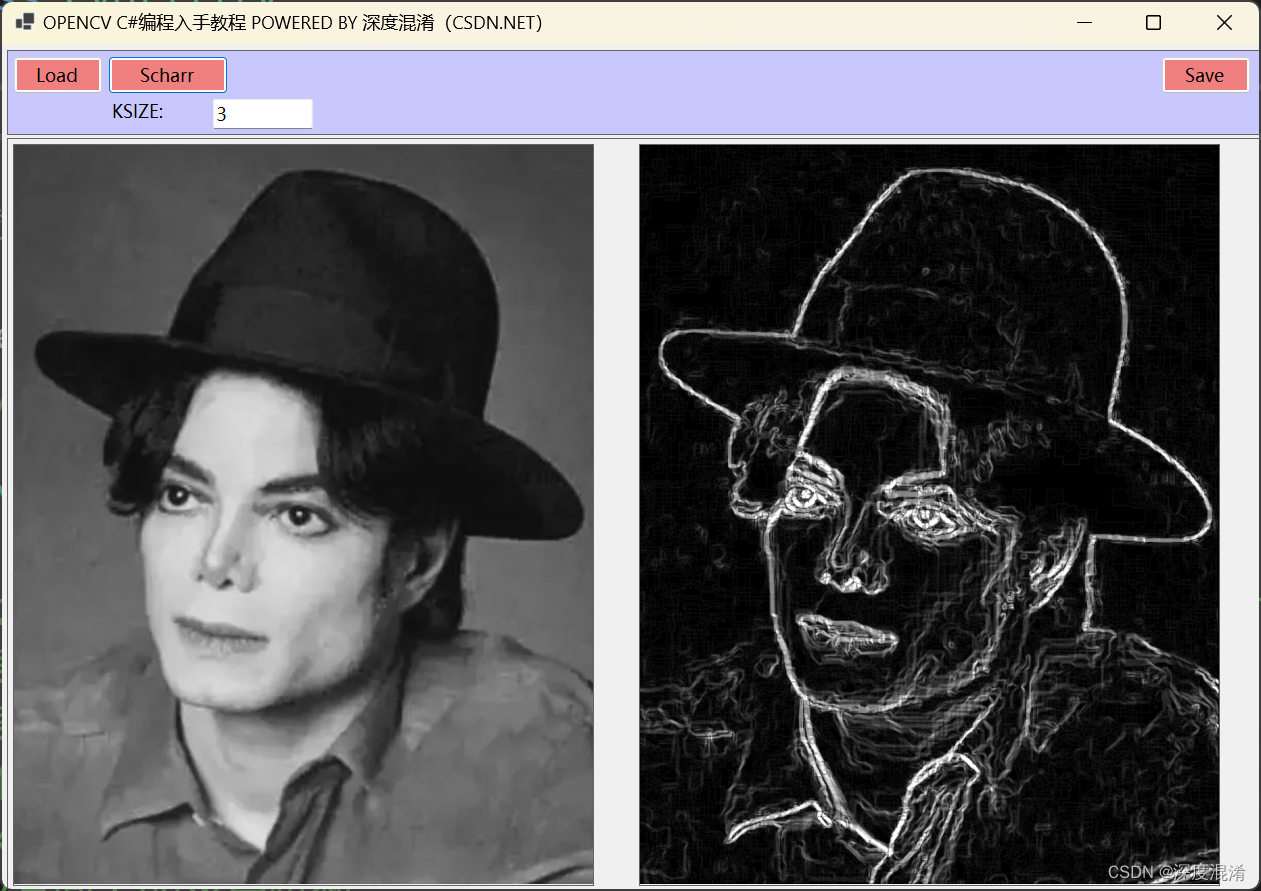
3 运行效果
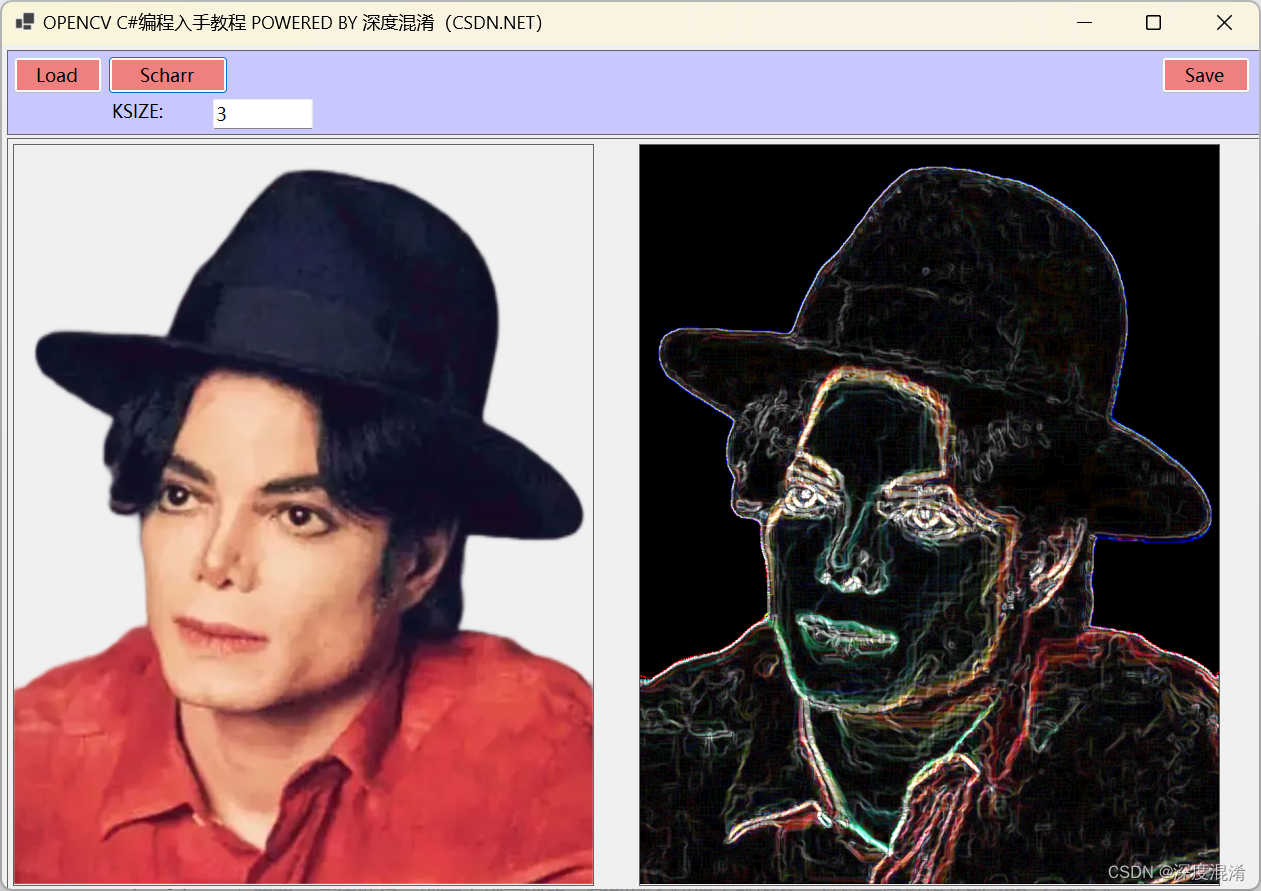
实际上一般都用黑白照片。
这篇关于C#图像处理OpenCV开发指南(CVStar,09)——边缘识别之Scharr算法的实例代码的文章就介绍到这儿,希望我们推荐的文章对编程师们有所帮助!


