本文主要是介绍利用caffe-ssd对钢材表面缺陷数据集(NEUDataset)进行finetune训练和测试,希望对大家解决编程问题提供一定的参考价值,需要的开发者们随着小编来一起学习吧!
本篇博客主要讲述如何使用ssd在Caffe下针对自己的数据集进行finetune训练
- NEUDataset介绍
- LMDB数据集制作
- 将数据集分为trainval和test
- 获得trainval.txt和test.txt
- 修改labelmap文件
- 生成LMDB数据集
- 使用caffe-ssd进行网络训练
- 代码修改
- 网络说明及修改
- 实验结果
本篇博客主要讲解如何使用在VOC0712数据集下训练好的ssd.caffemodel来对自己的数据集进行finetune训练,涉及到NEUDataset、一些python脚本代码、网络结构的修改、网络训练和测试流程以及批量生成测试图片的python代码。
同时,本篇博客不会再涉及到路径和名称修改问题,关于caffe-ssd的安装编译、网络训练和测试以及路径和名称修改等问题请参考我这篇博客: 目标检测SSD网络在Caffe下的实现
数据集来源: NEU surface defect database(
模型:ssd
系统平台:linux-ubuntu
NEUDataset介绍
该数据集是东北大学宋克臣团队制作而成,是钢材表面缺陷数据集,共有1800张图片,包含六种类型:
- crazing
- inclusion
- patches
- pitted_surface
- rolled-in_scale
- scratches
LMDB数据集制作
将数据集分为trainval和test
我写了个python脚本,将1800张images和labels按照8:2的比例随机分为trainval和test两个数据集
- trainval:1440
- test:360
代码如下:
"""this code is to split randomly images and xml files to train and test file"""import osimport cv2#import stringimport randomimport numpy as npimport shutilos.makedirs('/home1/xxx/caffe_ssd/data/NEU/neu/trainval/ANNOTATIONS')os.makedirs('/home1/xxx/caffe_ssd/data/NEU/neu/trainval/IMAGES')os.makedirs('/home1/xxx/caffe_ssd/data/NEU/neu/test/ANNOTATIONS')os.makedirs('/home1/xxx/caffe_ssd/data/NEU/neu/test/IMAGES')open_dir = "/home1/xxx/caffe_ssd/data/NEU/NEU-DET" #the file you want to splitsave_dir = '/home1/xxx/caffe_ssd/data/NEU/neu' #the file you want to savesum_samples = 300 #the sums of each classimg_resize = 300sample_class=['crazing', 'inclusion', 'patches', 'pitted_surface', 'rolled-in_scale', 'scratches'] #samples classdef get_specific_suffix(dirname, suffix='.jpg'): #get specific suffix images and xml filesimages_path = 'IMAGES' #the file name of imagesannotations_path = 'ANNOTATIONS' #the file name of annotationsimg_dir = os.path.join(dirname, images_path)img_list = os.listdir(img_dir)xml_dir = os.path.join(dirname, annotations_path)xml_list = os.listdir(xml_dir)img_list_suffix = []for img_array in img_list:if os.path.splitext(img_array)[1] == suffix:img_list_suffix.append(img_array)else:continuereturn img_list_suffix, xml_list #['crazing_1.jpg', 'crazing_10.jpg'] #return img list and xml list of contentdef get_random_list(sum_samples, scale=0.8): #get random list to split train and test with scalelist_random = random.sample(range(1, sum_samples), int(sum_samples * scale)) #get random figures without repetitionlist_sort = sorted(list_random)return list_sort#get random images and annotations, split them to train and test filedef get_random_img_anno(img_list_suffix, xml_list, sum_samples, img_anno_path='./data/', save_path='./'):images_path = 'IMAGES/' #the file name of imagesannotations_path = 'ANNOTATIONS/' #the file name of annotationsrandom_list = get_random_list(sum_samples) #get random list#split images to train and test according sample classfor sam_class in sample_class:for img_name in img_list_suffix:count = 0for i in random_list: if img_name.find(sam_class) != -1:if img_name.split('.')[0] == sam_class + '_' + str(i):shutil.copy(os.path.join(img_anno_path, images_path, img_name),os.path.join(save_path, 'trainval/', images_path, img_name))if img_name.split('.')[0] != sam_class + '_' + str(i):count = count + 1if count == len(random_list):count = 0shutil.copy(os.path.join(img_anno_path, images_path, img_name),os.path.join(save_path, 'test/', images_path, img_name))#split annotations to train and test according sample classfor sam_class in sample_class:#count_val = 0for xml_name in xml_list:count = 0for i in random_list:if xml_name.find(sam_class) != -1:if xml_name.split('.')[0] == sam_class + '_' + str(i):shutil.copy(os.path.join(img_anno_path, annotations_path, xml_name),os.path.join(save_path, 'trainval/', annotations_path, xml_name))if xml_name.split('.')[0] != sam_class + '_' + str(i):count = count + 1if count == len(random_list):count = 0shutil.copy(os.path.join(img_anno_path, annotations_path, xml_name),os.path.join(save_path, 'test/', annotations_path, xml_name))if __name__=='__main__':img_list_suffix, xml_list = get_specific_suffix(open_dir)get_random_img_anno(img_list_suffix, xml_list, sum_samples=sum_samples, img_anno_path=open_dir, save_path=save_dir)
执行该程序后,会生成两个文件夹train,test
trainval和test均有ANNOTATIONS和IMAGES两个文件夹。
- ANNOTATIONS:标签
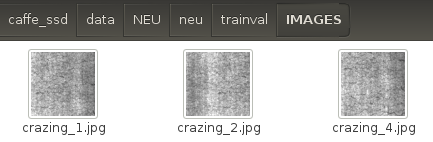
- IMAGES:图片
自己写了个python脚本获取train.txt和test.txt,并将其保存在trainval/MAIN和test/MAIN中。
import ostrainval_dirname = '/home1/xxx/caffe_ssd/data/NEU/neu/trainval/IMAGES'test_dirname = '/home1/xxx/caffe_ssd/data/NEU/neu/test/IMAGES'os.makedirs('/home1/xxx/caffe_ssd/data/NEU/neu/trainval/MAIN')os.makedirs('/home1/xxx/caffe_ssd/data/NEU/neu/test/MAIN')save_trainval_txt_dirname = '/home1/xxx/caffe_ssd/data/NEU/neu/trainval/MAIN/'save_test_txt_dirname = '/home1/xxx/caffe_ssd/data/NEU/neu/test/MAIN/'trainval_list = os.listdir(trainval_dirname)test_list = os.listdir(test_dirname)trainval_txt = open(os.path.join(save_trainval_txt_dirname, 'trainval.txt'), 'w')test_txt = open(os.path.join(save_test_txt_dirname, 'test.txt'), 'w')for trainval in trainval_list:if trainval != '':trainval = trainval.split('.')[0]trainval_txt.write(trainval)trainval_txt.write('\n')trainval_txt.close()for test in test_list:if test != '':test = test.split('.')[0]test_txt.write(test)test_txt.write('\n')test_txt.close()
执行该脚本文件,执行完毕后,此时trainval和test下均具有三个文件夹:
以trainval为例
- ANNOTATIONS:标签
- IMAGES:图片
- MAIN:txt文本文件所在路径,打开后如下图所示
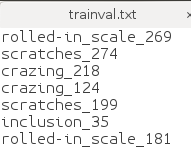
获得trainval.txt和test.txt
利用create_list.sh生成具有images和labels信息的trainval.txt和test.txt。
脚本命令:
#!/bin/bashroot_dir=/home1/xxx/caffe_ssd/data/NEU/neu/sub_dir=MAIN/bash_dir=/home1/xxx/caffe_ssd/data/NEU/neu && pwdfor dataset in trainval test dodst_file=$bash_dir/$dataset.txtecho "dst_file $dst_file" if [ -f $dst_file ]thenrm -f $dst_filefiecho "Create list for $dataset..." #VOC2012 testdataset_file=$root_dir$dataset/$sub_dir/$dataset.txt echo "dataset_file $dataset_file"img_file=$bash_dir/$dataset/$dataset"_img.txt"echo "img_file $img_file" cp $dataset_file $img_fileecho "dataset_file_change $dataset_file"echo "img_file_change $img_file" sed -i "s/^/$dataset\/IMAGES\//g" $img_fileecho "img_file $img_file"sed -i "s/$/.jpg/g" $img_filelabel_file=$bash_dir/$name$dataset/$dataset"_label.txt"cp $dataset_file $label_filesed -i "s/^/$name$dataset\/ANNOTATIONS\//g" $label_filesed -i "s/$/.xml/g" $label_filepaste -d' ' $img_file $label_file >> $dst_file#rm -f $label_file#rm -f $img_file# Generate image name and size infomation.if [ $dataset == "test" ]then/home1/xxx/caffe_ssd/build/tools/get_image_size $root_dir $dst_file $bash_dir/$dataset"_name_size.txt"echo "$root_dir $dst_file $bash_dir/$dataset _name_size.txt"fi# Shuffle trainval file.if [ $dataset == "trainval" ]thenrand_file=$dst_file.randomcat $dst_file | perl -MList::Util=shuffle -e 'print shuffle(<STDIN>);' > $rand_filemv $rand_file $dst_filefi done
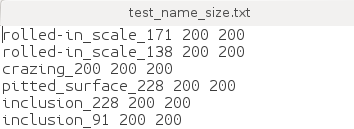
执行该脚本命令,生成三个文件:
- trainval.txt

- test.txt

- test_name_size.txt
修改labelmap文件
除此之外我们需要修改labelmap_voc.prototxt为labelmap_neu.prototxt,内容如下:
item {name: "none_of_the_above"label: 0display_name: "background"
}
item {name: "crazing"label: 1display_name: "crazing"
}
item {name: "inclusion"label: 2display_name: "inclusion"
}
item {name: "patches"label: 3display_name: "patches"
}
item {name: "pitted_surface"label: 4display_name: "pitted_surface"
}
item {name: "rolled-in_scale"label: 5display_name: "rolled-in_scale"
}
item {name: "scratches"label: 6display_name: "scratches"
}
生成LMDB数据集
#cur_dir=$(cd $( dirname ${BASH_SOURCE[0]} ) && pwd )#root_dir=$cur_dir/../..root_dir="/home1/xxx/caffe_ssd/data/NEU/neu"cd $root_direcho $root_dirredo=1data_root_dir="/home1/xxx/caffe_ssd/data/"dataset_name="NEU"mapfile="$root_dir/labelmap_neu.prototxt"anno_type="detection"db="lmdb"min_dim=0max_dim=0width=0height=0extra_cmd="--encode-type=jpg --encoded"if [ $redo ]thenextra_cmd="$extra_cmd --redo"fifor subset in test trainvaldopython2 /home1/jsk/caffe_ssd/scripts/create_annoset.py --anno-type=$anno_type --label-map-file=$mapfile --min-dim=$min_dim --max-dim=$max_dim --resize-width=$width --resize-height=$height --check-label $extra_cmd $data_root_dir$dataset_name/'neu' $root_dir/$subset.txt $root_dir/$db/$subset"_"$db examples/done
执行脚本命令:
sudo sh create_data.sh
会生成两个文件夹如下:
均值的求解我还是使用compute_image_mean工具,可参考我的这篇博客: Caffe制作LMDB数据并进行分类网络训练和测试
求解出均值为:【128.329,128.329,128.329】
使用caffe-ssd进行网络训练
代码修改
主要是对ssd_pascal.py进行修改:
路径和名称修改不再赘述,请参考我的这篇博客: 目标检测SSD网络在Caffe下的实现
其他修改如下:
266行、359行那里:
num_classes = 7 # 21改为7num_test_image = 360 # 4952改为360
网络说明及修改
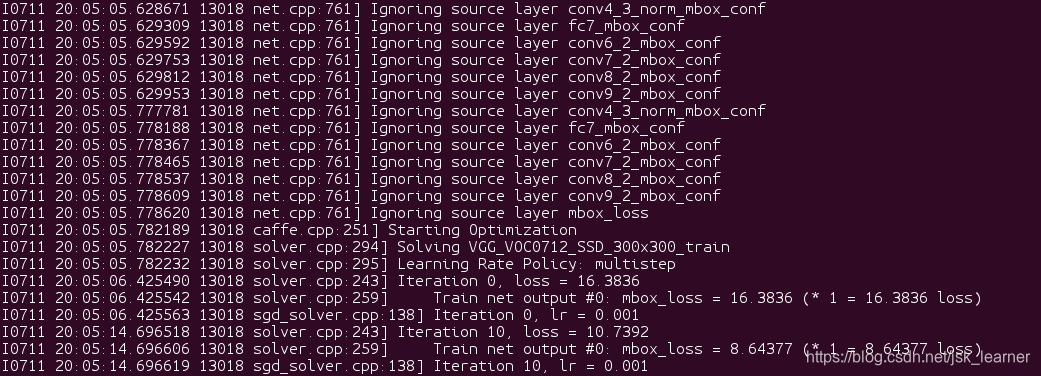
执行python2 ssd_pascal_neu.py,出现如下问题:
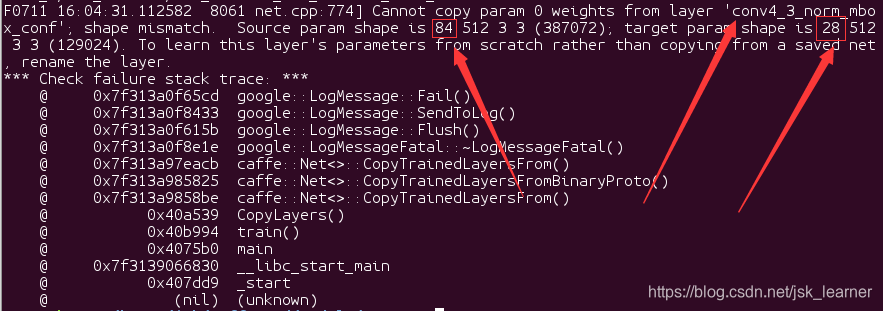
因为我在finetune的时候,用到的模型是在VOC下训练迭代120000次后的caffemodel,所以这里出现了一个参数不匹配的问题,source参数,也就是VGG_VOC0712_SSD_300x300_iter_120000.caffemodel中的类别是21,conv4_3_norm_mbox_conf层的维度为21x4=84;
而NEUDataset中的类别是7,conv4_3_norm_mbox_conf层的维度为7x4=28;
所以需要对这些涉及到类别数量的层进行命名修改,表示不对这些层进行权重复制。
而SSD中涉及到类别数量的维度有六层:
- conv4_3_norm_mbox_conf
- fc7_mbox_conf
- conv6_2_mbox_conf
- conv7_2_mbox_conf
- conv8_2_mbox_conf
- conv9_2_mbox_conf
因此需要对这些层进行重新命名,同时以这些层作为输入的层的bottom也要进行相应的修改。
修改后的网络结构,有时间我会放到Github上,也会在这里同步更新。
修改之后,这个时候就没必要再通过 python2 ssd_pascal_neu.py进行网络训练了。
直接在SSD_300x300文件夹下创建finetune_ssd.sh文件,文件内容为:
#!/usr/bin/env sh TOOLS=/home1/xxx/caffe_ssd/build/tools GLOG_logtostderr=0 GLOG_log_dir=./log1/ $TOOLS/caffe train --solver=solver.prototxt --weights=/home1/xxx/caffe_ssd/models/VGGNet/VOC0712_1/SSD_300x300/VGG_VOC0712_SSD_300x300_iter_120000.caffemodel -gpu 1 #加入 -gpu 选项
然后:
sudo sh finetune_ssd.sh
即可
运行成功如下图所示:
实验结果
最后的mAP值是0.655686,loss是0.73928,比ssd在VOC数据集下的mAP值下降了14%。
不是特别清楚是什么原因,猜想是因为训练集太少的缘故,VGG模型参数又多造成了模型欠拟合。
对测试集360张图片进行实际测试,修改ssd_detect.py代码,以绘制类别和矩形框信息并且可以批量存储。
- ssd_detect.py:
import osimport sysimport argparseimport numpy as npfrom PIL import Image, ImageDraw# Make sure that caffe is on the python path:caffe_root = './'os.chdir(caffe_root)sys.path.insert(0, os.path.join(caffe_root, 'python'))import caffefrom google.protobuf import text_formatfrom caffe.proto import caffe_pb2def get_labelname(labelmap, labels):num_labels = len(labelmap.item)labelnames = []if type(labels) is not list:labels = [labels]for label in labels:found = Falsefor i in xrange(0, num_labels):if label == labelmap.item[i].label:found = Truelabelnames.append(labelmap.item[i].display_name)breakassert found == Truereturn labelnamesclass CaffeDetection:def __init__(self, gpu_id, model_def, model_weights, image_resize, labelmap_file):caffe.set_device(gpu_id)caffe.set_mode_gpu()self.image_resize = image_resize# Load the net in the test phase for inference, and configure input preprocessing.self.net = caffe.Net(model_def, # defines the structure of the modelmodel_weights, # contains the trained weightscaffe.TEST) # use test mode (e.g., don't perform dropout)# input preprocessing: 'data' is the name of the input blob == net.inputs[0]self.transformer = caffe.io.Transformer({'data': self.net.blobs['data'].data.shape})self.transformer.set_transpose('data', (2, 0, 1))self.transformer.set_mean('data', np.array([104, 117, 123])) # mean pixel# the reference model operates on images in [0,255] range instead of [0,1]self.transformer.set_raw_scale('data', 255)# the reference model has channels in BGR order instead of RGBself.transformer.set_channel_swap('data', (2, 1, 0))# load PASCAL VOC labelsfile = open(labelmap_file, 'r')self.labelmap = caffe_pb2.LabelMap()text_format.Merge(str(file.read()), self.labelmap)def detect(self, image_file, conf_thresh=0.5, topn=5):'''SSD detection'''# set net to batch size of 1# image_resize = 300self.net.blobs['data'].reshape(1, 3, self.image_resize, self.image_resize)image = caffe.io.load_image(image_file)#Run the net and examine the top_k resultstransformed_image = self.transformer.preprocess('data', image)self.net.blobs['data'].data[...] = transformed_image# Forward pass.detections = self.net.forward()['detection_out']# Parse the outputs.det_label = detections[0,0,:,1]det_conf = detections[0,0,:,2]det_xmin = detections[0,0,:,3]det_ymin = detections[0,0,:,4]det_xmax = detections[0,0,:,5]det_ymax = detections[0,0,:,6]# Get detections with confidence higher than 0.6.top_indices = [i for i, conf in enumerate(det_conf) if conf >= conf_thresh]top_conf = det_conf[top_indices]top_label_indices = det_label[top_indices].tolist()top_labels = get_labelname(self.labelmap, top_label_indices)top_xmin = det_xmin[top_indices]top_ymin = det_ymin[top_indices]top_xmax = det_xmax[top_indices]top_ymax = det_ymax[top_indices]result = []for i in xrange(min(topn, top_conf.shape[0])):xmin = top_xmin[i] # xmin = int(round(top_xmin[i] * image.shape[1]))ymin = top_ymin[i] # ymin = int(round(top_ymin[i] * image.shape[0]))xmax = top_xmax[i] # xmax = int(round(top_xmax[i] * image.shape[1]))ymax = top_ymax[i] # ymax = int(round(top_ymax[i] * image.shape[0]))score = top_conf[i]label = int(top_label_indices[i])label_name = top_labels[i]result.append([xmin, ymin, xmax, ymax, label, score, label_name])return resultdef main(args):'''main '''detection = CaffeDetection(args.gpu_id,args.model_def, args.model_weights,args.image_resize, args.labelmap_file)test_image_list = os.listdir(args.image_file)print(test_image_list)count=0for test_image in test_image_list:print("test_image:", test_image)print('os',os.path.join(args.image_file, test_image))result = detection.detect(os.path.join(args.image_file, test_image))print("***result***",result)if len(result) == 0:count=count+1img = Image.open(os.path.join(args.image_file, test_image))draw = ImageDraw.Draw(img)width, height = img.sizeprint width, heightfor item in result:xmin = int(round(item[0] * width))ymin = int(round(item[1] * height))xmax = int(round(item[2] * width))ymax = int(round(item[3] * height))draw.rectangle([xmin, ymin, xmax, ymax], outline=(255, 0, 0))draw.text([xmin, ymin], item[-1] + str(item[-2]), (0, 0, 255))print itemprint [xmin, ymin, xmax, ymax]print [xmin, ymin], item[-1]img.save(os.path.join('/home1/xxx/caffe_ssd/data/VOC0712/neulmdb/detect_image_3',test_image))print('count:',count)print("accuracy:", (len(test_image_list) - count)/len(test_image_list))def parse_args():'''parse args'''parser = argparse.ArgumentParser()parser.add_argument('--gpu_id', type=int, default=1, help='gpu id')parser.add_argument('--labelmap_file',default='/home1/xxx/caffe_ssd/models/VGGNet/neu/labelmap_neu.prototxt')parser.add_argument('--model_def',default='/home1/xxx/caffe_ssd/models/VGGNet/neu/SSD_300x300/deploy.prototxt')parser.add_argument('--image_resize', default=300, type=int)parser.add_argument('--model_weights',default='/home1/xxx/caffe_ssd/models/VGGNet/neu/SSD_300x300/snapshot/snapshot_iter_119000.caffemodel')parser.add_argument('--image_file', default='/home1/xxx/caffe_ssd/data/VOC0712/neulmdb/test_image/')return parser.parse_args()if __name__ == '__main__':main(parse_args())
一些实际测试图片展示:
- crazing

- inclusion

- patches

- pitted_surface

- rolled-in_scale

- scatches

至此我们已经完成了ssd在NEUDatast上的finetune。
希望能帮到大家。谢谢。
2019.7.11
这篇关于利用caffe-ssd对钢材表面缺陷数据集(NEUDataset)进行finetune训练和测试的文章就介绍到这儿,希望我们推荐的文章对编程师们有所帮助!


