本文主要是介绍Pytorch: 利用预训练的残差网络ResNet50进行图像特征提取,并可视化特征图热图,希望对大家解决编程问题提供一定的参考价值,需要的开发者们随着小编来一起学习吧!
1. 残差网络ResNet的结构
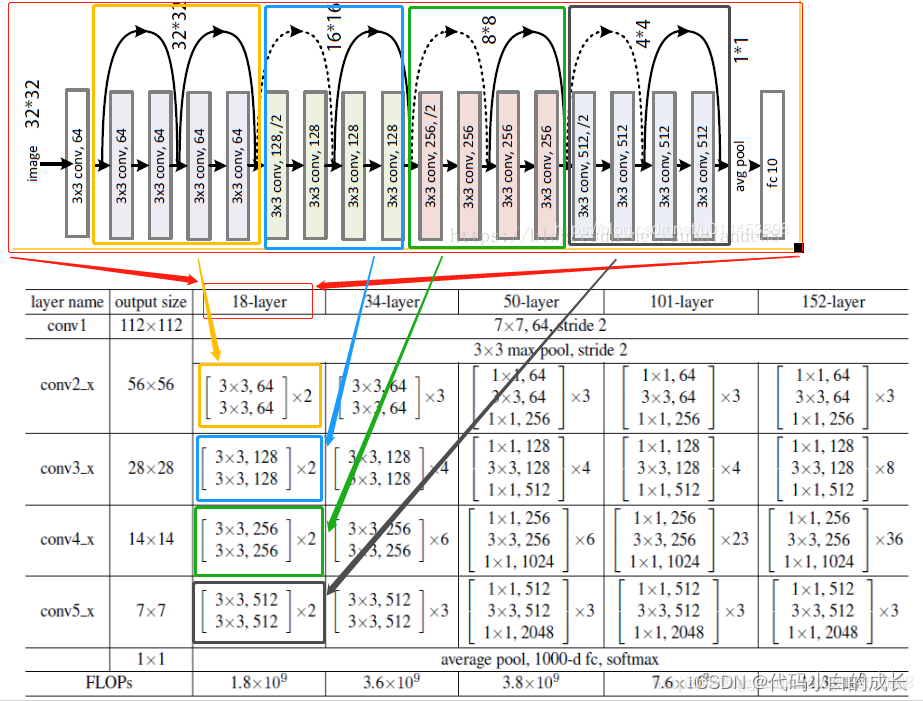
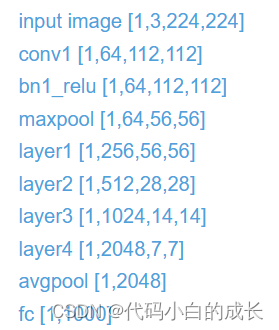
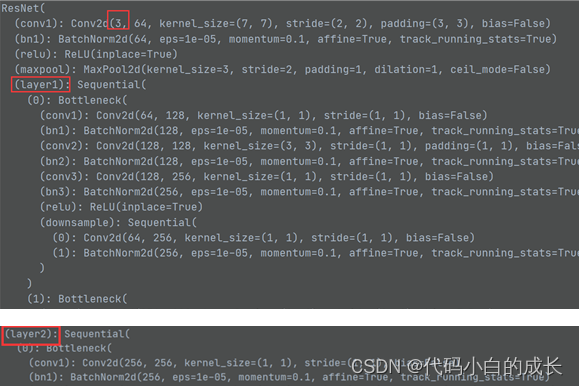
2.图像特征提取和可视化分析
import cv2
import time
import os
import matplotlib.pyplot as plt
import torch
from torch import nn
import torchvision.models as models
import torchvision.transforms as transforms
import numpy as npimgname = 'bottle_broken_large.png'
savepath='vis_resnet50/features_bottle'
if not os.path.isdir(savepath):os.makedirs(savepath)def draw_features(width,height,x,savename):tic = time.time()fig = plt.figure(figsize=(16, 16))fig.subplots_adjust(left=0.05, right=0.95, bottom=0.05, top=0.95, wspace=0.05, hspace=0.05)for i in range(width*height):plt.subplot(height, width, i + 1)plt.axis('off')img = x[0, i, :, :]pmin = np.min(img)pmax = np.max(img)img = ((img - pmin) / (pmax - pmin + 0.000001))*255  #float在[0,1]之间,转换成0-255img=img.astype(np.uint8)  #转成unit8img=cv2.applyColorMap(img, cv2.COLORMAP_JET) #生成heat mapimg = img[:, :, ::-1]#注意cv2(BGR)和matplotlib(RGB)通道是相反的plt.imshow(img)print("{}/{}".format(i,width*height))fig.savefig(savename, dpi=100)fig.clf()plt.close()print("time:{}".format(time.time()-tic))class ft_net(nn.Module):def __init__(self):super(ft_net, self).__init__()model_ft = models.resnet50(pretrained=True)self.model = model_ftdef forward(self, x):if True: # draw features or notx = self.model.conv1(x)draw_features(8, 8, x.cpu().numpy(),"{}/f1_conv1.png".format(savepath))x = self.model.bn1(x)draw_features(8, 8, x.cpu().numpy(),"{}/f2_bn1.png".format(savepath))x = self.model.relu(x)draw_features(8, 8, x.cpu().numpy(), "{}/f3_relu.png".format(savepath))x = self.model.maxpool(x)draw_features(8, 8, x.cpu().numpy(), "{}/f4_maxpool.png".format(savepath))x = self.model.layer1(x)draw_features(16, 16, x.cpu().numpy(), "{}/f5_layer1.png".format(savepath))x = self.model.layer2(x)draw_features(16, 32, x.cpu().numpy(), "{}/f6_layer2.png".format(savepath))x = self.model.layer3(x)draw_features(32, 32, x.cpu().numpy(), "{}/f7_layer3.png".format(savepath))x = self.model.layer4(x)draw_features(32, 32, x.cpu().numpy()[:, 0:1024, :, :], "{}/f8_layer4_1.png".format(savepath))draw_features(32, 32, x.cpu().numpy()[:, 1024:2048, :, :], "{}/f8_layer4_2.png".format(savepath))x = self.model.avgpool(x)plt.plot(np.linspace(1, 2048, 2048), x.cpu().numpy()[0, :, 0, 0])plt.savefig("{}/f9_avgpool.png".format(savepath))plt.clf()plt.close()x = x.view(x.size(0), -1)x = self.model.fc(x)plt.plot(np.linspace(1, 1000, 1000), x.cpu().numpy()[0, :])plt.savefig("{}/f10_fc.png".format(savepath))plt.clf()plt.close()else :x = self.model.conv1(x)x = self.model.bn1(x)x = self.model.relu(x)x = self.model.maxpool(x)x = self.model.layer1(x)x = self.model.layer2(x)x = self.model.layer3(x)x = self.model.layer4(x)x = self.model.avgpool(x)x = x.view(x.size(0), -1)x = self.model.fc(x)return xmodel = ft_net().cuda()# pretrained_dict = resnet50.state_dict()
# pretrained_dict = {k: v for k, v in pretrained_dict.items() if k in model_dict}
# model_dict.update(pretrained_dict)
# net.load_state_dict(model_dict)
model.eval()
img = cv2.imread(imgname)
img = cv2.resize(img, (288, 288))
img = cv2.cvtColor(img, cv2.COLOR_BGR2RGB)
transform = transforms.Compose([transforms.ToTensor(),transforms.Normalize((0.5, 0.5, 0.5), (0.5, 0.5, 0.5))])
img = transform(img).cuda()
img = img.unsqueeze(0)with torch.no_grad():start = time.time()out = model(img)print("total time:{}".format(time.time()-start))result = out.cpu().numpy()# ind=np.argmax(out.cpu().numpy())ind = np.argsort(result, axis=1)for i in range(5):print("predict:top {} = cls {} : score {}".format(i+1,ind[0,1000-i-1],result[0,1000-i-1]))print("done")
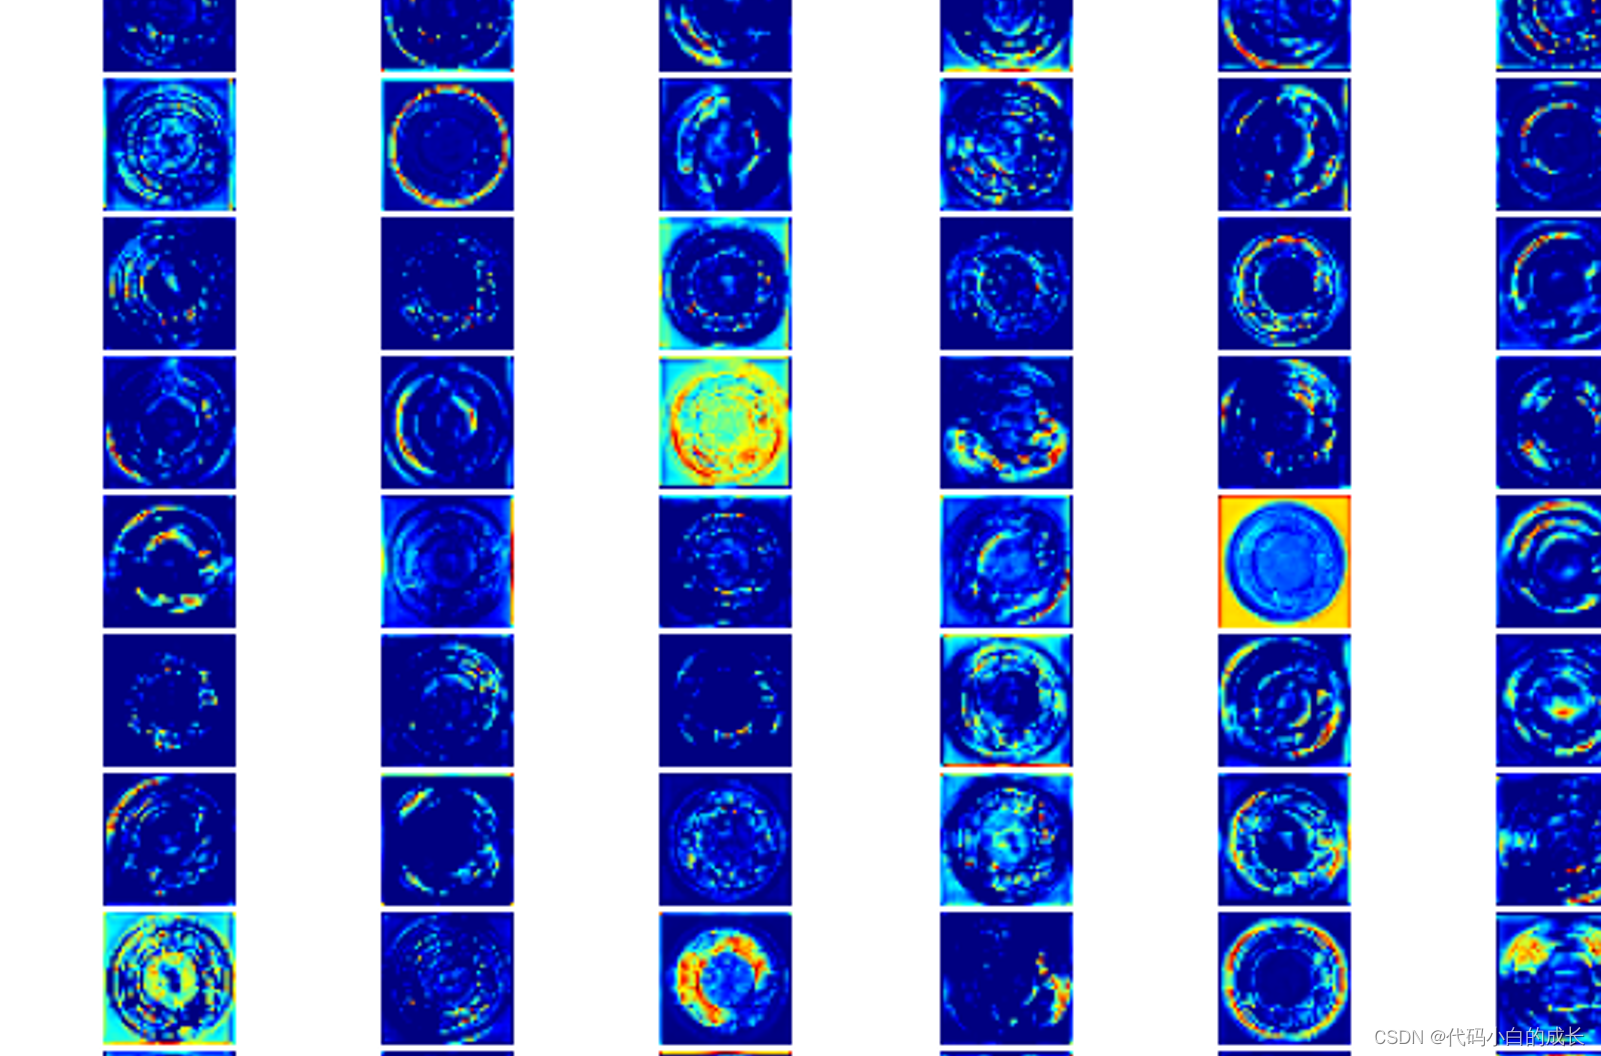
可视化结果:
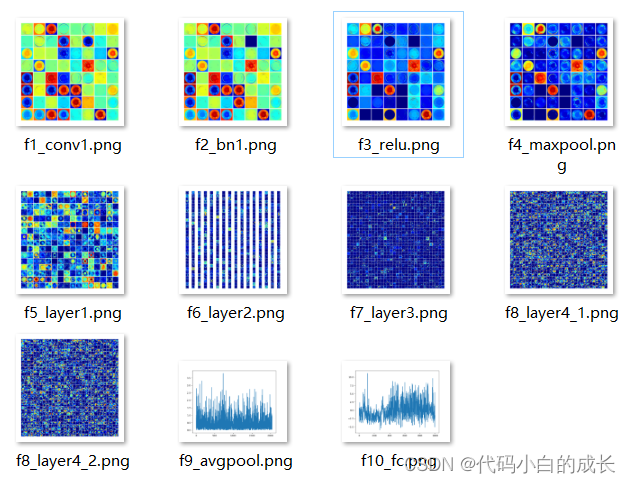
这篇关于Pytorch: 利用预训练的残差网络ResNet50进行图像特征提取,并可视化特征图热图的文章就介绍到这儿,希望我们推荐的文章对编程师们有所帮助!


