本文主要是介绍YoloV8实战:使用YoloV8实现水下目标检测(RUOD),希望对大家解决编程问题提供一定的参考价值,需要的开发者们随着小编来一起学习吧!
摘要
水下目标检测技术在生态监测、管道检修、沉船捕捞等任务中发挥着重要作用。常用的检测方法包括高清视像、侧扫声呐等。光学图像检测因高分辨率和灵活性,在近距离检测中优势显著。但水下图像受水体吸收、衰减、光源分布等影响,呈现蓝绿色,且存在低对比度、非均匀光照、模糊、亮斑和高噪声等问题。此外,水下环境复杂,数据集相对较少,目标小且分布密集,重叠遮挡现象常见。现有的检测算法在复杂水下环境中精确度有限。URPC2021和DUO等数据集为水下目标检测研究提供了重要资源。DUO为URPC挑战赛多年数据集的整合,对其中重复数据进行删除,训练集并且对有误的标签进行了重新标注。
下载链接:
https://github.com/xiaoDetection/RUOD
或者
https://aistudio.baidu.com/datasetdetail/216919(这个链接下载速度快,飕飕的)
数据集格式:COCO格式
类别:
holothurian,echinus,scallop,starfish,fish,corals,diver,cuttlefish,turtle,jellyfish10个常见类别
数据集转换与可视化
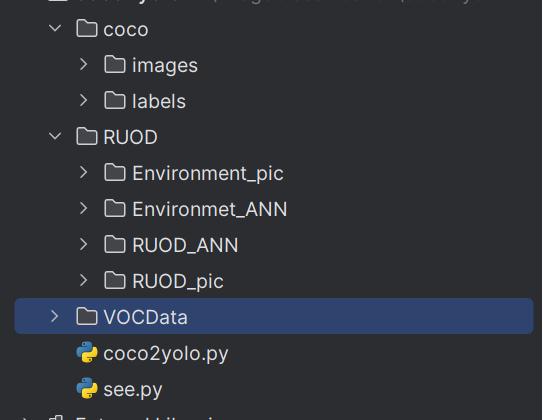
项目结构如下:
将数据集转成Yolo格式
代码:
import json
import glob
import os
import shutil
from pathlib import Path
import numpy as np
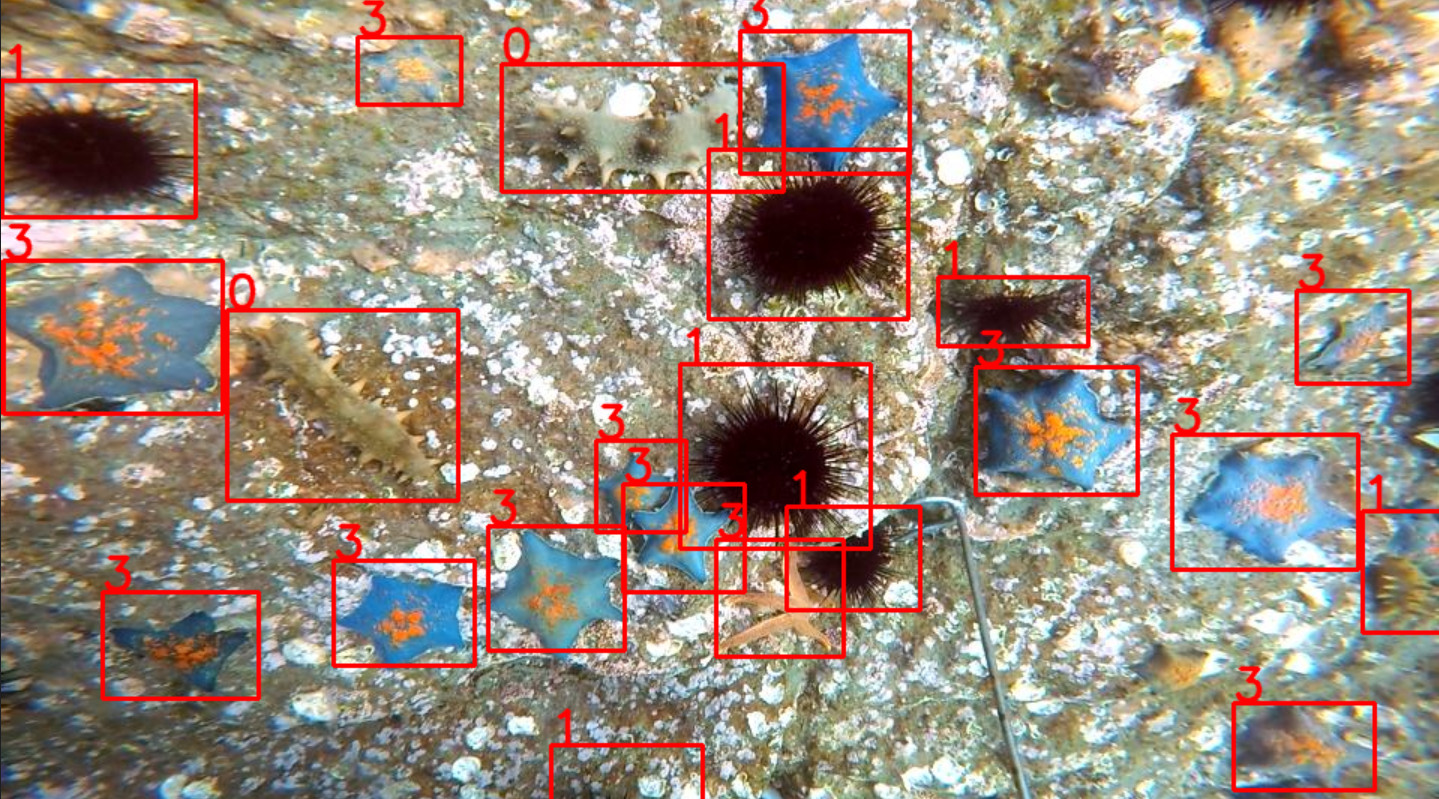
from tqdm import tqdmdef make_folders(path='./coco/'):# Create foldersif os.path.exists(path):shutil.rmtree(path) # delete output folderos.makedirs(path) # make new output folderos.makedirs(path + os.sep + 'labels') # make new labels folderos.makedirs(path + os.sep + 'images') # make new labels folderreturn pathdef convert_coco_json(json_dir='./RUOD/RUOD_ANN/'):jsons = glob.glob(json_dir + '*.json')# Import jsonfor json_file in sorted(jsons):fn = 'coco/labels/%s/' % Path(json_file).stem.replace('instances_', '') # folder namefn_images = 'coco/images/%s/' % Path(json_file).stem.replace('instances_', '') # folder nameos.makedirs(fn, exist_ok=True)os.makedirs(fn_images, exist_ok=True)with open(json_file) as f:data = json.load(f)print(fn)# Create image dictimages = {'%g' % x['id']: x for x in data['images']}# Write labels filefor x in tqdm(data['annotations'], desc='Annotations %s' % json_file):if x['iscrowd']:continueimg = images['%g' % x['image_id']]h, w, f = img['height'], img['width'], img['file_name']file_path = './RUOD/RUOD_pic/' + fn.split('/')[-2] + "/" + f# The Labelbox bounding box format is [top left x, top left y, width, height]box = np.array(x['bbox'], dtype=np.float64)box[:2] += box[2:] / 2 # xy top-left corner to centerbox[[0, 2]] /= w # normalize xbox[[1, 3]] /= h # normalize yif (box[2] > 0.) and (box[3] > 0.): # if w > 0 and h > 0with open(fn + Path(f).stem + '.txt', 'a') as file:file.write('%g %.6f %.6f %.6f %.6f\n' % (x['category_id'] - 1, *box))file_path_t = fn_images + fprint(file_path, file_path_t)shutil.copy(file_path, file_path_t)convert_coco_json()可视化
import cv2
import osdef draw_box_in_single_image(image_path, txt_path):# 读取图像image = cv2.imread(image_path)# 读取txt文件信息def read_list(txt_path):pos = []with open(txt_path, 'r') as file_to_read:while True:lines = file_to_read.readline()  # 整行读取数据if not lines:break# 将整行数据分割处理,如果分割符是空格,括号里就不用传入参数,如果是逗号, 则传入‘,'字符。p_tmp = [float(i) for i in lines.split(' ')]pos.append(p_tmp)  # 添加新读取的数据# Efield.append(E_tmp)passreturn pos# txt转换为boxdef convert(size, box):xmin = (box[1]-box[3]/2.)*size[1]xmax = (box[1]+box[3]/2.)*size[1]ymin = (box[2]-box[4]/2.)*size[0]ymax = (box[2]+box[4]/2.)*size[0]box = (int(xmin), int(ymin), int(xmax), int(ymax))return boxpos = read_list(txt_path)print(pos)tl = int((image.shape[0]+image.shape[1])/2)lf = max(tl-1,1)for i in range(len(pos)):label = str(int(pos[i][0]))print('label is '+label)box = convert(image.shape, pos[i])image = cv2.rectangle(image,(box[0], box[1]),(box[2],box[3]),(0,0,255),2)cv2.putText(image,label,(box[0],box[1]-2), 0, 1, [0,0,255], thickness=2, lineType=cv2.LINE_AA)passif pos:cv2.imwrite('./VOCData/see_images/{}.png'.format(image_path.split('\\')[-1][:-4]), image)else:print('None')print('./VOCData/see_images/{}.png'.format(image_path.split('\\')[-1][:-4]))# cv2.imshow("images", image)# cv2.waitKey(0)# cv2.destroyAllWindows()img_folder = "./coco/images/train"
img_list = os.listdir(img_folder)
img_list.sort()label_folder = "./coco/labels/train"
label_list = os.listdir(label_folder)
label_list.sort()
if not os.path.exists('./VOCData/see_images'):os.makedirs('./VOCData/see_images')
for i in range(len(img_list)):image_path = img_folder + "\\" + img_list[i]txt_path = label_folder + "\\" + label_list[i]draw_box_in_single_image(image_path, txt_path)

训练
完成上面的数据准备工作就可以开启训练了。将得到的数据集放到datasets文件夹下面,在项目的根目录新建coco.yaml,如下图:
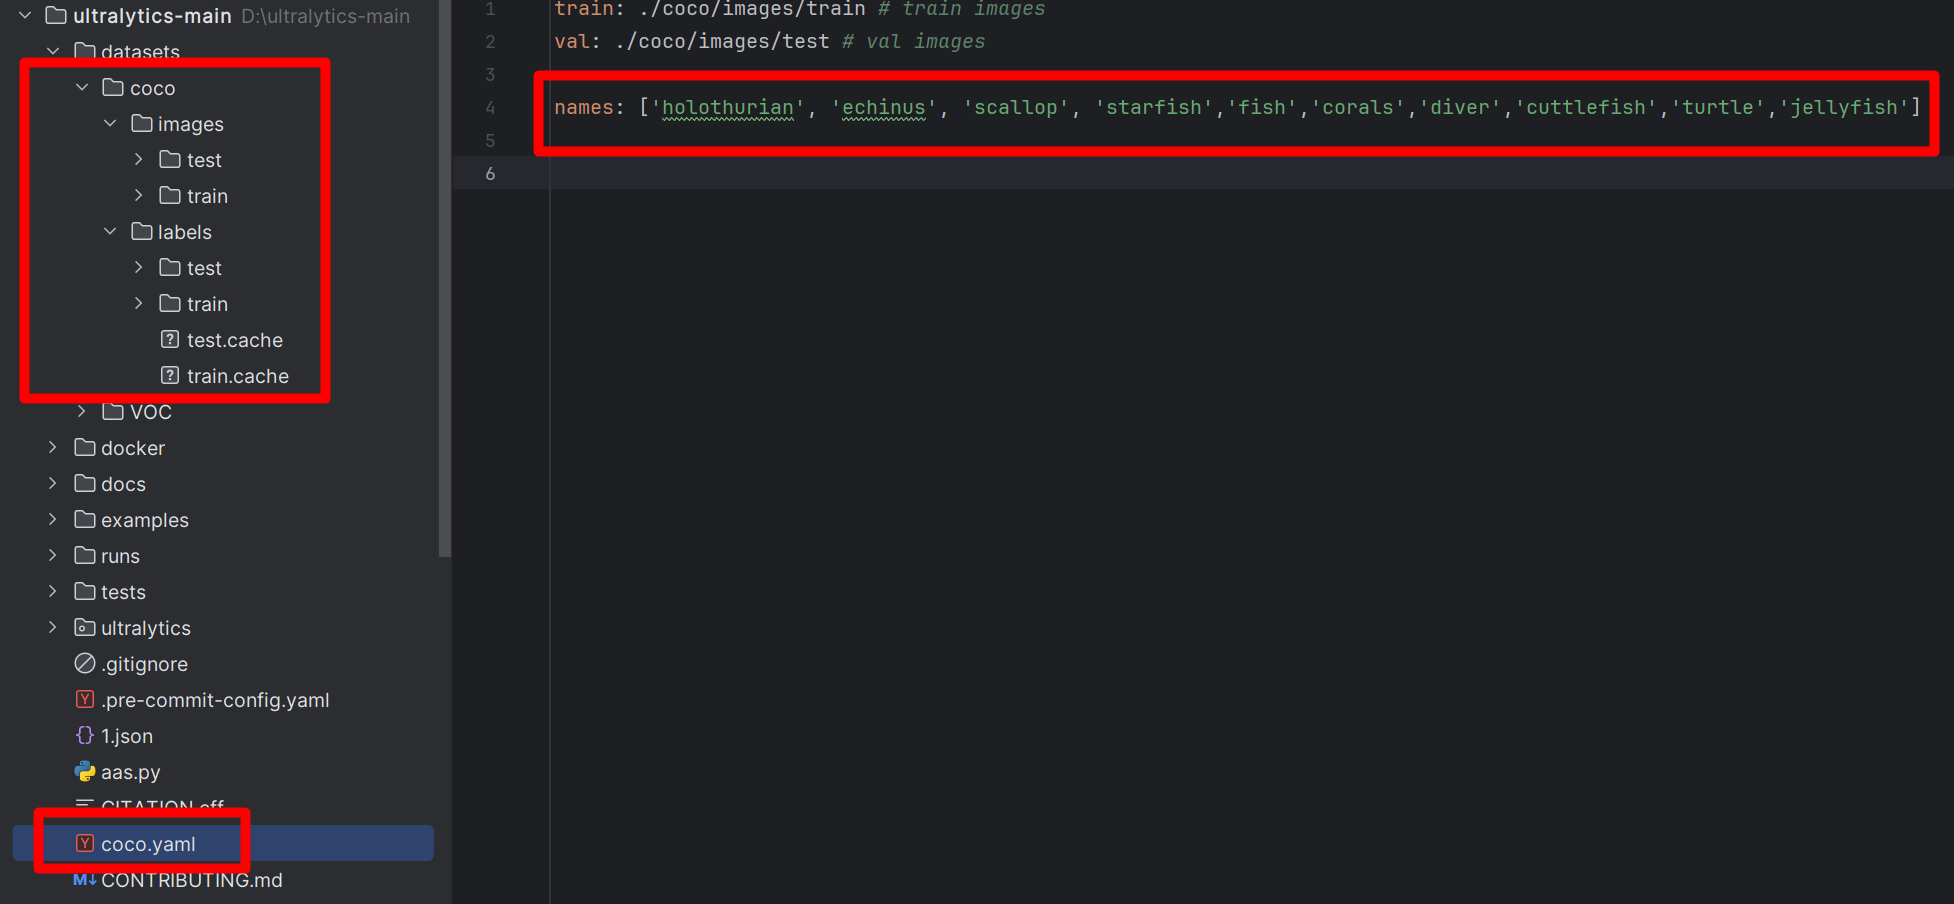
coco.yaml插入内容:
train: ./coco/images/train # train images
val: ./coco/images/test # val imagesnames: ['holothurian', 'echinus', 'scallop', 'starfish','fish','corals','diver','cuttlefish','turtle','jellyfish']
然后新建train.py,插入内容:
from ultralytics import YOLO
import osif __name__ == '__main__':model = YOLO(model="ultralytics/cfg/models/v8/yolov8s.yaml")  # 从头开始构建新模型print(model)# Use the modelresults = model.train(data="coco.yaml", patience=0, epochs=50, device='0', batch=16, seed=42)  # 训练模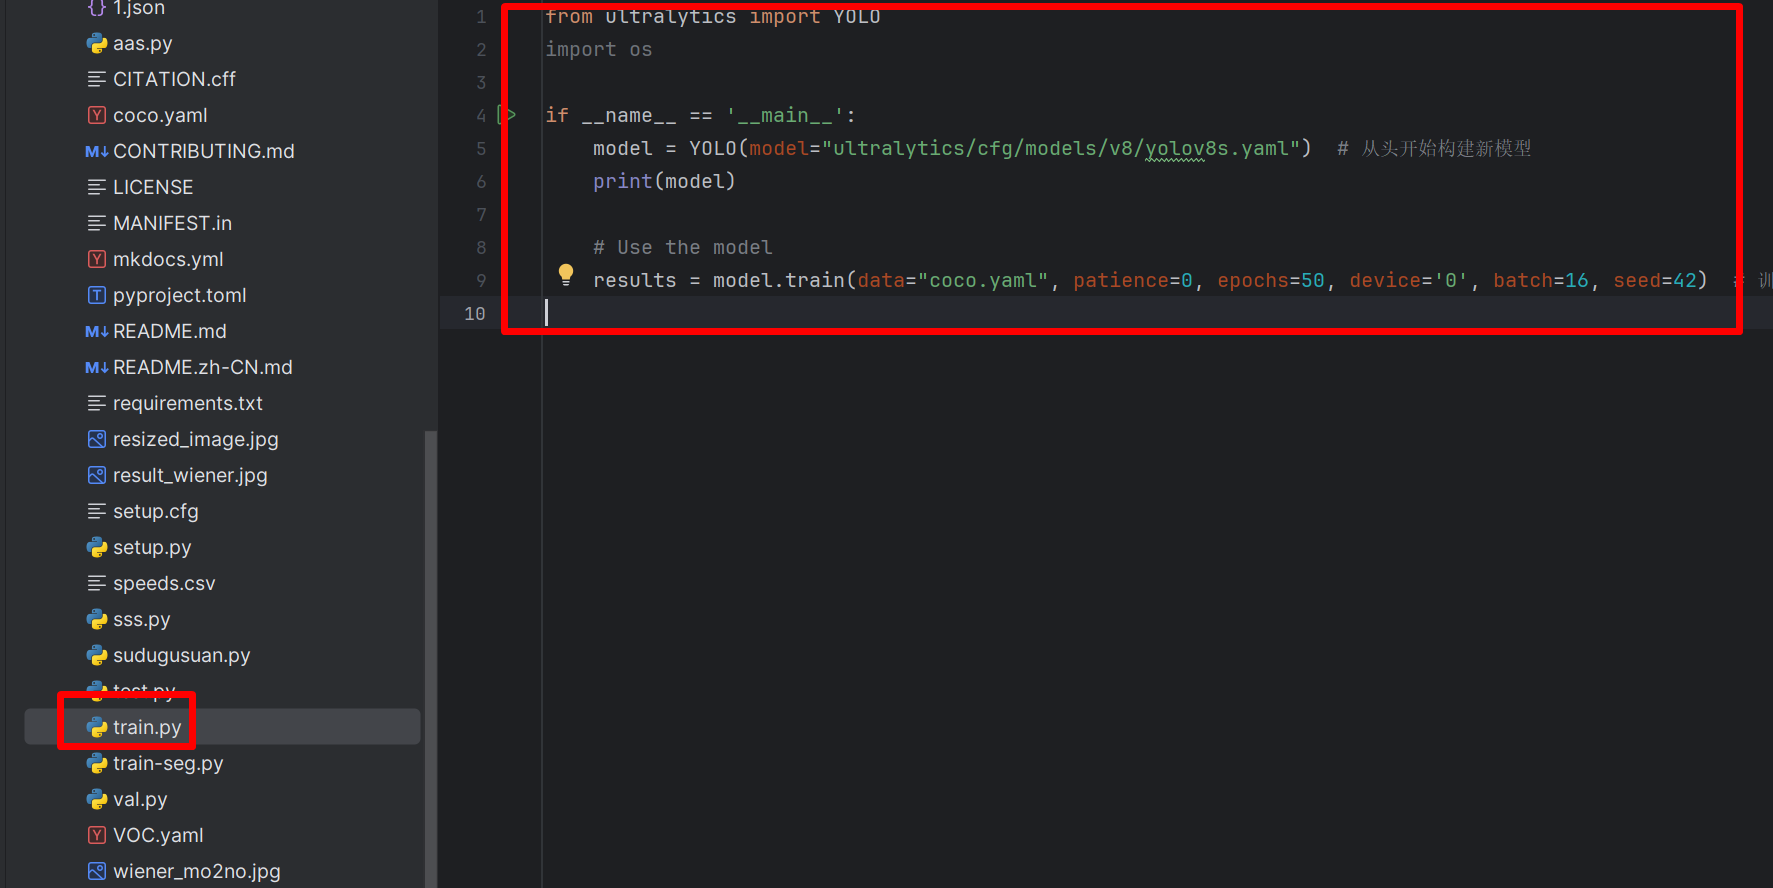
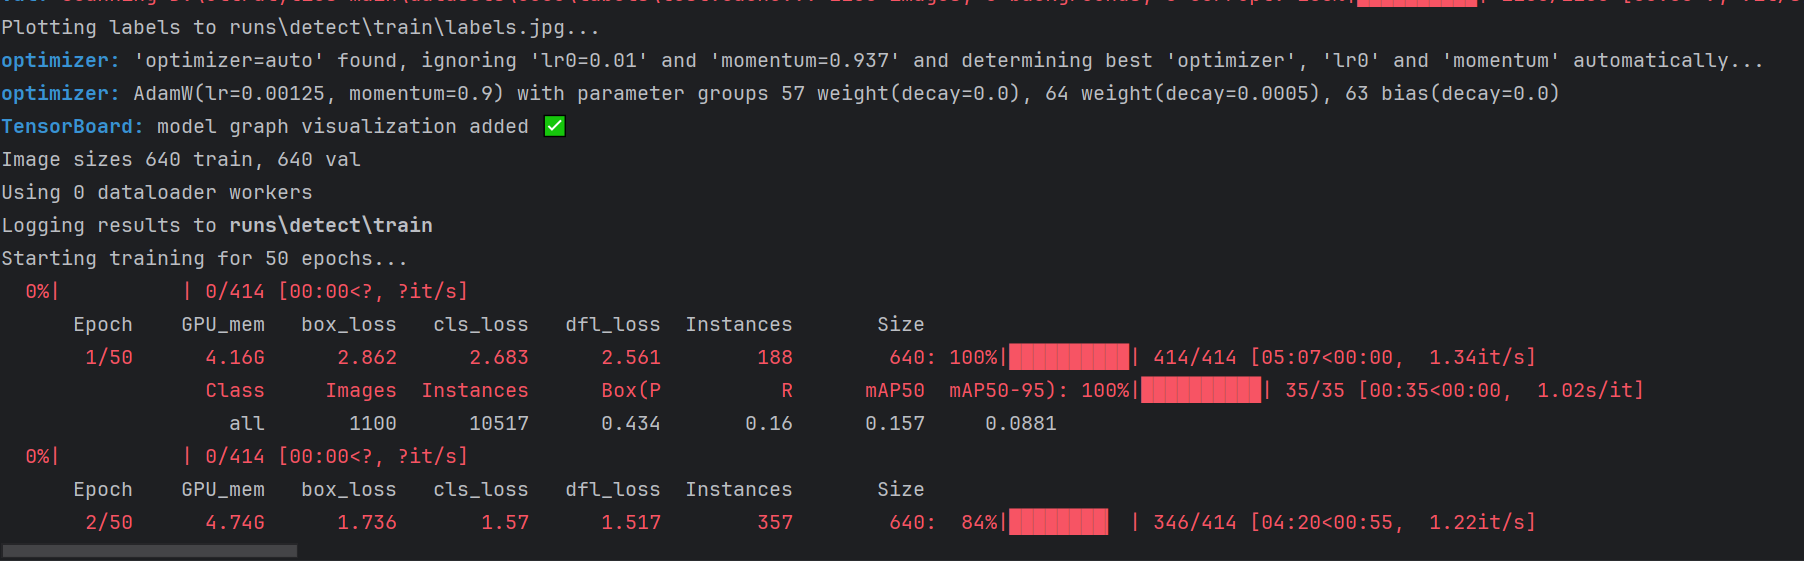
然后,运行train.py,就可以开启训练了!如下图:
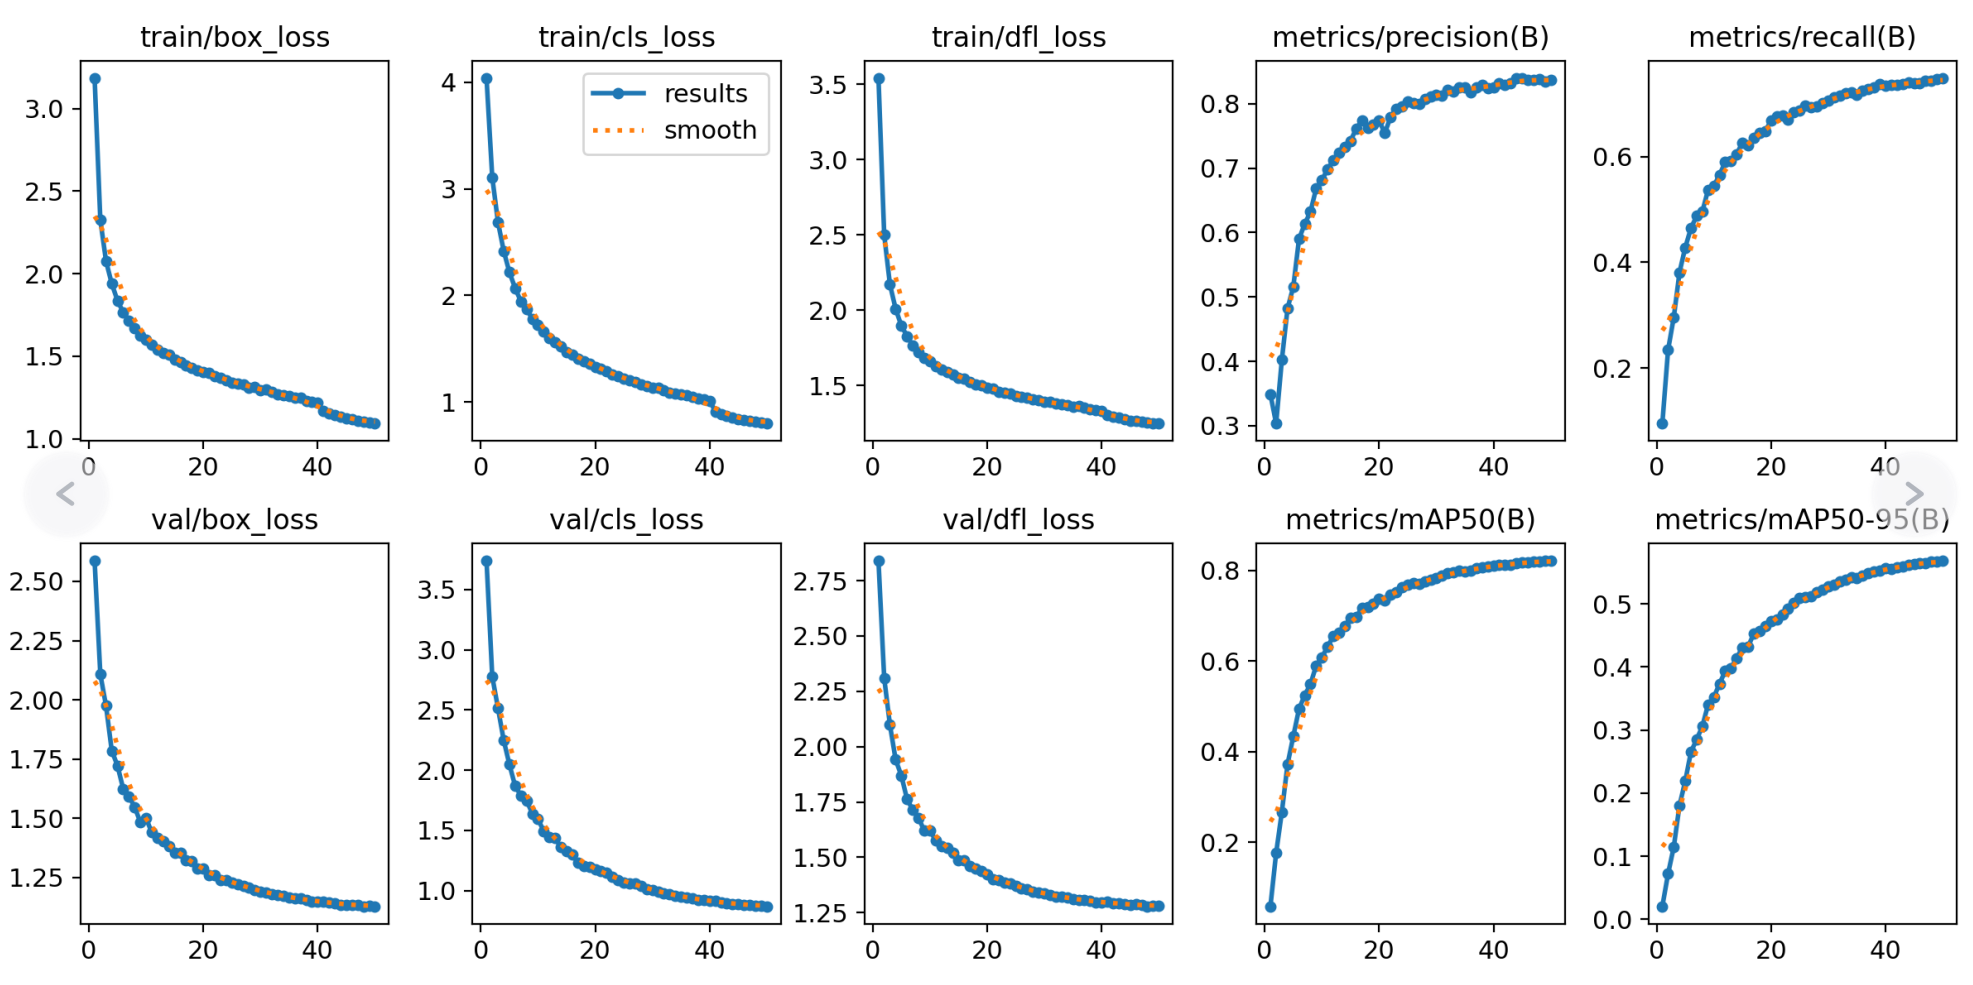
测试结果
验证
代码如下:
from ultralytics import YOLOif __name__ == '__main__':# Load a model# model = YOLO('yolov8m.pt') # load an official modelmodel = YOLO('runs/detect/train/weights/best.pt') # load a custom model# Validate the modelmetrics = model.val(split='val',save_json=True) # no arguments needed, dataset and settings remembered
split参数设置为val,则测试val指向数据集,如果设置为test,则测试test指向的数据集。本次没有test,所以我们只能设置为val。
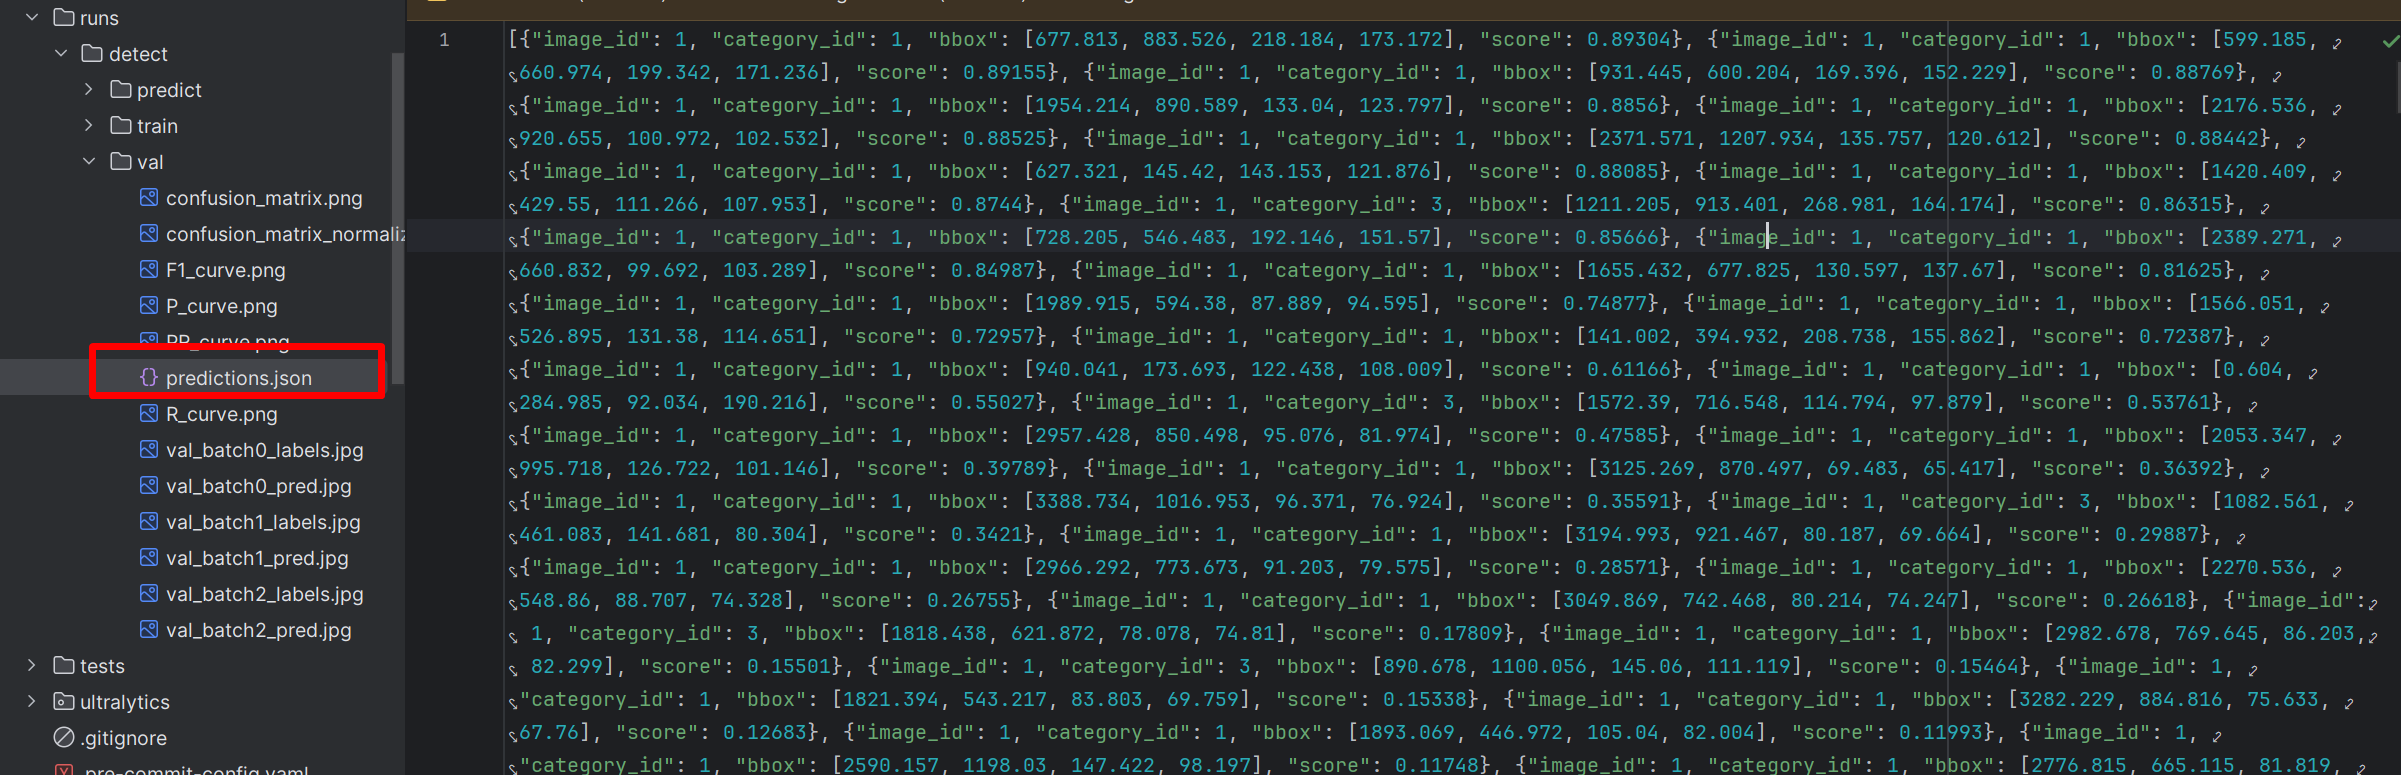
save_json设置为True,则会保存类似coco格式的json文件。如下图:
测试
新建test.py,插入代码:
from ultralytics import YOLOif __name__ == '__main__':# Load a model# model = YOLO('yolov8m.pt') # load an official modelmodel = YOLO('runs/detect/train/weights/best.pt') # load a custom modelresults = model.predict(source="ultralytics/assets", device='0', visualize=True, save=True) # predict on an imageprint(results)
其他的参数就不解释了!说一说YoloV8里没有介绍,或者难以理解的参数。
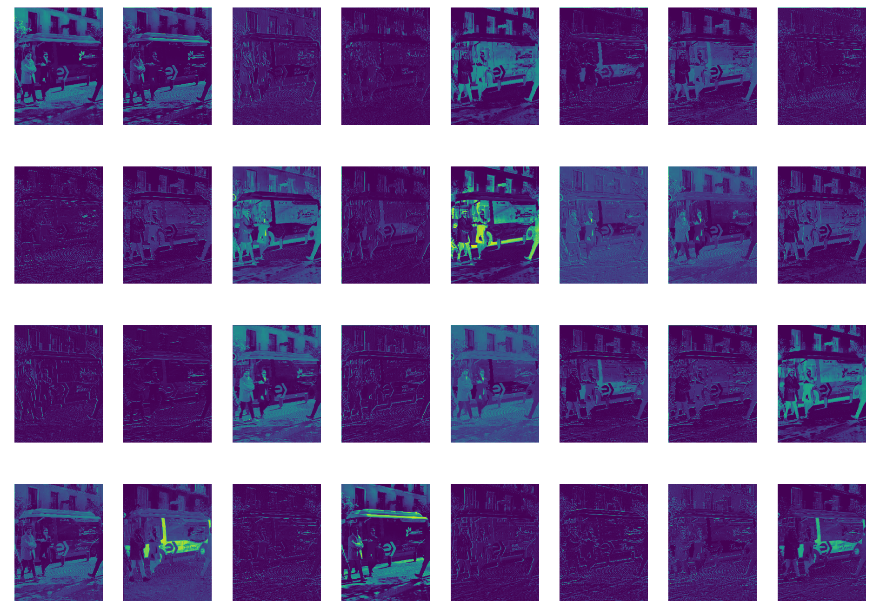
visualize设置为True,可视化每层的特征。设置后,会生成每层的特征,如下图:
保存的路径:
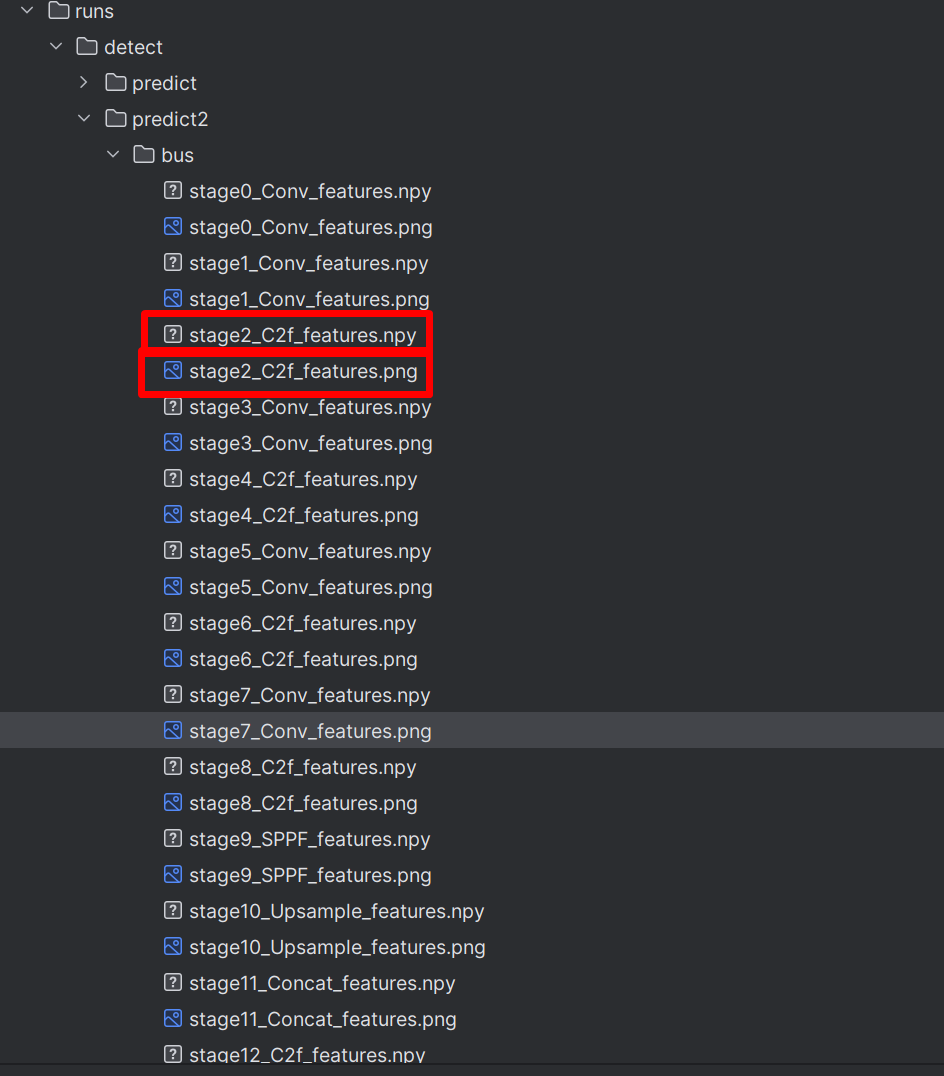
stage后面的数字代表的是YoloV8网络中的层,里面有两种文件,png文件是抽取的特征组成的图片,npy文件则是保存了所有的特征信息。读取方式:
#导入所需的包
import numpy as np#导入npy文件路径位置
test = np.load('runs/detect/predict/zidane/stage2_C2f_features.npy')print(test.shape[0])
总结
本次实战讲解了RUOD数据集的使用,以及训练、验证相关的知识。不知道还有没有遗漏的,欢迎大家补充。
完整的代码:
这篇关于YoloV8实战:使用YoloV8实现水下目标检测(RUOD)的文章就介绍到这儿,希望我们推荐的文章对编程师们有所帮助!


