本文主要是介绍跟着cherno手搓游戏引擎【29】Batch简单合批,希望对大家解决编程问题提供一定的参考价值,需要的开发者们随着小编来一起学习吧!
思路:
CPU和GPU都开辟同样大小的一大块内存(为了存储顶点信息)
索引在程序运行时生成对应规则后绑定到索引缓冲中
动态生成顶点信息(现在改成Drawquad只是确定图形顶点的位置)
然后在Endscene,将CPU的动态生成的顶点数据上传给GPU,然后再绘制出来
所以,就是根据所绘制的物体,动态生成索引缓冲区,然后根据索引缓冲区一次性绘制多个物体。
实现:
Renderer2D.h:
#pragma once
#include "OrthographicCamera.h"
#include"Texture.h"
namespace YOTO {class Renderer2D{public://为什么渲染器是静态的:static void Init();static void ShutDown();static void BeginScene(const OrthographicCamera& camera);static void EndScene();static void Flush();static void DrawQuad(const glm::vec2& position, const glm::vec2& size ,const glm::vec4& color);static void DrawQuad(const glm::vec3& position, const glm::vec2& size ,const glm::vec4& color);static void DrawQuad(const glm::vec2& position, const glm::vec2& size ,const Ref<Texture2D> texture,float tilingFactor=1.0f,const glm::vec4& tintColor=glm::vec4(1.0f));static void DrawQuad(const glm::vec3& position, const glm::vec2& size ,const Ref<Texture2D> texture,float tilingFactor=1.0f,const glm::vec4& tintColor=glm::vec4(1.0f));static void DrawRotatedQuad(const glm::vec2& position, const glm::vec2& size, float rotation,const glm::vec4& color);static void DrawRotatedQuad(const glm::vec3& position, const glm::vec2& size, float rotation,const glm::vec4& color);static void DrawRotatedQuad(const glm::vec2& position, const glm::vec2& size, float rotation,const Ref<Texture2D> texture, float tilingFactor = 1.0f,  const glm::vec4& tintColor = glm::vec4(1.0f));static void DrawRotatedQuad(const glm::vec3& position, const glm::vec2& size, float rotation,const Ref<Texture2D> texture, float tilingFactor = 1.0f, const glm::vec4& tintColor = glm::vec4(1.0f));};
}
Renderer2D.cpp:
#include "ytpch.h"
#include "Renderer2D.h"
#include"VertexArray.h"
#include"Shader.h"
//#include "Platform/OpenGL/OpenGLShader.h"
#include <glm/gtc/matrix_transform.hpp>
#include "RenderCommand.h"
namespace YOTO {/// <summary>/// 为什么QuadVertex的指针可以作为void*data传入glBufferSubData:/// SetLayout配置的就是这三个的顺序,因为glm内部用float实现/// 相当于前三个float是Position,之后四个float组成的Color,/// 最后是两个float组成的TexCoord/// </summary>struct QuadVertex {glm::vec3 Position;glm::vec4 Color;glm::vec2 TexCoord;//,纹理Id,};struct  Renderer2DData {const uint32_t MaxQuads = 10000;const uint32_t MaxVertices = MaxQuads * 4;const uint32_t MaxIndices = MaxQuads * 6;//顶点数组Ref<VertexArray> QuadVertexArray;//定带你缓冲Ref<VertexBuffer> QuadVertexBuffer;//Ref<Shader> FlatColorShader;//ShaderRef<Shader> TextureShader;//纹理Ref<Texture2D> WhiteTexture;//记录索引uint32_t QuadIndexCount =0;QuadVertex* QuadVertexBufferBase=nullptr;QuadVertex* QuadVertexBufferPtr= nullptr;};//CPU开辟的大内存static Renderer2DData s_Data;void Renderer2D::Init(){YT_PROFILE_FUNCTION();//---------------------顶点数组--------------------------//创建顶点数组s_Data.QuadVertexArray = VertexArray::Create();// 创建顶点缓冲区,先在GPU开辟一块s_Data.MaxVertices * sizeof(QuadVertex)大小的内存// 与cpu对应大,是为了传输顶点数据//---------------------顶点缓冲区--------------------------s_Data.QuadVertexBuffer =VertexBuffer::Create(s_Data.MaxVertices*sizeof(QuadVertex));s_Data.QuadVertexBuffer->SetLayout({{ShaderDataType::Float3,"a_Position"},{ShaderDataType::Float4,"a_Color"},{ShaderDataType::Float2,"a_TexCoord"}});//顶点数组添加顶点缓冲区,并且在这个缓冲区中设置布局s_Data.QuadVertexArray->AddVertexBuffer(s_Data.QuadVertexBuffer);// 在CPU开辟存储s_Data.MaxVertices个的QuadVertex的内存s_Data.QuadVertexBufferBase = new QuadVertex[s_Data.MaxVertices];//---------------------索引缓冲区--------------------------//开辟一块索引缓冲区uint32_t* quadIndices = new uint32_t[s_Data.MaxIndices];uint32_t offset = 0;	//配置索引for (uint32_t i = 0; i < s_Data.MaxIndices; i += 6) {quadIndices[i + 0] = offset + 0;quadIndices[i + 1] = offset + 1;quadIndices[i + 2] = offset + 2;quadIndices[i + 3] = offset + 2;quadIndices[i + 4] = offset + 3;quadIndices[i + 5] = offset + 0;offset += 4;}//创建索引缓冲区Ref<IndexBuffer> quardIB;quardIB =IndexBuffer::Create(quadIndices, s_Data.MaxIndices);s_Data.QuadVertexArray->AddIndexBuffer(quardIB);delete[] quadIndices;	// cpu上传到gpu上了可以删除cpu的索引数据块了//---------------------纹理--------------------------// 创建一个白色Textures_Data.WhiteTexture = Texture2D::Create(1, 1);uint32_t whiteTextureData = 0xffffffff;s_Data.WhiteTexture->SetData(&whiteTextureData, sizeof(uint32_t));//---------------------着色器--------------------------//加载shader,并传入shader参数s_Data.TextureShader= Shader::Create("assets/shaders/Texture.glsl");s_Data.TextureShader->Bind();s_Data.TextureShader->SetInt("u_Texture", 0);}void Renderer2D::ShutDown(){YT_PROFILE_FUNCTION();//delete s_Data;}void Renderer2D::BeginScene(const OrthographicCamera& camera){YT_PROFILE_FUNCTION();s_Data.TextureShader->Bind();s_Data.TextureShader->SetMat4("u_ViewProjection", camera.GetViewProjectionMatrix());// 相当于初始化此帧要绘制的索引数量,上传的顶点数据s_Data.QuadIndexCount = 0;//指针指向首部s_Data.QuadVertexBufferPtr = s_Data.QuadVertexBufferBase;}void Renderer2D::EndScene(){YT_PROFILE_FUNCTION();// 计算当前绘制需要多少个顶点数据,注意这里是8!!!!!!uint32_t dataSize = (uint8_t*)s_Data.QuadVertexBufferPtr - (uint8_t*)s_Data.QuadVertexBufferBase;// 截取部分CPU的顶点数据上传OpenGL,s_Data.QuadVertexBuffer->SetData(s_Data.QuadVertexBufferBase, dataSize);Flush();}void Renderer2D::Flush(){RenderCommand::DrawIndexed(s_Data.QuadVertexArray, s_Data.QuadIndexCount);}void Renderer2D::DrawQuad(const glm::vec2& position, const glm::vec2& size, const glm::vec4& color){DrawQuad({ position.x,position.y,0.0f }, size, color);}void Renderer2D::DrawQuad(const glm::vec3& position, const glm::vec2& size, const glm::vec4& color){YT_PROFILE_FUNCTION();//s_Data.FlatColorShader->Bind();//s_Data.FlatColorShader->SetFloat4("u_Color", color);//s_Data.TextureShader->Bind();s_Data.QuadVertexBufferPtr->Position = position;s_Data.QuadVertexBufferPtr->Color = color;s_Data.QuadVertexBufferPtr->TexCoord = {0.0f,0.0f};s_Data.QuadVertexBufferPtr++;s_Data.QuadVertexBufferPtr->Position = { position.x+size.x,position.y,0.0f};s_Data.QuadVertexBufferPtr->Color = color;s_Data.QuadVertexBufferPtr->TexCoord = { 1.0f,0.0f };s_Data.QuadVertexBufferPtr++;s_Data.QuadVertexBufferPtr->Position = { position.x + size.x,position.y + size.y,0.0f };s_Data.QuadVertexBufferPtr->Color = color;s_Data.QuadVertexBufferPtr->TexCoord = { 1.0f,1.0f };s_Data.QuadVertexBufferPtr++;s_Data.QuadVertexBufferPtr->Position = { position.x,position.y+size.y,0.0f };s_Data.QuadVertexBufferPtr->Color = color;s_Data.QuadVertexBufferPtr->TexCoord = { 0.0f,1.0f };s_Data.QuadVertexBufferPtr++;s_Data.QuadIndexCount += 6;/*s_Data.TextureShader->SetFloat4("u_Color", color);s_Data.TextureShader->SetFloat("m_TilingFactor", 1.0f);s_Data.WhiteTexture->Bind();*///glm::mat4 transform = glm::translate(glm::mat4(1.0f), position) /**rotation*/ * glm::scale(glm::mat4(1.0f), {size.x,size.y,1.0f});//s_Data.TextureShader->SetMat4("u_Transform", transform);//s_Data.QuadVertexArray->Bind();//RenderCommand::DrawIndexed(s_Data.QuadVertexArray);}void Renderer2D::DrawQuad(const glm::vec2& position, const glm::vec2& size, const Ref<Texture2D> texture,  float tilingFactor, const glm::vec4& tintColor){DrawQuad({ position.x,position.y,0.0f }, size, texture, tilingFactor, tintColor);}void Renderer2D::DrawQuad(const glm::vec3& position, const glm::vec2& size, const Ref<Texture2D> texture, float tilingFactor, const glm::vec4& tintColor){YT_PROFILE_FUNCTION();//s_Data.TextureShader->Bind();s_Data.TextureShader->SetFloat4("u_Color", tintColor);s_Data.TextureShader->SetFloat("m_TilingFactor",tilingFactor);texture->Bind();glm::mat4 transform = glm::translate(glm::mat4(1.0f), position) /**rotation*/ * glm::scale(glm::mat4(1.0f), { size.x,size.y,1.0f });s_Data.TextureShader->SetMat4("u_Transform", transform);s_Data.QuadVertexArray->Bind();RenderCommand::DrawIndexed(s_Data.QuadVertexArray);}void Renderer2D::DrawRotatedQuad(const glm::vec2& position, const glm::vec2& size, float rotation, const glm::vec4& color){DrawRotatedQuad({ position.x,position.y,0.0f }, size, rotation,color);}void Renderer2D::DrawRotatedQuad(const glm::vec3& position, const glm::vec2& size, float rotation, const glm::vec4& color){YT_PROFILE_FUNCTION();s_Data.TextureShader->SetFloat4("u_Color", color);s_Data.TextureShader->SetFloat("m_TilingFactor", 1.0f);s_Data.WhiteTexture->Bind();glm::mat4 transform = glm::translate(glm::mat4(1.0f), position) * glm::rotate(glm::mat4(1.0f), rotation, {0.0f,0.0f,1.0f}) * glm::scale(glm::mat4(1.0f), { size.x,size.y,1.0f });s_Data.TextureShader->SetMat4("u_Transform", transform);s_Data.QuadVertexArray->Bind();RenderCommand::DrawIndexed(s_Data.QuadVertexArray);}void Renderer2D::DrawRotatedQuad(const glm::vec2& position, const glm::vec2& size, float rotation, const Ref<Texture2D> texture, float tilingFactor, const glm::vec4& tintColor){DrawRotatedQuad({ position.x,position.y,0.0f }, size, rotation, texture, tilingFactor, tintColor);}void Renderer2D::DrawRotatedQuad(const glm::vec3& position, const glm::vec2& size, float rotation, const Ref<Texture2D> texture, float tilingFactor, const glm::vec4& tintColor){YT_PROFILE_FUNCTION();//s_Data.TextureShader->Bind();s_Data.TextureShader->SetFloat4("u_Color", tintColor);s_Data.TextureShader->SetFloat("m_TilingFactor", tilingFactor);texture->Bind();glm::mat4 transform = glm::translate(glm::mat4(1.0f), position) * glm::rotate(glm::mat4(1.0f), rotation, { 0.0f,0.0f,1.0f }) * glm::scale(glm::mat4(1.0f), { size.x,size.y,1.0f });s_Data.TextureShader->SetMat4("u_Transform", transform);s_Data.QuadVertexArray->Bind();RenderCommand::DrawIndexed(s_Data.QuadVertexArray);}
}
Buffer.h:添加SetData和Create方法:
#pragma once
namespace YOTO {enum class ShaderDataType{None=0,Float,Float2,Float3,Float4,Mat3,Mat4,Int,Int2,Int3,Int4,Bool,};static uint32_t  ShaderDataTypeSize(ShaderDataType type) {switch (type){case YOTO::ShaderDataType::Float:return 4;break;case YOTO::ShaderDataType::Float2:return 4*2;break;case YOTO::ShaderDataType::Float3:return 4*3;break;case YOTO::ShaderDataType::Float4:return 4*4;break;case YOTO::ShaderDataType::Mat3:return 4*3*3;break;case YOTO::ShaderDataType::Mat4:return 4*4*4;break;case YOTO::ShaderDataType::Int:return 4;break;case YOTO::ShaderDataType::Int2:return 4*2;break;case YOTO::ShaderDataType::Int3:return 4*3;break;case YOTO::ShaderDataType::Int4:return 4*4;break;case YOTO::ShaderDataType::Bool:return 1;break;}YT_CORE_ASSERT(false, "未知的ShaderDataType!");return 0;}struct BufferElement {std::string Name;ShaderDataType Type;uint32_t Size;uint32_t Offset;bool Normalized;BufferElement(){}BufferElement(ShaderDataType type, const std::string& name,bool normalized=false):Name(name), Type(type), Size(ShaderDataTypeSize(type)), Offset(0), Normalized(normalized){}uint32_t GetComponentCount() const{switch (Type){case YOTO::ShaderDataType::Float:return 1;break;case YOTO::ShaderDataType::Float2:return 2;break;case YOTO::ShaderDataType::Float3:return 3;break;case YOTO::ShaderDataType::Float4:return 4;break;case YOTO::ShaderDataType::Mat3:return 3*3;break;case YOTO::ShaderDataType::Mat4:return 4*4;break;case YOTO::ShaderDataType::Int:return 1;break;case YOTO::ShaderDataType::Int2:return 2;break;case YOTO::ShaderDataType::Int3:return 3;break;case YOTO::ShaderDataType::Int4:return 4;break;case YOTO::ShaderDataType::Bool:return 1;break;default:break;}YT_CORE_ASSERT(false, "未知的ShaderDataType!");return 0;}};class BufferLayout {public:BufferLayout(){}BufferLayout(const std::initializer_list<BufferElement>elements):m_Elements(elements) {CalculateOffsetAndStride();} inline uint32_t GetStride()const { return m_Stride; }inline const std::vector<BufferElement>& GetElements()const {return m_Elements;}std::vector<BufferElement>::iterator begin() { return m_Elements.begin(); }std::vector<BufferElement>::iterator end() { return m_Elements.end(); }std::vector<BufferElement>::const_iterator begin() const { return m_Elements.begin(); }std::vector<BufferElement>::const_iterator end() const { return m_Elements.end(); }private:void CalculateOffsetAndStride() {uint32_t offset = 0;m_Stride = 0;for (auto& element : m_Elements) {element.Offset = offset;offset += element.Size;m_Stride += element.Size;}}private:std::vector<BufferElement> m_Elements;uint32_t m_Stride = 0;};class VertexBuffer {public:virtual~VertexBuffer() {}virtual void Bind() const = 0;virtual void UnBind() const = 0;virtual void SetData(const void* data, uint32_t size) = 0;virtual void SetLayout(const BufferLayout& layout) = 0;virtual const BufferLayout& GetLayout()const = 0;static  Ref<VertexBuffer> Create(float* vertices, uint32_t size);static  Ref<VertexBuffer> Create(uint32_t size);};/// <summary>/// 目前索引仅支持32位的索引缓冲区/// </summary>class IndexBuffer {public:virtual~IndexBuffer(){}virtual void Bind() const = 0;virtual void UnBind() const = 0;virtual uint32_t GetCount() const = 0;static  Ref<IndexBuffer> Create(uint32_t* indices, uint32_t count);};
}
Buffer.cpp:
#include"ytpch.h"
#include"Buffer.h"
#include "Renderer.h"#include "Platform/OpenGL/OpenGLBuffer.h"namespace YOTO {Ref<VertexBuffer> VertexBuffer::Create(uint32_t size){switch (Renderer::GetAPI()){case RendererAPI::API::None:YT_CORE_ASSERT(false, "Buffer:API为None不支持");return nullptr;case RendererAPI::API::OpenGL:return std::make_shared<OpenGLVertexBuffer>(size);}YT_CORE_ASSERT(false, "Buffer:未知API");return nullptr;}Ref<VertexBuffer> VertexBuffer::Create(float* vertices, uint32_t size){switch (Renderer::GetAPI()){case RendererAPI::API::None:YT_CORE_ASSERT(false,"Buffer:API为None不支持");return nullptr;case RendererAPI::API::OpenGL:return std::make_shared<OpenGLVertexBuffer>(vertices,size);}YT_CORE_ASSERT(false,"Buffer:未知API");return nullptr;}Ref<IndexBuffer> IndexBuffer::Create(uint32_t* indices, uint32_t count){switch (Renderer::GetAPI()){case RendererAPI::API::None:YT_CORE_ASSERT(false, "Buffer:API为None不支持");return nullptr;case RendererAPI::API::OpenGL:return std::make_shared < OpenGLIndexBuffer>(indices, count);}YT_CORE_ASSERT(false, "Buffer:未知API");return nullptr;}}
OpenGLBuffer.cpp: 实现继承自Buffer的方法
#include"ytpch.h"
#include"OpenGLBuffer.h"
#include <glad/glad.h>
namespace YOTO {// VertexBuffer OpenGLVertexBuffer::OpenGLVertexBuffer(uint32_t size){YT_PROFILE_FUNCTION();glCreateBuffers(1, &m_RendererID);glBindBuffer(GL_ARRAY_BUFFER, m_RendererID);glBufferData(GL_ARRAY_BUFFER, size, nullptr, GL_DYNAMIC_DRAW);}OpenGLVertexBuffer::OpenGLVertexBuffer(float* vertices, uint32_t size){	 YT_PROFILE_FUNCTION();glCreateBuffers(1, &m_RendererID);glBindBuffer(GL_ARRAY_BUFFER, m_RendererID);glBufferData(GL_ARRAY_BUFFER, size, vertices, GL_STATIC_DRAW);}OpenGLVertexBuffer::~OpenGLVertexBuffer(){YT_PROFILE_FUNCTION();glDeleteBuffers(1, &m_RendererID);}void OpenGLVertexBuffer::Bind() const{YT_PROFILE_FUNCTION();glBindBuffer(GL_ARRAY_BUFFER, m_RendererID);}void OpenGLVertexBuffer::UnBind() const{glBindBuffer(GL_ARRAY_BUFFER, 0);}void OpenGLVertexBuffer::SetData(const void* data, uint32_t size){glBindBuffer(GL_ARRAY_BUFFER, m_RendererID);// 用来更新一个已有缓冲区对象中的一部分数据,//data:一个指向新数据源的指针,将新的数据源拷贝到缓冲区对象中完成更新glBufferSubData(GL_ARRAY_BUFFER,0,size,data);}// IndexBuffer /OpenGLIndexBuffer::OpenGLIndexBuffer(uint32_t* indices, uint32_t count):m_Count(count){YT_PROFILE_FUNCTION();glCreateBuffers(1, &m_RendererID);glBindBuffer(GL_ELEMENT_ARRAY_BUFFER, m_RendererID);glBufferData(GL_ELEMENT_ARRAY_BUFFER, count*sizeof(uint32_t), indices, GL_STATIC_DRAW);}OpenGLIndexBuffer::~OpenGLIndexBuffer(){YT_PROFILE_FUNCTION();glDeleteBuffers(1, &m_RendererID);}void OpenGLIndexBuffer::Bind() const{YT_PROFILE_FUNCTION();glBindBuffer(GL_ELEMENT_ARRAY_BUFFER, m_RendererID);}void OpenGLIndexBuffer::UnBind() const{YT_PROFILE_FUNCTION();glBindBuffer(GL_ELEMENT_ARRAY_BUFFER, 0);}
}
RenderAPI.h:创建DrawIndexed方法根据索引绘制图像:
#pragma once
#include<glm/glm.hpp>
#include "VertexArray.h"
namespace YOTO {class RendererAPI{public:enum class API {None = 0,OpenGL = 1};public:virtual void Init() = 0;virtual void SetClearColor(const glm::vec4& color)=0;virtual void SetViewport(uint32_t x, uint32_t y, uint32_t width, uint32_t height) = 0;virtual void Clear() = 0;virtual void DrawIndexed(const Ref<VertexArray>& vertexArray,uint32_t indexCount = 0)=0;inline static API GetAPI() { return s_API; }private:static API s_API;};
}
OpenGLRendererAPI.cpp:
#include "ytpch.h"
#include "OpenGLRendererAPI.h"
#include <glad/glad.h>
namespace YOTO {void OpenGLRendererAPI::Init(){YT_PROFILE_FUNCTION();//启用混合glEnable(GL_BLEND);//设置混合函数glBlendFunc(GL_SRC_ALPHA,GL_ONE_MINUS_SRC_ALPHA);//深度测试glEnable(GL_DEPTH_TEST);}void OpenGLRendererAPI::SetViewport(uint32_t x, uint32_t y, uint32_t width, uint32_t height){glViewport(x, y, width, height);}void OpenGLRendererAPI::SetClearColor(const glm::vec4& color){glClearColor(color.r, color.g, color.b, color.a);}void OpenGLRendererAPI::Clear(){glClear(GL_COLOR_BUFFER_BIT | GL_DEPTH_BUFFER_BIT);}void OpenGLRendererAPI::DrawIndexed(const Ref<VertexArray>& vertexArray, uint32_t indexCount){uint32_t count = indexCount ? vertexArray->GetIndexBuffer()->GetCount() : indexCount;glDrawElements(GL_TRIANGLES, count, GL_UNSIGNED_INT, nullptr);glBindTexture(GL_TEXTURE_2D, 0);}
}
RenderCommand.h: 对API的DrawIndexed封装:
#pragma once
#include"RendererAPI.h"
namespace YOTO {class RenderCommand{public:inline static void Init() {s_RendererAPI->Init();}inline static void SetViewport(uint32_t x, uint32_t y, uint32_t width, uint32_t height) {s_RendererAPI->SetViewport(x,y,width,height);}inline static void SetClearColor(const glm::vec4& color) {s_RendererAPI->SetClearColor(color);}inline static void Clear() {s_RendererAPI->Clear();}inline static void DrawIndexed(const Ref<VertexArray>& vertexArray,uint32_t count=0) {s_RendererAPI->DrawIndexed(vertexArray, count);}private:static RendererAPI* s_RendererAPI;};}
调用:
Texture.glsl:先改下shader
#type vertex
#version 330 corelayout(location = 0) in vec3 a_Position;
layout(location = 1) in vec4 a_Color;
layout(location = 2) in vec2 a_TexCoord;uniform mat4 u_ViewProjection;
// uniform mat4 u_Transform;out vec4 v_Color;
out vec2 v_TexCoord;void main() {v_Color = a_Color;v_TexCoord = a_TexCoord;// 由规则动态生成的顶点位置(基于本地空间)没有涉及transform变换顶点位置// gl_Position = u_ViewProjection * u_Transform * vec4(a_Position, 1.0); gl_Position = u_ViewProjection * vec4(a_Position, 1.0);
}
#type fragment
#version 330 corelayout(location = 0) out vec4 color;in vec4 v_Color;
in vec2 v_TexCoord;uniform vec4 u_Color;
uniform float u_TilingFactor;uniform sampler2D u_Texture;void main() {color = v_Color;
}
Sandbox2D.cpp:
#include "Sandbox2D.h"
#include <imgui/imgui.h>
#include <glm/gtc/matrix_transform.hpp>
//#include <Platform/OpenGL/OpenGLShader.h>
#include <glm/gtc/type_ptr.hpp>
#include<vector>
#include<chrono>
template<typename Fn>
class Timer {
public:Timer(const char* name, Fn&&func):m_Name(name),m_Func(func),m_Stopped(false){m_StartTimepoint = std::chrono::high_resolution_clock::now();}~Timer() {if (!m_Stopped) {Stop();}}void Stop() {auto endTimepoint= std::chrono::high_resolution_clock::now();long long start = std::chrono::time_point_cast<std::chrono::microseconds>(m_StartTimepoint).time_since_epoch().count();long long end = std::chrono::time_point_cast<std::chrono::microseconds>(endTimepoint).time_since_epoch().count();m_Stopped = true;float duration = (end - start)*0.001f;m_Func({m_Name,duration});//std::cout << "Timer:"<< m_Name << "时差:" << duration << "ms" << std::endl;}
private:const char* m_Name;std::chrono::time_point<std::chrono::steady_clock>m_StartTimepoint;bool m_Stopped;Fn m_Func;
};
//未找到匹配的重载:auto的问题,改回原来的类型就好了
#define PROFILE_SCOPE(name) Timer timer##__LINE__(name,[&](ProfileResult profileResult) {m_ProfileResults.push_back(profileResult);})
Sandbox2D::Sandbox2D()
:Layer("Sandbox2D"), m_CameraController(1280.0f / 720.0f, true)
{
}
void Sandbox2D::OnAttach()
{YT_PROFILE_FUNCTION();m_CheckerboardTexture = YOTO::Texture2D::Create("assets/textures/Checkerboard.png");}
void Sandbox2D::OnDetach()
{YT_PROFILE_FUNCTION();
}void Sandbox2D::OnUpdate(YOTO::Timestep ts)
{YT_PROFILE_FUNCTION();//updatem_CameraController.OnUpdate(ts);{YT_PROFILE_SCOPE("Sandbox2D::Renderer Prep");//RenderYOTO::RenderCommand::SetClearColor({ 0.2f, 0.2f, 0.2f, 1.0f });YOTO::RenderCommand::Clear();}{YT_PROFILE_SCOPE("Sandbox2D::Renderer Draw");YOTO::Renderer2D::BeginScene(m_CameraController.GetCamera());{/*		static glm::mat4 scale = glm::scale(glm::mat4(1.0f), glm::vec3(0.1f));glm::vec4  redColor(0.8f, 0.3f, 0.3f, 1.0f);glm::vec4  blueColor(0.2f, 0.3f, 0.8f, 1.0f);*//*std::dynamic_pointer_cast<YOTO::OpenGLShader>(m_FlatColorShader)->Bind();std::dynamic_pointer_cast<YOTO::OpenGLShader>(m_FlatColorShader)->UploadUniformFloat4("u_Color", m_SquareColor);YOTO::Renderer::Submit(m_FlatColorShader, m_SquareVA, glm::scale(glm::mat4(1.0f), glm::vec3(1.5f)));*///	YOTO::Renderer2D::DrawRotatedQuad({ -1.0f,0.0f }, { 0.8f,0.8f }, glm::radians(45.0f),{ 0.8f,0.2f,0.3f,1.0f });YOTO::Renderer2D::DrawQuad({ -1.0f,0.0f }, { 0.8f,0.8f }, { 0.8f,0.2f,0.3f,1.0f });YOTO::Renderer2D::DrawQuad({ 0.5f,-0.5f }, { 0.5f,0.75f }, { 0.2f,0.3f,0.8f,1.0f });//YOTO::Renderer2D::DrawQuad({ 0.0f,0.0f,-0.1f }, { 10.0f,10.0f }, m_CheckerboardTexture,10.0f,glm::vec4(1.0f,0.9f,0.9f,1.0f));YOTO::Renderer2D::EndScene();}}}
void Sandbox2D::OnImGuiRender()
{YT_PROFILE_FUNCTION();ImGui::Begin("Setting");ImGui::ColorEdit4("Color", glm::value_ptr(m_SquareColor));for (auto& res : m_ProfileResults) {char lable[50];strcpy(lable, "%.3fms  ");strcat(lable, res.Name);ImGui::Text(lable, res.Time);}m_ProfileResults.clear();ImGui::End();
}void Sandbox2D::OnEvent(YOTO::Event& e)
{YT_PROFILE_FUNCTION();m_CameraController.OnEvent(e);
}
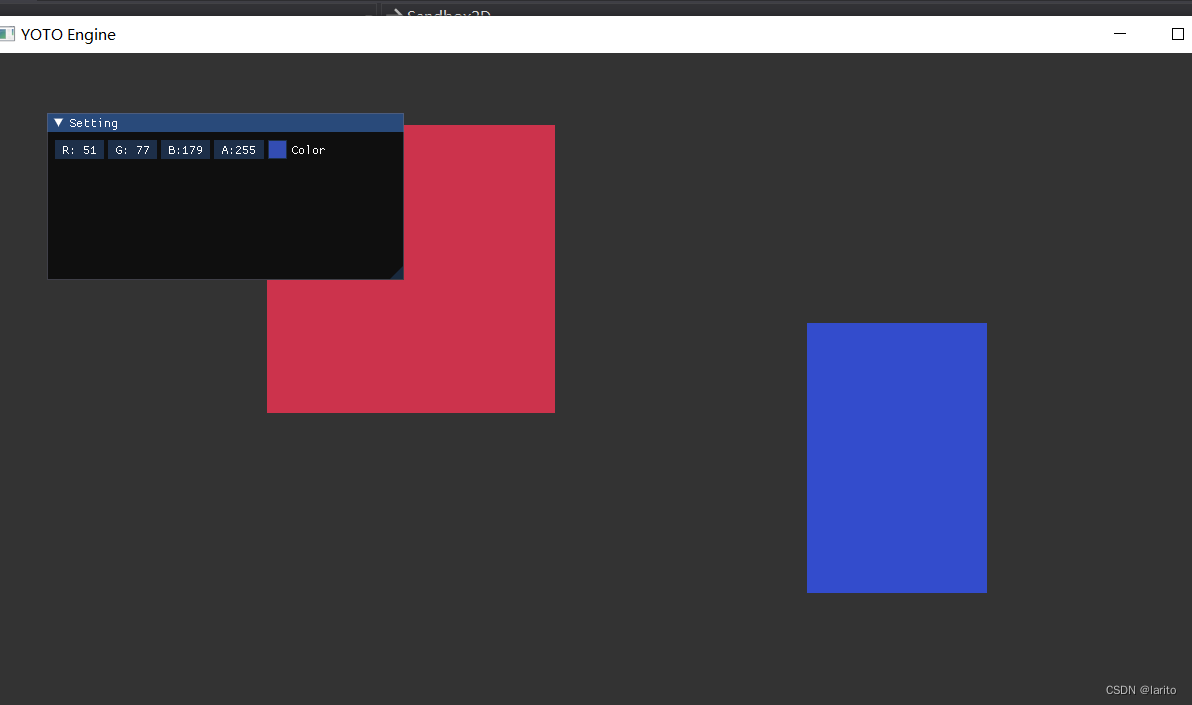
cool!
这篇关于跟着cherno手搓游戏引擎【29】Batch简单合批的文章就介绍到这儿,希望我们推荐的文章对编程师们有所帮助!


