首页设计分析:
在上一次https://www.cnblogs.com/webor2006/p/13661960.html已经用node搭建好了后台接口的环境了,接下来则来开始实现首页页面,它也是电商里面最最核心的页面,当然也是比较复杂的,在正式撸码之前先来对整个首页的功能有一个大体的印象,其实也就是分几大区域:
广告轮播图区:

商品分类区:

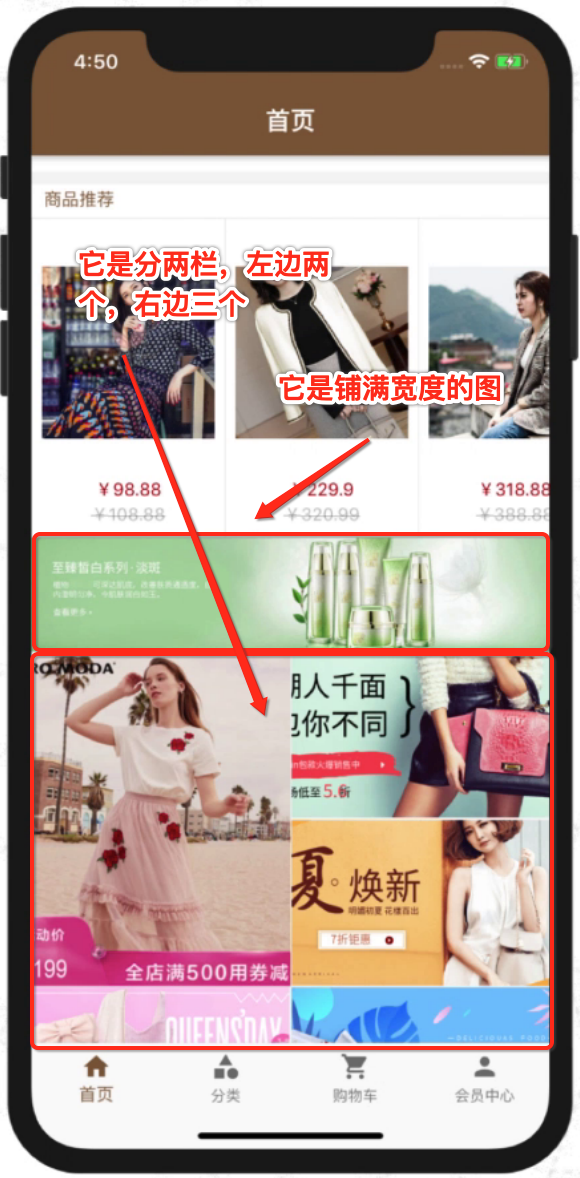
商品推荐及广告:

其中商品推荐栏是可以左右滑动的:

而下面的图片广告则是有两种展现形式:
火爆专区:

当然这块还需要有上拉加载下一页的常用功能,总的来看用一个Flutter来搭建这么复杂的列表页还是有些小难度的,当然也能学到很多知识的,期待实现的那一天~~
数据准备:
接一下则开始撸码了, 这里先来准备首页需要的后台API数据,先来回忆一下上次搭建的node后台环境的代码结构:
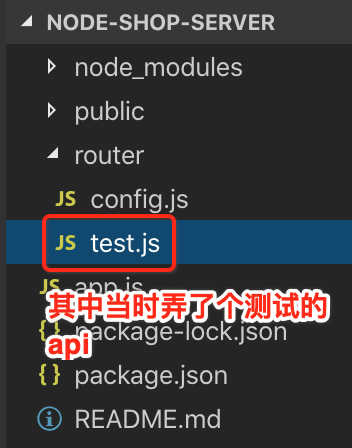
它的测试数据如下:
const express = require("express");
const router = express();
const config = require("./config");
const base_url = "http://" + config.IP + ":" + config.PORT + "/images/banner/";router.get("/",(req,res) => {var id = req.query.id;console.log("传递过来的参数测试:id = " + id);var data = {"code":"0","message":"success","data":[{"image": base_url + "1.jpeg",},{"image": base_url + "2.jpeg",},{"image": base_url + "3.jpeg",},]};res.send(data);});module.exports = router;
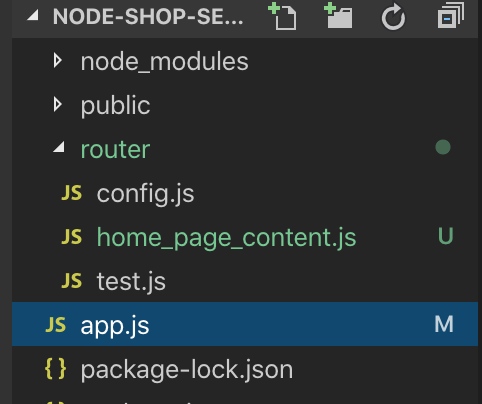
这里可以直接copy一个用来准备首页数据的准备:

然后改吧改吧,没啥可说的,整个数据如下:
const express = require("express");
const router = express();
const config = require("./config");
const base_url = "http://" + config.IP + ":" + config.PORT + "/images/";
const category_url = "http://" + config.IP + ":" + config.PORT + "/images/category/";router.get("/",(req,res) => {var data = {"code":"0","message":"success","data":{//banner轮播图片"slides": [{"image": base_url + "banner/1.jpeg","goodsId": "001"}, {"image": base_url + "banner/2.jpeg","goodsId": "002"},{"image": base_url + "banner/3.jpeg","goodsId": "003"},{"image": base_url + "banner/4.jpeg","goodsId": "004"},],//商品推荐上层"recommend": [{"name": "法国代购新款江疏影同款翻领修身中长裙春夏印花连衣裙","image": base_url + "goods/001/cover.jpg","presentPrice": 98.88,"goodsId": "001","oriPrice": 108.88}, {"name": "柔美而精致~高贵而优雅~圆领金银丝春季毛衣羊毛开衫女短款白外套","image": base_url + "goods/002/cover.jpg","presentPrice": 229.90,"goodsId": "002","oriPrice": 320.99}, {"name": "明星同款高端西服2019春装新款韩版英伦风短款格子小西装女外套潮","image": base_url + "goods/003/cover.jpg","presentPrice": 318.88,"goodsId": "003","oriPrice": 388.88}, {"name": "复古廓形机车进口绵羊皮衣真皮外套女E142","image": base_url + "goods/004/cover.jpg","presentPrice": 238.99,"goodsId": "004","oriPrice": 248.99}, {"name": "单排扣高腰牛仔裤女春夏薄款紧身弹力小脚裤显瘦百搭网红浅色长裤","image": base_url + "goods/005/cover.jpg","presentPrice": 588.99,"goodsId": "005","oriPrice": 888.88}, {"name": "MIUCO女装夏季重工星星烫钻圆领短袖宽松显瘦百搭T恤上衣k","image": base_url + "goods/006/cover.jpg","presentPrice": 1028.88,"goodsId": "006","oriPrice": 1888.88}, {"name": "春夏一步裙包臀裙开叉弹力修身显瘦短裙黑色高腰职业半身裙","image": base_url + "goods/007/cover.jpg","presentPrice": 2388.66,"goodsId": "007","oriPrice": 2888.88}, {"name": "夏季新款短袖圆领紧身小黑超短裙开叉包臀性感连衣裙夜店女装","image": base_url + "goods/008/cover.jpg","presentPrice": 666.88,"goodsId": "008","oriPrice": 888.88}, ],//商品中间广告"floor1Pic": {"PICTURE_ADDRESS": base_url + "advert/ad02.png","TO_PLACE": "4"},//商品推荐底部"floor1": [{"image": base_url + "floor/1.png","goodsId": "001"}, {"image": base_url + "floor/2.png","goodsId": "002"}, {"image": base_url + "floor/3.png","goodsId": "003"}, {"image": base_url + "floor/4.png","goodsId": "004"}, {"image": base_url + "floor/5.png","goodsId": "005"}],"category": [ {"firstCategoryId": "1","firstCategoryName": "毛衣","secondCategoryVO": [{"secondCategoryId": "11","firstCategoryId": "1","secondCategoryName": "羊绒","comments": ""}, ],"comments": null,"image": category_url + "1.png"}, {"firstCategoryId": "2","firstCategoryName": "西服","secondCategoryVO": [{"secondCategoryId": "21","firstCategoryId": "2","secondCategoryName": "小西服","comments": ""}, {"secondCategoryId": "22","firstCategoryId": "2","secondCategoryName": "职业装","comments": ""}, ],"comments": null,"image": category_url + "2.png"}, {"firstCategoryId": "3","firstCategoryName": "皮衣","secondCategoryVO": [{"secondCategoryId": "31","firstCategoryId": "3","secondCategoryName": "真皮皮衣","comments": ""}, {"secondCategoryId": "32","firstCategoryId": "3","secondCategoryName": "仿皮皮衣","comments": ""}],"comments": null,"image": category_url + "3.png"},{"firstCategoryId": "4","firstCategoryName": "连衣裙","secondCategoryVO": [{"secondCategoryId": "41","firstCategoryId": "4","secondCategoryName": "半身裙","comments": ""}, {"secondCategoryId": "42","firstCategoryId": "4","secondCategoryName": "打底裙","comments": ""}, ],"comments": null,"image": category_url + "4.png"}, {"firstCategoryId": "5","firstCategoryName": "牛仔裤","secondCategoryVO": [{"secondCategoryId": "51","firstCategoryId": "5","secondCategoryName": "阔腿牛仔裤","comments": ""}, {"secondCategoryId": "52","firstCategoryId": "5","secondCategoryName": "紧身牛仔裤","comments": ""}],"comments": null,"image": category_url + "5.png"}, {"firstCategoryId": "6","firstCategoryName": "T恤","secondCategoryVO": [{"secondCategoryId": "61","firstCategoryId": "6","secondCategoryName": "印花T恤","comments": ""}, {"secondCategoryId": "62","firstCategoryId": "6","secondCategoryName": "字母T恤","comments": ""}, ],"comments": null,"image": category_url + "6.png"}, {"firstCategoryId": "7","firstCategoryName": "运动装","secondCategoryVO": [{"secondCategoryId": "71","firstCategoryId": "7","secondCategoryName": "春季运动装","comments": ""}, {"secondCategoryId": "72","firstCategoryId": "7","secondCategoryName": "秋季运动装","comments": ""}, ],"comments": null,"image": category_url + "7.png"}, {"firstCategoryId": "8","firstCategoryName": "短裙","secondCategoryVO": [{"secondCategoryId": "81","firstCategoryId": "8","secondCategoryName": "宽松","comments": ""}, {"secondCategoryId": "82","firstCategoryId": "8","secondCategoryName": "包臀","comments": ""}, ],"comments": null,"image": category_url + "8.png"}, {"firstCategoryId": "9","firstCategoryName": "礼服","secondCategoryVO": [{"secondCategoryId": "91","firstCategoryId": "9","secondCategoryName": "晚礼服","comments": ""}, {"secondCategoryId": "92","firstCategoryId": "9","secondCategoryName": "婚纱","comments": ""}, ],"comments": null,"image": category_url + "9.png"}, {"firstCategoryId": "10","firstCategoryName": "风衣","secondCategoryVO": [{"secondCategoryId": "101","firstCategoryId": "10","secondCategoryName": "中长款","comments": ""}, {"secondCategoryId": "102","firstCategoryId": "10","secondCategoryName": "长款","comments": ""}, ],"comments": null,"image": category_url + "10.png"}, ],}};res.send(data);});module.exports = router;
关于具体的数据咋用等到时开发到了再来细看,然后再到app.js中配置一下接口对应的路由路径,如下:
const express = require("express");
const path = require("path");
const app = express();app.use(express.static(path.resolve(__dirname, "public")));app.use(function(req, res, next) {const proxy = req.query.proxy;if(proxy) {req.header.cookie = req.header.cookie + `__proxy__${proxy}`;}next();
});//获取数据 路由到不同的数据接口
app.use("/getTestData",require("./router/test"));
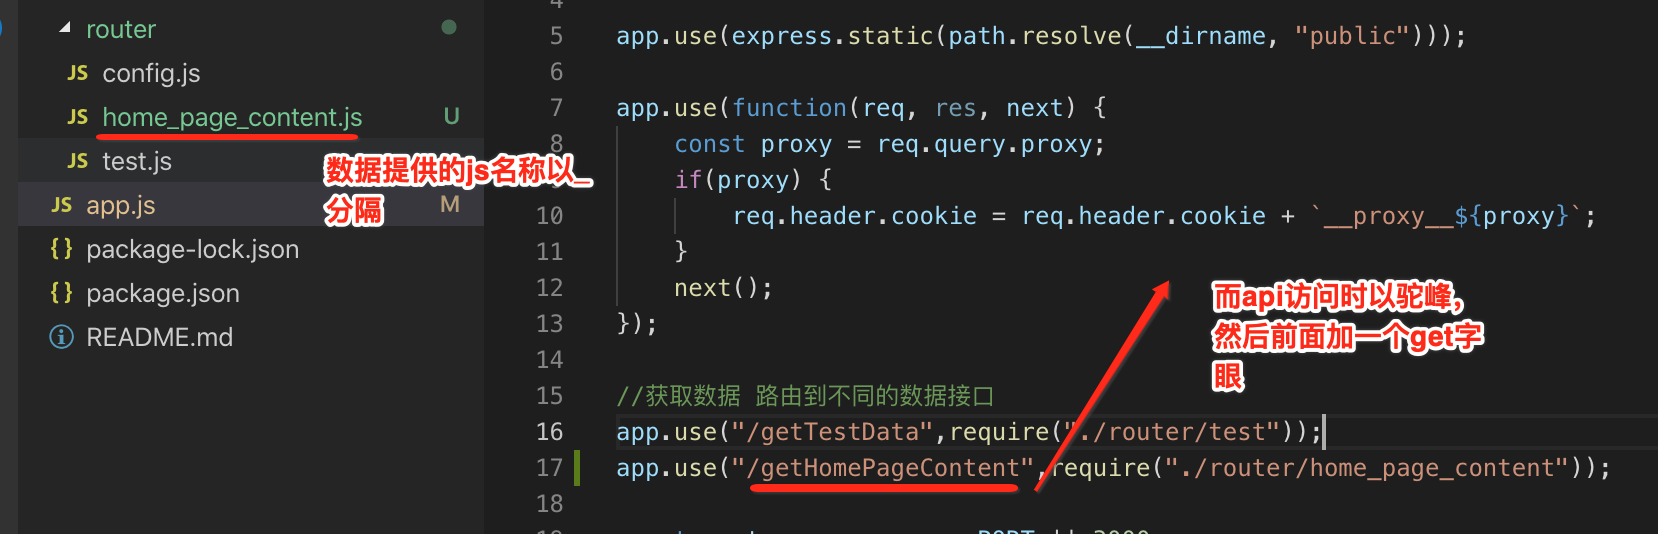
app.use("/getHomePageContent",require("./router/home_page_content"));const port = process.env.PORT || 3000;
app.listen(port, ()=>{console.log(`server running @http://localhost:${port}`);
})module.exports = app;
其中有个命名的约定:
此时咱们重启一下node服务,访问一下看是否api一切ok?

嗯,妥妥的~~
Dio请求处理:
这是干嘛的?
先来上官方https://pub.dev/packages/dio了解一下这个库:

它的简单用法看一下:

就是一个网络开源库~~
使用它:
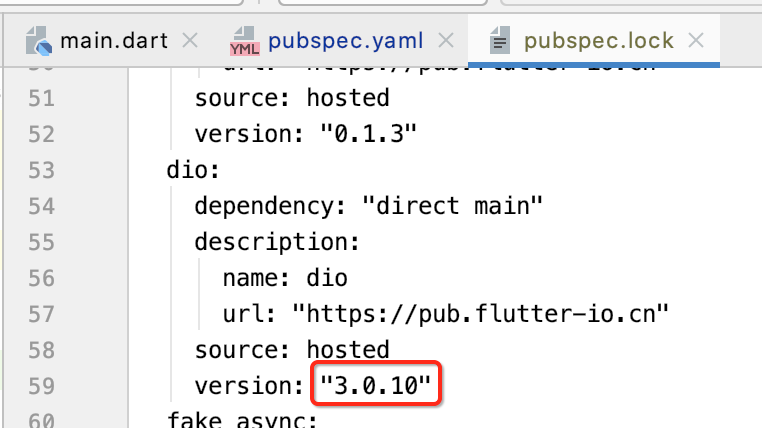
先到Flutter项目中增加它的依赖,这里有个小技巧,在添加依赖时不需要知道具体版本,先这样添加:

然后此时到它的.lock文件中就可以看到具体版本了:

封装网络请求:
接下来用它来封装一下网络请求,这里封装到这个文件:

该请求肯定是异步的,所以得用async..await:
Future request(url, {formData}) async {try {//TODO} catch (e) {//TODO}
}
其中有个Dart的小语法提示一下:

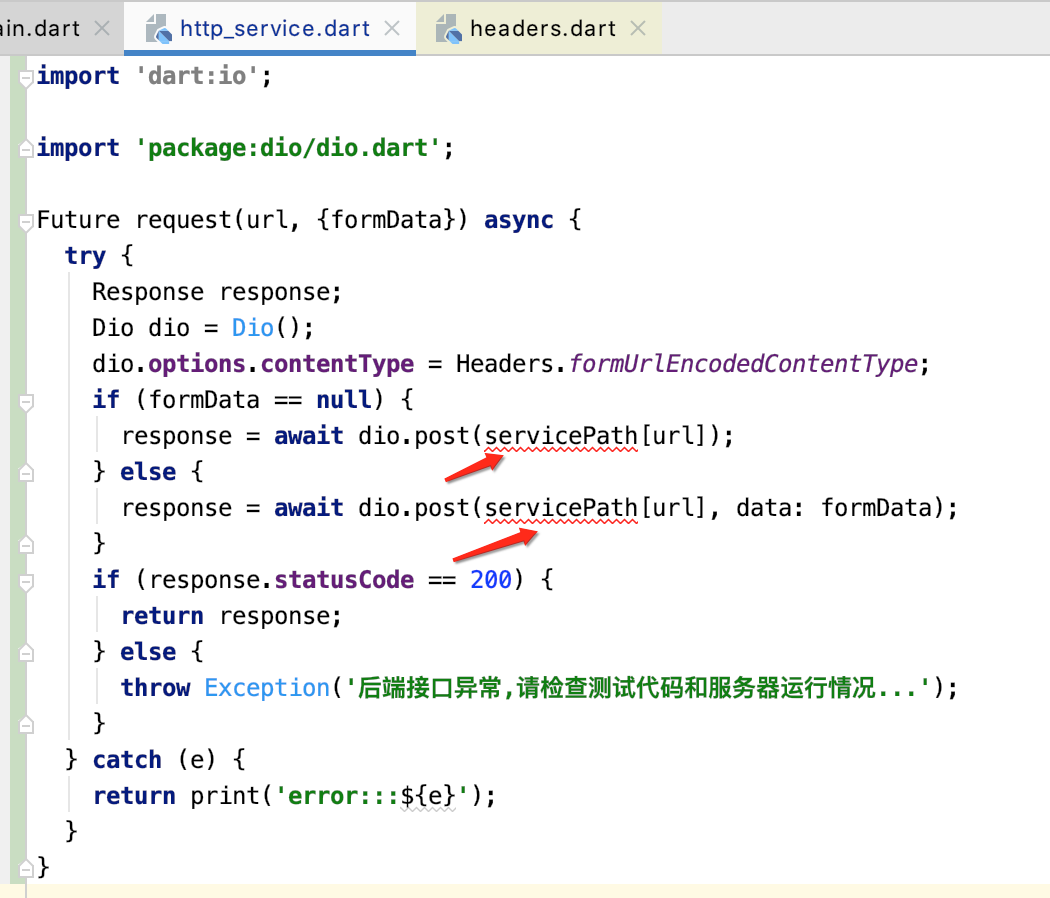
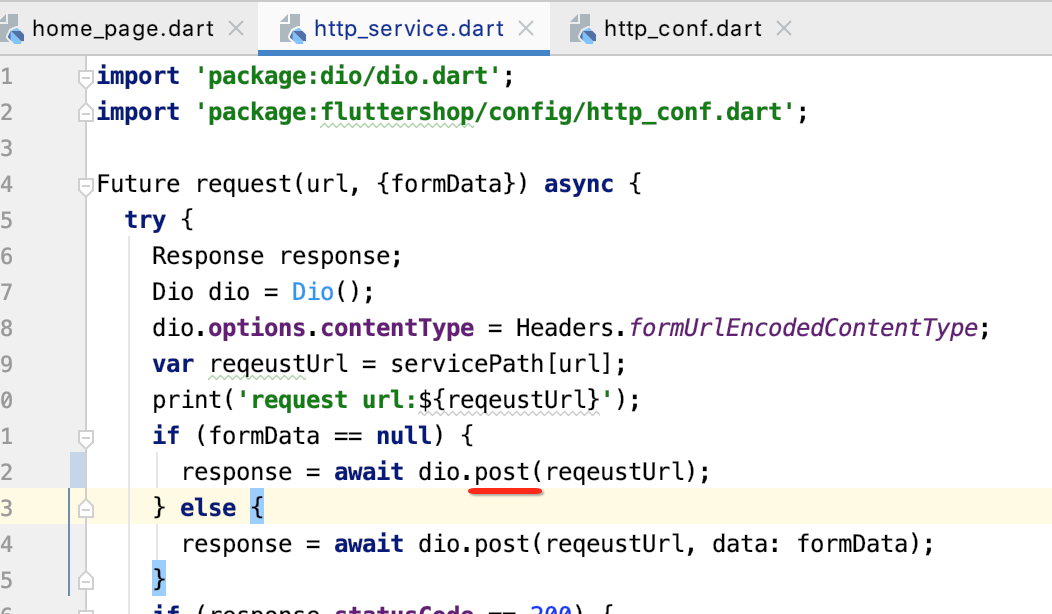
接下来则用Dio来实现一下:
import 'dart:io';import 'package:dio/dio.dart';Future request(url, {formData}) async {try {Response response;Dio dio = Dio();dio.options.contentType = Headers.formUrlEncodedContentType;if (formData == null) {response = await dio.post(servicePath[url]);} else {response = await dio.post(servicePath[url], data: formData);}if (response.statusCode == 200) {return response;} else {throw Exception('后端接口异常,请检查测试代码和服务器运行情况...');}} catch (e) {return print('error:::${e}');}
}
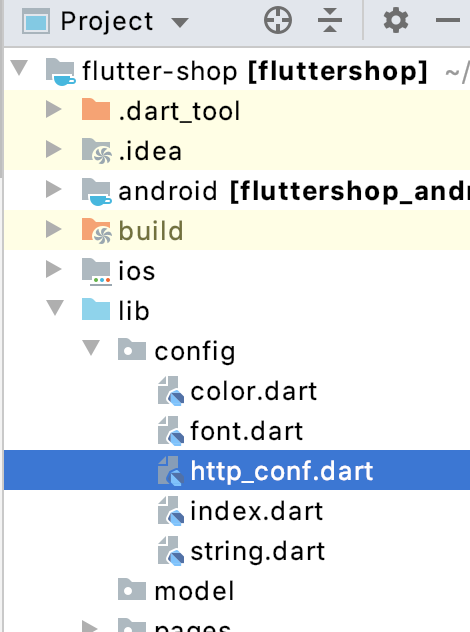
其中这块需要配置一下:
接口配置:
为啥在网络请求封装逻辑中要接口配置一下而非直接使用url,统一管理,另外也方便调用,具体如下:
const base_url = 'http://192.168.0.105:3000/';
const servicePath = {'homePageContext': base_url + 'getHomePageContent', //首页数据'getHotGoods': base_url + 'getHotGoods', //火爆专区'getCategory': base_url + 'getCategory', //商品类别信息'getCategoryGoods': base_url + 'getCategoryGoods', //商品分类别的商品列表'getGoodDetail': base_url + 'getGoodDetail', //商品详细信息
};
这里先提前定义未来用到后个URL配置,另外再回到咱们的网络封装文件中导一下包既可:

请求首页数据:
接下来则来发起首页数据的请求,先来回忆一下目前首页的代码:
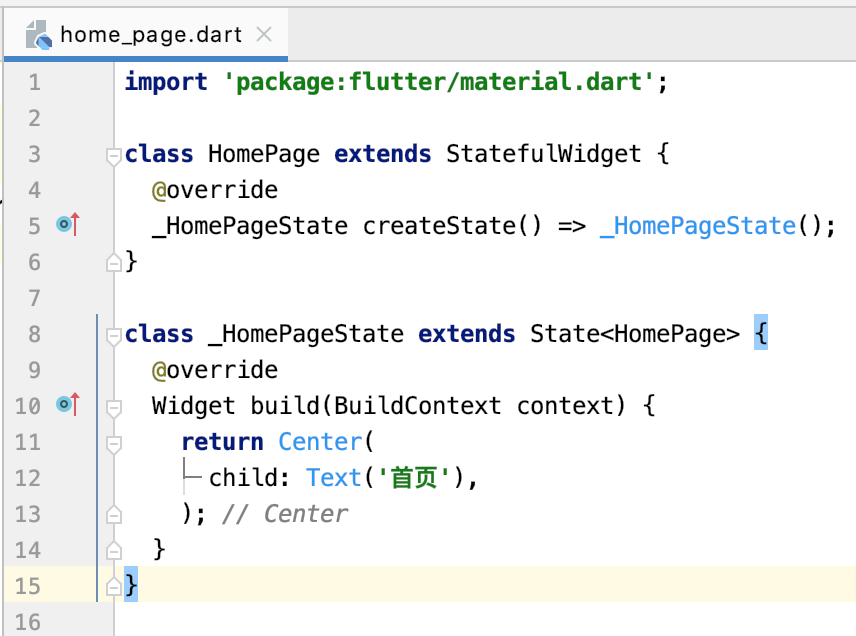
这里需要替换成脚手架的Widget,而不能用Center了:

接下来则可以发起数据请求了,此时需要用到FutureBuilder了,之前已经用过了https://www.cnblogs.com/webor2006/p/13336013.html,它可以防止重绘,而使用也很简单,如该类名一下,先定义future,然后再定义builder,对于future的定义当然就是直接请求网络了喽,如下:
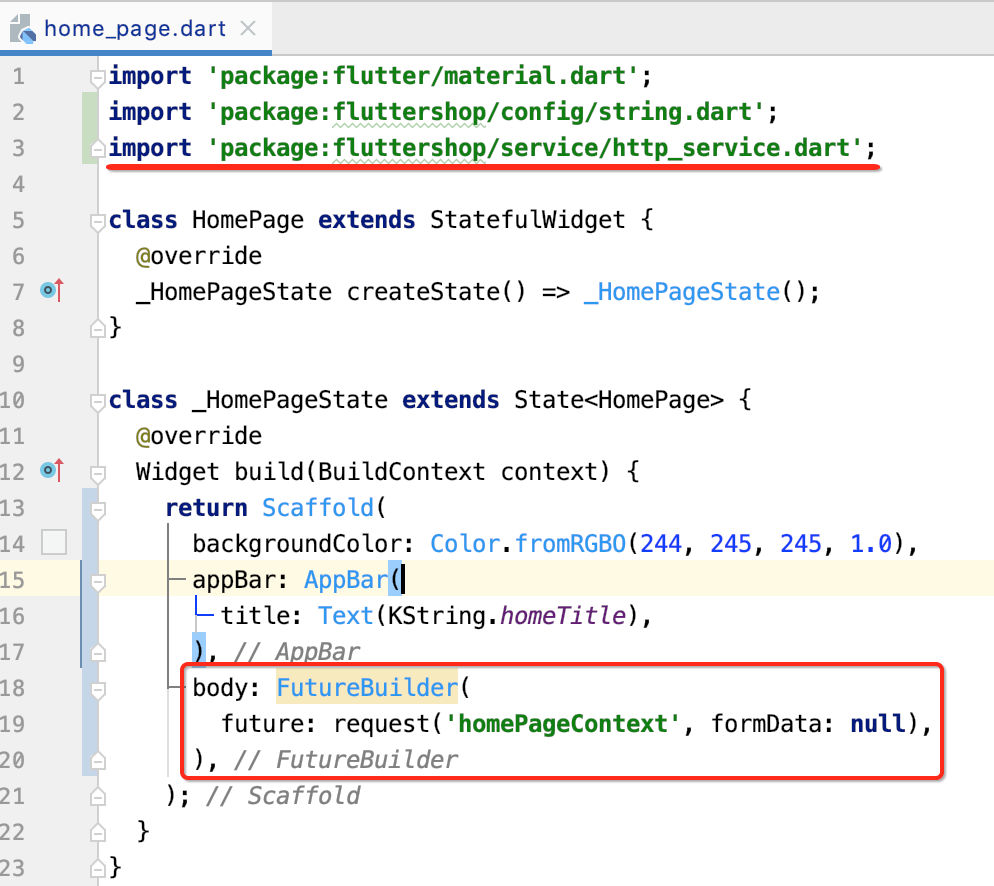
而builder很显然就可以获取请求数据的结果然后做相应的结果处理了:
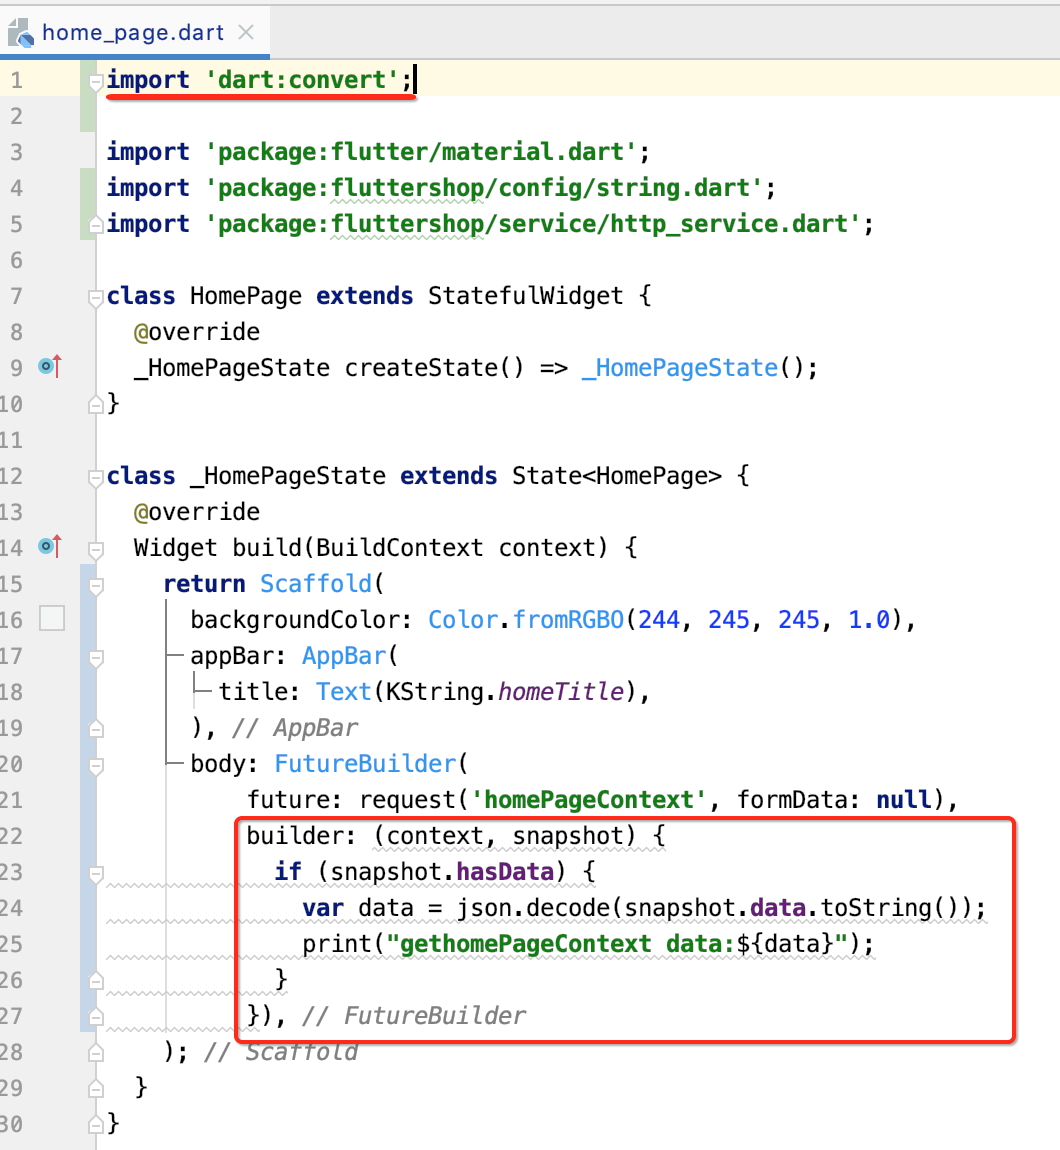
下面运行看一下能否成功请求到首页的数据,发现报错了:

原因是对于FutureBuilder是需要返回一个Widget的,所以修改一下代码:

再来运行:
I/flutter (26841): error:::DioError [DioErrorType.RESPONSE]: Http status error [404]
抛异常了,咱会404呢,咱们打印一下请求的url看有木有问题:

运行:
2020-11-13 09:18:38.683 26841-26892/com.fluttershop I/flutter: request url:http://192.168.31.188:3000/getHomePageContent
2020-11-13 09:18:38.932 26841-26892/com.fluttershop I/flutter: error:::DioError [DioErrorType.RESPONSE]: Http status error [404]
【提示】:貌似看着ip变了,是因为此时已经从家里换到公司了,所以ip变了~~
貌似这个地址没啥问题呢,用浏览器访问一下:

其实换成get就成了:

再运行:

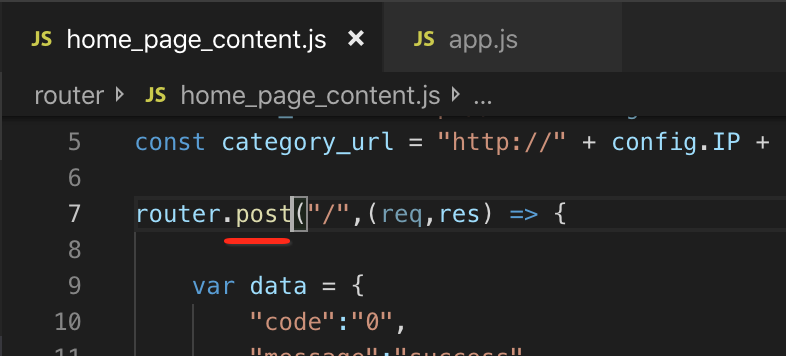
这是为啥呢?咱们就是要post,其实是node接口写成get了,如下:

将其改成post:
重新一下node,还是将flutter中的http_service还原成post:
此时就不能用get请求了:

再运行就一切正常啦~~
数据解析:
有了请求数据之后,接下来则需要将json解析成实体,供界面的渲染用,比较简单,直接贴出来了:
保持状态处理:
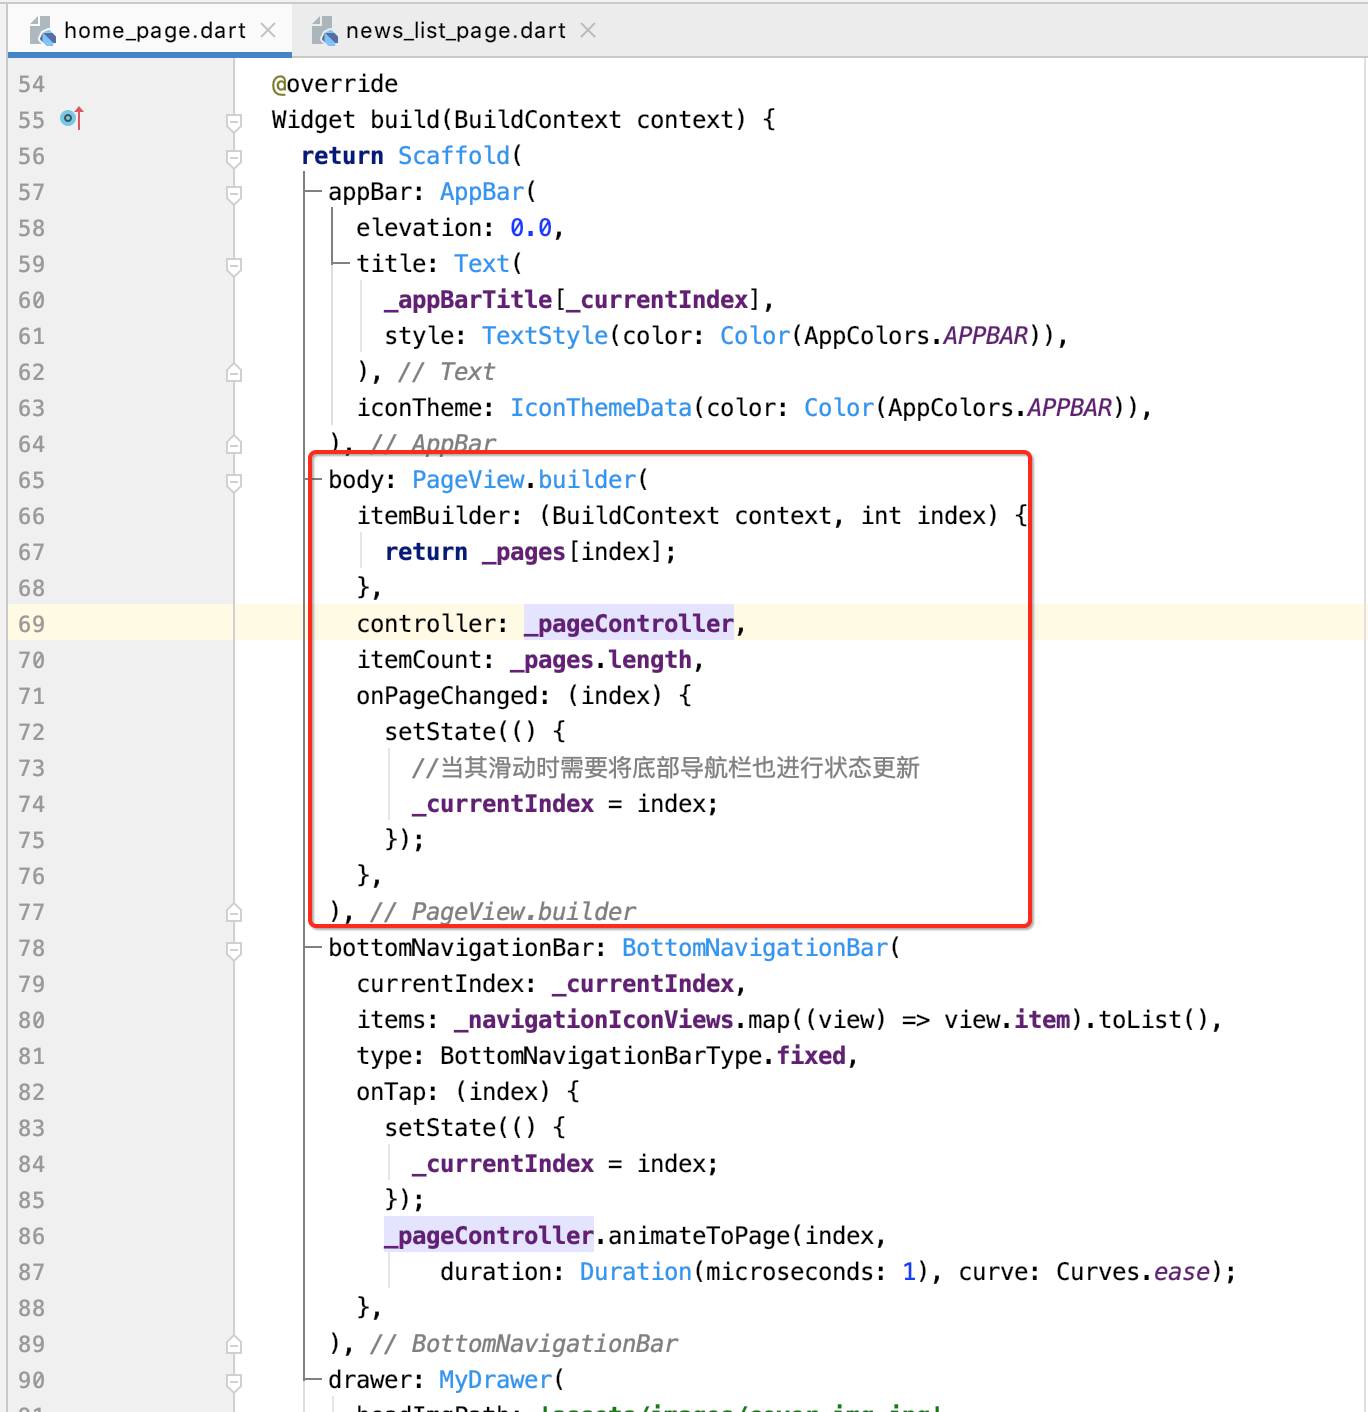
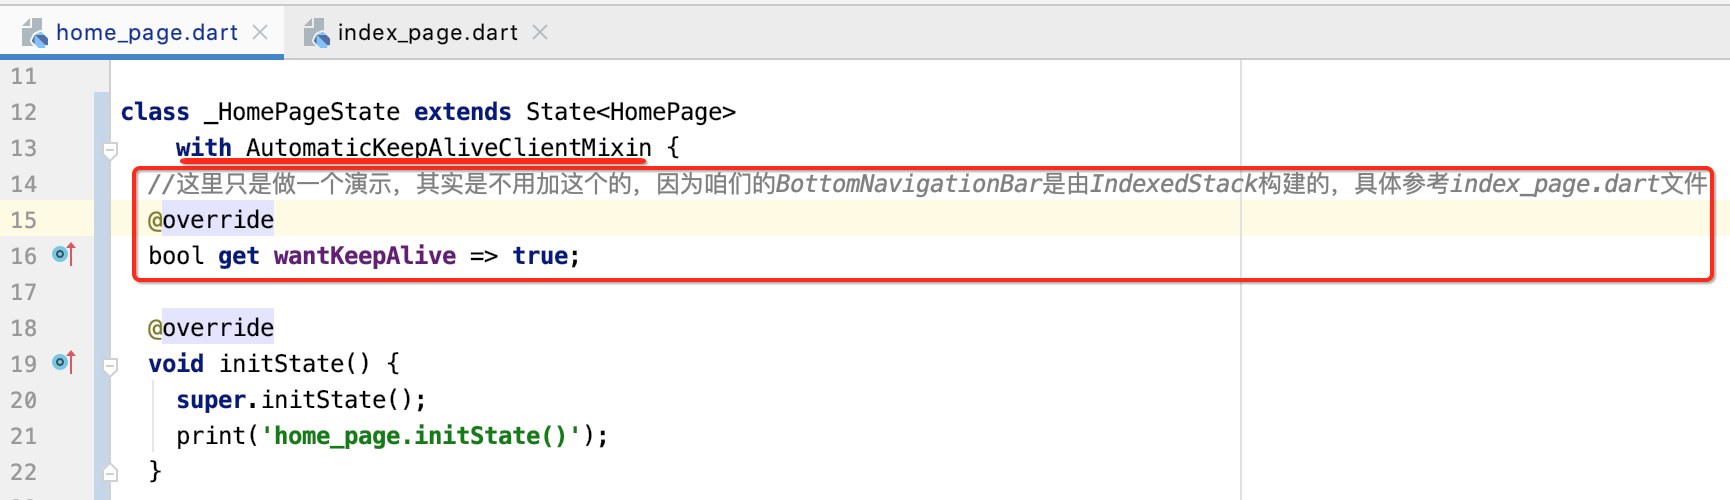
数据解析一切就绪之后,接下来照理就来处理界面的渲染了,但是!!!这个先暂缓一下,因为有个知识点需要道出来,就是标题所示,它说的是啥意思呢?咱们目前底部的Tab使用的是BottomNavigationBar控件,而对于使用过它的可能知道它会有一个切换重绘的问题,具体可以参考网上这篇文章https://www.jianshu.com/p/4930fde7efa2,但是!!!咱们这其实是不会重绘的,因为在构建bottom的时候使用的是它:

不信的话可以在首页的这个生命周期上打印一个日志:

只要在每次切换如果都回调了此方法证明肯定重绘了,很明显结果是只会绘一次,在tab切出去再切回来时是不会再次执行这个生命周期的,那没问题提出来干嘛?是因为有可能在实现Tab效果时会这样用:
上面截图的这代码是之前https://www.cnblogs.com/webor2006/p/12879031.html学习Flutter做的一个小项目, 这种情况下就会导致每次切换都会执行initState()造成页面重绘了,效果如下:
而解决办法两个,如博主所说:
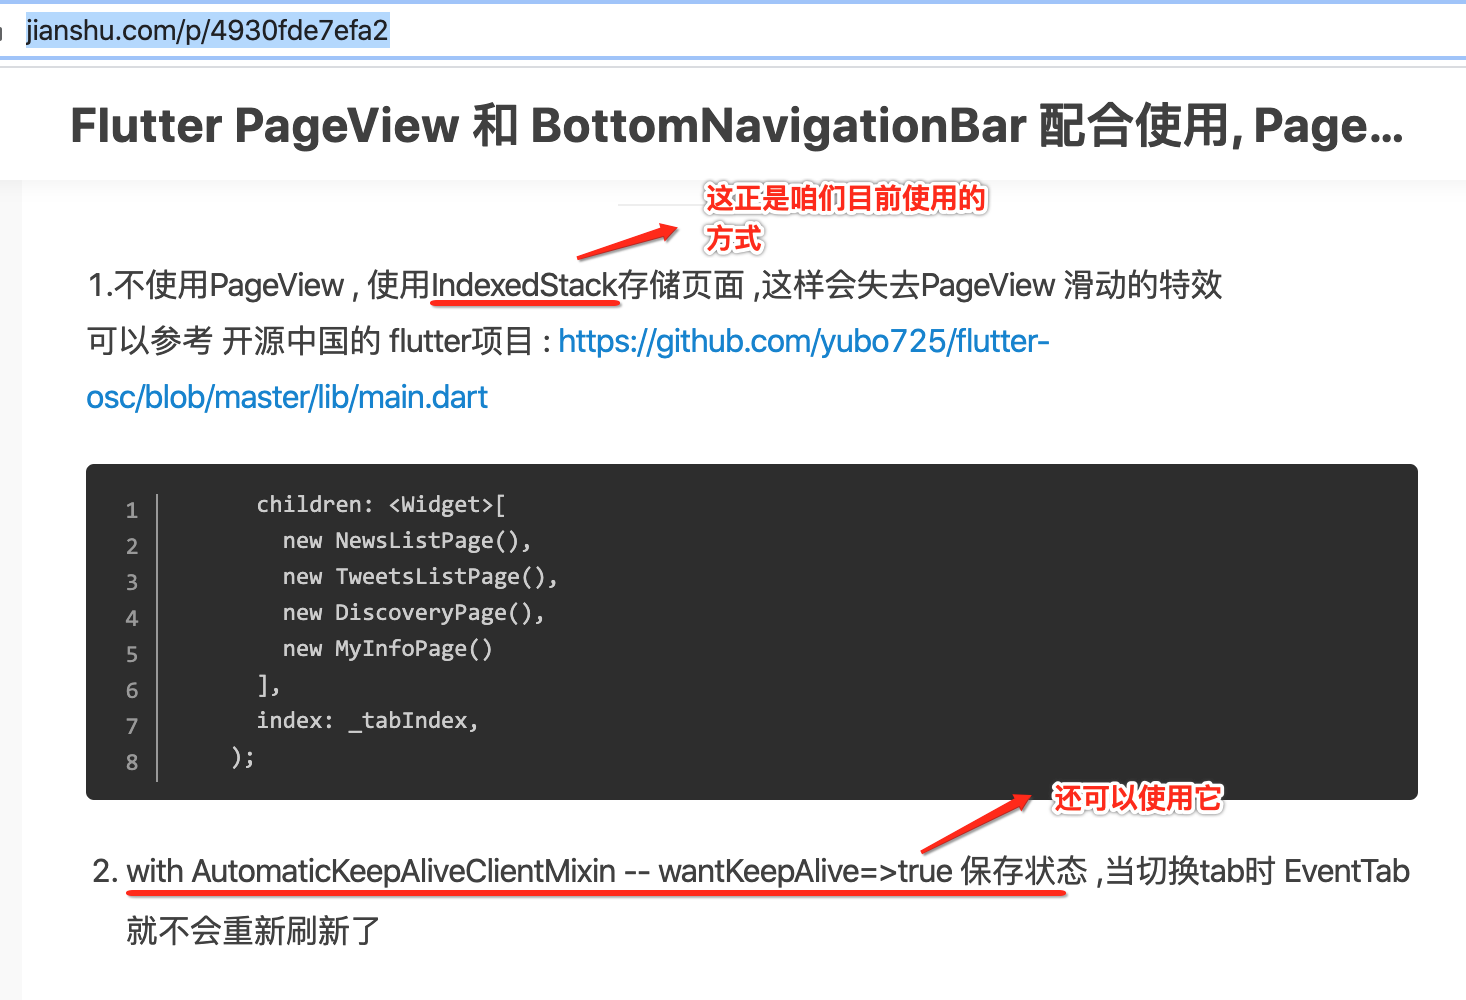
回到咱们这个首页,如果用第二种解决方法则就是这样写的:
另外还有一个Flutter语法,就是啥是Mixin呢?这里可以参考https://www.cnblogs.com/webor2006/p/11981709.html,
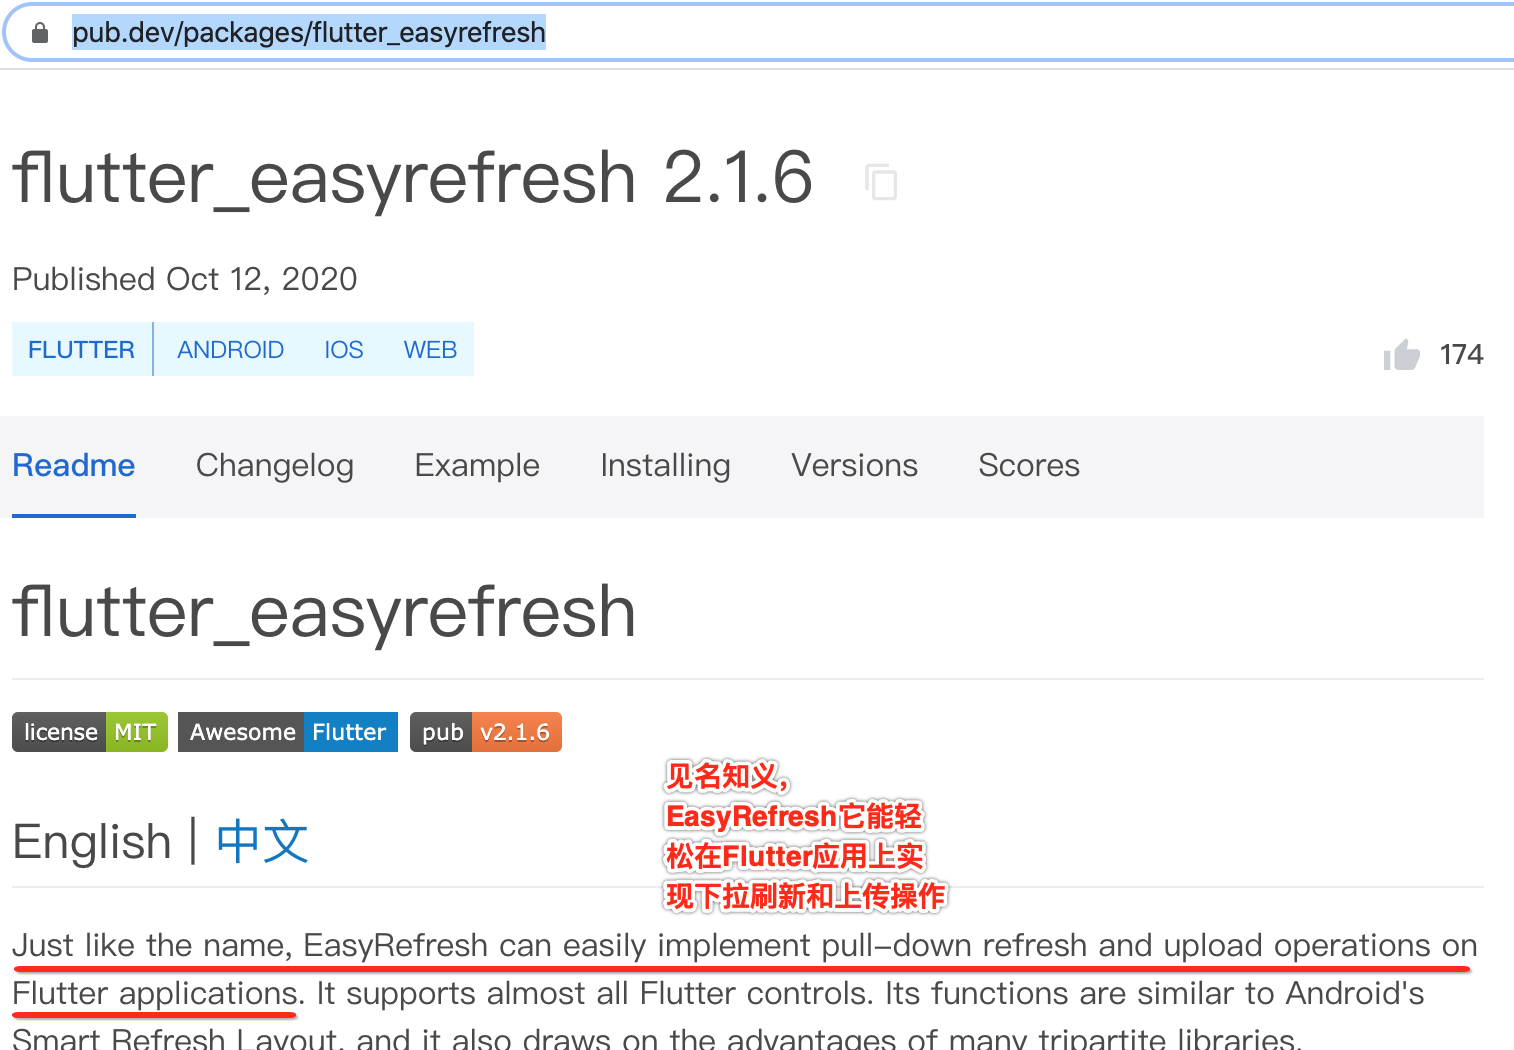
EasyRefresh刷新处理:
了解:
对于首页需要有上拉加载与下拉刷新的功能,如果是Android里面实现有经典的PullToRefresh来实现,类似的这里可以用EasyRefresh,先来了解一下它https://pub.dev/packages/flutter_easyrefresh:
使用:
先添加依赖:

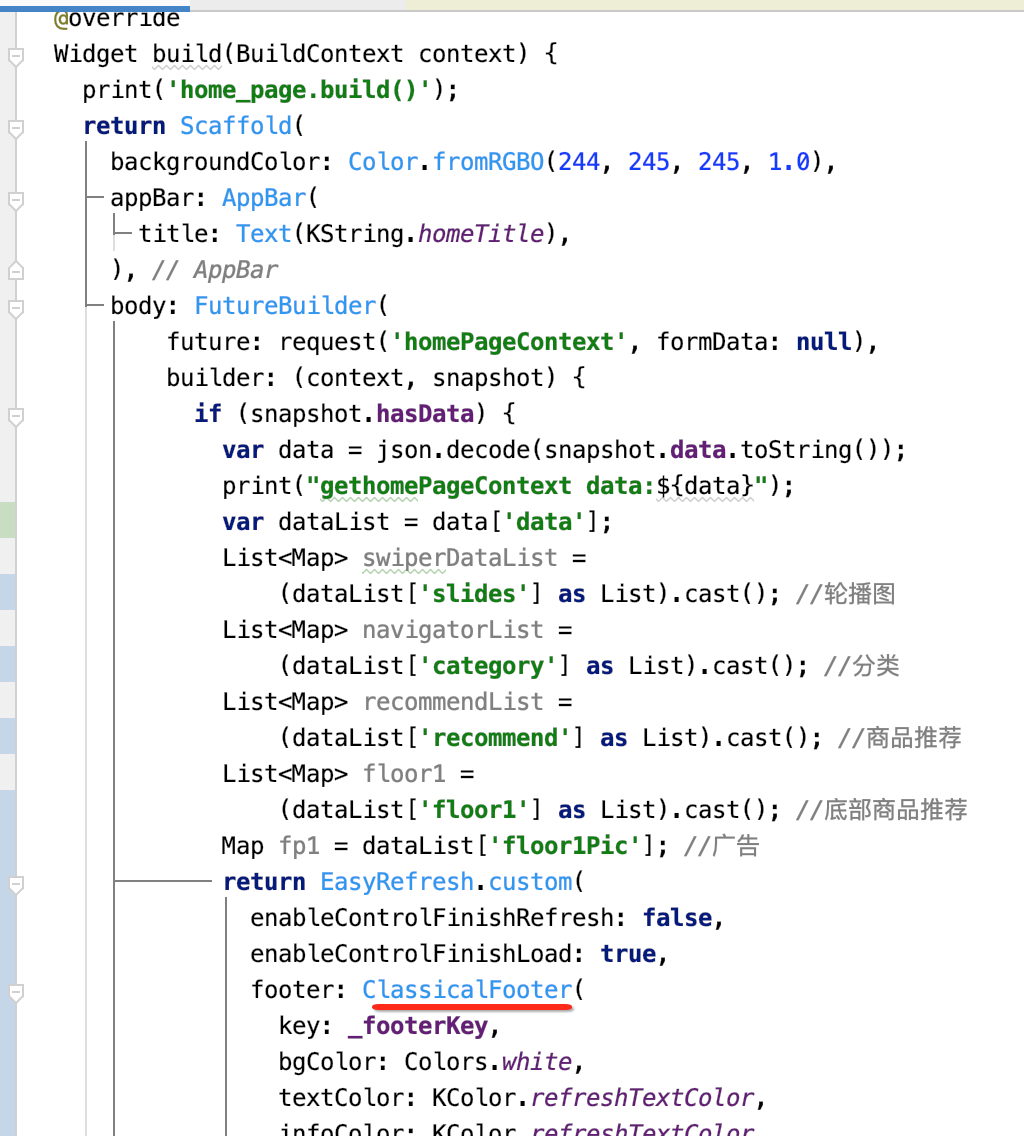
然后来使用到界面上,这里参考官方的DEMO来https://pub.dev/packages/flutter_easyrefresh/example:这里先弄上拉分页的,也就是footer,这个构建细节就不一一解释了:
import 'dart:convert';import 'package:flutter/material.dart';
import 'package:flutter_easyrefresh/easy_refresh.dart';
import 'package:fluttershop/config/color.dart';
import 'package:fluttershop/config/string.dart';
import 'package:fluttershop/service/http_service.dart';class HomePage extends StatefulWidget {@override_HomePageState createState() => _HomePageState();
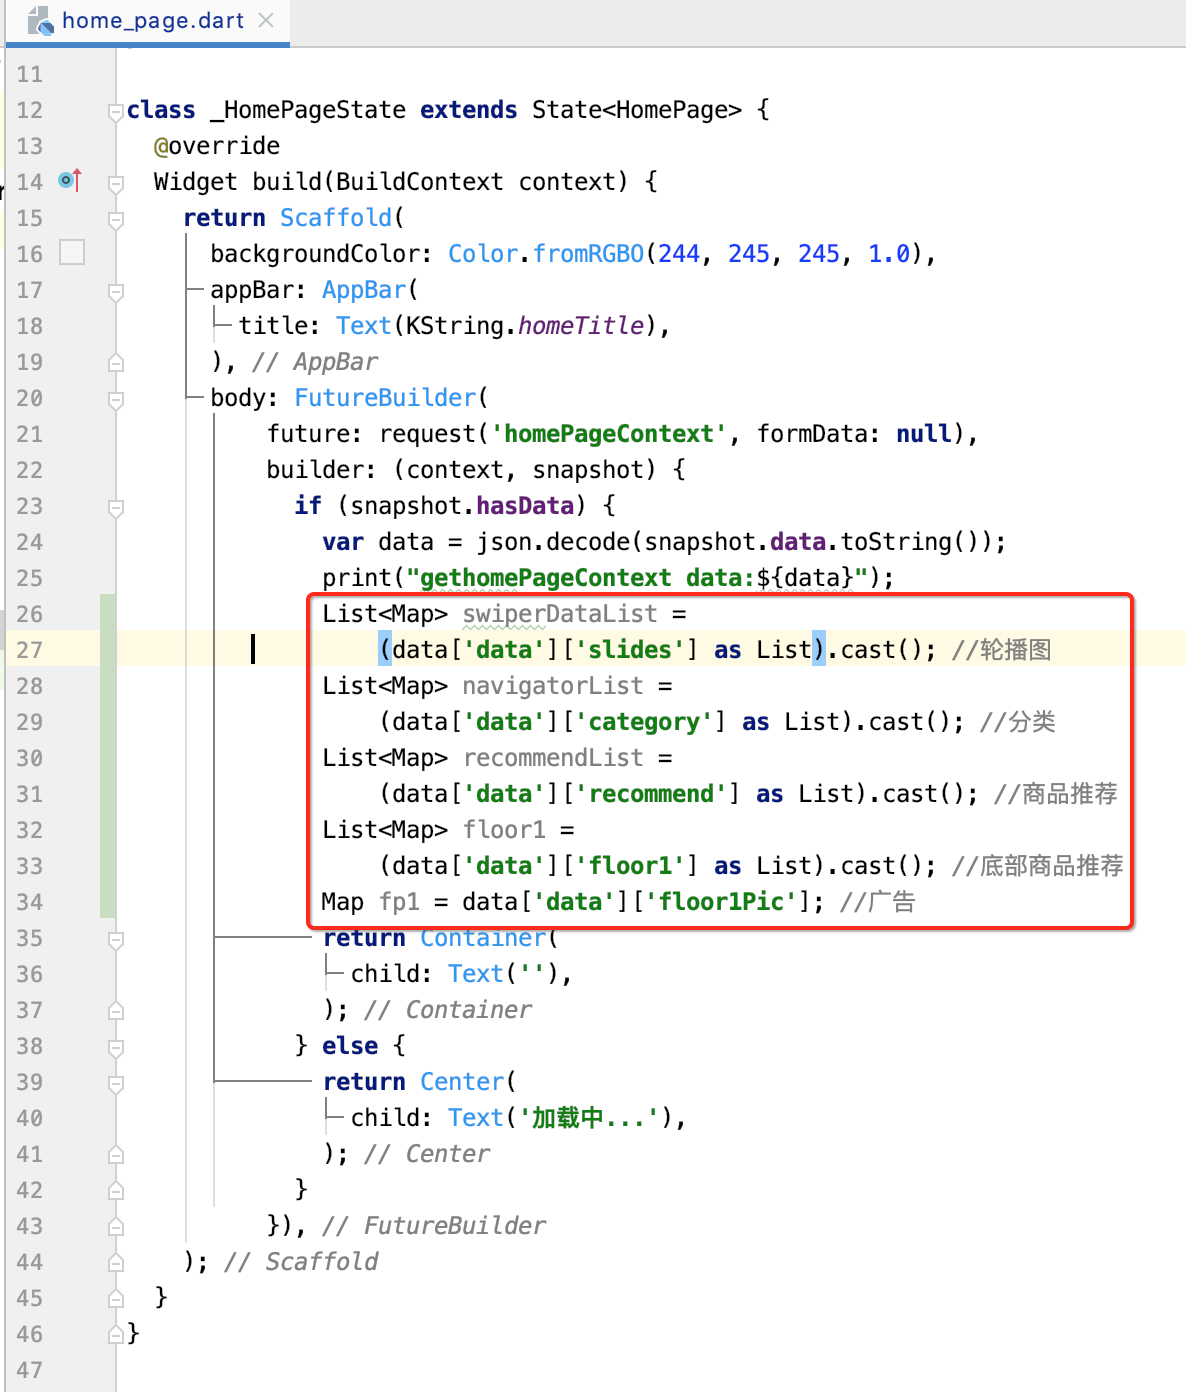
}class _HomePageState extends State<HomePage>with AutomaticKeepAliveClientMixin {//这里只是做一个演示,其实是不用加这个的,因为咱们的BottomNavigationBar是由IndexedStack构建的,具体参考index_page.dart文件@overridebool get wantKeepAlive => true;GlobalKey<ClassicalFooterWidgetState> _footerKey =GlobalKey<ClassicalFooterWidgetState>();@overridevoid initState() {super.initState();print('home_page.initState()');}@overrideWidget build(BuildContext context) {print('home_page.build()');return Scaffold(backgroundColor: Color.fromRGBO(244, 245, 245, 1.0),appBar: AppBar(title: Text(KString.homeTitle),),body: FutureBuilder(future: request('homePageContext', formData: null),builder: (context, snapshot) {if (snapshot.hasData) {var data = json.decode(snapshot.data.toString());print("gethomePageContext data:${data}");var dataList = data['data'];List<Map> swiperDataList =(dataList['slides'] as List).cast(); //轮播图List<Map> navigatorList =(dataList['category'] as List).cast(); //分类List<Map> recommendList =(dataList['recommend'] as List).cast(); //商品推荐List<Map> floor1 =(dataList['floor1'] as List).cast(); //底部商品推荐Map fp1 = dataList['floor1Pic']; //广告return EasyRefresh.custom(enableControlFinishRefresh: false,enableControlFinishLoad: true,footer: ClassicalFooter(key: _footerKey,bgColor: Colors.white,textColor: KColor.refreshTextColor,infoColor: KColor.refreshTextColor,noMoreText: '',//加载中...loadingText: KString.loading,loadReadyText: KString.loadReadyText,),slivers: [SliverList(delegate: SliverChildBuilderDelegate((context, index) {return Container(width: 60.0,height: 60.0,child: Center(child: Text('$index'),),color: index % 2 == 0? Colors.grey[300]: Colors.transparent,);},childCount: 5,),),],onLoad: () async {print('开始加载更多');//TODO 执行下一页的请求},);} else {return Center(child: Text('加载中...'),);}}),);}
}
其中用到了一个Key:

这是干嘛用的呢?关于这块网上搜了搜https://blog.csdn.net/qq_32760901/article/details/91798507,其目的是可以在外面的Widget来调用它泛型中的Widget中的东东:

啥意思,回到咱们定义的:
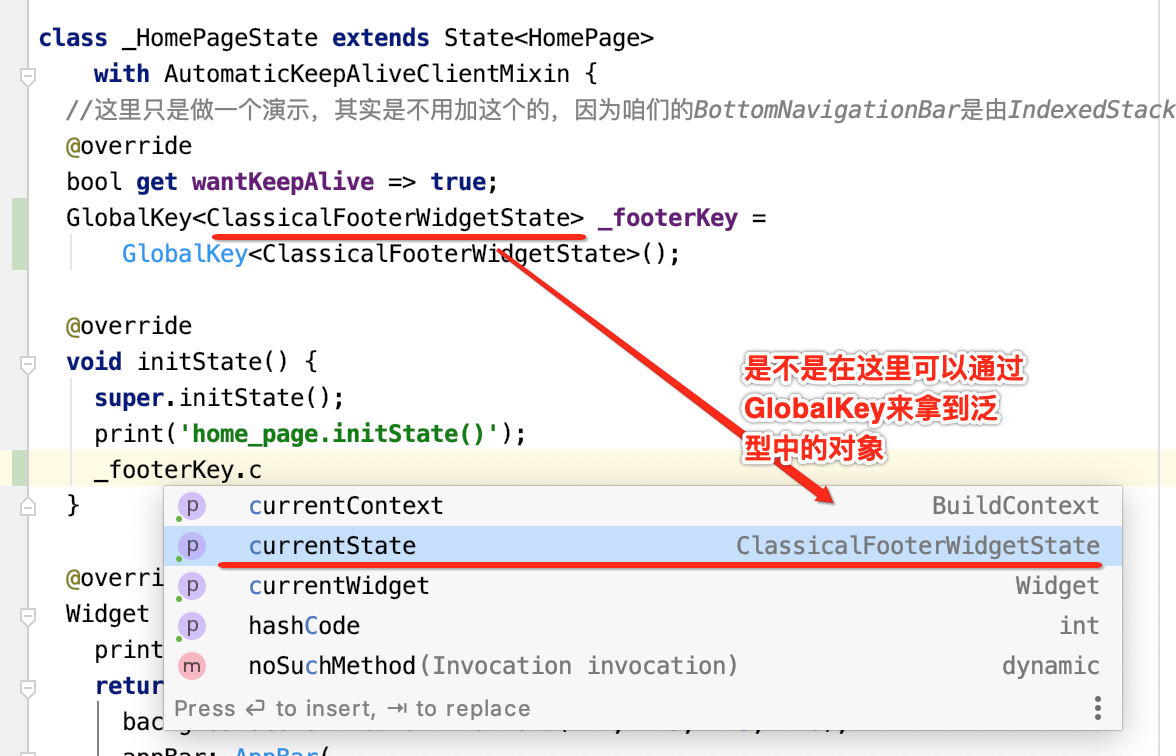
而拿到这个State有啥有呢,再点一下:

但是我们底部Widget叫它呀:
它俩其实是一个东东,看一眼ClassicalFooter的源码:

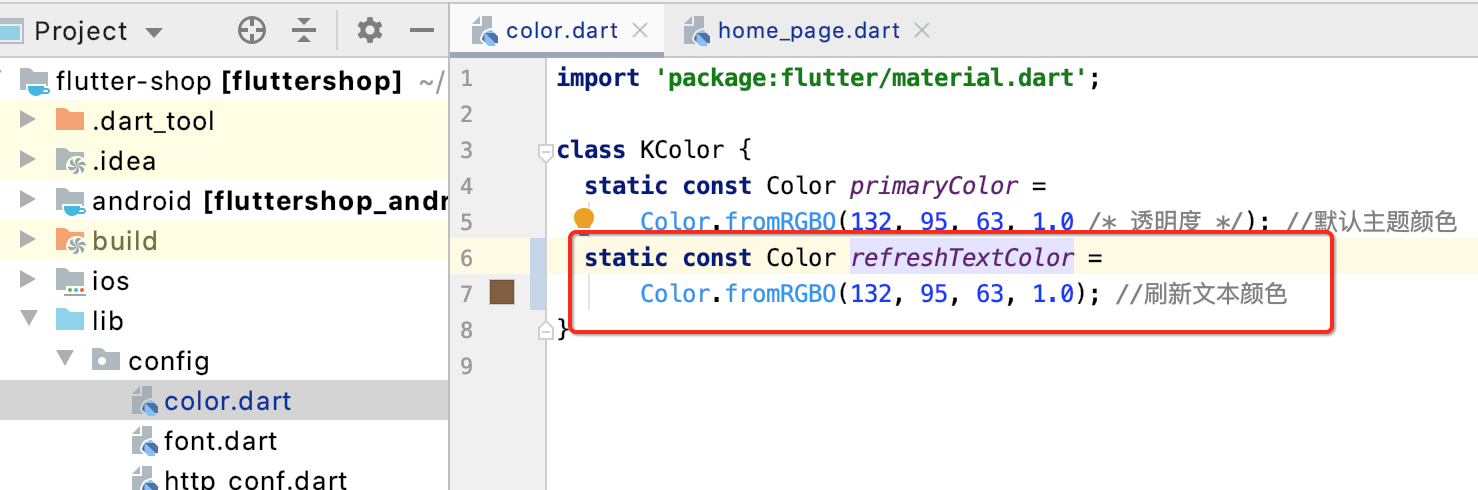
然后这程序还涉及到一个色值:
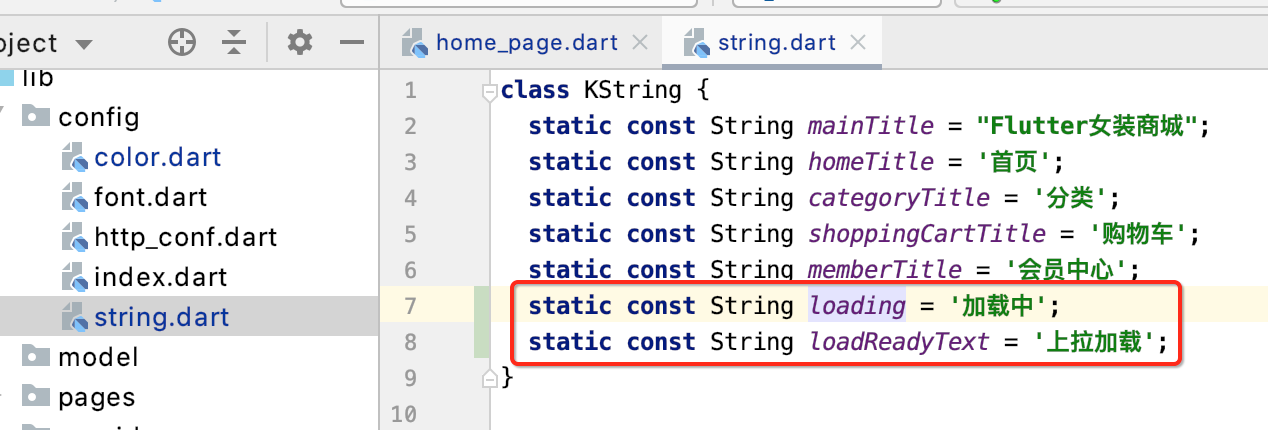
还有两个文本:
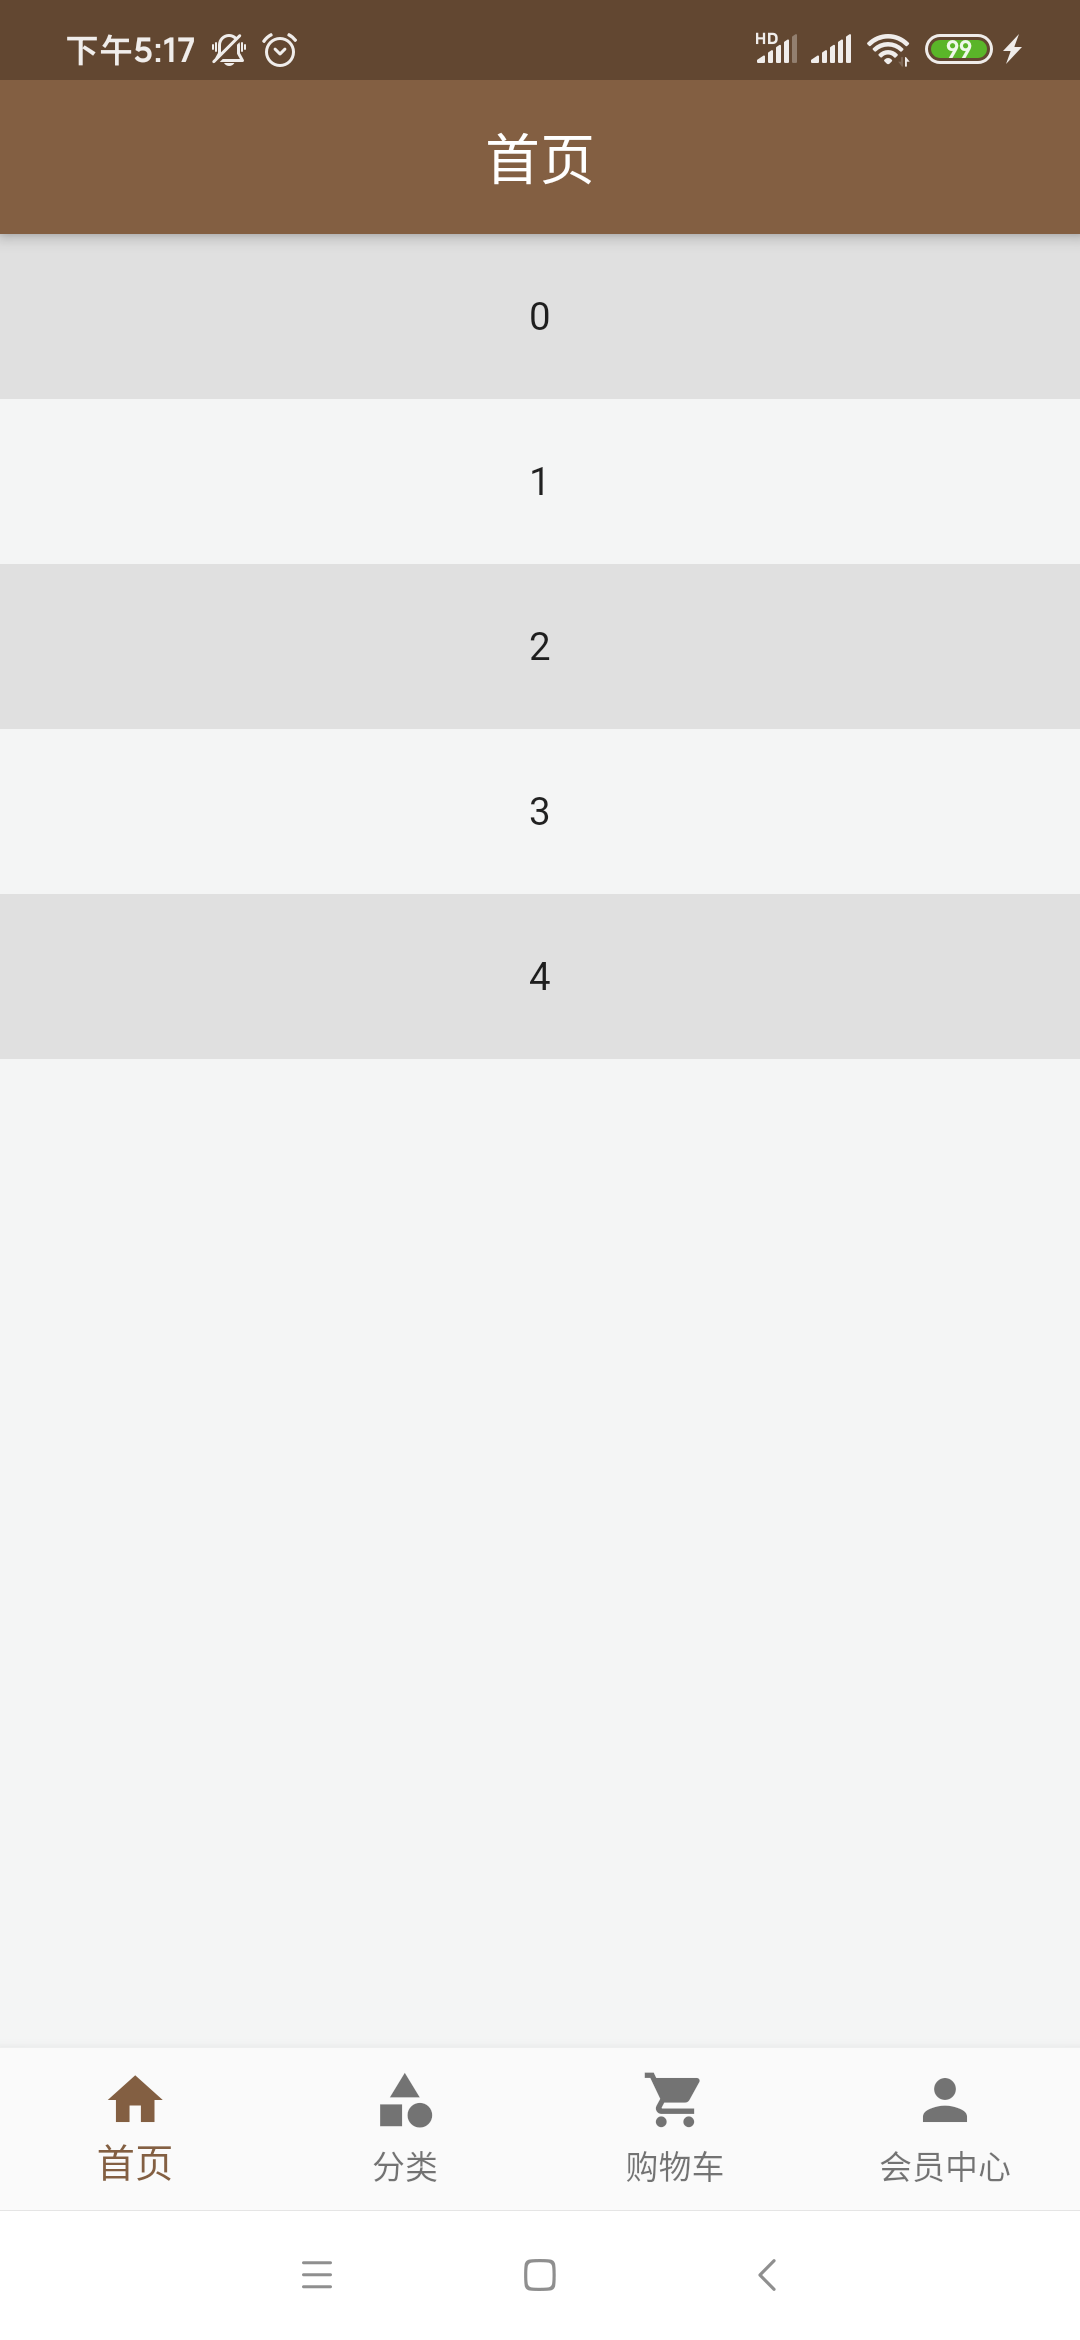
也就是在外部可以通过这个GlobalKey来操纵底部加载Widget的啦,大概就是做这个用的,接下来运行看一下效果:

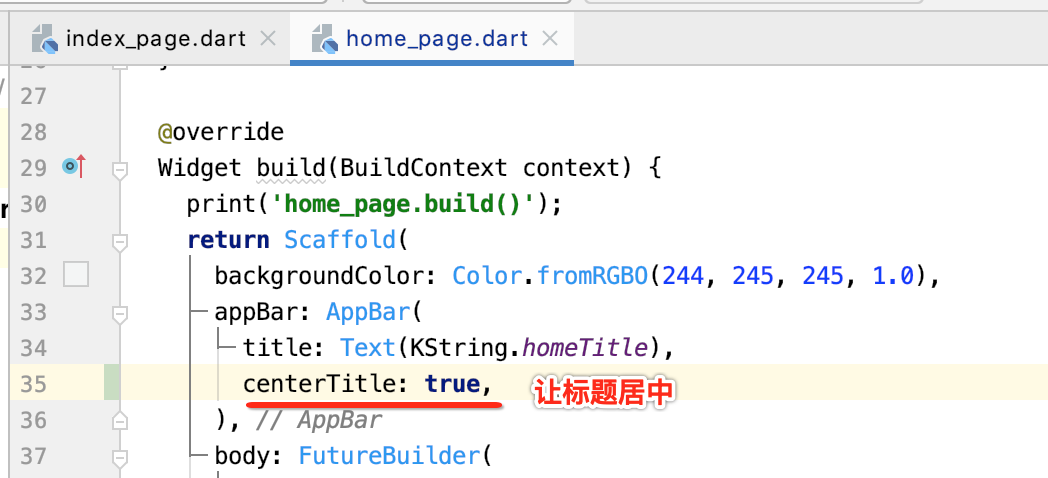
但是标题不对,先把外层的Flutter女装商城给去掉:


运行结果:
接下来则需要实现列表项的内容了,累了,下次继续~~


