本文主要是介绍从编译OpenGL库到我的第一个颜色变化的三角形-Shader,希望对大家解决编程问题提供一定的参考价值,需要的开发者们随着小编来一起学习吧!
大学开始就在接触OpenGL,但是都是“见缝插针”式的学习,一直想着有机会走一遍OpenGL该有的学习过程。前段时间终于鼓起勇气,踏出这个久违的第一步。此前一直觉得CMake编译会很难,但是真的实践下来,发现其实也不是很难。
第一步:下载相关的材料,编译OpenGL库,并测试。
1.下载glfw包,git形式:http://192.168.1.108/svn/webgl/client/branch/1.0.3 网址:http://www.glfw.org/
2.下载CMake安装包,网址:https://cmake.org/
3.下载glew包,git形式: https://github.com/nigels-com/glew.git glew 网址:http://glew.sourceforge.net/
注:这个网址下的glew包的对应VS版本:VC6、VC10、VC12、VC14、VC15,如果是更高的VS版本,这需要另外找glew包,建议是到官网下。
(1)首先安装CMake软件。
(2)在电脑里任意目录下新建一个文件专门安放OpenGL相关库,例如文件夹名“OpenGL”,子目录有“include”和“libs”。
(3)由于glew不需要经过Cmake,可直接使用VS打开下载的glew>build目录下的对应VS版本的工程项目,进行编译。编译成功之后,打开glew目录下的lib->Debug->Win32,
将glew32d.lib和glew32sd.lib文件拷贝到上述的“libs”目录下;glew目录下的include目录下的整个“GL”文件夹拷贝到上述的“include”目录下。
(4)在glfw目录下新建一个“build”文件夹,打开CMake软件(点击运行cmake-gui.exe程序),在<where to the source code>处选择你的glfw所在的目录,在<where to build the binaries> 处选择刚刚新建的“build”文件夹所在的目录,如图:

然后点击<Configure> 选择你的VS版本,其他选项默认,之后点击“Finish”,等待几秒最后点击“Generate”按钮。之后就可以关闭CMake了。
在刚刚新建的“build”目录中,会增加一些文件,双击GLFW.sln,启动VS,按F7键等待工程生成完毕,在刚新建的build目录,build->src->Debug目录下会有一个glfw3.lib,这是我们所需要的,将glfw3.lib拷贝到上述的“OpenGL”->“libs”目录下。在glfw->include目录下会生成“GLFW”,将其整个拷贝到上述的“OpenGL”->“include”目录下。
到此,OpenGL库生成完毕。
(5)项目测试。
打开VS软件,新建一个空的C++工程项目,在项目属性中<配置属性>-><VC++目录>-><包含目录>添加上述“OpenGL”->“include”所在的目录,在<库目录>中添加上述“OpenGL”->“libs”所在的目录,在<链接器>-><输入>-><附加依赖项>中添加文件:glfw3.lib glew32sd.lib opengl32.lib,其中opengl32.lib是安装VS的时候直接就包含了。
新建一个.cpp文件,复制下面的代码:
#include <iostream> // GLEW #define GLEW_STATIC #include <GL/glew.h> // GLFW #include <GLFW/glfw3.h> // Window dimensions const GLuint WIDTH = 800, HEIGHT = 600; // The MAIN function, from here we start the application and run the game loop int main() { std::cout << "Starting GLFW context, OpenGL 3.3" << std::endl; // Init GLFW glfwInit(); // Set all the required options for GLFW glfwWindowHint(GLFW_CONTEXT_VERSION_MAJOR, 3); glfwWindowHint(GLFW_CONTEXT_VERSION_MINOR, 3); glfwWindowHint(GLFW_OPENGL_PROFILE, GLFW_OPENGL_CORE_PROFILE); glfwWindowHint(GLFW_RESIZABLE, GL_FALSE); // Create a GLFWwindow object that we can use for GLFW's functions GLFWwindow* window = glfwCreateWindow(WIDTH, HEIGHT, "LearnOpenGL", nullptr, nullptr); if (window == nullptr) { std::cout << "Failed to create GLFW window" << std::endl; glfwTerminate(); return -1; } glfwMakeContextCurrent(window); // Set this to true so GLEW knows to use a modern approach to retrieving function pointers and extensions glewExperimental = GL_TRUE; // Initialize GLEW to setup the OpenGL Function pointers if (glewInit() != GLEW_OK) { std::cout << "Failed to initialize GLEW" << std::endl; return -1; } // Define the viewport dimensions int width, height; glfwGetFramebufferSize(window, &width, &height); glViewport(0, 0, width, height); // Game loop while (!glfwWindowShouldClose(window)) { // Check if any events have been activiated (key pressed, mouse moved etc.) and call corresponding response functions glfwPollEvents(); // Swap the screen buffers glfwSwapBuffers(window); } // Terminate GLFW, clearing any resources allocated by GLFW. glfwTerminate(); return 0; }然后进行编译即可。
第二步:创建我的变化三角形-着色器
同样新建一个C++空工程项目,使用着色器来显示绘制的三角形。关于着色器,这里说的很详细。完整的代码可参见下面。
#include <iostream>
#include <cmath>// GLEW
#define GLEW_STATIC
#include <GL/glew.h>// GLFW
#include <GLFW/glfw3.h>// Function prototypes
void key_callback(GLFWwindow* window, int key, int scancode, int action, int mode);// Window dimensions
const GLuint WIDTH = 800, HEIGHT = 600;// Shaders
const GLchar* vertexShaderSource = "#version 330 core\n""layout (location = 0) in vec3 position;\n""layout (location = 1) in vec3 color;\n""out vec3 ourColor;\n""void main()\n""{\n""gl_Position = vec4(position, 1.0);\n""ourColor = color;\n""}\0";
const GLchar* fragmentShaderSource = "#version 330 core\n""out vec4 color;\n""uniform vec4 ourColor;\n""void main()\n""{\n""color = ourColor;\n""}\n\0";// The MAIN function, from here we start the application and run the game loop
int main()
{// Init GLFWglfwInit();// Set all the required options for GLFWglfwWindowHint(GLFW_CONTEXT_VERSION_MAJOR, 3);glfwWindowHint(GLFW_CONTEXT_VERSION_MINOR, 3);glfwWindowHint(GLFW_OPENGL_PROFILE, GLFW_OPENGL_CORE_PROFILE);glfwWindowHint(GLFW_RESIZABLE, GL_FALSE);// Create a GLFWwindow object that we can use for GLFW's functionsGLFWwindow* window = glfwCreateWindow(WIDTH, HEIGHT, "LearnOpenGL", nullptr, nullptr);glfwMakeContextCurrent(window);// Set the required callback functionsglfwSetKeyCallback(window, key_callback);// Set this to true so GLEW knows to use a modern approach to retrieving function pointers and extensionsglewExperimental = GL_TRUE;// Initialize GLEW to setup the OpenGL Function pointersglewInit();// Define the viewport dimensionsglViewport(0, 0, WIDTH, HEIGHT);// Build and compile our shader program// Vertex shaderGLuint vertexShader = glCreateShader(GL_VERTEX_SHADER);glShaderSource(vertexShader, 1, &vertexShaderSource, NULL);glCompileShader(vertexShader);// Check for compile time errorsGLint success;GLchar infoLog[512];glGetShaderiv(vertexShader, GL_COMPILE_STATUS, &success);if (!success){glGetShaderInfoLog(vertexShader, 512, NULL, infoLog);std::cout << "ERROR::SHADER::VERTEX::COMPILATION_FAILED\n" << infoLog << std::endl;}// Fragment shaderGLuint fragmentShader = glCreateShader(GL_FRAGMENT_SHADER);glShaderSource(fragmentShader, 1, &fragmentShaderSource, NULL);glCompileShader(fragmentShader);// Check for compile time errorsglGetShaderiv(fragmentShader, GL_COMPILE_STATUS, &success);if (!success){glGetShaderInfoLog(fragmentShader, 512, NULL, infoLog);std::cout << "ERROR::SHADER::FRAGMENT::COMPILATION_FAILED\n" << infoLog << std::endl;}// Link shadersGLuint shaderProgram = glCreateProgram();glAttachShader(shaderProgram, vertexShader);glAttachShader(shaderProgram, fragmentShader);glLinkProgram(shaderProgram);// Check for linking errorsglGetProgramiv(shaderProgram, GL_LINK_STATUS, &success);if (!success) {glGetProgramInfoLog(shaderProgram, 512, NULL, infoLog);std::cout << "ERROR::SHADER::PROGRAM::LINKING_FAILED\n" << infoLog << std::endl;}glDeleteShader(vertexShader);glDeleteShader(fragmentShader);// Set up vertex data (and buffer(s)) and attribute pointersGLfloat vertices[] = {// Positions 0.5f, -0.5f, 0.0f, // Bottom Right-0.5f, -0.5f, 0.0f, // Bottom Left0.0f, 0.5f, 0.0f // Top };GLuint VBO, VAO;glGenVertexArrays(1, &VAO);glGenBuffers(1, &VBO);// Bind the Vertex Array Object first, then bind and set vertex buffer(s) and attribute pointer(s).glBindVertexArray(VAO);glBindBuffer(GL_ARRAY_BUFFER, VBO);glBufferData(GL_ARRAY_BUFFER, sizeof(vertices), vertices, GL_STATIC_DRAW);// Position attributeglVertexAttribPointer(0, 3, GL_FLOAT, GL_FALSE, 3 * sizeof(GLfloat), (GLvoid*)0);glEnableVertexAttribArray(0);glBindVertexArray(0); // Unbind VAO// Game loopwhile (!glfwWindowShouldClose(window)){// Check if any events have been activiated (key pressed, mouse moved etc.) and call corresponding response functionsglfwPollEvents();// Render// Clear the colorbufferglClearColor(0.2f, 0.3f, 0.3f, 1.0f);glClear(GL_COLOR_BUFFER_BIT);// Be sure to activate the shaderglUseProgram(shaderProgram);// Update the uniform colorGLfloat timeValue = glfwGetTime();GLfloat greenValue = (sin(timeValue) / 2) + 0.5;GLint vertexColorLocation = glGetUniformLocation(shaderProgram, "ourColor");glUniform4f(vertexColorLocation, 0.0f, greenValue, 0.0f, 1.0f);// Draw the triangleglBindVertexArray(VAO);glDrawArrays(GL_TRIANGLES, 0, 3);glBindVertexArray(0);// Swap the screen buffersglfwSwapBuffers(window);}// Properly de-allocate all resources once they've outlived their purposeglDeleteVertexArrays(1, &VAO);glDeleteBuffers(1, &VBO);// Terminate GLFW, clearing any resources allocated by GLFW.glfwTerminate();return 0;
}// Is called whenever a key is pressed/released via GLFW
void key_callback(GLFWwindow* window, int key, int scancode, int action, int mode)
{if (key == GLFW_KEY_ESCAPE && action == GLFW_PRESS)glfwSetWindowShouldClose(window, GL_TRUE);
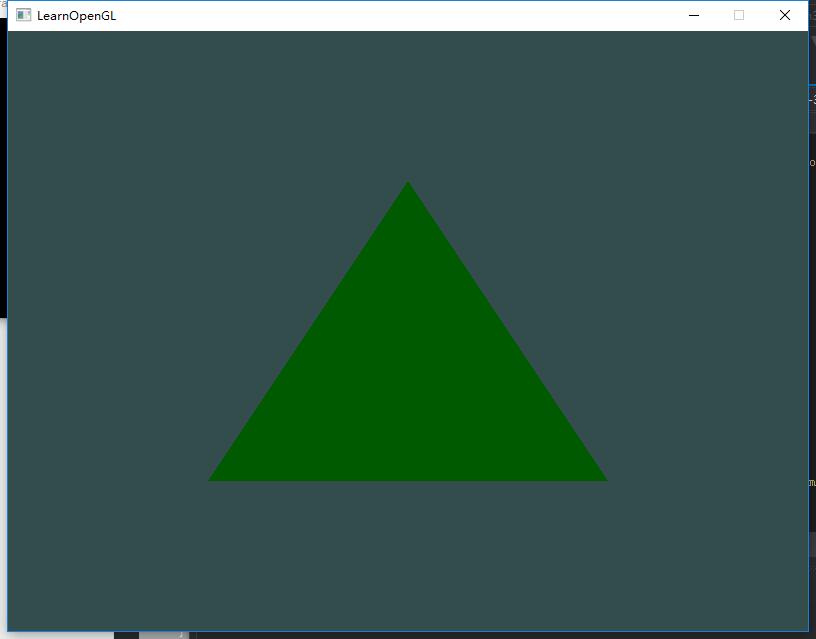
}最后的显示效果如图:

这篇关于从编译OpenGL库到我的第一个颜色变化的三角形-Shader的文章就介绍到这儿,希望我们推荐的文章对编程师们有所帮助!


