本文主要是介绍Cesium——如何让模型沿着设定的轨迹运动加拖尾(非czml),希望对大家解决编程问题提供一定的参考价值,需要的开发者们随着小编来一起学习吧!
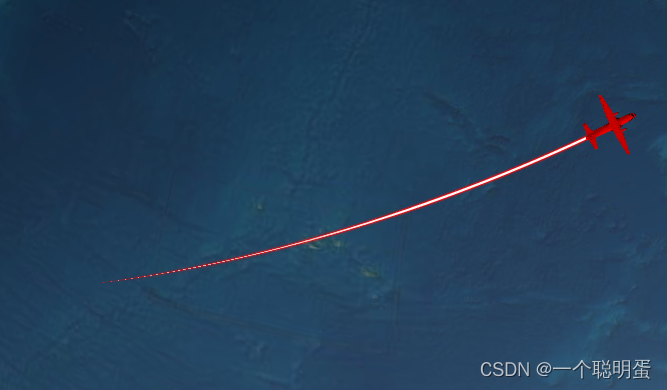
如图,需求为给出两个经纬度坐标,让模型从一个位置运动到另一个位置,代码如下:
01.设置时间轴
在创建viewer的时候要将时间轴打开(timeline)
var viewer = new Cesium.Viewer('cesiumContainer', {//UI控制baseLayerPicker: false, //右上角的图层选择按钮animation: true,       //左下角的动画仪表盘infoBox: false,         //点击要素之后显示的信息geocoder: false,        //搜索框homeButton:false,       //home按钮sceneModePicker:true,  //模式切换按钮timeline: true,         //底部的时间轴fullscreenButton: false,//右下角的全屏按钮shouldAnimate: true,navigationHelpButton: false, //右上角的帮助按钮,terrainProvider: new Cesium.createWorldTerrain({requestWaterMask: true,requestVertexNormals: true}),
})
再对时间轴进行设置,设置循环
start = new Cesium.JulianDate.fromDate(new Date(2022,12,15,12)); //设置具体时间//start = new Cesium.JulianDate.now(new Date());//设置为当前时间start = Cesium.JulianDate.addHours(start, 8, new Cesium.JulianDate()); // 添加八小时,得到东八区的北京时间stop = Cesium.JulianDate.addSeconds(start, 360, new Cesium.JulianDate()); // 设置一个结束时间,意思是360秒之后时间结束viewer.clock.startTime = start.clone(); // 给cesium时间轴设置开始的时间viewer.clock.stopTime = stop.clone(); // 设置cesium时间轴设置结束的时间viewer.clock.currentTime = start.clone(); // 设置cesium时间轴设置当前的时间viewer.clock.clockRange = Cesium.ClockRange.LOOP_STOP; // 时间结束了,再继续重复来一遍//时间变化来控制速度 viewer.clock.multiplier = 4;// 时间速率,数字越大时间过的越快//给时间线设置边界viewer.timeline.zoomTo(start, stop);02.得到position
我们需要通过两个经纬度坐标来设定飞机的运行轨迹,如果我们设置position的时候直接就设置起止的两个点,飞机并不会绕着地球的表面运动,而是从地球的中间穿过,因此我们需要得到这两个经纬度之间的一些插值点的坐标,获取中间插值的函数computeAirRoute如下所示,输入起止的经纬度,输出中间一系列经纬度状态点的数组:
(插值的原理简单来说就地图展开是一个平面,然后两个点之间是一个连线,我们以固定的距离在直线上取坐标)
// 时空状态点结构
function State() {this.lon = 0; //经度this.lat = 0; //纬度this.hei = 0 ; //高度this.time = 0; //对应的时间
}
//设定步长
var stepLength=30000;
function computeAirRoute(startLon,startLat,endLon,endLat){//首先计算给出两点之间的距离let startPoint = Cesium.Cartographic.fromDegrees(startLon,startLat)let endPoint = Cesium.Cartographic.fromDegrees(endLon,endLat)let geodesic = new Cesium.EllipsoidGeodesic();geodesic.setEndPoints(startPoint, endPoint);let distance = geodesic.surfaceDistance let lngDiff = endLon-startLon; //起点与终端经度差let latDiff = endLat-startLat; //起点与终端纬度差let n = Math.ceil(distance / stepLength); //点的总数let a = lngDiff / n; //每步的经度差let b = latDiff / n; //每步的纬度差let airSateArray=[];let time=0;for (let u = 1; u < n; u++) {var state = new State(); //状态点state.lon = startLon + a * u;//经度state.lat = startLat + b * u;;//纬度state.time = time;state.hei=100000;airStateArray.push(state);time+=360/n; //设定两点之间运动时间为360}return airStateArray
}
03.得到SampledPositionProperty数据
function computeFlight(source) {// 时空状态数组let property = new Cesium.SampledPositionProperty();for(let i=0; i<source.length; i++){let time = Cesium.JulianDate.addSeconds(start, source[i].time, new Cesium.JulianDate);let position = Cesium.Cartesian3.fromDegrees(end, source[i].lat, source[i].hei);// 添加位置,和时间对应property.addSample(time, position);}return property;
}
04. 创建运动模型
飞机不是通过读取czml来运动的,而是采用在创建模型时设置position属性为Cesium.SampledPositionProperty数据来达到运动效果
- availability属性设置模型与时间轴关联,其中的start和end设置的就是模型运动的起止时间
- 通过model中的color属性设置模型颜色
- 插值器用于在我们设定的position之间再多插入一些值,使运动轨迹更加精细
var planeModel = viewer.entities.add({// 和时间轴关联availability : new Cesium.TimeIntervalCollection([new Cesium.TimeInterval({start : start,stop : end})]),position: property,// 根据所提供的速度计算模型的朝向orientation: new Cesium.VelocityOrientationProperty(property),// 模型数据model: {uri: '../model/Cesium_Air.glb',minimumPixelSize: 128,maximumScale: 10000,color: getColor('RED', 1.0),//设置颜色},});//差值器planeModel.position.setInterpolationOptions({interpolationDegree: 20,interpolationAlgorithm: Cesium.LagrangePolynomialApproximation});
function getColor(colorName, alpha) {const color = Cesium.Color[colorName.toUpperCase()];return Cesium.Color.fromAlpha(color, parseFloat(alpha));
}
05.设置飞机拖尾
飞机的拖尾同样用到上面的property数据就好啦,代码如下:
const entityPath = viewer.entities.add({position: property,name: "path",path: {show: true,leadTime: 0,trailTime: 20,width: 6,resolution: 1,material: new Cesium.PolylineGlowMaterialProperty({glowPower: 0.3,taperPower: 0.3,color: "RED",}),},});06.完整代码
过程并不复杂,将以上内容串起来的完整代码也放一份吧!
// 时空状态点结构
function State() {this.lon = 0; //经度this.lat = 0; //纬度this.hei = 0 ; //高度this.time = 0; //对应的时间
}
//设定步长
var stepLength=30000;
function computeAirRoute(startLon,startLat,endLon,endLat){//首先计算给出两点之间的距离let startPoint = Cesium.Cartographic.fromDegrees(startLon,startLat)let endPoint = Cesium.Cartographic.fromDegrees(endLon,endLat)let geodesic = new Cesium.EllipsoidGeodesic();geodesic.setEndPoints(startPoint, endPoint);let distance = geodesic.surfaceDistance let lngDiff = endLon-startLon; //起点与终端经度差let latDiff = endLat-startLat; //起点与终端纬度差let n = Math.ceil(distance / stepLength); //点的总数let a = lngDiff / n; //每步的经度差let b = latDiff / n; //每步的纬度差let airSateArray=[];let time=0;for (let u = 1; u < n; u++) {var state = new State(); //状态点state.lon = startLon + a * u;//经度state.lat = startLat + b * u;;//纬度state.time = time;state.hei=100000;airStateArray.push(state);time+=360/n; //设定两点之间运动时间为360}return airStateArray
}function computeFlight(source) {// 时空状态数组let property = new Cesium.SampledPositionProperty();for(let i=0; i<source.length; i++){let time = Cesium.JulianDate.addSeconds(start, source[i].time, new Cesium.JulianDate);let position = Cesium.Cartesian3.fromDegrees(end, source[i].lat, source[i].hei);// 添加位置,和时间对应property.addSample(time, position);}return property;
}let airStateArray=computeAirRoute(-42.3534940,51.6691952,-15.0063289,24.7925729)
var property=computeFlight( airStateArray)var planeModel = viewer.entities.add({// 和时间轴关联availability : new Cesium.TimeIntervalCollection([new Cesium.TimeInterval({start : start,stop : end})]),position: property,// 根据所提供的速度计算模型的朝向orientation: new Cesium.VelocityOrientationProperty(property),// 模型数据model: {uri: '../model/Cesium_Air.glb',minimumPixelSize: 128,maximumScale: 10000,color: getColor('RED', 1.0),//设置颜色},});//差值器planeModel.position.setInterpolationOptions({interpolationDegree: 20,interpolationAlgorithm: Cesium.LagrangePolynomialApproximation});const entityPath = viewer.entities.add({position: property,name: "path",path: {show: true,leadTime: 0,trailTime: 20,width: 6,resolution: 1,material: new Cesium.PolylineGlowMaterialProperty({glowPower: 0.3,taperPower: 0.3,color: "RED",}),},});
function getColor(colorName, alpha) {const color = Cesium.Color[colorName.toUpperCase()];return Cesium.Color.fromAlpha(color, parseFloat(alpha));
}
关于速度可以通过调整每一步的时间或者步长改变
PS:如果设置多个点位连续运动,还是通过插值的方式在两两点位之间添加中间点,可能会遇到在转弯的时候方向突变的问题,这主要是因为步长设置的太小了,步长设置大一些,然后通过插值设置好,在转变方向的时候就可以平滑的转向
这篇关于Cesium——如何让模型沿着设定的轨迹运动加拖尾(非czml)的文章就介绍到这儿,希望我们推荐的文章对编程师们有所帮助!


