本文主要是介绍three.js 物体下落动画(重力加速度),希望对大家解决编程问题提供一定的参考价值,需要的开发者们随着小编来一起学习吧!
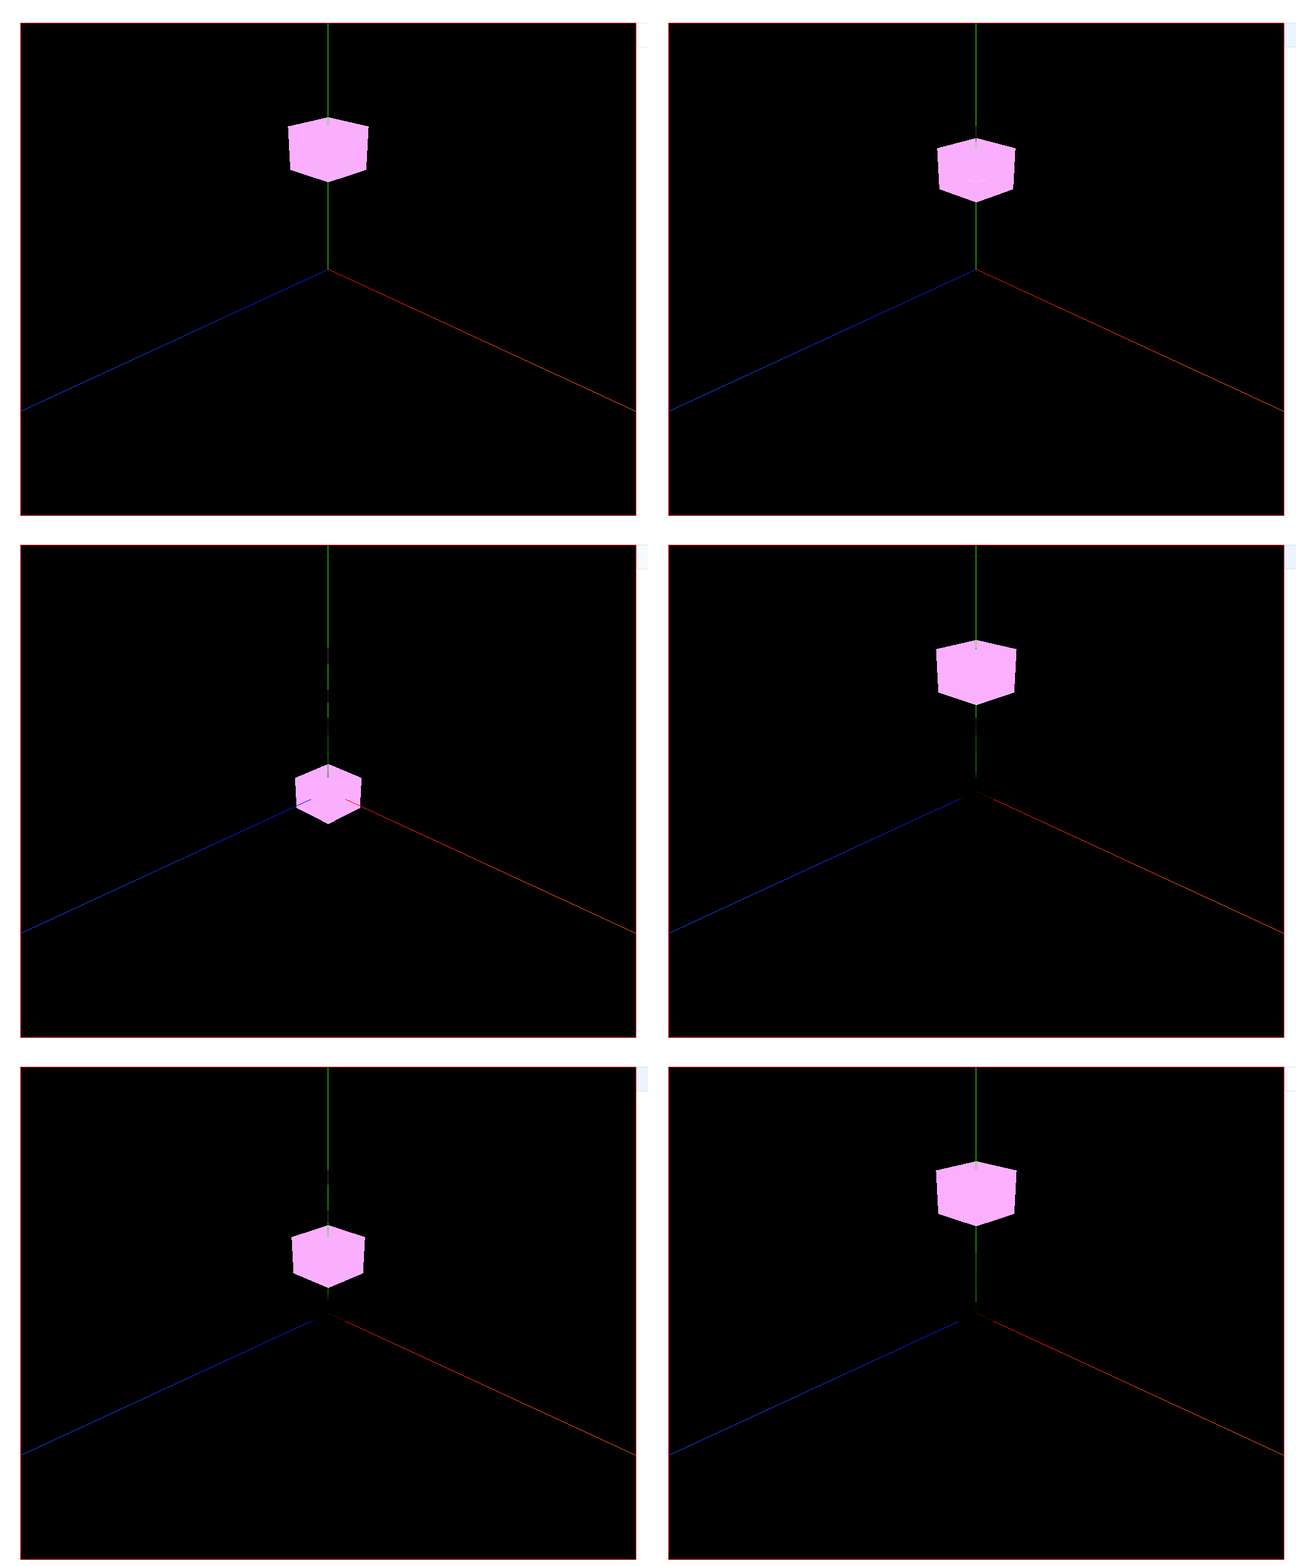
效果:

<template><div><el-container><el-main><div class="box-card-left"><div id="threejs" style="border: 1px solid red"></div><el-button @click="loopFun"> 物体下落动画(重力加速度) </el-button><el-button @click="reset"> 复位</el-button></div></el-main></el-container></div>
</template>
<script>
// 引入轨道控制器扩展库OrbitControls.js
import { OrbitControls } from "three/examples/jsm/controls/OrbitControls.js";
import { GLTFLoader } from "three/examples/jsm/loaders/GLTFLoader.js";
// 效果制作器
import { EffectComposer } from "three/examples/jsm/postprocessing/EffectComposer.js";
// 渲染通道
import { RenderPass } from "three/examples/jsm/postprocessing/RenderPass.js";
// 发光描边OutlinePass
import { OutlinePass } from "three/examples/jsm/postprocessing/OutlinePass.js";
import {CSS2DObject,CSS2DRenderer,
} from "three/examples/jsm/renderers/CSS2DRenderer.js";
import TWEEN from "@tweenjs/tween.js";
// TextGeometry 是一个附加组件,必须显式导入。 three/examples/jsm/geometries
import { TextGeometry } from "three/examples/jsm/geometries/TextGeometry.js";
// FontLoader 是一个附加组件,必须显式导入。
import { FontLoader } from "three/examples/jsm/loaders/FontLoader.js";
export default {data() {return {geometry: null,group: null,camera: null,box: null,renderer: null,clock: null,sudu: null,mesh: null,group: null,flag: true,animation: null,p0: null,v: null,g: null,t: 0,requestId: 0,};},created() {},mounted() {this.name = this.$route.query.name;this.init();},methods: {goBack() {this.$router.go(-1);},// 1. 物体下落动画( 重力加速度)init() {// 创建场景对象this.scene = new this.$three.Scene();// 创建时钟对象this.clock = new this.$three.Clock();// 创建立方缓冲几何体对象this.geometry = new this.$three.BoxGeometry(30, 30, 30);// 创建材质对象const material = new this.$three.MeshBasicMaterial({ color: 0xfaafff });// 创建网格模型对象this.mesh = new this.$three.Mesh(this.geometry, material);// 设置模型位置this.mesh.position.set(0, 100, 0);this.scene.add(this.mesh);// 创建辅助坐标轴对象const axesHelper = new this.$three.AxesHelper(300);this.scene.add(axesHelper);// 创建相机对象this.camera = new this.$three.PerspectiveCamera(60, 1, 0.01, 2000);// 设置相机位置this.camera.position.set(200, 200, 200);// 设置相机指向this.camera.lookAt(0, 0, 0);// 创建渲染器对象this.renderer = new this.$three.WebGLRenderer();this.renderer.setSize(1000, 800);this.renderer.render(this.scene, this.camera);window.document.getElementById("threejs").appendChild(this.renderer.domElement);const controls = new OrbitControls(this.camera, this.renderer.domElement);controls.addEventListener("change", (e) => {this.renderer.render(this.scene, this.camera);});// 位移、时间与加速度的关系:x = vt + (1/2)gt^2// 设定初始速度 const v = new this.$three.Vector3(30,0,0)// 重力加速度g:   const g = new this.$three.Vector3(0,-9.8,0);// 时间t : 可以通过 this.clock.getDelta()  不断获取时间段// 初始速度this.v = new this.$three.Vector3(0, 0, 0);this.g = new this.$three.Vector3(0, 9.8, 0);this.t = 0;},reset() {// 新建了clock对象this.clock = new this.$three.Clock();this.t = 0;this.v = new this.$three.Vector3(0, 0, 0);this.mesh.position.copy(new this.$three.Vector3(0, 100, 0));cancelAnimationFrame(this.requestId);this.renderer.render(this.scene, this.camera);},loopFun() {if (this.mesh.position.y > 0) {this.t += this.clock.getDelta();// 在时间 t 时,计算模型的位移量const p = this.v.clone().multiplyScalar(this.t).add(this.g.clone().multiplyScalar(0.5 * this.t * this.t));// 之前的模型位置 减去 位移量,计算实际位置const dis = this.mesh.position.clone().sub(p);// 直接设置模型的位置this.mesh.position.copy(dis);this.renderer.render(this.scene, this.camera);this.requestId = requestAnimationFrame(this.loopFun);}},},
};
</script>
<style lang="less" scoped>
.box-card-left {display: flex;align-items: flex-start;flex-direction: row;width: 100%;.box-right {img {width: 500px;user-select: none;}}
}
</style>
这篇关于three.js 物体下落动画(重力加速度)的文章就介绍到这儿,希望我们推荐的文章对编程师们有所帮助!


