本文主要是介绍OpenShift 4 - 在 OpenShift 上运行物体检测 AI/ML 应用,希望对大家解决编程问题提供一定的参考价值,需要的开发者们随着小编来一起学习吧!
《OpenShift / RHEL / DevSecOps 汇总目录》
说明:本文已经在 OpenShift 4.14 + RHODS 2.5.0 的环境中验证
说明:请先根据《OpenShift 4 - 部署 OpenShift AI 环境,运行 AI/ML 应用(视频)》一文完成 OpenShift AI 环境的安装。
注意:如无特殊说明,和 OpenShift AI 相关的 Blog 均无需 GPU。
运行和部署后端模型
在 Jupyter Notebook 中我们先用本地图片测试一个预先训练好的机器学习模型,然后将该模型的功能封装为一个 REST 服务。在完成本地测后再将物体识别模块部署到 OpenShift 上。
运行测试后端模型
- 在 OpenShift AI 中启动 notebook server 环境,notebook 镜像使用 TensorFlow 2023.2 即可。
- 在 Jupyter Notebook 界面中导入 https://github.com/rh-aiservices-bu/object-detection-rest.git 仓库。
- 在 Launcher 中进入 Terminal,然后执行以下命令安装 Pillow。
(app-root) (app-root) pip install Pillow==9.5.0
Collecting Pillow==9.5.0Downloading Pillow-9.5.0-cp39-cp39-manylinux_2_28_x86_64.whl (3.4 MB)━━━━━━━━━━━━━━━━━━━━━━━━━━━━━━━━━━━━━━━━ 3.4/3.4 MB 84.0 MB/s eta 0:00:00
Installing collected packages: PillowAttempting uninstall: PillowFound existing installation: Pillow 10.1.0Uninstalling Pillow-10.1.0:Successfully uninstalled Pillow-10.1.0
Successfully installed Pillow-9.5.0[notice] A new release of pip available: 22.2.2 -> 23.3.2
[notice] To update, run: pip install --upgrade pip
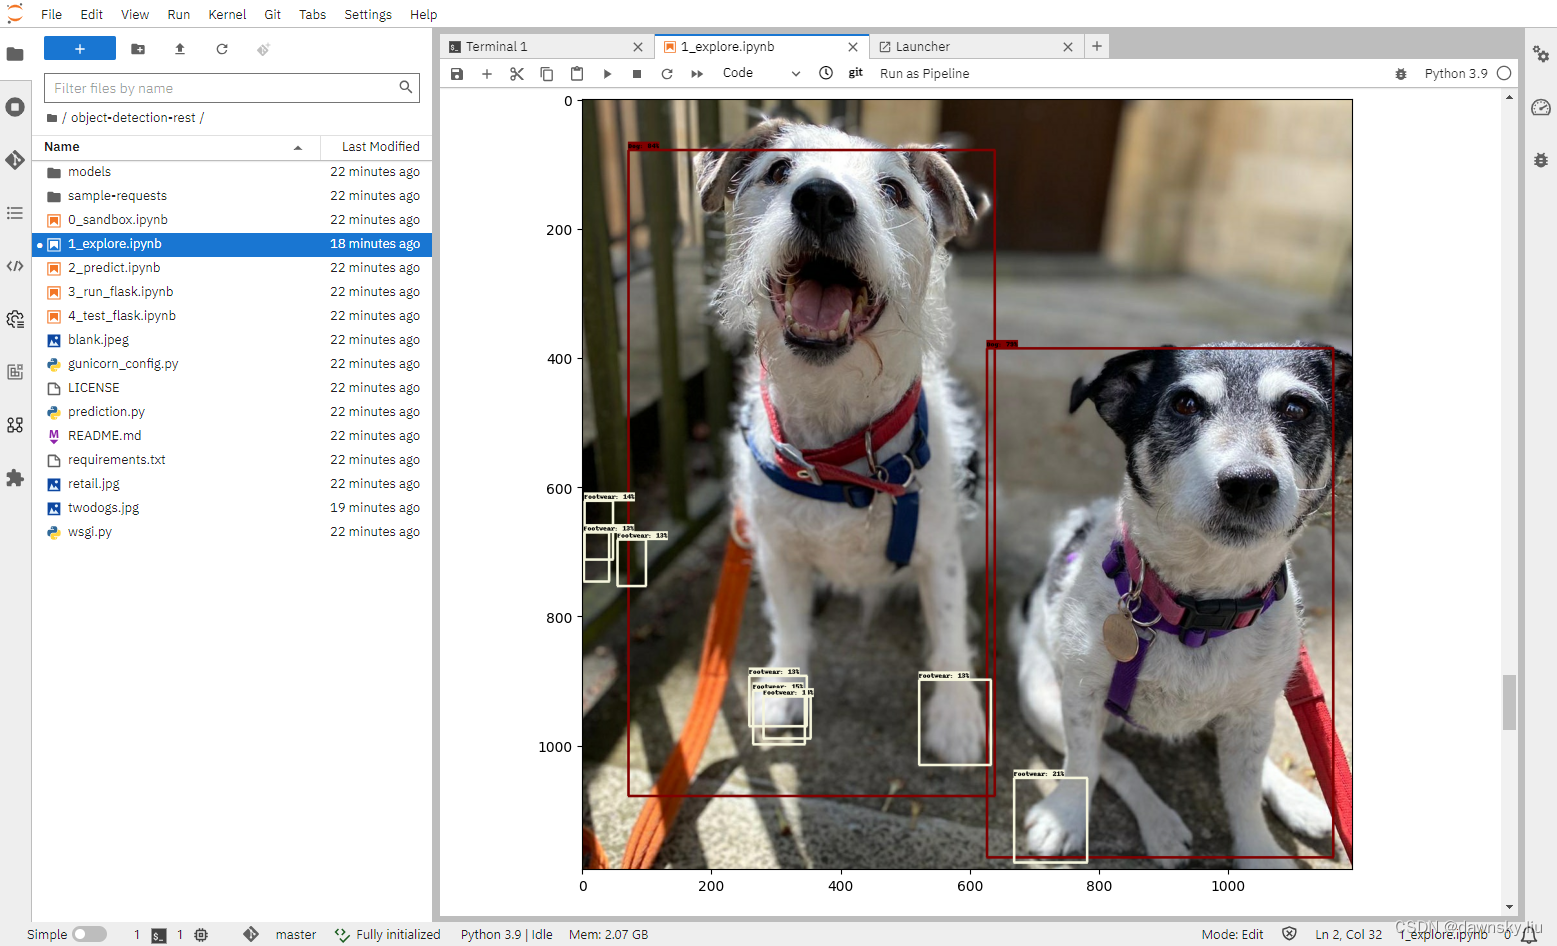
- 打开 1_explore.ipynb 文件,然后点击 Run > Run All Cells 菜单。
- 运行完成后会识别并标记出 twodogs.jpg 图片的 dog。
将后端模型部署为 REST 服务
- 根据 Notebook 的说明依次运行 2_predict.ipynb、3_run_flask.ipynb、4_test_flask.ipynb。其中 3_run_flask.ipynb 会在 http://127.0.0.1:5000 提供运行物体识别的 REST 服务。
- 在 OpenShift 中创建 object-detect 项目。
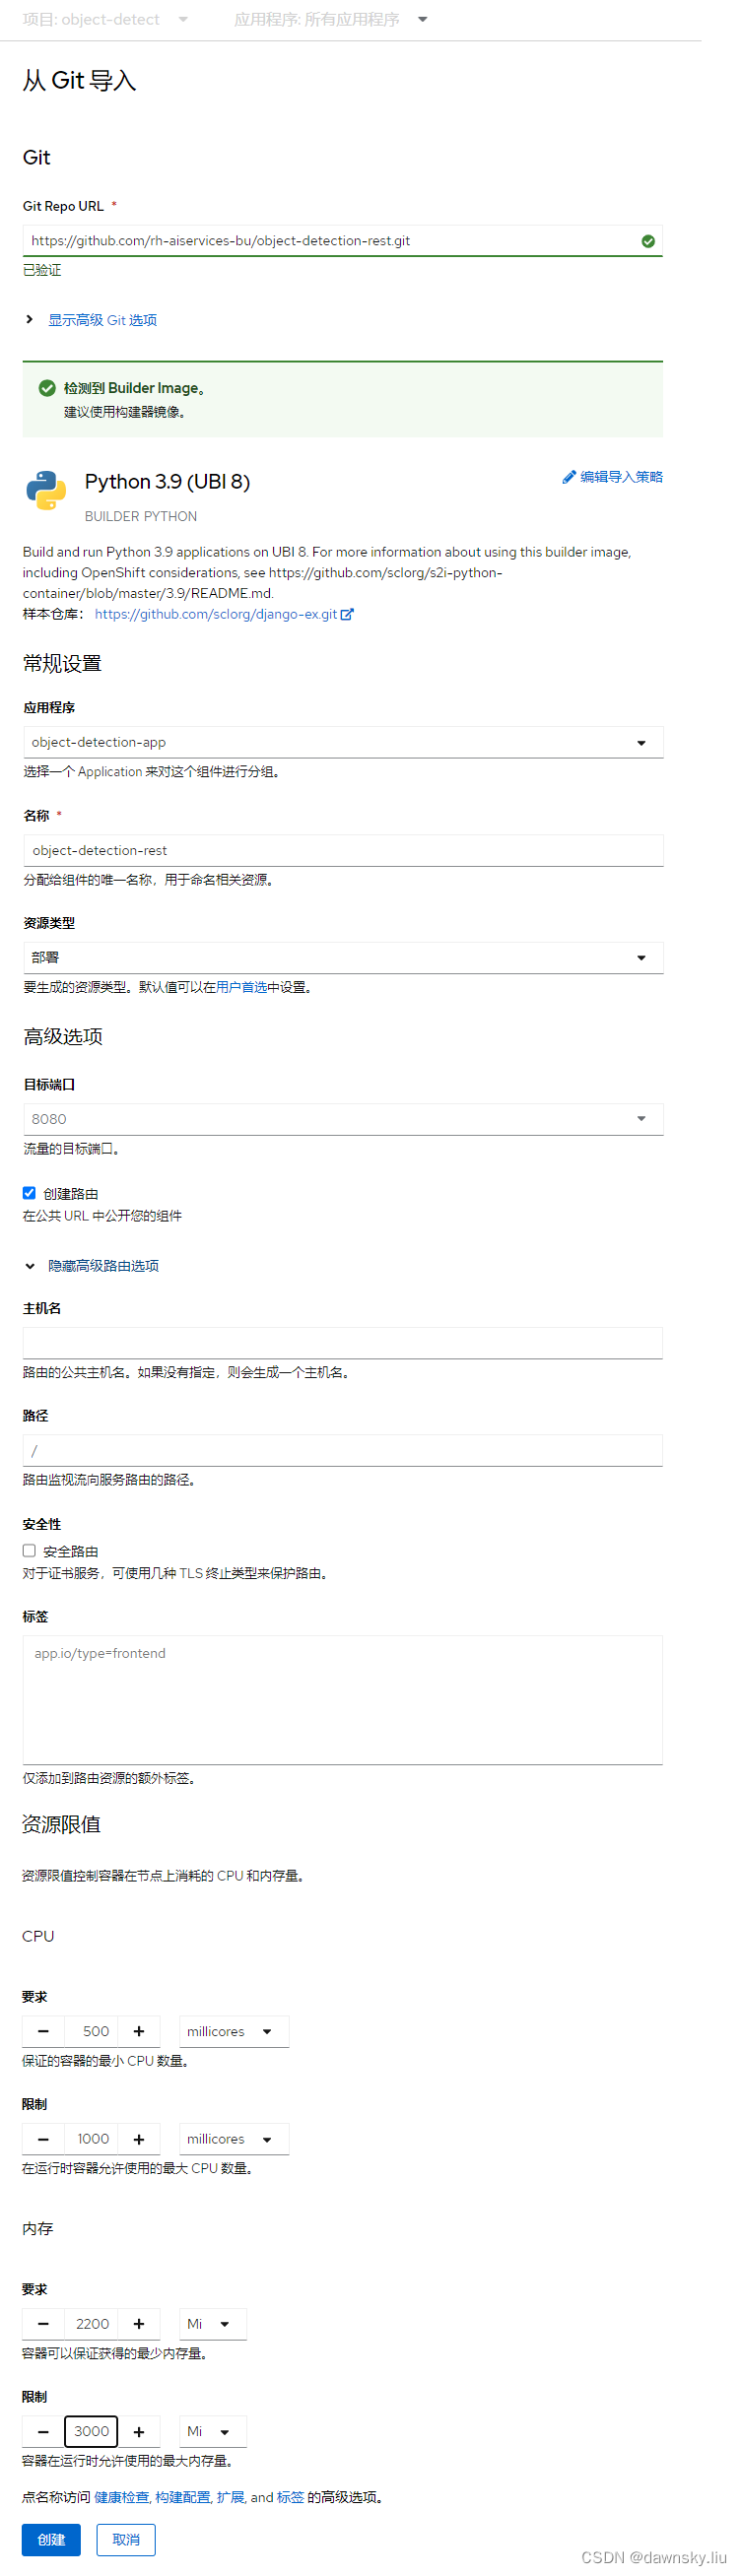
- 在 OpenShift 的开发者视图中进入 “+添加” > "从 Github 导入”,在 Git Repo URL 中填入 https://github.com/rh-aiservices-bu/object-detection-rest.git。在按下图完成配置后点击 “创建”。
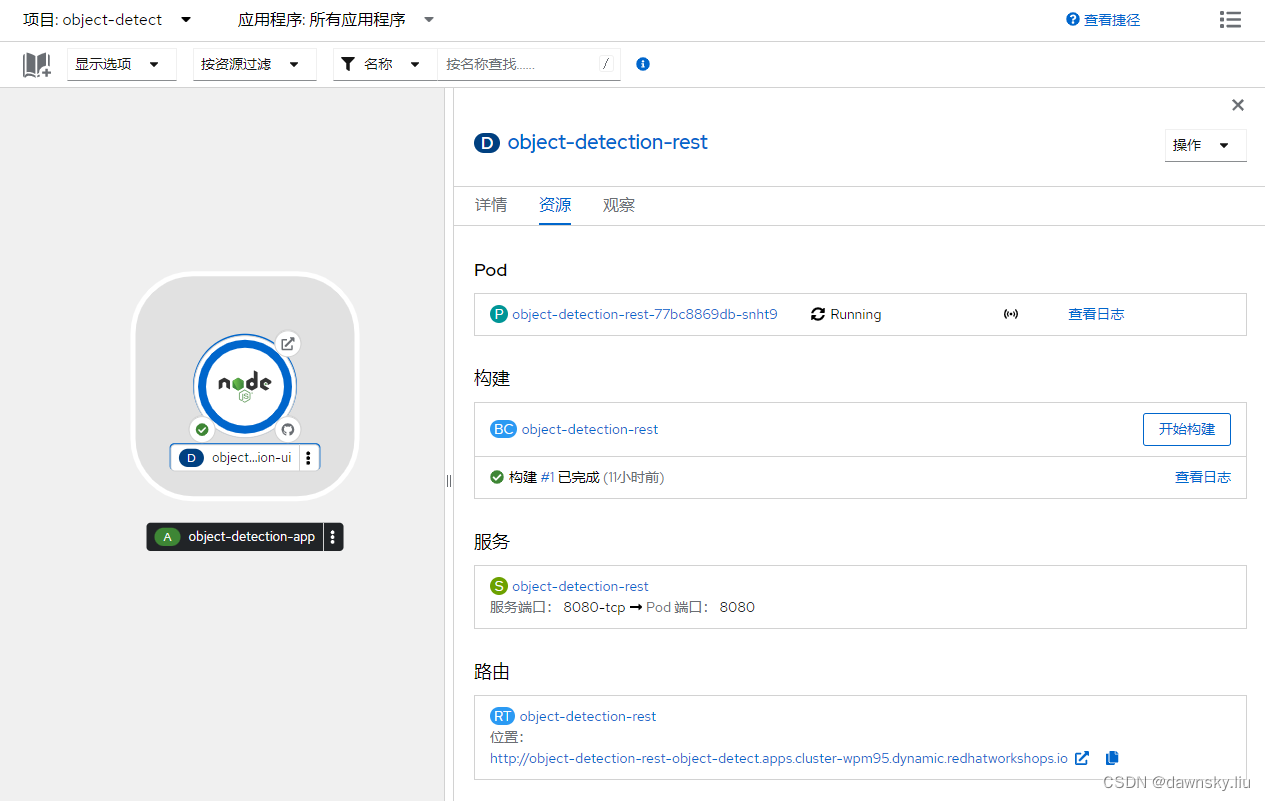
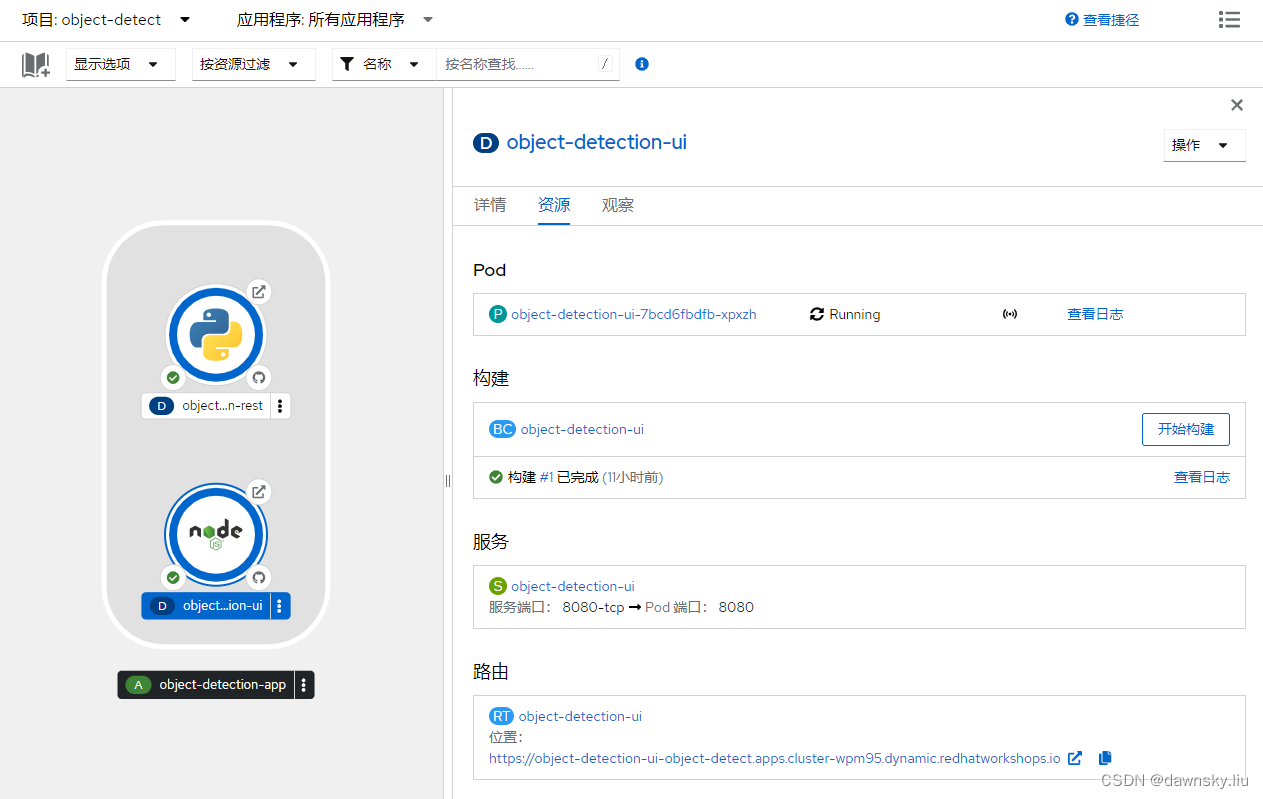
- 部署完成后可以打开下图 object-detect-rest 路由的地址,将显示 {“status”:“ok”},说明 REST 服务正常运行。
- 打开 4_test_flask.ipynb 文件,将 my_route 变量的内容改为上图的路由地址,然后再运行该文件并确认可以正常识别图片中的物体。
部署前端识别图片应用
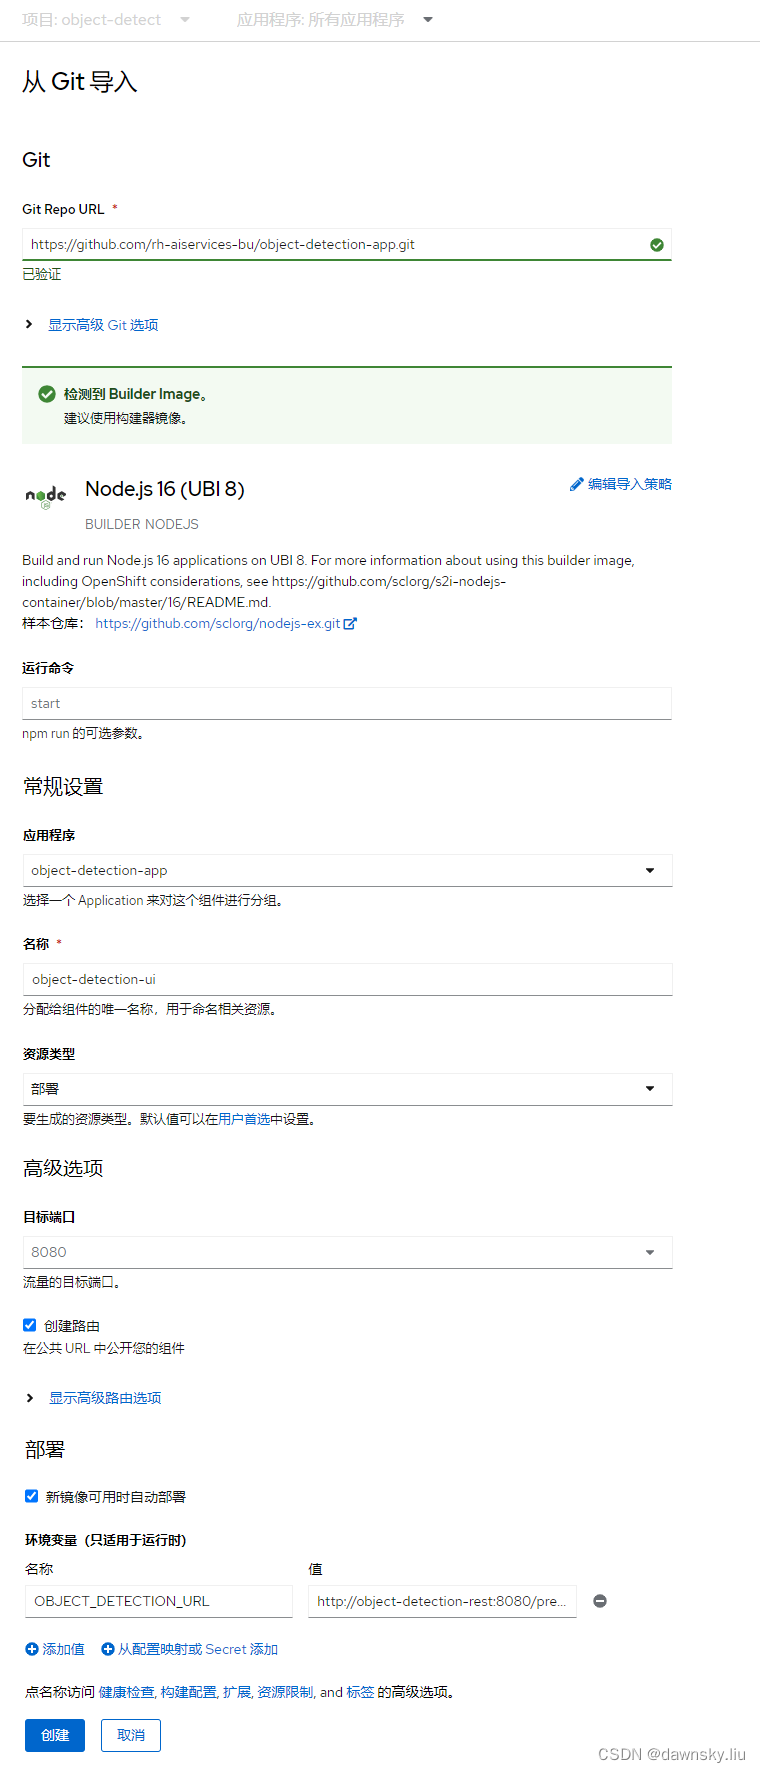
- 再次使用 “从 Git 导入” 功能部署 https://github.com/rh-aiservices-bu/object-detection-app.git。
其中需要在部署中增加一个环境变量 OBJECT_DETECTION_URL=http://object-detection-rest:8080/predictions
- 完成部署后打开下图 object-detect-ui 路由的地址。
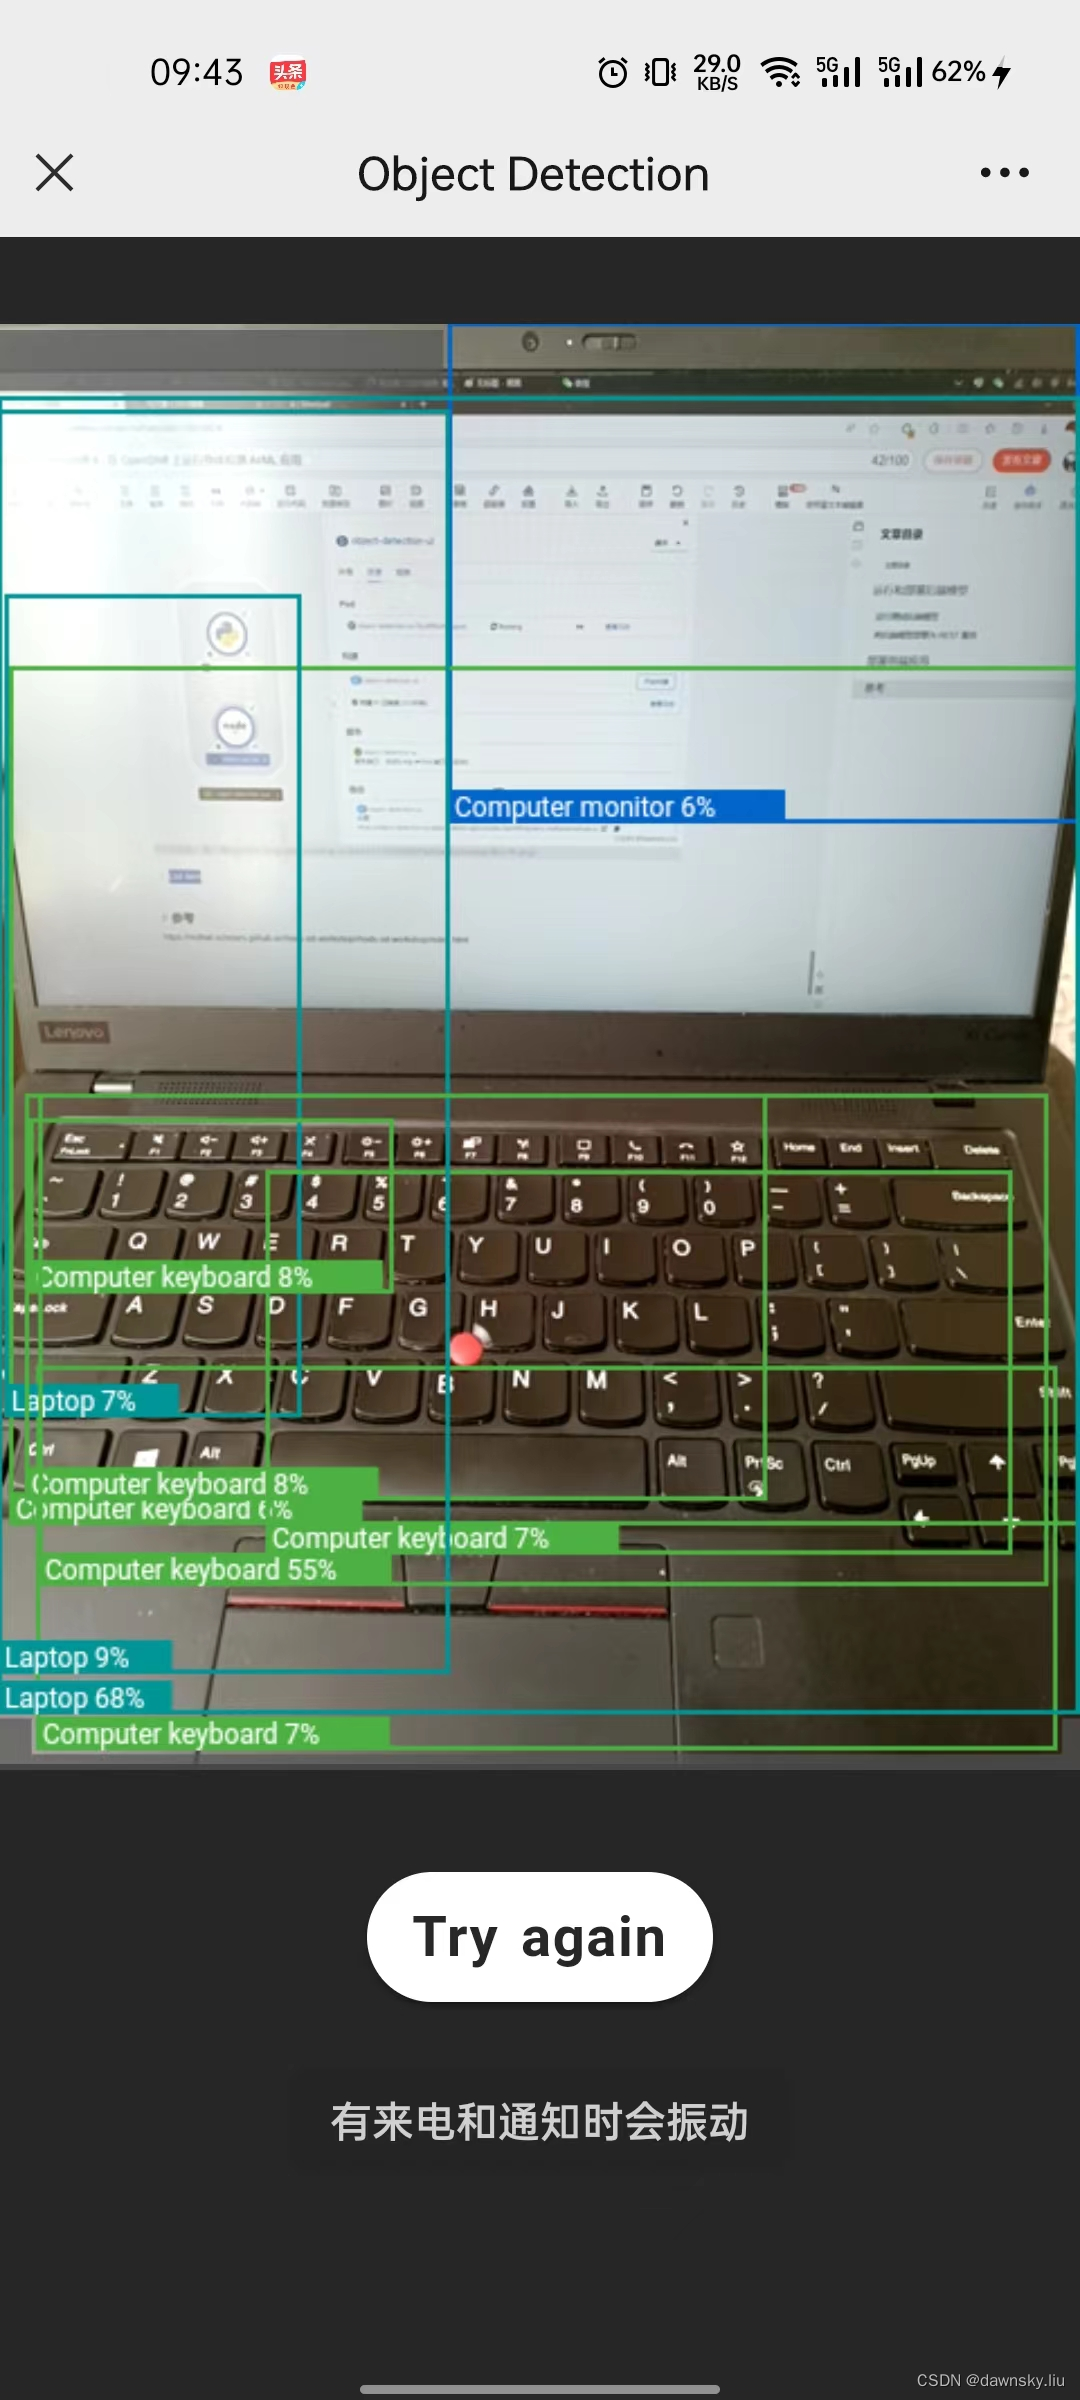
- 用带有摄像头的电脑打开 object-detect-ui 路由的地址,然后可拍摄图片确认物体识别结果。
部署前端识别视频应用
Kafka
安装 AMQ Streams Operator。
创建名为 object-detect 的 Kafka 实例。
apiVersion: kafka.strimzi.io/v1beta2
kind: KafkaTopic
metadata:name: imageslabels:strimzi.io/cluster: my-clusternamespace: object-detect
spec:config:retention.ms: 604800000segment.bytes: 1073741824partitions: 1replicas: 3
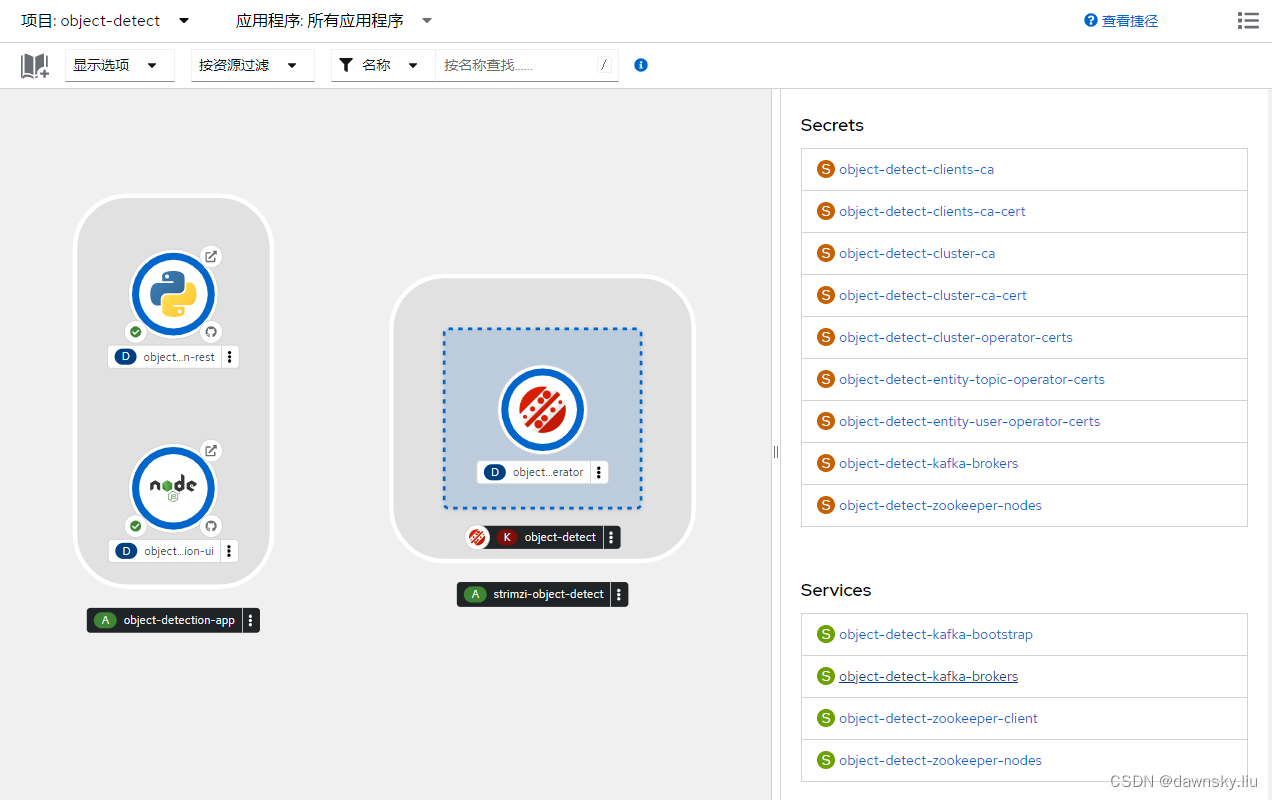
$ oc get kafkatopics -n object-detect
NAME                                                                                               CLUSTER         PARTITIONS   REPLICATION FACTOR   READY
consumer-offsets---84e7a678d08f4bd226872e5cdd4eb527fadc1c6a                                        object-detect   50           3                    True
images                                                                                             my-cluster      1            3
notebook-test                                                                                      my-cluster      1            3
objects                                                                                            my-cluster      1            3
strimzi-store-topic---effb8e3e057afce1ecf67c3f5d8e4e3ff177fc55                                     object-detect   1            3                    True
strimzi-topic-operator-kstreams-topic-store-changelog---b75e702040b99be8a9263134de3507fc0cc4017b   object-detect   1            3                    True
https://github.com/blues-man/object-detection-kafka-consumer

apiVersion: v1
kind: Secret
metadata:name: object-detection-kafkalabels:app: object-detectionapp.kubernetes.io/component: object-detectionapp.kubernetes.io/instance: object-detectionapp.kubernetes.io/part-of: object-detection
data:
stringData:KAFKA_BOOTSTRAP_SERVER: object-detect-kafka-brokers.object-detect.svc.cluster.local:8443KAFKA_TOPIC_IMAGES: imagesKAFKA_TOPIC_OBJECTS: objects


参考
https://redhat-scholars.github.io/rhods-od-workshop/rhods-od-workshop/index.html
这篇关于OpenShift 4 - 在 OpenShift 上运行物体检测 AI/ML 应用的文章就介绍到这儿,希望我们推荐的文章对编程师们有所帮助!


