本文主要是介绍【从零到一AIGC源码解析系列1】文本生成图片Stable Diffusion的diffusers实现,希望对大家解决编程问题提供一定的参考价值,需要的开发者们随着小编来一起学习吧!
目录
1. 如何使用 StableDiffusionPipeline
1.1环境配置
1.2 Stable Diffusion Pipeline
1.3生成非正方形图像
2. 如何使用 diffusers 构造自己的推理管线
关注公众号【AI杰克王】
Stable Diffusion是由CompVis、StabilityAl和LAION的研究人员和工程师创建的文本到图像潜在扩散模型。
它使用来自LAION-5B数据库子集的512x512图像进行训练。该模型使用冻结的CLIPViT-L/14文本编码器,并根据文本提示词来控制模型生成图片。
该模型具有860M参数的UNet和123M参数文本编码器,相对轻量级,可以在许多消费级GPU上运行。
*注:本文结合diffusers库来实现
1. 如何使用 StableDiffusionPipeline
1.1环境配置
首先确保GPU已经安装,使用如下命令:
nvidia-smi其次安装 diffusers 以及 scipy 、 ftfy 和transformers. accelerate 用于实现更快的加载。
pip install diffusers==0.11.1
pip install transformers scipy ftfy accelerate
1.2 Stable Diffusion Pipeline
StableDiffusionPipeline 是一个端到端推理管道,只需几行代码即可使用它从文本生成图像。
首先,我们加载模型所有组件的预训练权重。在此次实验中,我们使用Stable Diffusion 1.4 (CompVis/stable-diffusion-v1-4)。也有其他变种可以使用,如下:
runwayml/stable-diffusion-v1-5stabilityai/stable-diffusion-2-1-basestabilityai/stable-diffusion-2-1
stabilityai/stable-diffusion-2-1 版本可以生成分辨率为 768x768 的图像,而其他版本则可以生成分辨率为 512x512 的图像。
我们除了传递模型ID CompVis/stable-diffusion-v1-4 之外,我们还将特定的 revision 和 torch_dtype 传递给from_pretrained 方法。
为了节省内存使用量,我们使用半精度torch_dtype=torch.float16来推理模型:
import torch
from diffusers import StableDiffusionPipelinepipe = StableDiffusionPipeline.from_pretrained("CompVis/stable-diffusion-v1-4", torch_dtype=torch.float16)
接下来将整个推理管线移至 GPU 以实现更快的推理。
pipe = pipe.to("cuda")这时准备生成图像。
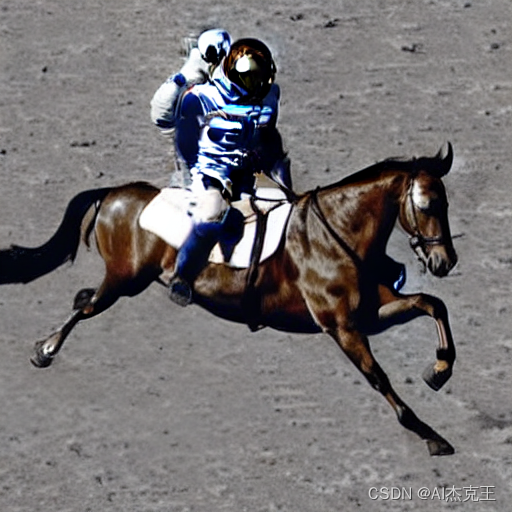
prompt = "a photograph of an astronaut riding a horse"
image = pipe(prompt).images[0]  # image here is in [PIL format](https://pillow.readthedocs.io/en/stable/)# Now to display an image you can either save it such as:
image.save(f"astronaut_rides_horse.png")
结果如下:

每次运行上述代码都会生成不同图片。如果想要每次输出图片保持一致,需要传入一个固定种子。
import torchgenerator = torch.Generator("cuda").manual_seed(1024)image = pipe(prompt, generator=generator).images[0]

另外可以使用 num_inference_steps 参数更改推理步骤数。一般来说,使用的步骤越多,结果就越好。稳定扩散是最新的模型之一,只需相对较少的步骤就可以很好地工作。如果想要更快的结果,可以使用较小的数字。
以下结果使用与之前相同的种子,但num_inference_steps =15,步骤更少。可以看到,一些细节(例如马头或头盔)与上一张图像相比不太真实和清晰:
Stable Diffusion的另一个参数是 guidance_scale 。简单来说,无分类器指导CFG迫使生成的图片更好地与提示文本匹配。像 7 或 8.5 这样的数字会给出很好的结果。
如果使用很大的数字,图像可能看起来不错,但多样性会降低。
要为同一提示生成多个图像,我们只需使用重复多次相同提示的列表即可。我们将把提示词列表(包含多个提示词)作为参数传入管线,而不是我们之前使用的单个字符串。
from PIL import Imagedef image_grid(imgs, rows, cols):assert len(imgs) == rows*colsw, h = imgs[0].sizegrid = Image.new('RGB', size=(cols*w, rows*h))grid_w, grid_h = grid.sizefor i, img in enumerate(imgs):grid.paste(img, box=(i%cols*w, i//cols*h))return grid现在,我们可以在运行带有 3 个提示列表的pipe后生成网格图像。

以下是如何生成 n × m 图像网格。
num_cols = 3
num_rows = 4prompt = ["a photograph of an astronaut riding a horse"] * num_colsall_images = []
for i in range(num_rows):images = pipe(prompt).imagesall_images.extend(images)grid = image_grid(all_images, rows=num_rows, cols=num_cols)
1.3生成非正方形图像
默认情况下,Stable Diffusion会生成 512 × 512 像素的图像。但使用 height 和 width 参数覆盖默认值非常容易,可以按纵向或横向比例创建矩形图像。
以下是选择良好图像尺寸的一些建议:
-
确保 height 和 width 都是 8 的倍数。
-
低于 512 可能会导致图像质量较低。
-
两个方向超过 512 将重复图像区域(全局连贯性丢失)
-
创建非方形图像的最佳方法是在一维中使用 512 ,并在另一维中使用大于该值的值。
prompt = "a photograph of an astronaut riding a horse"image = pipe(prompt, height=512, width=768).images[0]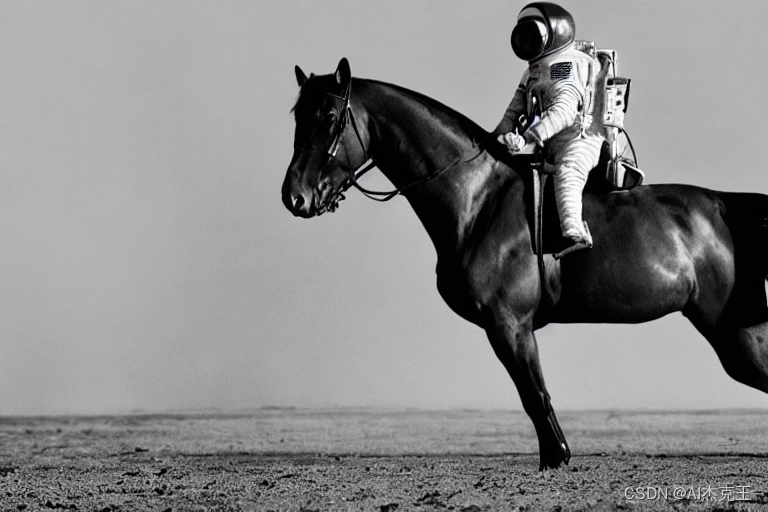
2. 如何使用 diffusers 构造自己的推理管线
先逐步浏览一下 StableDiffusionPipeline ,看看我们自己如何编写它。
我们从加载所涉及的各个模型开始。
import torch
torch_device = "cuda" if torch.cuda.is_available() else "cpu"预训练模型包括设置完整扩散线所需的所有组件。它们存储在以下文件夹中:
text_encoder :稳定扩散使用 CLIP,但其他扩散模型可能使用其他编码器,例如 BERT 。
tokenizer 。它必须与text_encoder 模型使用的模型匹配。
scheduler :用于在训练期间逐步向图像添加噪声的调度算法。
unet :用于生成输入的潜在表示的模型。
vae :自动编码器模块,我们将使用它来将潜在表示解码为真实图像。
我们可以通过使用 from_pretrained 的 subfolder 参数引用它们保存的文件夹来加载组件。
from transformers import CLIPTextModel, CLIPTokenizer
from diffusers import AutoencoderKL, UNet2DConditionModel, PNDMScheduler# 1. Load the autoencoder model which will be used to decode the latents into image space.
vae = AutoencoderKL.from_pretrained("CompVis/stable-diffusion-v1-4", subfolder="vae")# 2. Load the tokenizer and text encoder to tokenize and encode the text.
tokenizer = CLIPTokenizer.from_pretrained("openai/clip-vit-large-patch14")
text_encoder = CLIPTextModel.from_pretrained("openai/clip-vit-large-patch14")# 3. The UNet model for generating the latents.
unet = UNet2DConditionModel.from_pretrained("CompVis/stable-diffusion-v1-4", subfolder="unet")
这里,我们使用 K-LMS 调度程序,而不是加载预定义的调度程序。
from diffusers import LMSDiscreteSchedulerscheduler = LMSDiscreteScheduler.from_pretrained("CompVis/stable-diffusion-v1-4", subfolder="scheduler")接下来将模型移至 GPU。
vae = vae.to(torch_device)
text_encoder = text_encoder.to(torch_device)
unet = unet.to(torch_device)
我们现在定义将用于生成图像的参数。
请注意,guidance_scale 的定义类似于 Imagen 论文中等式 (2) 的指导权重 w 。guidance_scale == 1 对应于不进行无分类器指导。这里我们将其设置为 7.5,就像之前所做的那样。
与前面的示例相反,我们将 num_inference_steps 设置为 100 以获得更加清晰的图像。
prompt = ["a photograph of an astronaut riding a horse"]height = 512                        # default height of Stable Diffusion
width = 512                         # default width of Stable Diffusionnum_inference_steps = 100            # Number of denoising stepsguidance_scale = 7.5                # Scale for classifier-free guidancegenerator = torch.manual_seed(32)   # Seed generator to create the inital latent noisebatch_size = 1
首先,我们获取提示的 text_embeddings。这些嵌入将用于控制 UNet 模型输出。
text_input = tokenizer(prompt, padding="max_length", max_length=tokenizer.model_max_length, truncation=True, return_tensors="pt")with torch.no_grad():text_embeddings = text_encoder(text_input.input_ids.to(torch_device))[0]我们还将获得无分类器指导的无条件文本嵌入,这只是填充标记(空文本)的嵌入。它们需要具有与条件 text_embeddings 相同的形状( batch_size 和 seq_length )
max_length = text_input.input_ids.shape[-1]
uncond_input = tokenizer([""] * batch_size, padding="max_length", max_length=max_length, return_tensors="pt"
)
with torch.no_grad():uncond_embeddings = text_encoder(uncond_input.input_ids.to(torch_device))[0]
对于无分类器指导,我们需要进行两次前向传递。一个具有条件输入 ( text_embeddings ),另一个具有无条件嵌入 ( uncond_embeddings )。在实践中,我们可以将两者连接成一个批次,以避免进行两次前向传递。
text_embeddings = torch.cat([uncond_embeddings, text_embeddings])这里生成初始随机噪声。
latents = torch.randn((batch_size, unet.in_channels, height // 8, width // 8),generator=generator,
)
latents = latents.to(torch_device)
注意这里的latents的shape是torch.Size([1, 4, 64, 64])。
模型后续会将这种潜在表示(纯噪声)转换为 512 × 512 图像。
接下来,我们使用选择的 num_inference_steps 初始化调度程序。这将计算去噪过程中要使用的 sigmas 和准确的时间步值。
scheduler.set_timesteps(num_inference_steps)K-LMS 调度程序需要将latents 与其 sigma 值相乘。
latents = latents * scheduler.init_noise_sigma编写去噪循环。
from tqdm.auto import tqdm
from torch import autocastfor t in tqdm(scheduler.timesteps):# expand the latents if we are doing classifier-free guidance to avoid doing two forward passes.latent_model_input = torch.cat([latents] * 2)latent_model_input = scheduler.scale_model_input(latent_model_input, t)# predict the noise residualwith torch.no_grad():noise_pred = unet(latent_model_input, t, encoder_hidden_states=text_embeddings).sample# perform guidancenoise_pred_uncond, noise_pred_text = noise_pred.chunk(2)noise_pred = noise_pred_uncond + guidance_scale * (noise_pred_text - noise_pred_uncond)# compute the previous noisy sample x_t -> x_t-1latents = scheduler.step(noise_pred, t, latents).prev_sample
使用 vae 将生成的 latents 解码回图像。
# scale and decode the image latents with vae
latents = 1 / 0.18215 * latentswith torch.no_grad():image = vae.decode(latents).sample
最后,将图像转换为 PIL,以便可以显示或保存它。

关注公众号【AI杰克王】
1. 回复“资源”,获取AIGC 博客教程,顶级大学PPT知识干货;
2. 回复“星球”,获取AIGC 免费知识星球入口,有前沿资深算法工程师分享讨论。
欢迎加入AI杰克王的免费知识星球,海量干货等着你,一起探讨学习AIGC!
这篇关于【从零到一AIGC源码解析系列1】文本生成图片Stable Diffusion的diffusers实现的文章就介绍到这儿,希望我们推荐的文章对编程师们有所帮助!


