本文主要是介绍瞳孔检测眼动追踪python实现(基于dlib),希望对大家解决编程问题提供一定的参考价值,需要的开发者们随着小编来一起学习吧!
效果展示:
原图:(图片来自 b站up 借我300去洗牙)

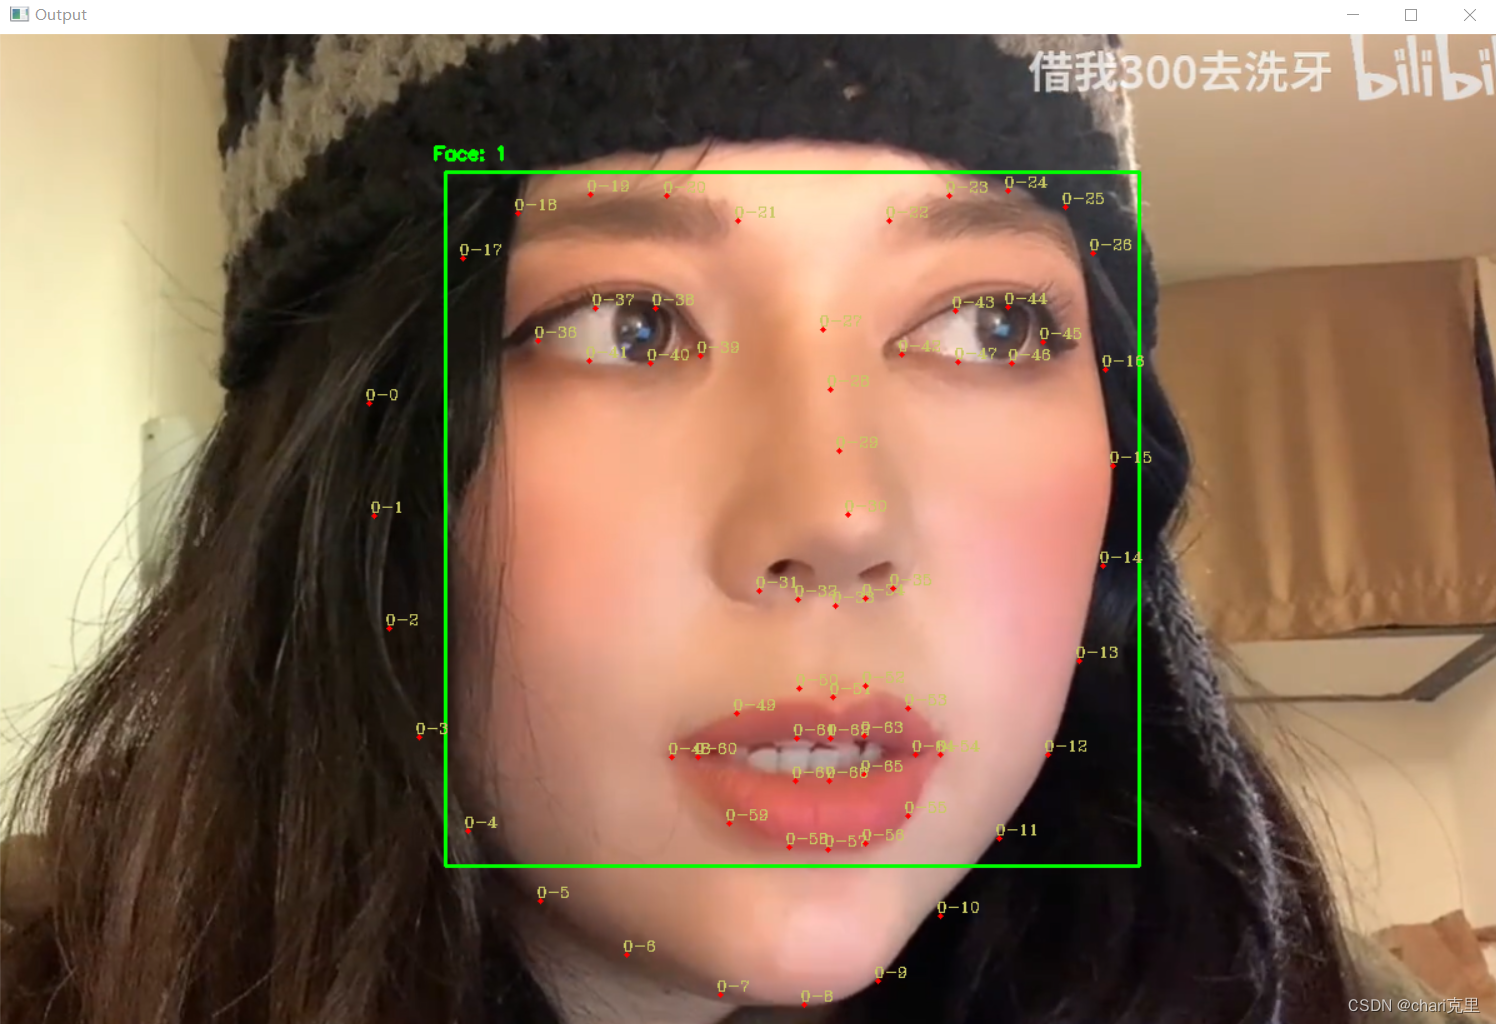
dlib实现的特征点检测
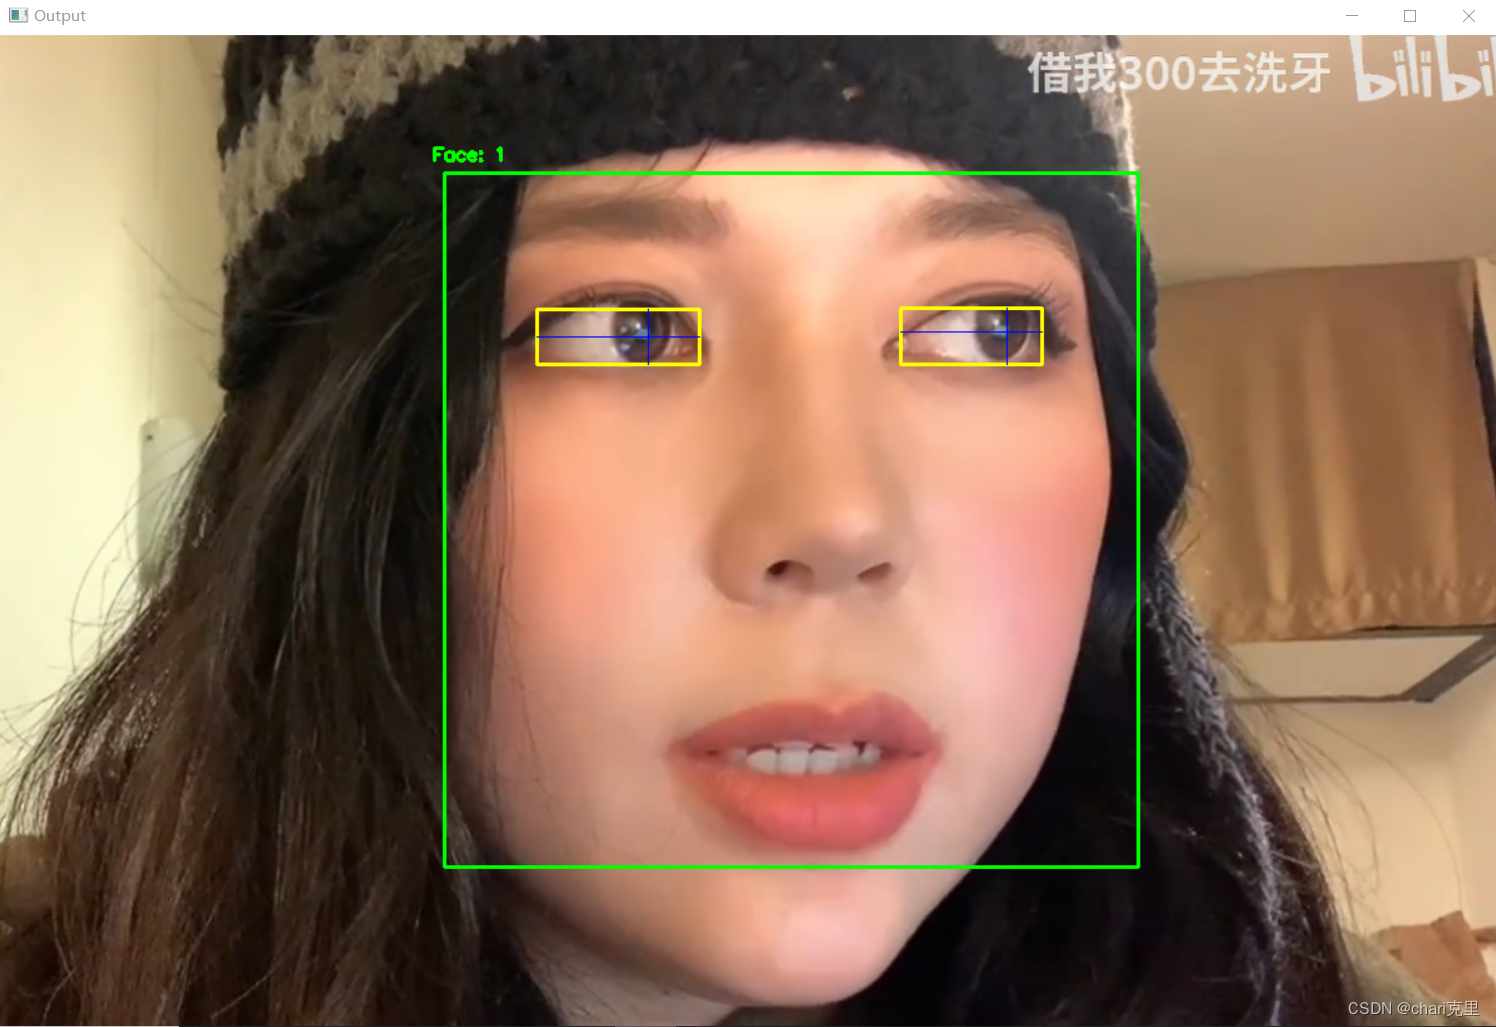
瞳孔检测结果
完整代码:
# encoding:utf-8import dlib
import numpy as np
import cv2def rect_to_bb(rect): # 获得人脸矩形的坐标信息x = rect.left()y = rect.top()w = rect.right() - xh = rect.bottom() - yreturn (x, y, w, h)def shape_to_np(shape, dtype="int"): # 将包含68个特征的的shape转换为numpy array格式coords = np.zeros((68, 2), dtype=dtype)for i in range(0, 68):coords[i] = (shape.part(i).x, shape.part(i).y)return coordsdef resize(image, width=1200):  # 将待检测的image进行resizer = width * 1.0 / image.shape[1]dim = (width, int(image.shape[0] * r))resized = cv2.resize(image, dim, interpolation=cv2.INTER_AREA)return resizeddef feature():image_file = r"F:\project_python\facenet\2.PNG"detector = dlib.get_frontal_face_detector()predictor = dlib.shape_predictor(r"F:\project_python\facenet\shape_predictor_68_face_landmarks.dat")image = cv2.imread(image_file)image = resize(image, width=1200)gray = cv2.cvtColor(image, cv2.COLOR_BGR2GRAY)rects = detector(gray, 1)shapes = []for (i, rect) in enumerate(rects):shape = predictor(gray, rect)shape = shape_to_np(shape)shapes.append(shape)(x, y, w, h) = rect_to_bb(rect)cv2.rectangle(image, (x, y), (x + w, y + h), (0, 255, 0), 2)cv2.putText(image, "Face: {}".format(i + 1), (x - 10, y - 10), cv2.FONT_HERSHEY_SIMPLEX, 0.5, (0, 255, 0), 2)count1 = 0count2 = 0# encoding:utf-8import dlib
import numpy as np
import cv2def rect_to_bb(rect): # 获得人脸矩形的坐标信息x = rect.left()y = rect.top()w = rect.right() - xh = rect.bottom() - yreturn (x, y, w, h)def shape_to_np(shape, dtype="int"): # 将包含68个特征的的shape转换为numpy array格式coords = np.zeros((68, 2), dtype=dtype)for i in range(0, 68):coords[i] = (shape.part(i).x, shape.part(i).y)return coordsdef resize(image, width=1200):  # 将待检测的image进行resizer = width * 1.0 / image.shape[1]dim = (width, int(image.shape[0] * r))resized = cv2.resize(image, dim, interpolation=cv2.INTER_AREA)return resizeddef feature():image_file = r"F:\project_python\facenet\2.PNG"detector = dlib.get_frontal_face_detector()predictor = dlib.shape_predictor(r"F:\project_python\facenet\shape_predictor_68_face_landmarks.dat")image = cv2.imread(image_file)image = resize(image, width=1200)gray = cv2.cvtColor(image, cv2.COLOR_BGR2GRAY)rects = detector(gray, 1)shapes = []for (i, rect) in enumerate(rects):shape = predictor(gray, rect)shape = shape_to_np(shape)shapes.append(shape)(x, y, w, h) = rect_to_bb(rect)cv2.rectangle(image, (x, y), (x + w, y + h), (0, 255, 0), 2)cv2.putText(image, "Face: {}".format(i + 1), (x - 10, y - 10), cv2.FONT_HERSHEY_SIMPLEX, 0.5, (0, 255, 0), 2)count1 = 0count2 = 0image1=image.copy()eyes=[]eyes2=[]for shape in shapes:left_eye=[]right_eye=[]left_eye2=[]right_eye2=[]for (x, y) in shape:cv2.circle(image1, (x, y), 2, (0, 0, 255), -1)cv2.putText(image1, str(count1)+"-"+str(count2), (x-3, y-3), cv2.FONT_HERSHEY_COMPLEX, 0.4, (100, 200, 200), 1)if count2>=36 and count2<=41:left_eye.append([x,y])left_eye2.append((x,y))elif count2>=42 and count2<=47:right_eye.append([x,y])right_eye2.append((x,y))count2+=1count1+=1    eyes.append([left_eye,right_eye])eyes2.append([left_eye2,right_eye2])cv2.imshow("Output", image1)cv2.waitKey(0)image2=image.copy()for i in range(len(eyes)):e=eyes[i]for j in range(len(e)):points=e[j]# 六边形的顶点坐标pts = np.array(points, np.int32)pts = pts.reshape((-1, 1, 2))# 创建一个空白图像作为掩模mask = np.zeros_like(image)# 在掩模上绘制填充了白色的六边形cv2.fillPoly(mask, [pts], (255, 255, 255))# 创建一个白色背景图像white_background = np.ones_like(image) * 255# 在白色背景上绘制填充了原始图像的六边形cv2.fillPoly(white_background, [pts], (0, 0, 0))# 将原始图像和白色背景图像按位取反inverse_mask = cv2.bitwise_not(mask)# 将原始图像中六边形内的部分与白色背景中六边形外的部分相结合result = cv2.bitwise_and(image, mask) + cv2.bitwise_and(white_background, inverse_mask)# 显示最终结果cv2.imshow('Result', result)cv2.waitKey(0)# 找到最小长方形的左上角和右下角坐标min_x = min(point[0] for point in points)max_x = max(point[0] for point in points)min_y = min(point[1] for point in points)max_y = max(point[1] for point in points)cv2.rectangle(image2, (min_x, min_y), (max_x, max_y), (0, 255, 255), 2)# 获取最小长方形中的图像部分roi = result[min_y:max_y, min_x:max_x]# 将图像部分转换为灰度图gray_roi = cv2.cvtColor(roi, cv2.COLOR_BGR2GRAY)# define a threshold, 128 is the middle of black and white in grey scalethresh = 100# assign blue channel to zerosimg_binary = cv2.threshold(gray_roi, thresh, 255, cv2.THRESH_BINARY)[1]cv2.imshow("Output", img_binary)cv2.waitKey(0)#处理眼睛反光形成的白点# 获取图像高度img_binary1=img_binary.copy()height = img_binary1.shape[0]# 遍历每一列像素for col in range(img_binary1.shape[1]):white_run_length = 0start_index = 0end_index = 0for row in range(height):if img_binary1[row, col] == 255:  # 白色像素if white_run_length == 0:start_index = rowwhite_run_length += 1end_index = rowelse:  # 黑色像素if white_run_length > 0 and white_run_length < height / 2 and (start_index == 0 or img_binary1[start_index - 1, col] == 0) and (end_index == height - 1 or img_binary1[end_index + 1, col] == 0):img_binary1[start_index:end_index + 1, col] = 0  # 将连续的白色像素改为黑色像素white_run_length = 0cv2.imshow("Output", img_binary1)cv2.waitKey(0)# 计算每一列的像素值总和column_sums = np.sum(img_binary1, axis=0)# 计算每一列与相邻的n列的总和neighbor_sums = np.convolve(column_sums, np.ones(1), mode='valid')# 找到结果最小的n列的列号min_indices = np.argpartition(neighbor_sums, 20)[:20]# 将列号按数字排序sorted_indices = np.sort(min_indices)# 找到这7列的最中间的列的列号middle_column = sorted_indices[len(sorted_indices) // 2]print("每一列与相邻的6列的总和:", neighbor_sums)print("结果最小的7列的列号(按数字排序):", sorted_indices)print("这7列的最中间的列的列号:", middle_column)cv2.line(image2, (min_x+middle_column, min_y), (min_x+middle_column, max_y), (255, 0, 0))# 找出结果最小的列min_column = img_binary[:, middle_column]# 找出连续相邻的白色像素点white_pixels = np.where(min_column == 255)[0]# 找出连续相邻的白色像素点中最长的一段longest_start = 0longest_end = 0max_length = 0current_start = 0current_length = 0for i in range(1, len(white_pixels)):if white_pixels[i] == white_pixels[i-1] + 1:current_length += 1else:if current_length > max_length:max_length = current_lengthlongest_start = white_pixels[current_start]longest_end = white_pixels[i-1]current_start = icurrent_length = 0# 判断起始位置和结束位置的中点在图像的上半部分还是下半部分mid_point = (longest_start + longest_end) // 2height = img_binary.shape[0]if mid_point < height // 2:print("最长的白色像素段起始位置:", longest_start)print("最长的白色像素段结束位置:", longest_end)print("连续的长度:", max_length)print("中点在图像的上半部分")cv2.line(image2, (min_x,min_y+ height // 2-max_length), (max_x,min_y+ height // 2-max_length), (255, 0, 0))else:print("最长的白色像素段起始位置:", longest_start)print("最长的白色像素段结束位置:", longest_end)print("连续的长度:", max_length)print("中点在图像的下半部分")cv2.line(image2, (min_x,min_y+ height // 2+max_length), (max_x,min_y+ height // 2+max_length), (255, 0, 0))cv2.imshow("Output", image2)cv2.waitKey(0)if __name__ == "__main__":feature()
文件下载:
1.shape_predictor_68_face_landmarks.dat 下载地址
1.官方下载地址(会比较慢) http://dlib.net/files/
2.我的网盘: 链接:https://pan.baidu.com/s/1ORhqLS1bkHyyYfzbmftNpg 提取码:va12
3.我的资源(免费下载):https://download.csdn.net/download/qq_51985653/15122811
原文链接:https://blog.csdn.net/qq_51985653/article/details/113748025
这篇关于瞳孔检测眼动追踪python实现(基于dlib)的文章就介绍到这儿,希望我们推荐的文章对编程师们有所帮助!


