本文主要是介绍⭐ Unity里 用Shader 去做实时动态绿幕抠图,希望对大家解决编程问题提供一定的参考价值,需要的开发者们随着小编来一起学习吧!
1.先看一下效果
a.这是背景图片
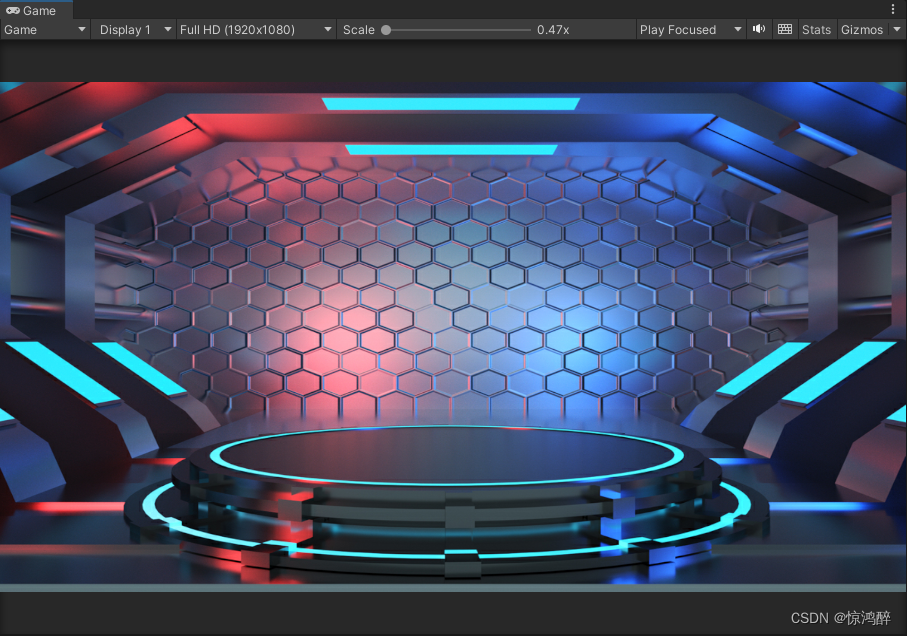
b.抠完图之后(这里用的是扣去白色的)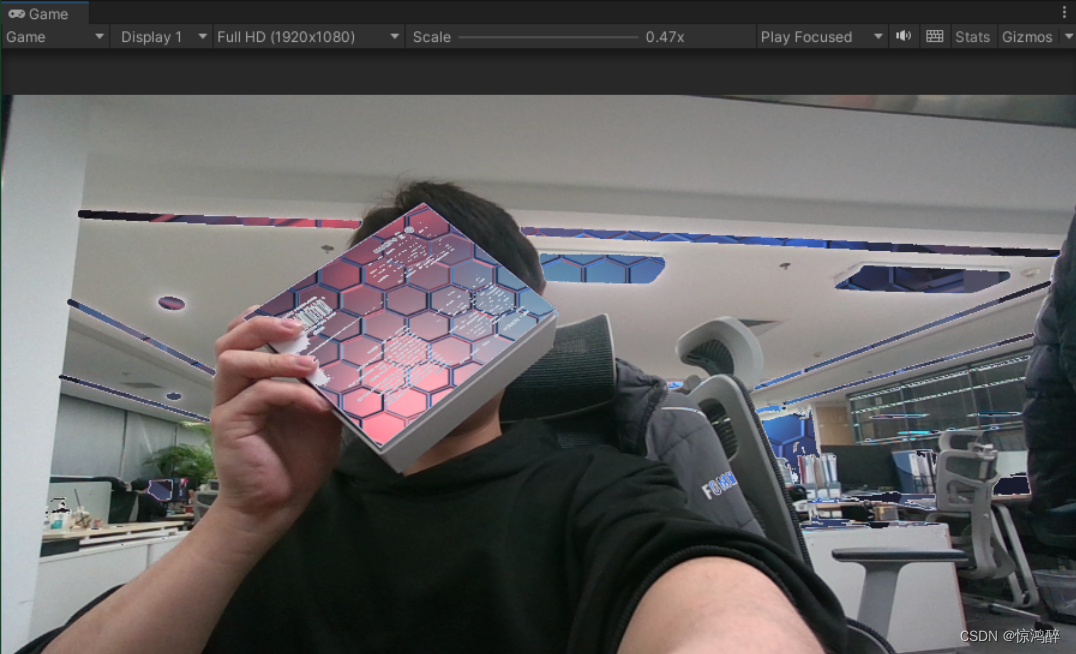
2.shader代码如下
Shader "UniversalChromaKey" {Properties{_MainTex("Base (RGB)", 2D) = "white" {}_Sens("Sensibilidad", Range(0,.9)) = .3_Cutoff("Recorte", Range(0,.9)) = .2_Color("Chroma", Color) = (0, 1.0, 0)}SubShader{Tags { "Queue" = "Transparent" "RenderType" = "Transparent" }LOD 200CGPROGRAM#pragma surface surf Lambert alphasampler2D _MainTex;float _Cutoff;float _Sens;half3 _Color;struct Input {float2 uv_MainTex;};void surf(Input IN, inout SurfaceOutput o) {half4 c = tex2D(_MainTex, IN.uv_MainTex);o.Emission = c.rgb;float aR = abs(c.r - _Color.r) < _Sens ? abs(c.r - _Color.r) : 1;float aG = abs(c.g - _Color.g) < _Sens ? abs(c.g - _Color.g) : 1;float aB = abs(c.b - _Color.b) < _Sens ? abs(c.b - _Color.b) : 1;float a = (aR + aG + aB) / 3;if (a < _Cutoff) {o.Alpha = 0;}
else {o.Alpha = 1;
}}
ENDCG}FallBack "Diffuse"
}
3.相机脚本和控制shader脚本
using UnityEngine;
using System.Collections;
using UnityEngine.Video;
using UnityEngine.UI;
using System.IO;public class CameraControl : MonoBehaviour
{/// <summary>/// 外部摄像头/// </summary>private WebCamTexture webTex;/// <summary>/// UI父物体/// </summary>private Canvas canvas;/// <summary>/// 摄像头映射画面/// </summary>private RawImage Camera_image;private void Start(){canvas = GameObject.Find("Canvas").GetComponent<Canvas>();Camera_image = canvas.transform.Find("Camera_screen").GetComponent<RawImage>();StartCoroutine(CallCamera());}/// <summary>/// 打开摄像头/// </summary>/// <returns></returns>IEnumerator CallCamera(){//等待用户允许访问yield return Application.RequestUserAuthorization(UserAuthorization.WebCam);//如果用户允许访问,开始获取图像        if (Application.HasUserAuthorization(UserAuthorization.WebCam)){WebCamDevice[] devices = WebCamTexture.devices;string devicename = devices[1].name;webTex = new WebCamTexture(devicename, Screen.width, Screen.height);Camera_image.texture = webTex;webTex.Play();}}}
using UnityEngine;
using System.Collections;
using UnityEngine.UI;public class ShaderControls : MonoBehaviour
{float sensS, cutoffS;Color colS;// Use this for initializationvoid Start(){sensS = GetComponent<RawImage>().material.GetFloat("_Sens");cutoffS = GetComponent<RawImage>().material.GetFloat("_Cutoff");colS = GetComponent<RawImage>().material.GetColor("_Color");sens = sensS;cutoff = cutoffS;}// Update is called once per framevoid Update(){}public float sens, cutoff;public string r = "99", g = "205", b = "77";//void OnGUI()//{//    sens = GUI.HorizontalSlider(new Rect(25, 25, 100, 30), sens, 0.0f, 1.0f);//    cutoff = GUI.HorizontalSlider(new Rect(25, 70, 100, 30), cutoff, 0.0f, 1.0f);//    r = GUI.TextField(new Rect(25, 120, 40, 20), r);//    g = GUI.TextField(new Rect(70, 120, 40, 20), g);//    b = GUI.TextField(new Rect(120, 120, 40, 20), b);//    if (GUI.Button(new Rect(25, 160, 100, 30), "Reset"))//    {//        sens = sensS;//        cutoff = cutoffS;//        r = (colS.r * 255f).ToString();//        g = (colS.g * 255f).ToString();//        b = (colS.b * 255f).ToString();//    }//    GetComponent<RawImage>().material.SetFloat("_Sens", sens);//    GetComponent<RawImage>().material.SetFloat("_Cutoff", cutoff);//    try//    {//        Color col = new Color(int.Parse(r) / 255f, int.Parse(g) / 255f, int.Parse(b) / 255f);//        //print (col);//        GetComponent<RawImage>().material.color = col;//    }//    catch (UnityException e)//    {//    }//}
}
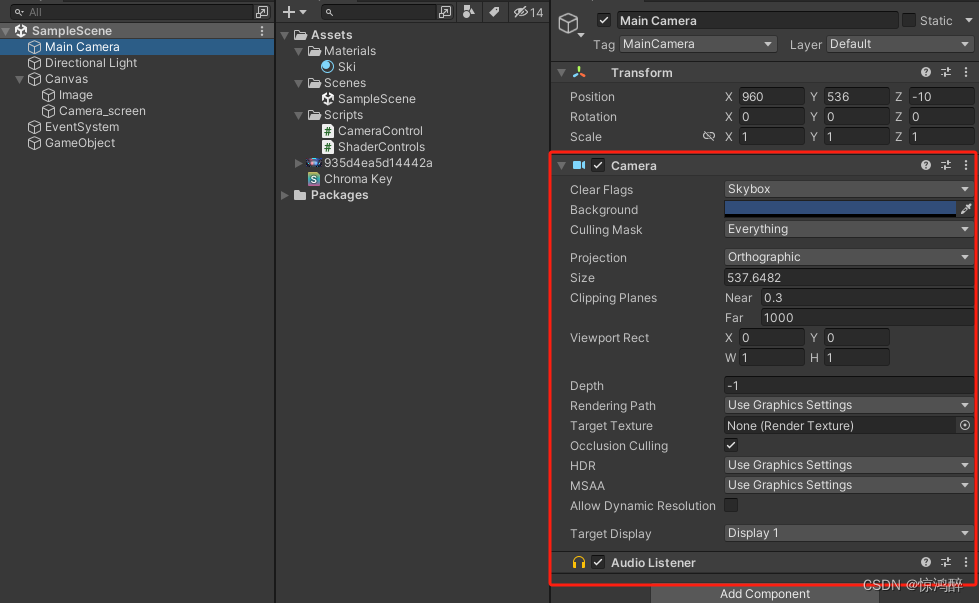
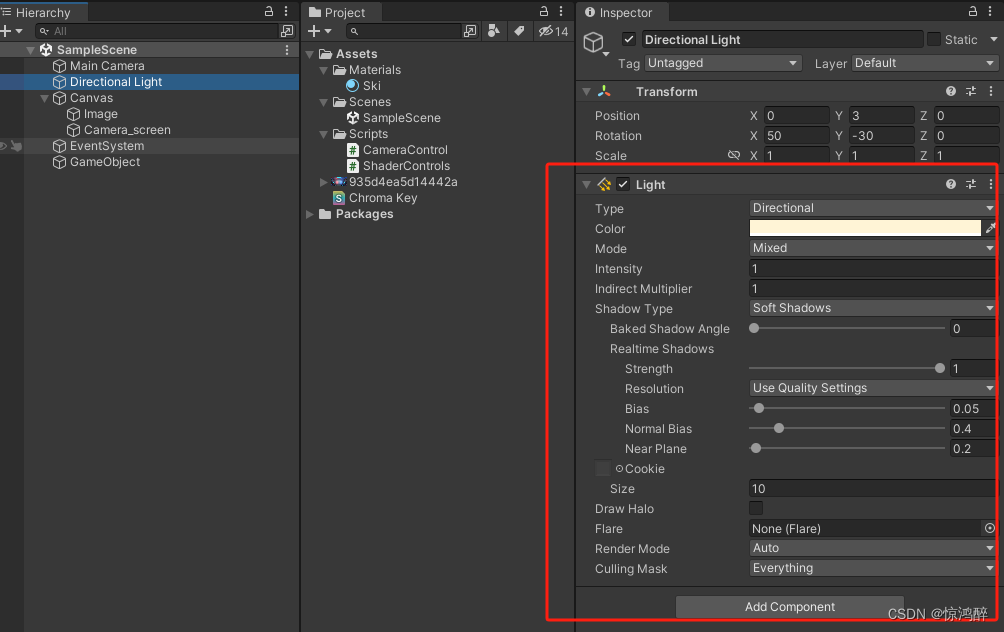
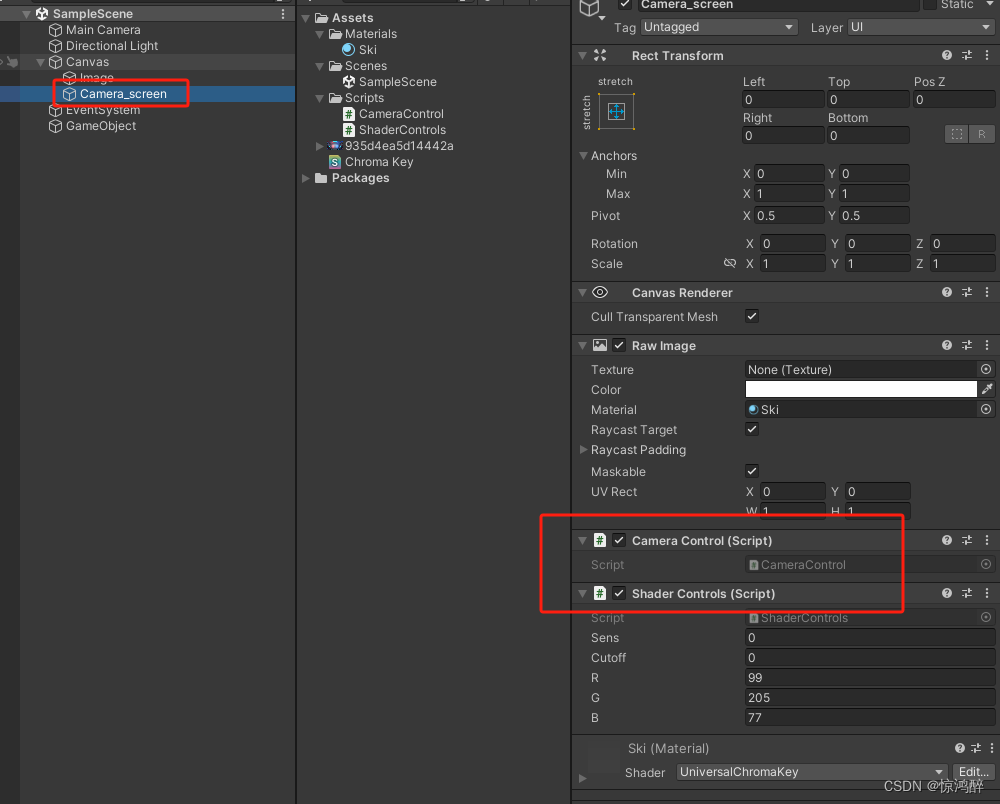
4.调整场景里的注意事项
a.主相机
b.光照
c.canvas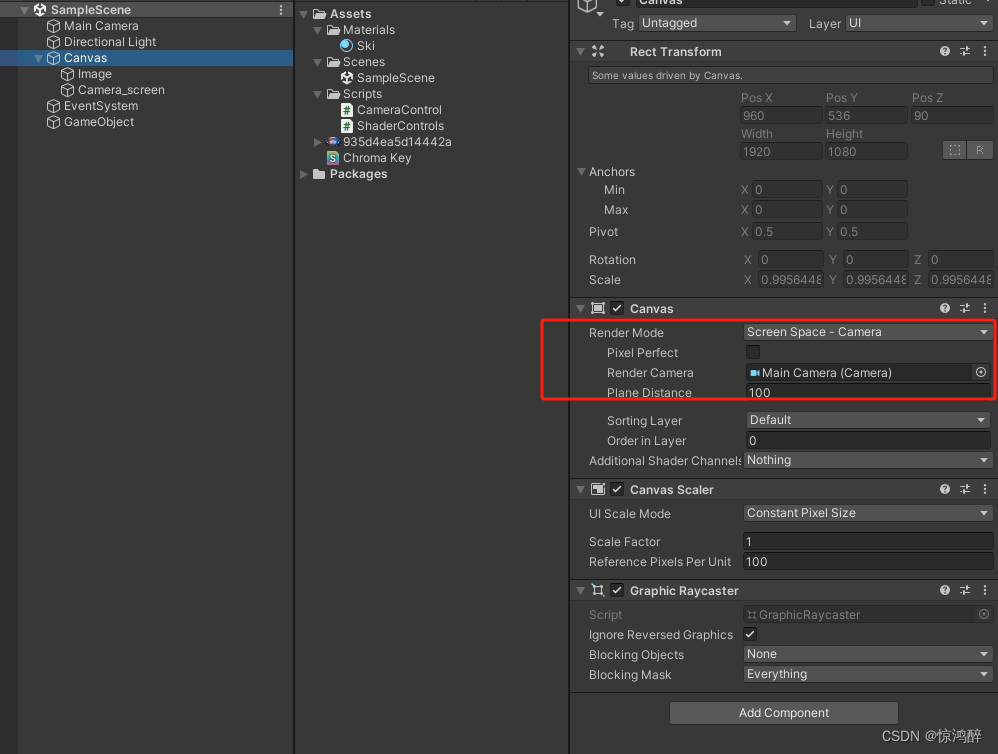
d.脚本挂载
这篇关于⭐ Unity里 用Shader 去做实时动态绿幕抠图的文章就介绍到这儿,希望我们推荐的文章对编程师们有所帮助!


