本文主要是介绍Google codelab WebGPU入门教程源码<6> - 使用计算着色器实现计算元胞自动机之生命游戏模拟过程(源码),希望对大家解决编程问题提供一定的参考价值,需要的开发者们随着小编来一起学习吧!
对应的教程文章:
https://codelabs.developers.google.com/your-first-webgpu-app?hl=zh-cn#7
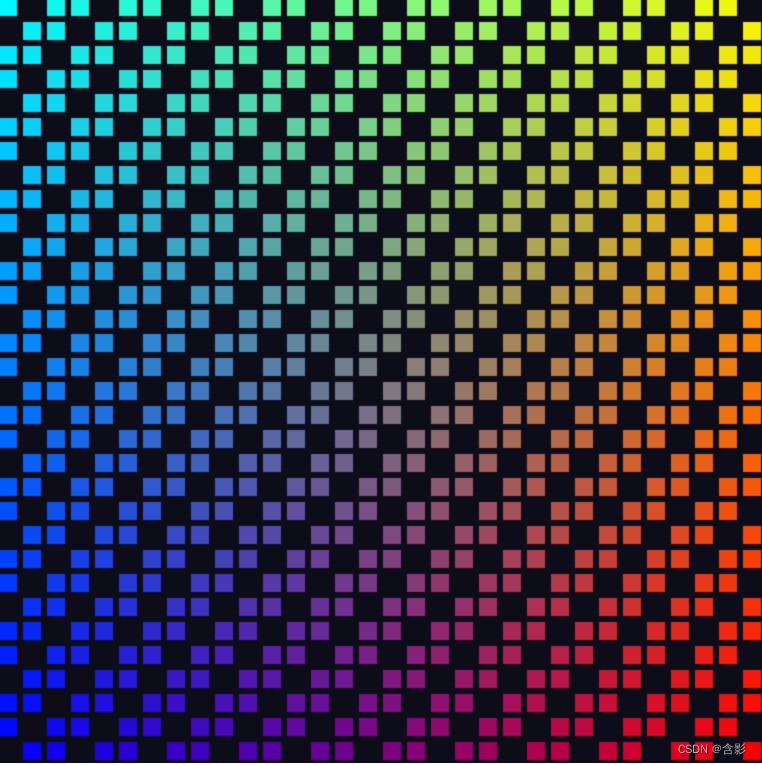
对应的源码执行效果:
对应的教程源码:
此处源码和教程本身提供的部分代码可能存在一点差异。点击画面,切换效果。
class Color4 {r: number;g: number;b: number;a: number;constructor(pr = 1.0, pg = 1.0, pb = 1.0, pa = 1.0) {this.r = pr;this.g = pg;this.b = pb;this.a = pa;}
}export class WGPUSimulation {private mRVertices: Float32Array = null;private mRPipeline: any | null = null;private mRSimulationPipeline: any | null = null;private mVtxBuffer: any | null = null;private mCanvasFormat: any | null = null;private mWGPUDevice: any | null = null;private mWGPUContext: any | null = null;private mUniformBindGroups: any | null = null;private mGridSize = 32;private mShdWorkGroupSize = 8;constructor() {}initialize(): void {const canvas = document.createElement("canvas");canvas.width = 512;canvas.height = 512;document.body.appendChild(canvas);console.log("ready init webgpu ...");this.initWebGPU(canvas).then(() => {console.log("webgpu initialization finish ...");this.updateWGPUCanvas();});document.onmousedown = (evt):void => {this.updateWGPUCanvas( new Color4(0.05, 0.05, 0.1) );}}private mUniformObj: any = {uniformArray: null, uniformBuffer: null};private createStorage(device: any): any {// Create an array representing the active state of each cell.const cellStateArray = new Uint32Array(this.mGridSize * this.mGridSize);// Create two storage buffers to hold the cell state.const cellStateStorage = [device.createBuffer({label: "Cell State A",size: cellStateArray.byteLength,usage: GPUBufferUsage.STORAGE | GPUBufferUsage.COPY_DST,}),device.createBuffer({label: "Cell State B",size: cellStateArray.byteLength,usage: GPUBufferUsage.STORAGE | GPUBufferUsage.COPY_DST,})];// Mark every third cell of the first grid as active.for (let i = 0; i < cellStateArray.length; i+=3) {cellStateArray[i] = 1;}device.queue.writeBuffer(cellStateStorage[0], 0, cellStateArray);// Mark every other cell of the second grid as active.for (let i = 0; i < cellStateArray.length; i++) {cellStateArray[i] = i % 2;}device.queue.writeBuffer(cellStateStorage[1], 0, cellStateArray);return cellStateStorage;}private createUniform(device: any): any {// Create a uniform buffer that describes the grid.const uniformArray = new Float32Array([this.mGridSize, this.mGridSize]);const uniformBuffer = device.createBuffer({label: "Grid Uniforms",size: uniformArray.byteLength,usage: GPUBufferUsage.UNIFORM | GPUBufferUsage.COPY_DST,});device.queue.writeBuffer(uniformBuffer, 0, uniformArray);const cellStateStorage = this.createStorage(device);// Create the bind group layout and pipeline layout.const bindGroupLayout = device.createBindGroupLayout({label: "Cell Bind Group Layout",entries: [{binding: 0,visibility: GPUShaderStage.FRAGMENT | GPUShaderStage.VERTEX | GPUShaderStage.COMPUTE,buffer: {} // Grid uniform buffer}, {binding: 1,visibility: GPUShaderStage.VERTEX | GPUShaderStage.COMPUTE,buffer: { type: "read-only-storage"} // Cell state input buffer}, {binding: 2,visibility: GPUShaderStage.COMPUTE,buffer: { type: "storage"} // Cell state output buffer}]});const bindGroups = [device.createBindGroup({label: "Cell renderer bind group A",layout: bindGroupLayout,entries: [{binding: 0,resource: { buffer: uniformBuffer }}, {binding: 1,resource: { buffer: cellStateStorage[0] }}, {binding: 2,resource: { buffer: cellStateStorage[1] }}],}),device.createBindGroup({label: "Cell renderer bind group B",layout: bindGroupLayout,entries: [{binding: 0,resource: { buffer: uniformBuffer }}, {binding: 1,resource: { buffer: cellStateStorage[1] }}, {binding: 2,resource: { buffer: cellStateStorage[0] }}],})];this.mUniformBindGroups = bindGroups;const obj = this.mUniformObj;obj.uniformArray = uniformArray;obj.uniformBuffer = uniformBuffer;return bindGroupLayout;}private mStep = 0;private createComputeShader(device: any): any {let sgs = this.mShdWorkGroupSize;// Create the compute shader that will process the simulation.const simulationShaderModule = device.createShaderModule({label: "Game of Life simulation shader",code: `@group(0) @binding(0) var<uniform> grid: vec2f;@group(0) @binding(1) var<storage> cellStateIn: array<u32>;@group(0) @binding(2) var<storage, read_write> cellStateOut: array<u32>;fn cellIndex(cell: vec2u) -> u32 {return cell.y * u32(grid.x) + cell.x;}@compute @workgroup_size(${sgs}, ${sgs})fn computeMain(@builtin(global_invocation_id) cell: vec3u) {if (cellStateIn[cellIndex(cell.xy)] == 1) {cellStateOut[cellIndex(cell.xy)] = 0;} else {cellStateOut[cellIndex(cell.xy)] = 1;}}`});return simulationShaderModule;}private createRectGeometryData(device: any, pass: any, computePass: any): void {let vertices = this.mRVertices;let vertexBuffer = this.mVtxBuffer;let cellPipeline = this.mRPipeline;let simulationPipeline = this.mRSimulationPipeline;if(!cellPipeline) {let hsize = 0.8;vertices = new Float32Array([//   X,    Y,-hsize, -hsize, // Triangle 1 (Blue)hsize, -hsize,hsize,  hsize,-hsize, -hsize, // Triangle 2 (Red)hsize,  hsize,-hsize,  hsize,]);vertexBuffer = device.createBuffer({label: "Cell vertices",size: vertices.byteLength,usage: GPUBufferUsage.VERTEX | GPUBufferUsage.COPY_DST,});device.queue.writeBuffer(vertexBuffer, /*bufferOffset=*/0, vertices);const vertexBufferLayout = {arrayStride: 8,attributes: [{format: "float32x2",offset: 0,shaderLocation: 0, // Position, see vertex shader}],};const shaderCodes = `struct VertexInput {@location(0) pos: vec2f,@builtin(instance_index) instance: u32,};struct VertexOutput {@builtin(position) pos: vec4f,@location(0) cell: vec2f,};@group(0) @binding(0) var<uniform> grid: vec2f;@group(0) @binding(1) var<storage> cellState: array<u32>;@vertexfn vertexMain(input: VertexInput) -> VertexOutput  {let i = f32(input.instance);let cell = vec2f(i % grid.x, floor(i / grid.x));let cellOffset = cell / grid * 2;let state = f32(cellState[input.instance]);let gridPos = (input.pos * state + 1) / grid - 1 + cellOffset;var output: VertexOutput;output.pos = vec4f(gridPos, 0, 1);output.cell = cell;return output;}@fragmentfn fragmentMain(input: VertexOutput) -> @location(0) vec4f {// return vec4f(input.cell, 0, 1);let c = input.cell/grid;return vec4f(c, 1.0 - c.x, 1);}`;const bindGroupLayout = this.createUniform(device);const pipelineLayout = device.createPipelineLayout({label: "Cell Pipeline Layout",bindGroupLayouts: [ bindGroupLayout ],});const cellShaderModule = device.createShaderModule({label: "Cell shader",code: shaderCodes});cellPipeline = device.createRenderPipeline({label: "Cell pipeline",layout: pipelineLayout,vertex: {module: cellShaderModule,entryPoint: "vertexMain",buffers: [vertexBufferLayout]},fragment: {module: cellShaderModule,entryPoint: "fragmentMain",targets: [{format: this.mCanvasFormat}]},});const simulationShaderModule = this.createComputeShader( device );// Create a compute pipeline that updates the game state.simulationPipeline = device.createComputePipeline({label: "Simulation pipeline",layout: pipelineLayout,compute: {module: simulationShaderModule,entryPoint: "computeMain",}});this.mRVertices = vertices;this.mVtxBuffer = vertexBuffer;this.mRPipeline = cellPipeline;this.mRSimulationPipeline = simulationPipeline;}const bindGroups = this.mUniformBindGroups;computePass.setPipeline(simulationPipeline),computePass.setBindGroup(0, bindGroups[this.mStep % 2]);const workgroupCount = Math.ceil(this.mGridSize / this.mShdWorkGroupSize);computePass.dispatchWorkgroups(workgroupCount, workgroupCount);pass.setPipeline(cellPipeline);pass.setVertexBuffer(0, vertexBuffer);// pass.setBindGroup(0, this.mUniformBindGroup);pass.setBindGroup(0, bindGroups[this.mStep % 2]);pass.draw(vertices.length / 2, this.mGridSize * this.mGridSize);this.mStep ++;}private updateWGPUCanvas(clearColor: Color4 = null): void {clearColor = clearColor ? clearColor : new Color4(0.05, 0.05, 0.1);const device = this.mWGPUDevice;const context = this.mWGPUContext;const rpassParam = {colorAttachments: [{clearValue: clearColor,// clearValue: [0.3,0.7,0.5,1.0], // yesview: context.getCurrentTexture().createView(),loadOp: "clear",storeOp: "store"}]};const encoder = device.createCommandEncoder();const pass = encoder.beginRenderPass( rpassParam );const computeEncoder = device.createCommandEncoder();const computePass = computeEncoder.beginComputePass()this.createRectGeometryData(device, pass, computePass);pass.end();computePass.end();device.queue.submit([ encoder.finish() ]);device.queue.submit([ computeEncoder.finish() ]);}private async initWebGPU(canvas: HTMLCanvasElement) {const gpu = (navigator as any).gpu;if (gpu) {console.log("WebGPU supported on this browser.");const adapter = await gpu.requestAdapter();if (adapter) {console.log("Appropriate GPUAdapter found.");const device = await adapter.requestDevice();if (device) {this.mWGPUDevice = device;console.log("Appropriate GPUDevice found.");const context = canvas.getContext("webgpu") as any;const canvasFormat = gpu.getPreferredCanvasFormat();this.mWGPUContext = context;this.mCanvasFormat = canvasFormat;console.log("canvasFormat: ", canvasFormat);context.configure({device: device,format: canvasFormat,alphaMode: "premultiplied"});} else {throw new Error("No appropriate GPUDevice found.");}} else {throw new Error("No appropriate GPUAdapter found.");}} else {throw new Error("WebGPU not supported on this browser.");}}run(): void {}
}
这篇关于Google codelab WebGPU入门教程源码<6> - 使用计算着色器实现计算元胞自动机之生命游戏模拟过程(源码)的文章就介绍到这儿,希望我们推荐的文章对编程师们有所帮助!


