本文主要是介绍【HarmonyOS】模仿个人中心头像图片,调用系统相机拍照,从系统相册选择图片和圆形裁剪显示 (二),希望对大家解决编程问题提供一定的参考价值,需要的开发者们随着小编来一起学习吧!
【HarmonyOS】模仿个人中心头像图片,调用系统相机拍照,从系统相册选择图片和圆形裁剪显示 (二)
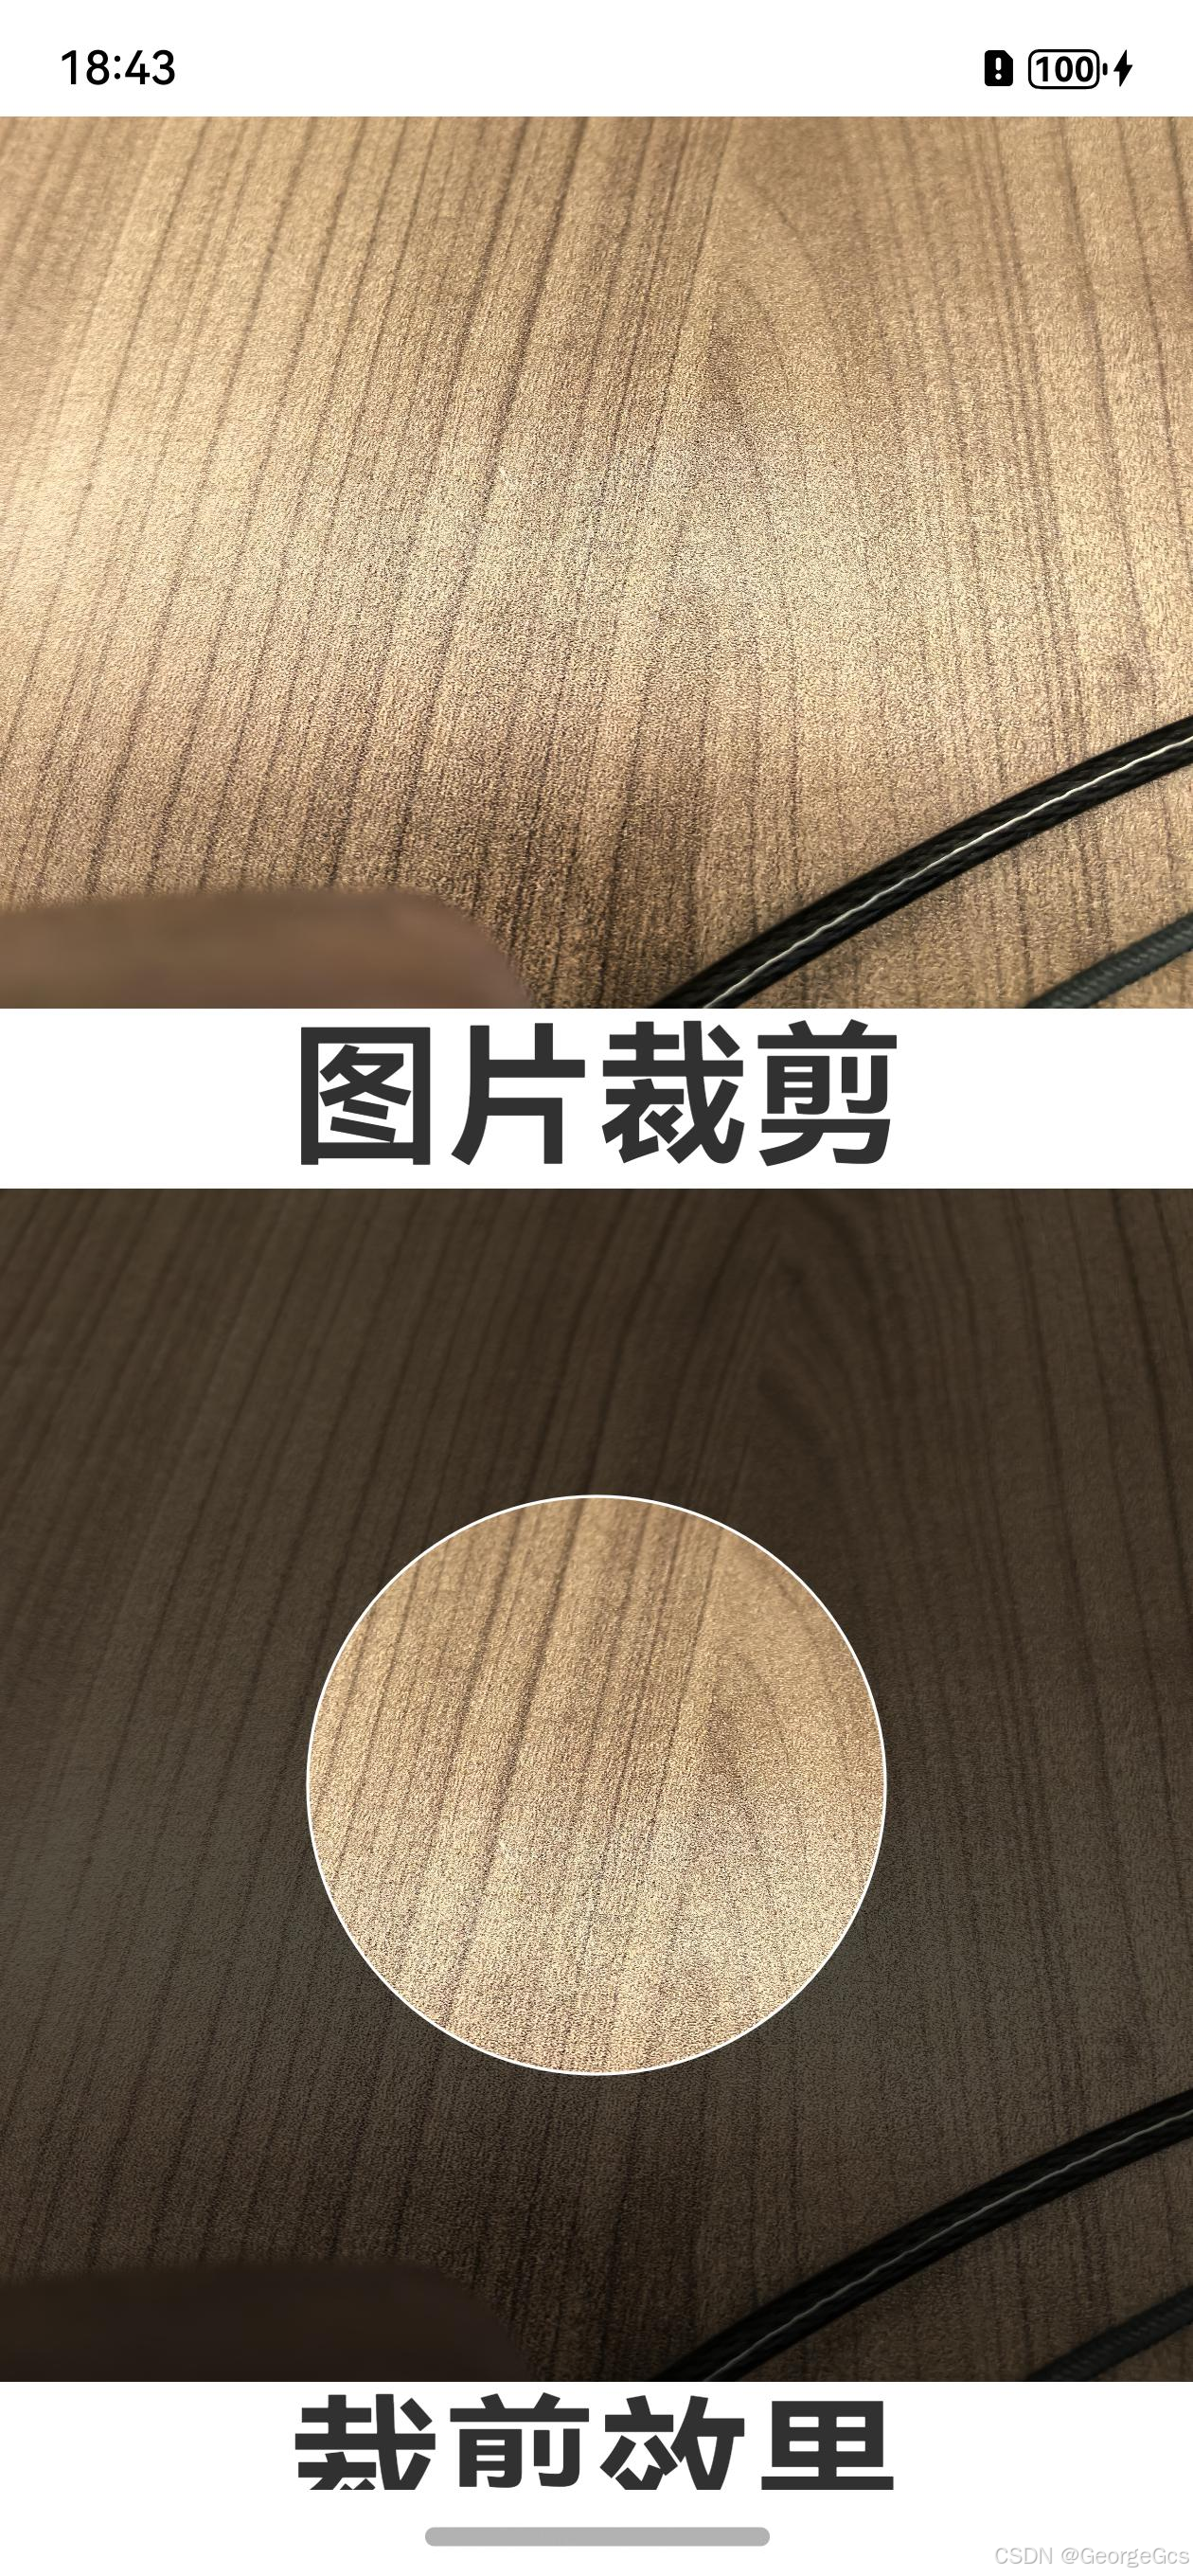
Demo效果展示:
方案思路:
1.修改调用相机的方式,使用cameraKit进行相机的调用,拍照后返回图片url进行处理。
2.裁剪View,使用画布进行取景框的效果展示
手势拖动和放大缩小图片,裁剪计算在第三章进行讲解。
Demo示例代码:
UI主界面
import { photoAccessHelper } from '@kit.MediaLibraryKit';
import { image } from '@kit.ImageKit';
import { fileIo as fs } from '@kit.CoreFileKit';
import { router } from '@kit.ArkUI';
import { cameraPicker as picker } from '@kit.CameraKit';
import { camera } from '@kit.CameraKit';
import { BusinessError } from '@kit.BasicServicesKit';
import { CropView } from './CropView';
struct Index {private TAG: string = "imageTest"; mUserPixel: image.PixelMap | undefined = undefined; mTargetPixel: image.PixelMap | undefined = undefined;/*** 拍照获取图片*/private async getPictureFromCamera(){try {let pickerProfile: picker.PickerProfile = {// 相机的位置。cameraPosition: camera.CameraPosition.CAMERA_POSITION_BACK};let pickerResult: picker.PickerResult = await picker.pick(getContext(),[picker.PickerMediaType.PHOTO],pickerProfile);console.log(this.TAG, "the pick pickerResult is:" + JSON.stringify(pickerResult));// 成功才处理if(pickerResult && pickerResult.resultCode == 0){await this.getImageByPath(pickerResult.resultUri);}} catch (error) {let err = error as BusinessError;console.error(this.TAG, `the pick call failed. error code: ${err.code}`);}}/*** 相册选择图片*/private async getPictureFromAlbum() {let PhotoSelectOptions = new photoAccessHelper.PhotoSelectOptions();PhotoSelectOptions.MIMEType = photoAccessHelper.PhotoViewMIMETypes.IMAGE_TYPE;PhotoSelectOptions.maxSelectNumber = 1;let photoPicker = new photoAccessHelper.PhotoViewPicker();let photoSelectResult: photoAccessHelper.PhotoSelectResult = await photoPicker.select(PhotoSelectOptions);let albumPath = photoSelectResult.photoUris[0];console.info(this.TAG, 'getPictureFromAlbum albumPath= ' + albumPath);await this.getImageByPath(albumPath);}/*** 获取图片pixelMap* @param path*/private async getImageByPath(path: string) {console.info(this.TAG, 'getImageByPath path: ' + path);try {// 读取图片为bufferconst file = fs.openSync(path, fs.OpenMode.READ_ONLY);let photoSize = fs.statSync(file.fd).size;console.info(this.TAG, 'Photo Size: ' + photoSize);let buffer = new ArrayBuffer(photoSize);fs.readSync(file.fd, buffer);fs.closeSync(file);// 解码成PixelMapconst imageSource = image.createImageSource(buffer);console.log(this.TAG, 'imageSource: ' + JSON.stringify(imageSource));this.mUserPixel = await imageSource.createPixelMap({});} catch (e) {console.info(this.TAG, 'getImage e: ' + JSON.stringify(e));}}build() {Scroll(){Column() {Text("点击拍照").fontSize(50).fontWeight(FontWeight.Bold).onClick(() => {this.getPictureFromCamera();})Text("相册选择").fontSize(50).fontWeight(FontWeight.Bold).onClick(() => {this.getPictureFromAlbum();})Image(this.mUserPixel).objectFit(ImageFit.Fill).width('100%').aspectRatio(1)Text("图片裁剪").fontSize(50).fontWeight(FontWeight.Bold).onClick(() => {this.cropImage();// router.pushUrl({// url: "pages/crop"// })})CropView({ mImg: $mUserPixel }).width('100%').aspectRatio(1)Text("裁剪效果").fontSize(50).fontWeight(FontWeight.Bold)Image(this.mTargetPixel).width('100%').aspectRatio(1).borderRadius(200)}.height(3000).width('100%')}.height('100%').width('100%')}private async cropImage(){if(!this.mUserPixel){return;}let cp = await this.copyPixelMap(this.mUserPixel);let region: image.Region = { x: 0, y: 0, size: { width: 400, height: 400 } };cp.cropSync(region);}async copyPixelMap(pixel: PixelMap): Promise<PixelMap> {const info: image.ImageInfo = await pixel.getImageInfo();const buffer: ArrayBuffer = new ArrayBuffer(pixel.getPixelBytesNumber());await pixel.readPixelsToBuffer(buffer);const opts: image.InitializationOptions = {editable: true,pixelFormat: image.PixelMapFormat.RGBA_8888,size: { height: info.size.height, width: info.size.width }};return image.createPixelMap(buffer, opts);}}
CropView 裁剪View
interface LoadResult {width: number;height: number;componentWidth: number;componentHeight: number;loadingStatus: number;contentWidth: number;contentHeight: number;contentOffsetX: number;contentOffsetY: number;
}
export struct CropView {private TAG: string = "CropView";private mRenderingContextSettings: RenderingContextSettings = new RenderingContextSettings(true);private mCanvasRenderingContext2D: CanvasRenderingContext2D = new CanvasRenderingContext2D(this.mRenderingContextSettings); mImg: PixelMap;private onLoadImgComplete = (msg: LoadResult) => {}private onCanvasReady = ()=>{if(!this.mCanvasRenderingContext2D){console.error(this.TAG, "onCanvasReady error mCanvasRenderingContext2D null !");return;}let cr = this.mCanvasRenderingContext2D;// 画布颜色cr.fillStyle = '#AA000000';let height = cr.height;let width = cr.width;cr.fillRect(0, 0, width, height);// 圆形的中心点let centerX = width / 2;let centerY = height / 2;// 圆形半径let radius = Math.min(width, height) / 2 - 100;cr.globalCompositeOperation = 'destination-out'cr.fillStyle = 'white'cr.beginPath();cr.arc(centerX, centerY, radius, 0, 2 * Math.PI);cr.fill();cr.globalCompositeOperation = 'source-over';cr.strokeStyle = '#FFFFFF';cr.beginPath();cr.arc(centerX, centerY, radius, 0, 2 * Math.PI);cr.closePath();cr.lineWidth = 1;cr.stroke();}build() {Stack() {// 黑色底图Row().width("100%").height("100%").backgroundColor(Color.Black)// 用户图Image(this.mImg).objectFit(ImageFit.Fill).width('100%').aspectRatio(1).onComplete(this.onLoadImgComplete)// 取景框Canvas(this.mCanvasRenderingContext2D).width('100%').height('100%').backgroundColor(Color.Transparent).onReady(this.onCanvasReady).clip(true).backgroundColor("#00000080")}.width("100%").height("100%")}
}
这篇关于【HarmonyOS】模仿个人中心头像图片,调用系统相机拍照,从系统相册选择图片和圆形裁剪显示 (二)的文章就介绍到这儿,希望我们推荐的文章对编程师们有所帮助!


