本文主要是介绍uniapp-vue3-wechat:基于uniapp+vue3仿微信app聊天实例(H5+小程序+App端),希望对大家解决编程问题提供一定的参考价值,需要的开发者们随着小编来一起学习吧!
uni-vue3-wchat:基于uni-app+vue3+pinia2高仿微信app聊天模板。
原创基于最新跨端技术
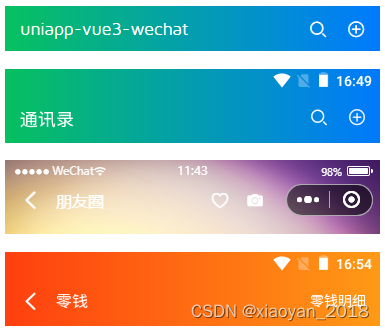
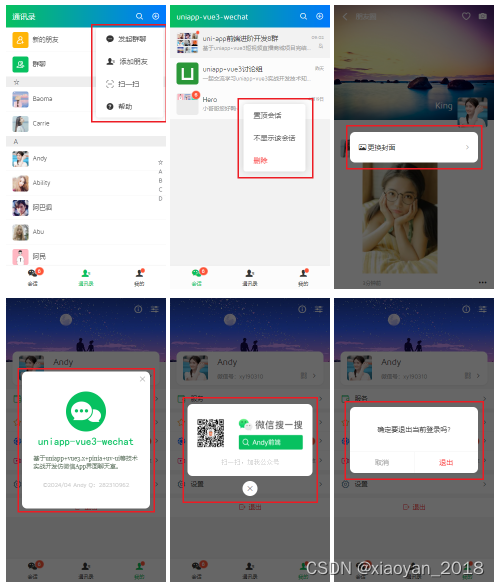
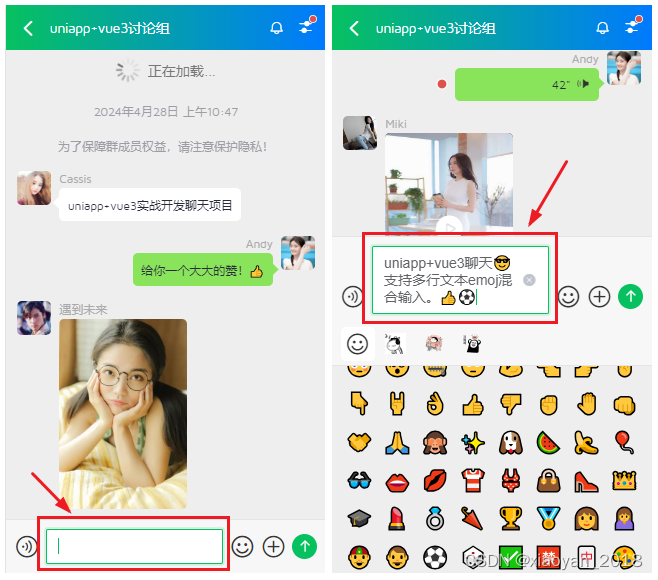
uni-app+vue3.x+pinia2+vite4+uv-ui构建三端仿微信app界面聊天实例。实现编辑框多行消息/emoj混合、长按触摸式仿微信语音面板、图片/视频预览、红包/朋友圈等功能。支持编译到H5+小程序端+App端。

整个项目采用vue3 setup语法编码,支持编译到h5+小程序端+APP端。

使用技术
- 编辑器:HbuilderX 4.0.8
- 框架技术:Uniapp+Vue3+Pinia2+Vite4.x
- 组件库:uni-ui+uv-ui
- 弹窗组件:uv3-popup(uniapp+vue3多端自定义弹框组件)
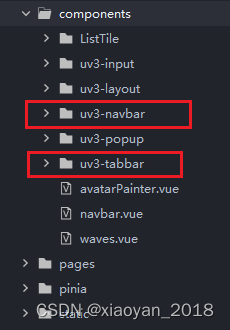
- 导航栏+菜单栏:uv3-navbar+uv3-tabbar组件
- 本地缓存:pinia-plugin-unistorage
- 编译支持:H5+小程序+APP端


uniapp+vue3实现类似微信朋友圈功能。

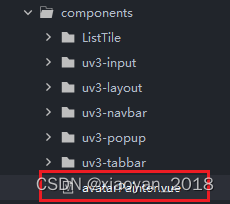
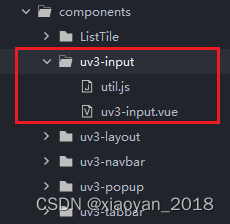
项目结构


入口main.js配置
/*** 入口文件 main.js
*/import { createSSRApp } from 'vue'
import App from './App'// 引入pinia状态管理
import pinia from '@/pinia'export function createApp() {const app = createSSRApp(App)app.use(pinia)return {app,pinia}
}

App.vue配置
采用 vue3 setup 语法开发。
<script setup>import { provide } from 'vue'import { onLaunch, onShow, onHide, onPageNotFound } from '@dcloudio/uni-app'onLaunch(() => {console.log('App Launch')uni.hideTabBar()loadSystemInfo()})onShow(() => {console.log('App Show')})onHide(() => {console.log('App Hide')})onPageNotFound((e) => {console.warn('Route Error:', `${e.path}`)})// 获取系统设备信息const loadSystemInfo = () => {uni.getSystemInfo({success: (e) => {// 获取手机状态栏高度let statusBar = e.statusBarHeightlet customBar// #ifndef MPcustomBar = statusBar + (e.platform == 'android' ? 50 : 45)// #endif// #ifdef MP-WEIXIN// 获取胶囊按钮的布局位置信息let menu = wx.getMenuButtonBoundingClientRect()// 导航栏高度 = 胶囊下距离 + 胶囊上距离 - 状态栏高度customBar = menu.bottom + menu.top - statusBar// #endif// #ifdef MP-ALIPAYcustomBar = statusBar + e.titleBarHeight// #endif// 由于globalData在vue3 setup存在兼容性问题,改为provide/inject替代方案provide('globalData', {statusBarH: statusBar,customBarH: customBar,screenWidth: e.screenWidth,screenHeight: e.screenHeight,platform: e.platform})}})}
</script><style>/* #ifndef APP-NVUE */@import 'static/fonts/iconfont.css';/* #endif */
</style>
<style lang="scss">@import 'styles/reset.scss';@import 'styles/layout.scss';
</style>

uniapp+vue3自定义navbar+tabbar组件
<uv3-navbar :back="true" title="标题内容" bgcolor="#07c160" color="#fff" fixed zIndex="1010" /><uv3-navbar custom bgcolor="linear-gradient(to right, #07c160, #0000ff)" color="#fff" center transparent zIndex="2024"><template #back><uni-icons type="close" /></template><template #backText><text>首页</text></template><template #title><image src="/static/logo.jpg" style="height:20px;width:20px;" /> Admin</template><template #right><view class="ml-20" @click="handleAdd"><text class="iconfont icon-tianjia"></text></view><view class="ml-20"><text class="iconfont icon-msg"></text></view></template>
</uv3-navbar>
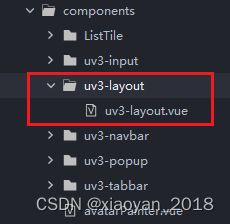
公共布局模板
整体项目结构采用顶部导航区域+主体内容区+底部区域。

<!-- 公共布局模板 --><!-- #ifdef MP-WEIXIN -->
<script>export default {/*** 解决小程序class、id透传问题* manifest.json中配置mergeVirtualHostAttributes: true, 在微信小程序平台不生效,组件外部传入的class没有挂到组件根节点上,在组件中增加options: { virtualHost: true }* https://github.com/dcloudio/uni-ui/issues/753*/options: { virtualHost: true }}
</script>
<!-- #endif --><script setup>const props = defineProps({// 是否显示自定义tabbarshowTabBar: { type: [Boolean, String], default: false },})
</script><template><view class="uv3__container flexbox flex-col flex1"><!-- 顶部插槽 --><slot name="header" /><!-- 内容区 --><view class="uv3__scrollview flex1"><slot /></view><!-- 底部插槽 --><slot name="footer" /><!-- tabbar栏 --><uv3-tabbar v-if="showTabBar" hideTabBar fixed /></view>
</template>
uni-app+vue3微信九宫格图像组
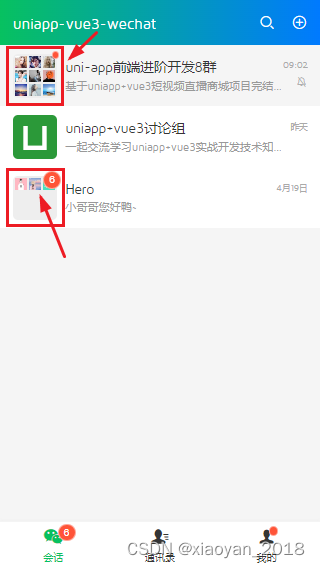
<script setup>import { onMounted, ref, computed, watch, getCurrentInstance } from 'vue'const props = defineProps({// 图像组avatar: { type: Array, default: null },})const instance = getCurrentInstance()const uuid = computed(() => Math.floor(Math.random() * 10000))const avatarPainterId = ref('canvasid' + uuid.value)const createAvatar = () => {const ctx = uni.createCanvasContext(avatarPainterId.value, instance)// 计算图像在画布上的坐标const avatarSize = 12const gap = 2for(let i = 0, len = props.avatar.length; i < len; i++) {const row = Math.floor(i / 3)const col = i % 3const x = col * (avatarSize + gap)const y = row * (avatarSize + gap)ctx.drawImage(props.avatar[i], x, y, avatarSize, avatarSize)}ctx.draw(false, () => {// 输出临时图片/* uni.canvasToTempFilePath({canvasId: avatarPainterId.value,success: (res) => {console.log(res.tempFilePath)}}) */})}onMounted(() => {createAvatar()})watch(() => props.avatar, () => {createAvatar()})
</script><template><template v-if="avatar.length > 1"><view class="uv3__avatarPainter"><canvas :canvas-id="avatarPainterId" class="uv3__avatarPainter-canvas"></canvas></view></template><template v-else><image class="uv3__avatarOne" :src="avatar[0]" /></template>
</template><style lang="scss" scoped>.uv3__avatarPainter {background-color: #eee; border-radius: 5px; overflow: hidden; padding: 2px; height: 44px; width: 44px;}.uv3__avatarPainter-canvas {height: 100%; width: 100%;}.uv3__avatarOne {border-radius: 5px; height: 44px; width: 44px;}
</style>
uni-app+vue3自定义弹出框组件

v-model        当前组件是否显示
title          标题(支持富文本div标签、自定义插槽内容)
content        内容(支持富文本div标签、自定义插槽内容)
type           弹窗类型(toast | footer | actionsheet | actionsheetPicker | android/ios)
customStyle    自定义弹窗样式
icon           toast图标(loading | success | fail | warn | info)
shade          是否显示遮罩层
shadeClose     是否点击遮罩时关闭弹窗
opacity        遮罩层透明度
round          是否显示圆角
xclose         是否显示关闭图标
xposition      关闭图标位置(left | right | top | bottom)
xcolor         关闭图标颜色
anim           弹窗动画(scaleIn | fadeIn | footer | fadeInUp | fadeInDown)
position       弹出位置(top | right | bottom | left)
follow         长按/右键弹窗(坐标点)
time           弹窗自动关闭秒数(1、2、3)
zIndex         弹窗层叠(默认202107)
btns           弹窗按钮(参数:text|style|disabled|click)
------------------------------------------
## slot [插槽]
<template #title></template>
<template #content></template>
------------------------------------------
## emit
open        打开弹出层时触发(@open="xxx")
close       关闭弹出层时触发(@close="xxx")
uv3-popup支持函数式+组件式两种调用方式。
<script setup>import { onMounted, ref, computed, watch, nextTick, getCurrentInstance } from 'vue'const props = defineProps({...})const emit = defineEmits(['update:modelValue','open','close'])const instance = getCurrentInstance()const opts = ref({...props})const visible = ref(false)const closeAnim = ref(false)const stopTimer = ref(null)const oIndex = ref(props.zIndex)const uuid = computed(() => Math.floor(Math.random() * 10000))const positionStyle = ref({ position: 'absolute', left: '-999px', top: '-999px' })const toastIcon = {...}// 打开弹框const open = (options) => {if(visible.value) returnopts.value = Object.assign({}, props, options)// console.log('-=-=混入参数:', opts.value)visible.value = true// nvue 的各组件在安卓端默认是透明的,如果不设置background-color,可能会导致出现重影的问题// #ifdef APP-NVUEif(opts.value.customStyle && !opts.value.customStyle['background'] && !opts.value.customStyle['background-color']) {opts.value.customStyle['background'] = '#fff'}// #endiflet _index = ++indexoIndex.value = _index + parseInt(opts.value.zIndex)emit('open')typeof opts.value.onOpen === 'function' && opts.value.onOpen()// 长按处理if(opts.value.follow) {nextTick(() => {let winW = uni.getSystemInfoSync().windowWidthlet winH = uni.getSystemInfoSync().windowHeight// console.log('坐标点信息:', opts.value.follow)getDom(uuid.value).then(res => {// console.log('Dom尺寸信息:', res)if(!res) returnlet pos = getPos(opts.value.follow[0], opts.value.follow[1], res.width+15, res.height+15, winW, winH)positionStyle.value.left = pos[0] + 'px'positionStyle.value.top = pos[1] + 'px'})})}if(opts.value.time) {if(stopTimer.value) clearTimeout(stopTimer.value)stopTimer.value = setTimeout(() => {close()}, parseInt(opts.value.time) * 1000)}}// 关闭弹框const close = () => {if(!visible.value) returncloseAnim.value = truesetTimeout(() => {visible.value = falsecloseAnim.value = falseemit('update:modelValue', false)emit('close')typeof opts.value.onClose === 'function' && opts.value.onClose()positionStyle.value.left = '-999px'positionStyle.value.top = '-999px'stopTimer.value && clearTimeout(stopTimer.value)}, 200)}// 点击遮罩层const handleShadeClick = () => {if(JSON.parse(opts.value.shadeClose)) {close()}}// 按钮事件const handleBtnClick = (e, index) => {let btn = opts.value.btns[index]if(!btn?.disabled) {console.log('按钮事件类型:', typeof btn.click)typeof btn.click === 'function' && btn.click(e)}}// 获取dom宽高const getDom = (id) => {return new Promise((resolve, inject) => {// uniapp vue3中 uni.createSelectorQuery().in(this) 会报错__route__未定义  https://ask.dcloud.net.cn/question/140192uni.createSelectorQuery().in(instance).select('#uapopup-' + id).fields({size: true,}, data => {resolve(data)}).exec()})}// 自适应坐标点const getPos = (x, y, ow, oh, winW, winH) => {let l = (x + ow) > winW ? x - ow : xlet t = (y + oh) > winH ? y - oh : yreturn [l, t]}onMounted(() => {if(props.modelValue) {open()}})watch(() => props.modelValue, (val) => {// console.log(val)if(val) {open()}else {close()}})defineExpose({open,close})
</script>
uni-app+vue3聊天功能

目前该插件已经免费发布到插件市场,欢迎去下载使用。
https://ext.dcloud.net.cn/plugin?id=13275

<!-- 语音操作面板 -->
<view v-if="voicePanelEnable" class="uv3__voicepanel-popup"><view class="uv3__voicepanel-body flexbox flex-col"><!-- 取消发送+语音转文字 --><view v-if="!voiceToTransfer" class="uv3__voicepanel-transfer"><!-- 提示动效 --><view class="animtips flexbox" :class="voiceType == 2 ? 'left' : voiceType == 3 ? 'right' : null"><Waves :lines="[2, 3].includes(voiceType) ? 10 : 20" /></view><!-- 操作项 --><view class="icobtns flexbox"><view class="vbtn cancel flexbox flex-col" :class="{'hover': voiceType == 2}" @click="handleVoiceCancel"><text class="vicon uv3-icon uv3-icon-close"></text></view><view class="vbtn word flexbox flex-col" :class="{'hover': voiceType == 3}"><text class="vicon uv3-icon uv3-icon-word"></text></view></view></view><!-- 语音转文字(识别结果状态) --><view v-if="voiceToTransfer" class="uv3__voicepanel-transfer result fail"><!-- 提示动效 --><view class="animtips flexbox"><uni-icons type="info-filled" color="#fff" size="20"></uni-icons><text class="c-fff">未识别到文字</text></view><!-- 操作项 --><view class="icobtns flexbox"><view class="vbtn cancel flexbox flex-col" @click="handleVoiceCancel"><text class="vicon uv3-icon uv3-icon-chexiao"></text>取消</view><view class="vbtn word flexbox flex-col"><text class="vicon uv3-icon uv3-icon-audio"></text>发送原语音</view><view class="vbtn check flexbox flex-col"><text class="vicon uv3-icon uv3-icon-duigou"></text></view></view></view><!-- 背景语音图 --><view class="uv3__voicepanel-cover"><image v-if="!voiceToTransfer" src="/static/voice_bg.webp" :webp="true" mode="widthFix" style="width: 100%;" /></view><!-- // 提示文字(操作状态) --><view v-if="!voiceToTransfer" class="uv3__voicepanel-tooltip">{{voiceTypeMap[voiceType]}}</view><!-- 背景小图标 --><view v-if="!voiceToTransfer" class="uv3__voicepanel-fixico"><text class="uv3-icon uv3-icon-audio fs-50"></text></view></view>
</view>
目前该项目已经同步到工房,如果有需要,欢迎自行去拍哈~
https://gf.bilibili.com/item/detail/1105801011
好了,综上就是uniapp+vue3跨端聊天实例的一些分享,希望大家能喜欢!
最后附上几个最新实战项目
-
flutter3-winchat基于flutter3.x+bitsdojo_window桌面端仿微信
https://blog.csdn.net/yanxinyun1990/article/details/136410049 -
flutter3_douyin基于flutter3.19仿抖音短视频/直播
https://blog.csdn.net/yanxinyun1990/article/details/136996521 -
flutter3_macos基于flutter3.x+window_manager桌面端仿macOS系统
https://blog.csdn.net/yanxinyun1990/article/details/137697164

这篇关于uniapp-vue3-wechat:基于uniapp+vue3仿微信app聊天实例(H5+小程序+App端)的文章就介绍到这儿,希望我们推荐的文章对编程师们有所帮助!


