本文主要是介绍Depth maps转点云,希望对大家解决编程问题提供一定的参考价值,需要的开发者们随着小编来一起学习吧!
前言
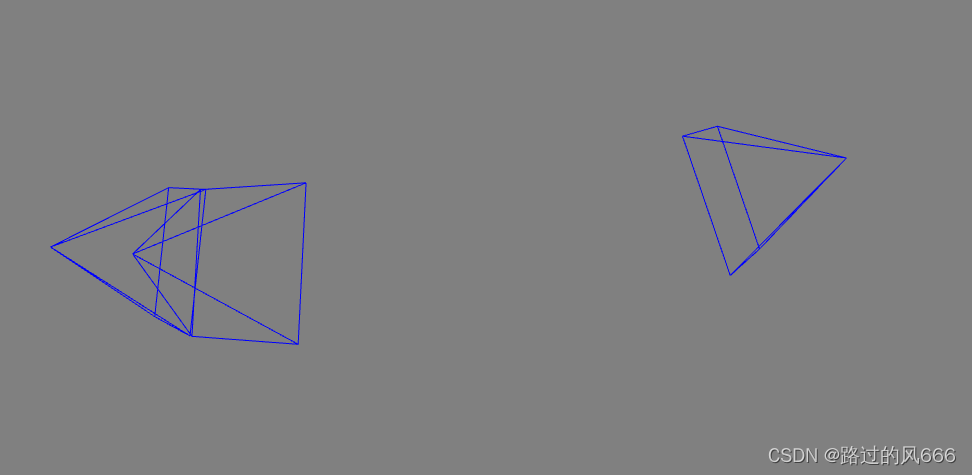
本文主要记录一下如何可视化相机位姿,如何用Blender得到的深度图反投影到3D空间,得到相应的点云。
Refernce
https://github.com/colmap/colmap/issues/1106
https://github.com/IntelRealSense/librealsense/issues/12090
https://medium.com/yodayoda/from-depth-map-to-point-cloud-7473721d3f
https://stackoverflow.com/questions/59590200/generate-point-cloud-from-depth-image
https://github.com/isl-org/Open3D/issues/481
https://stackoverflow.com/questions/31265245/extracting-3d-coordinates-given-2d-image-points-depth-map-and-camera-calibratio
https://github.com/vitalemonate/depth2Cloud
1 可视化相机位姿
import open3d as o3d
import numpy as npfocal = 346.4101498574051
img_w = img_h = 400.0
intrinsic = np.array([[focal, 0., -img_w / 2],[0., -focal, -img_h / 2],[0., 0., -1.]])
print(intrinsic)
pcds = []
# 创建相机线集并添加到列表中
for pose in poses:
#     extrinsic = poseextrinsic = np.eye(4)R, t = pose[:3, :3], pose[:3, 3]extrinsic[:3, :3] = R.Textrinsic[:3, 3] = -np.dot(R.T, t)print(extrinsic)cam_pcd = o3d.geometry.LineSet()cam_pcd = cam_pcd.create_camera_visualization(view_width_px=400,view_height_px=400,intrinsic=intrinsic,extrinsic=extrinsic)
#     cam_pcd.paint_uniform_color(color)
#     cam_pcd.colors[4] = 0.5 * colorcam_pcd.scale(scale=1., center=t)pcds.append(cam_pcd)# 初始化Open3D的可视化窗口
vis = o3d.visualization.Visualizer()
vis.create_window()vis.add_geometry()# 添加相机线集到可视化窗口
for cam_pcd in pcds:vis.add_geometry(cam_pcd)# 设置视图参数
vis.get_render_option().background_color = [0.5, 0.5, 0.5]  # 设置背景颜色为灰色
vis.get_render_option().point_show_normal = True  # 显示法线# 更新可视化窗口
# vis.update_geometry()# 运行可视化窗口
while True:vis.poll_events()vis.update_renderer()# 关闭可视化窗口
vis.destroy_window()

2 Depth2PointCloud
2.1 depth map反投影至三维空间
# 将depth map反投影至三维空间
def depth_image_to_point_cloud(rgb, depth, scale, K, pose):u = range(0, rgb.shape[1])v = range(0, rgb.shape[0])u, v = np.meshgrid(u, v)u = u.astype(float)v = v.astype(float)# K为内参矩阵3*3# 图片坐标转相机坐标Z = depth.astype(float) / scaleX = (u - K[0, 2]) * Z / K[0, 0]Y = (v - K[1, 2]) * Z / K[1, 1]X = np.ravel(X)Y = -np.ravel(Y)   # Blender的坐标系为[x, -y, -z]Z = -np.ravel(Z)valid = Z < 0X = X[valid]Y = Y[valid]Z = Z[valid]position = np.vstack((X, Y, Z, np.ones(len(X))))# 相机坐标转世界坐标transform = np.array([[1, 0, 0, 0],[0, -1, 0, 0],[0, 0, -1, 0],[0, 0, 0, 1]])pose = np.dot(transform, pose)position = np.dot(pose, position)R = np.ravel(rgb[:, :, 0])[valid]G = np.ravel(rgb[:, :, 1])[valid]B = np.ravel(rgb[:, :, 2])[valid]print(position.shape, R.shape)points = np.transpose(np.vstack((position[:3, :], R, G, B))).tolist()return points
2.2 将点云保存至ply文件
import os
import numpy as np
import cv2
from path import Path
from tqdm import tqdm# 将点云写入ply文件
def write_point_cloud(ply_filename, points):formatted_points = []for point in points:formatted_points.append("%f %f %f %d %d %d 0\n" % (point[0], point[1], point[2], point[3], point[4], point[5]))out_file = open(ply_filename, "w")out_file.write('''plyformat ascii 1.0element vertex %dproperty float xproperty float yproperty float zproperty uchar blueproperty uchar greenproperty uchar redproperty uchar alphaend_header%s''' % (len(points), "".join(formatted_points)))out_file.close()# image_files: XXXXXX.png (RGB, 24-bit, PNG)
# depth_files: XXXXXX.png (16-bit, PNG)
# poses: camera-to-world, 4×4 matrix in homogeneous coordinates
def build_point_cloud(dataset_path, scale, view_ply_in_world_coordinate, poses):K = np.fromfile(os.path.join(dataset_path, "K.txt"), dtype=float, sep="\n ")K = np.reshape(K, newshape=(3, 3))print(K)print(poses)image_files = sorted(Path(os.path.join(dataset_path, "images")).files('*.png'))depth_files = sorted(Path(os.path.join(dataset_path, "depth_maps")).files('*.png'))sum_points_3D = []for i in tqdm(range(0, len(image_files))):image_file = image_files[i]depth_file = depth_files[i]rgb = cv2.imread(image_file)depth = cv2.imread(depth_file, -1).astype(np.uint16)if view_ply_in_world_coordinate:current_points_3D = depth_image_to_point_cloud(rgb, depth, scale=scale, K=K, pose=poses[i])else:current_points_3D = depth_image_to_point_cloud(rgb, depth, scale=scale, K=K, pose=poses[i])
#             print(len(current_points_3D), current_points_3D[0])save_ply_name = os.path.basename(os.path.splitext(image_files[i])[0]) + ".ply"save_ply_path = os.path.join(dataset_path, "point_clouds")if not os.path.exists(save_ply_path):  # 判断是否存在文件夹如果不存在则创建为文件夹os.mkdir(save_ply_path)write_point_cloud(os.path.join(save_ply_path, save_ply_name), current_points_3D)sum_points_3D.extend(current_points_3D)write_point_cloud(os.path.join(save_ply_path, 'all.ply'), sum_points_3D)
这篇关于Depth maps转点云的文章就介绍到这儿,希望我们推荐的文章对编程师们有所帮助!


