本文主要是介绍【echarts】echarts图例支持自定义图标以及点击后方法调用,希望对大家解决编程问题提供一定的参考价值,需要的开发者们随着小编来一起学习吧!
echarts官网:https://echarts.apache.org/handbook/zh/get-started/
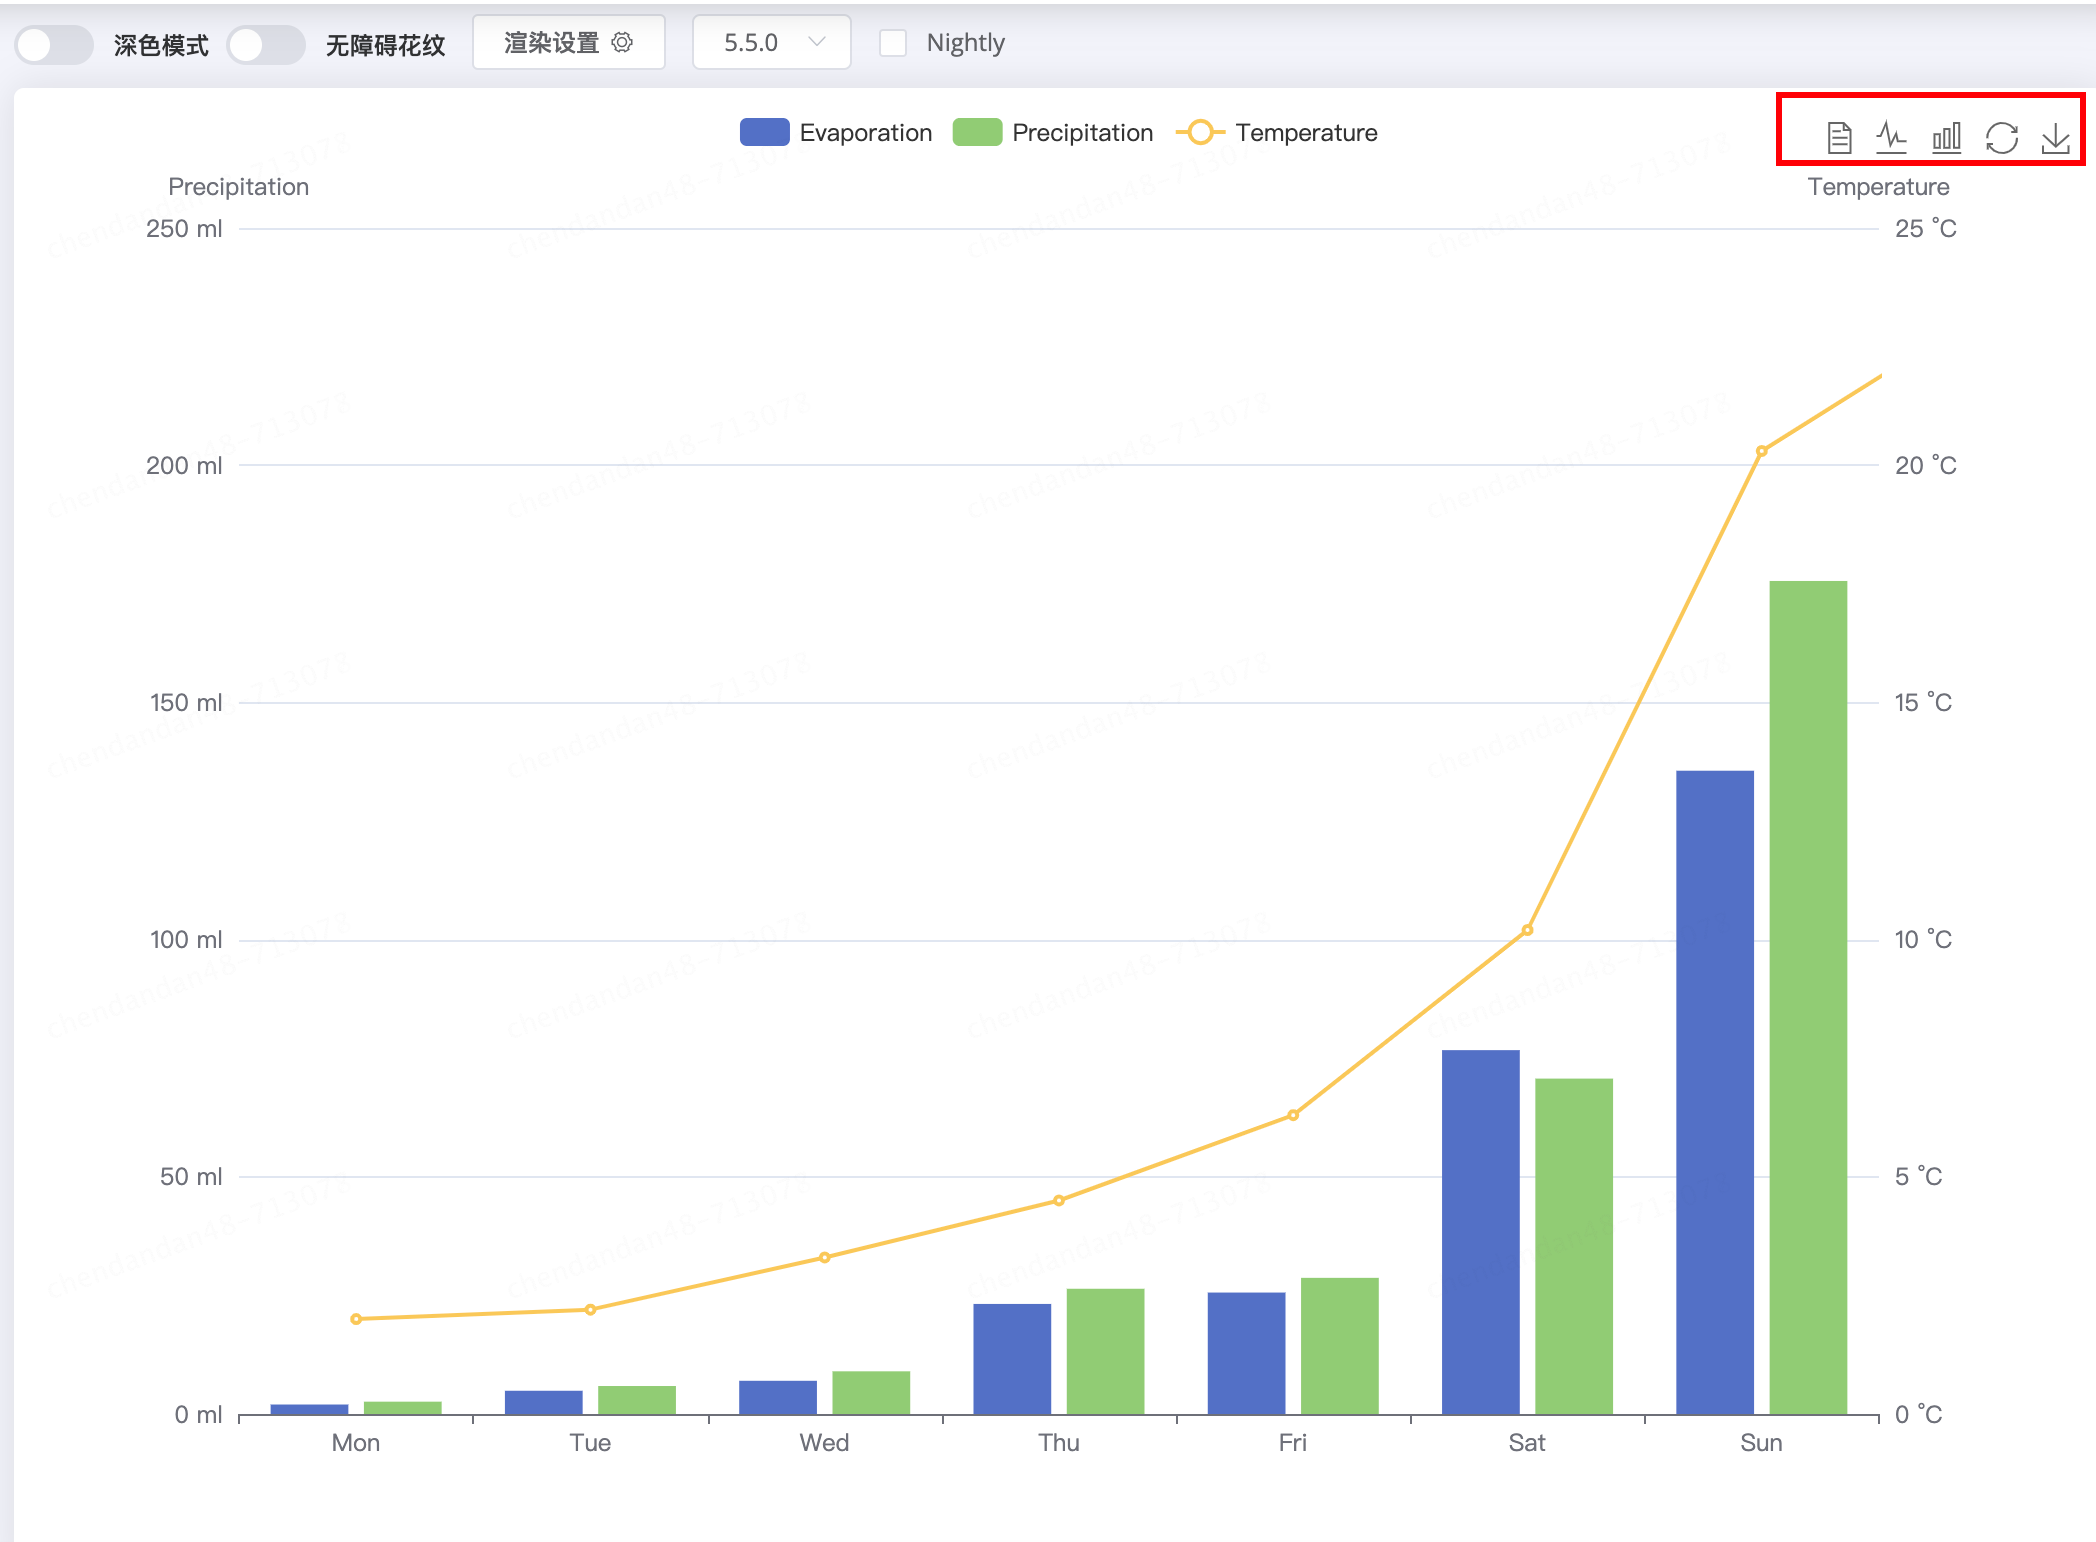
以这个图为例,自带有图标和交互,但是如何在后面增加自定义图标呢?
首先我是在vue前端框架里面使用这个echarts的,会有一个vue-echarts工具,方便我们来使用它
因此首先需要下载echarts和vue-echarts的包,然后在main.js项目中引入它:
vue-echarts:https://gitcode.com/ecomfe/vue-echarts/blob/HEAD/README.zh-Hans.md?utm_source=csdn_github_accelerator&isLogin=1
我用的是版本是:
“echarts”:“^5.5.0”
“vue-echarts”:“^6.6.9”
import ECharts from 'vue-echarts'
import 'echarts'
Vue.config.productionTip = false
// 全局注册组件(也可以使用局部注册)
Vue.component('v-chart', ECharts)
看上面的图列,可以知道我们要调整的部分就是这个部分toolbox
toolbox: {feature: {dataView: { show: true, readOnly: false },magicType: { show: true, type: ["line", "bar"] },restore: { show: true },saveAsImage: { show: true }}},
在这个内部增加自定义的配置:
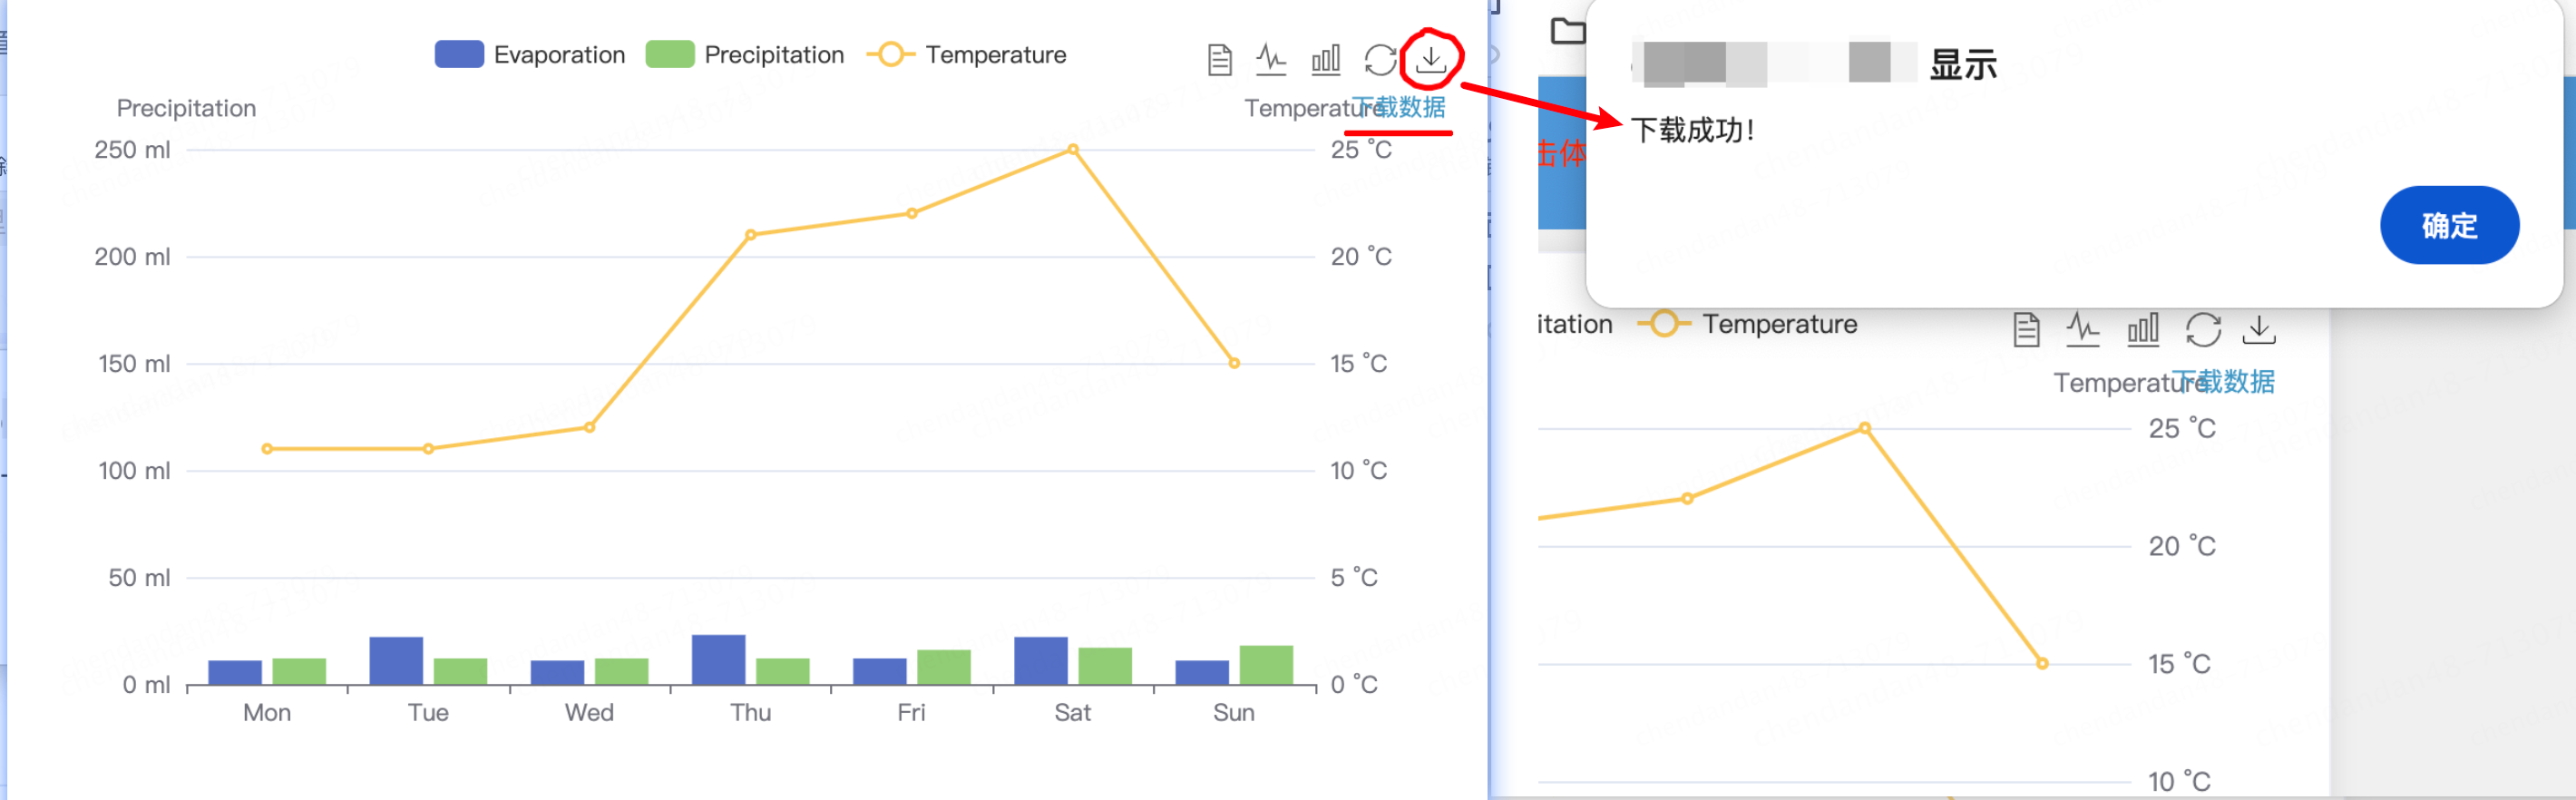
toolbox: {feature: {dataView: { show: true, readOnly: false },magicType: { show: true, type: ["line", "bar"] },restore: { show: true },// saveAsImage: { show: true },// 自定义下载myTool: {show: true,title: '下载数据',icon: 'image://../icons/icon-download.png',onclick: this.myToolHandler},}},
其中icon: 'image://../icons/icon-download.png'就是指定自定义图标的地址:格式是image://+url
onclick方法是点击这个图标,对应相应方法
title:是鼠标停留在这个图标上的时候,显示的文字
myToolHandler() {alert("下载成功!")}
这样就实现了一个自定义图标,演示是这样的:
完整示例代码:基于https://echarts.apache.org/examples/zh/editor.html?c=mix-line-bar
<template><div><!-- 图表 --><v-chart ref="chart" :option="option" style="height: 400px"></v-chart></div>
</template>
<script>
export default {name: "databoardMain",mounted() {window.addEventListener("resize", this.handleResize);},beforeDestroy() {window.removeEventListener("resize", this.handleResize);},data() {return {option: {tooltip: {trigger: "axis",axisPointer: {type: "cross",crossStyle: {color: "#999"}}},toolbox: {feature: {dataView: { show: true, readOnly: false },magicType: { show: true, type: ["line", "bar"] },restore: { show: true },// saveAsImage: { show: true },// 自定义下载myTool: {show: true,title: '下载数据',icon: 'image://../icons/icon-download.png',onclick: this.myToolHandler},}},legend: {data: ["Evaporation", "Precipitation", "Temperature"]},xAxis: [{type: "category",data: ["Mon", "Tue", "Wed", "Thu", "Fri", "Sat", "Sun"],axisPointer: {type: "shadow"}}],yAxis: [{type: "value",name: "Precipitation",min: 0,max: 250,interval: 50,axisLabel: {formatter: "{value} ml"}},{type: "value",name: "Temperature",min: 0,max: 25,interval: 5,axisLabel: {formatter: "{value} °C"}}],series: [{name: "Evaporation",type: "bar",tooltip: {valueFormatter: function(value) {return value + " ml";}},data: []},{name: "Precipitation",type: "bar",tooltip: {valueFormatter: function(value) {return value + " ml";}},data: []},{name: "Temperature",type: "line",yAxisIndex: 1,tooltip: {valueFormatter: function(value) {return value + " °C";}},data: []}]}};},created() {this.init();},methods: {async init() {//初始化数据//data数据可以来自后台接口this.option.series[0].data = [11,22,11,23,12,22,11]this.option.series[1].data = [12,12,12,12,16,17,18];this.option.series[2].data = [11,11,12,21,22,25,15];this.option = { ...this.option };},handleResize() {this.$refs.chart.resize();},myToolHandler() {alert("下载成功!")}}
};
</script>
这篇关于【echarts】echarts图例支持自定义图标以及点击后方法调用的文章就介绍到这儿,希望我们推荐的文章对编程师们有所帮助!


