本文主要是介绍GDAL实现标准差拉伸渲染影像,希望对大家解决编程问题提供一定的参考价值,需要的开发者们随着小编来一起学习吧!
import os
from sys import path
from osgeo import gdal
from osgeo import osr
import numpy as np
import matplotlib.pyplot as plt
import matplotlib.colors as mpc
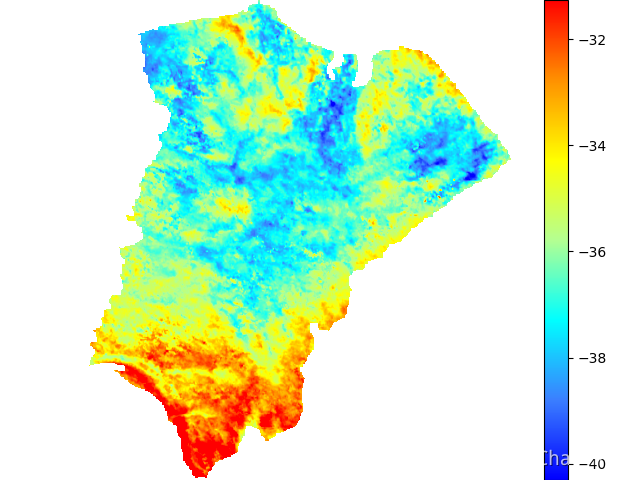
import argparsedef stdStretch(imgFile, colorList, flag, outPath):# imgFile 影像# colorList 色带参数# flag=True 将数据投影到3857坐标系进行显示# flag=False 将数据按原坐标系进行显示gdal.AllRegister()ds = gdal.Open(imgFile)if flag:dsrs = osr.SpatialReference()dsrs.ImportFromEPSG(3857)vrt_ds = gdal.AutoCreateWarpedVRT(ds, None, dsrs.ExportToWkt(), gdal.GRA_Bilinear)band = gdal.Dataset.GetRasterBand(vrt_ds, 1)else:band = gdal.Dataset.GetRasterBand(ds, 1)array = gdal.Band.ReadAsArray(band)avg = np.nanmean(array)std = np.nanstd(array)# 默认按2.5倍标准差进行拉伸v_max = avg+2.5*stdv_min = avg-2.5*stdnorm = plt.Normalize(v_min, v_max)colors = colorListcm = mpc.LinearSegmentedColormap.from_list('colormap', colors, 512)plt.imshow(array, cm, norm)plt.axis('off')plt.subplots_adjust(bottom=0, top=1, left=0, right=1, hspace=0, wspace=0)plt.colorbar()outname = os.path.basename(imgFile)outname = outname.replace(outname[outname.rindex('.'):], '.png')outname = os.path.join(outPath, outname)plt.savefig(outname, transparent=True, dpi=100)plt.close()# 封装为命令行工具 批量处理目录下的影像
if __name__ == '__main__':parser = argparse.ArgumentParser('标准差拉伸渲染影像')parser.add_argument('inputPath', type=str, help='The directory  stores the images or a image file to process!')parser.add_argument('colorList', type=str,help='Color map used in render!')parser.add_argument('outPath', type=str,help='The directory stores the result!')parser.add_argument('flag', type=bool, help='A flag which indicates whether the image should be prjected to epsg3857!')parser.add_argument('extension',type=str,help='The extension of image file to be processed!',default=None)args=parser.parse_args()inputPath=args.inputPathcolors=args.colorList.split(',')outPath=args.outPathflag=args.flagextension=args.extension# extension=None 则处理目录下的所有影像if os.path.isfile(inputPath):# 处理单张影像stdStretch(inputPath,colors,flag,outPath)else:# 处理整个目录imgFiles=os.listdir(inputPath)for imgFile in imgFiles:if not(extension) or imgFile.endswith(extension):stdStretch(os.path.join(inputPath,imgFile),colors,flag,outPath)# colors = '#0000FF, #3B7FFF, #00FFFF,#B4FF91, #FFFF00, #FF9100, #FF0000'print('finished!')
调用方式
user@DESKTOP-IFIB8V0 MINGW64 /i/毕业设计整理/LST
$ python color.py --help
usage: 标准差拉伸渲染影像 [-h] inputPath colorList outPath flag extensionpositional arguments:inputPath   The directory stores the images or a image file to process!colorList   Color map used in render!outPath     The directory stores the result!flag        A flag which indicates whether the image should be prjected to epsg3857!extension   The extension of image file to be processed!optional arguments:-h, --help  show this help message and exit
(base)
渲染结果


这篇关于GDAL实现标准差拉伸渲染影像的文章就介绍到这儿,希望我们推荐的文章对编程师们有所帮助!


