本文主要是介绍TouchGFX之Button,希望对大家解决编程问题提供一定的参考价值,需要的开发者们随着小编来一起学习吧!
TouchGFX中的按钮是一种感应触控事件的控件,能够在按钮被按下/释放时发送回调
代码
#ifndef TOUCHGFX_ABSTRACTBUTTON_HPP
#define TOUCHGFX_ABSTRACTBUTTON_HPP
#include <touchgfx/Callback.hpp>
#include <touchgfx/events/ClickEvent.hpp>
#include <touchgfx/widgets/Widget.hpp>namespace touchgfx
{
/* 按键抽象接口类 */
class AbstractButton : public Widget
{
public:/* 构造函数 */AbstractButton() : Widget(), action(), pressed(false){setTouchable(true);	//打开触摸功能}/* 点击事件处理函数 */virtual void handleClickEvent(const ClickEvent& event);/* 设置点击事件回调函数 */void setAction(GenericCallback<const AbstractButton&>& callback){action = &callback;}/* 执行点击事件回调函数 */virtual void executeAction(){if (action && action->isValid()){action->execute(*this);}}/* 获取按钮状态 */virtual bool getPressedState() const{return pressed;}protected:GenericCallback<const AbstractButton&>* action; //点击事件回调函数bool pressed; //按键状态(按下/松开)
};}#endif
#include <touchgfx/widgets/AbstractButton.hpp>namespace touchgfx
{
/* 点击事件回调函数 */
void AbstractButton::handleClickEvent(const ClickEvent& event)
{const bool wasPressed = pressed;pressed = (event.getType() == ClickEvent::PRESSED);/* 按钮状态改变,重绘 */if ((pressed && !wasPressed) || (!pressed && wasPressed)){invalidate();}/* 按下触发回调 */if (wasPressed && (event.getType() == ClickEvent::RELEASED)){executeAction();}
}
}
自定义按键
#ifndef BUTTONWITHCOLOR
#define BUTTONWITHCOLOR
#include <touchgfx/widgets/AbstractButton.hpp>using namespace touchgfx;class ButtonWithColor : public AbstractButton
{
public:ButtonWithColor(): AbstractButton(), upColor(0xFFFFFF), downColor(0xFFFFFF), alpha(255){}	virtual void draw(const Rect& invalidatedArea) const;virtual void setColor(const colortype colorReleased, const colortype colorPressed){upColor = colorReleased;downColor = colorPressed;}virtual Rect getSolidRect() const;void setAlpha(uint8_t newAlpha){alpha = newAlpha;}uint8_t getAlpha() const{return alpha;}colortype getCurrentlyDisplayedColor() const{return (pressed ? downColor : upColor);}virtual void invalidateContent() const{if (alpha > 0){Widget::invalidateContent();}}private:colortype upColor;colortype downColor;uint8_t alpha;
};#endif
#include <touchgfx/Drawable.hpp>
#include <touchgfx/hal/HAL.hpp>
#include <touchgfx/lcd/LCD.hpp>
#include <gui/common/ButtonWithColor.hpp>void ButtonWithColor::draw(const Rect& invalidatedArea) const
{const colortype color = pressed ? downColor : upColor;Rect dirty = invalidatedArea;translateRectToAbsolute(dirty);HAL::lcd().fillRect(dirty, color, alpha);
}Rect ButtonWithColor::getSolidRect() const
{Rect solidRect;if(alpha == 255){solidRect.width = rect.width;solidRect.height = rect.height;}return solidRect;
}
#ifndef SCREENVIEW_HPP
#define SCREENVIEW_HPP#include <gui_generated/screen_screen/screenViewBase.hpp>
#include <gui/screen_screen/screenPresenter.hpp>
#include <gui/common/ButtonWithColor.hpp>class screenView : public screenViewBase
{
public:screenView();virtual ~screenView() {}virtual void setupScreen();virtual void tearDownScreen();
protected:private:ButtonWithColor button;
};#endif // SCREENVIEW_HPP
#include <gui/screen_screen/screenView.hpp>
#include <touchgfx/Color.hpp>screenView::screenView()
{}void screenView::setupScreen()
{screenViewBase::setupScreen();button.setColor(Color::getColorFromRGB(0x00, 0xFF, 0x00), Color::getColorFromRGB(0x00, 0xFF, 0xFF));button.setPosition(100,100,100,100);add(button);
}void screenView::tearDownScreen()
{screenViewBase::tearDownScreen();
}
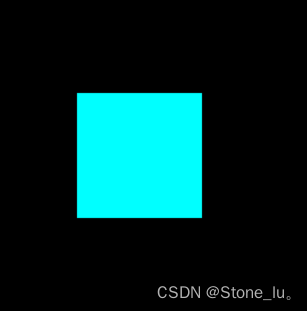
运行模拟器
左边松开 -> 右边按下

这篇关于TouchGFX之Button的文章就介绍到这儿,希望我们推荐的文章对编程师们有所帮助!