本文主要是介绍CloudCompare插件开发之点云如何创建、保存并显示?,希望对大家解决编程问题提供一定的参考价值,需要的开发者们随着小编来一起学习吧!
文章目录
- 0.引言
- 1.创建插件工程
- 2.代码编写
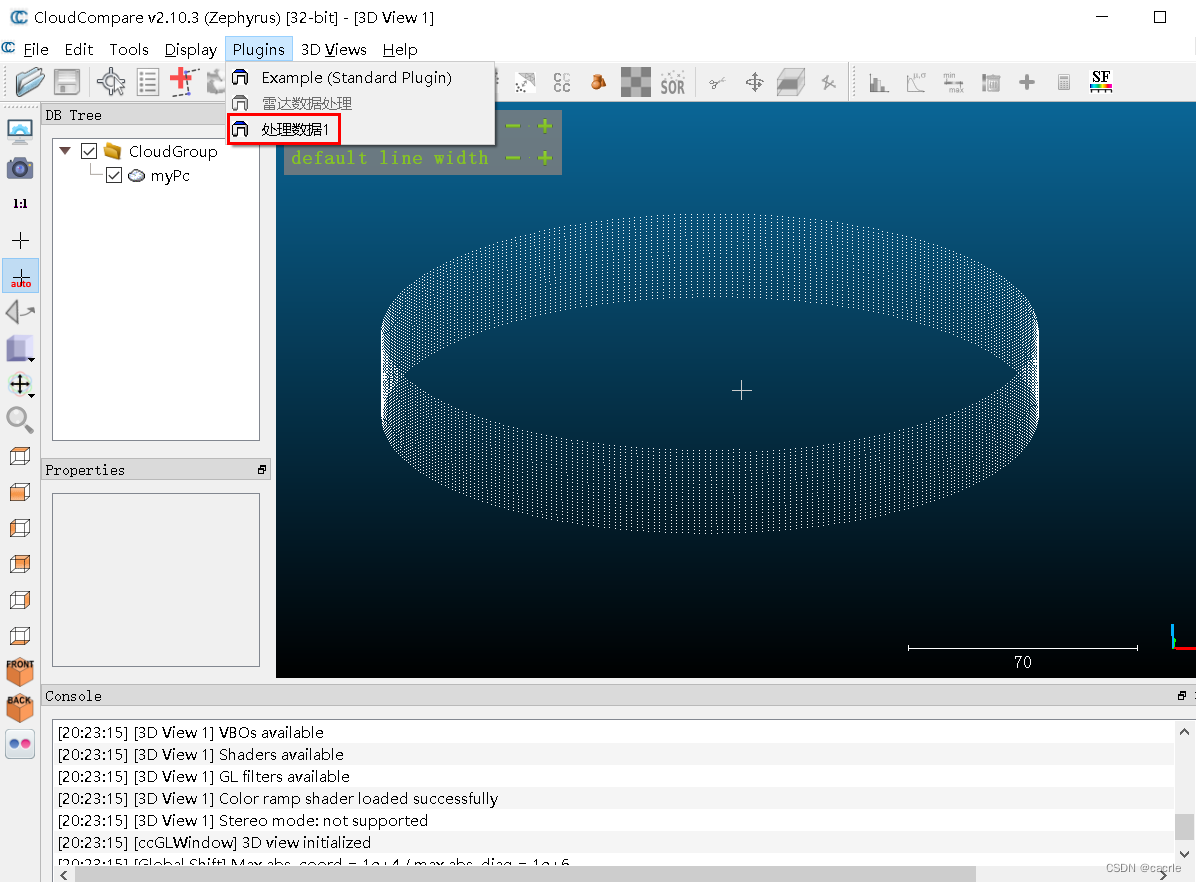
- 3.显示点云
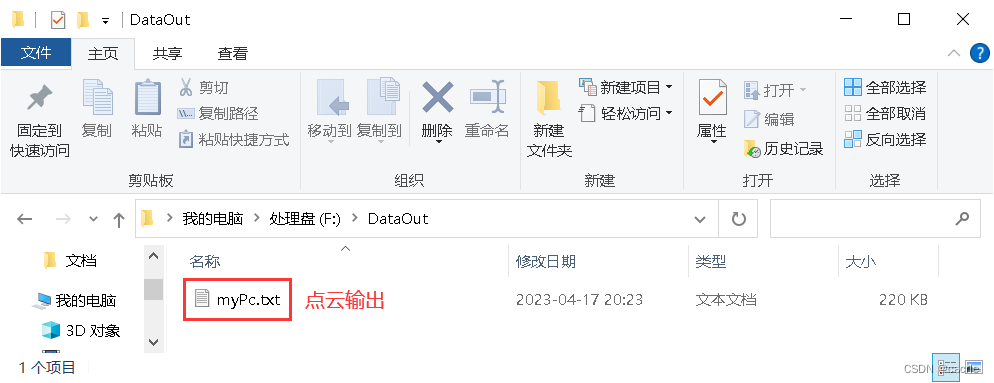
- 4.保存点云
0.引言
CloudCompaer是一款优秀的开源软件,在点云处理时可以根据实际要求开发合适的插件,在实际使用中,创建点云、保存点云、显示点云的操作较为基础,为了使这些操作得到总结,本文实现创建点云、保存并显示。
1.创建插件工程
创建插件流程见:CloudCompare如何进行二次开发之插件开发?。
本文创建的插件文件名:OperateData_1;
CloudCompare中插件名:处理数据1。
2.代码编写
(1)引入头文件
#include "qinputdialog.h"
#include "ccPointCloud.h"
#include "qfiledialog.h"
(2)编写代码

// This is an example of an action's method called when the corresponding action
// is triggered (i.e. the corresponding icon or menu entry is clicked in CC's
// main interface). You can access most of CC's components (database,
// 3D views, console, etc.) via the 'm_app' variable (see the ccMainAppInterface
// class in ccMainAppInterface.h).
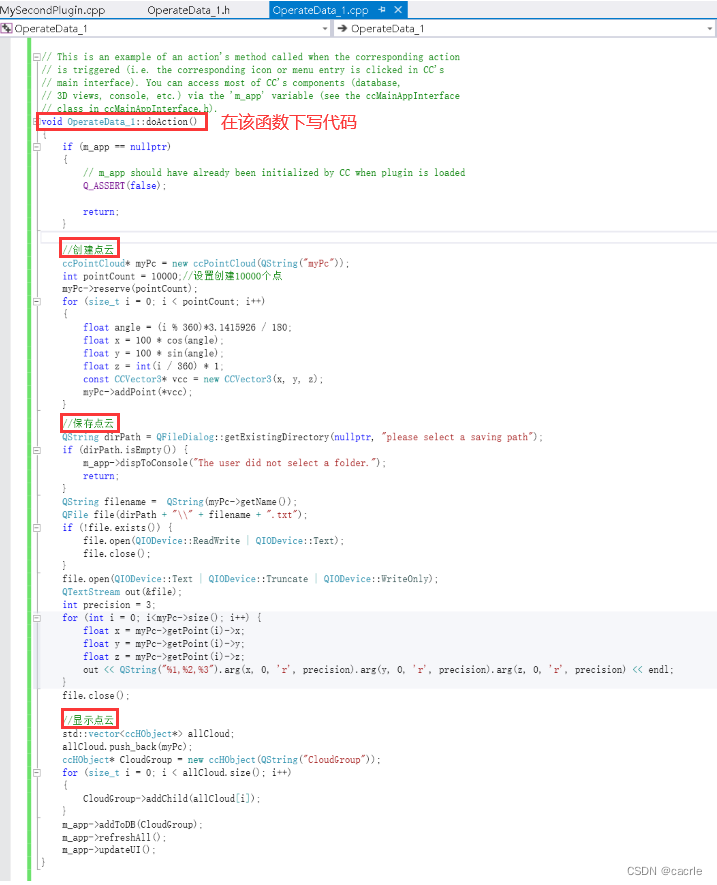
void OperateData_1::doAction()
{  if (m_app == nullptr)  {  // m_app should have already been initialized by CC when plugin is loaded  Q_ASSERT(false);  return;  }  //创建点云  ccPointCloud* myPc = new ccPointCloud(QString("myPc"));  int pointCount = 10000;//设置创建10000个点  myPc->reserve(pointCount);  for (size_t i = 0; i < pointCount; i++)  {  float angle = (i % 360)*3.1415926 / 180;  float x = 100 * cos(angle);  float y = 100 * sin(angle);  float z = int(i / 360) * 1;  const CCVector3* vcc = new CCVector3(x, y, z);  myPc->addPoint(*vcc);  }  //保存点云  QString dirPath = QFileDialog::getExistingDirectory(nullptr, "please select a saving path");  if (dirPath.isEmpty()) {  m_app->dispToConsole("The user did not select a folder.");  return;  }  QString filename =  QString(myPc->getName());  QFile file(dirPath + "\\" + filename + ".txt");  if (!file.exists()) {  file.open(QIODevice::ReadWrite | QIODevice::Text);  file.close();  }  file.open(QIODevice::Text | QIODevice::Truncate | QIODevice::WriteOnly);  QTextStream out(&file);  int precision = 3;  for (int i = 0; i<myPc->size(); i++) {  float x = myPc->getPoint(i)->x;  float y = myPc->getPoint(i)->y;  float z = myPc->getPoint(i)->z;  out << QString("%1,%2,%3").arg(x, 0, 'r', precision).arg(y, 0, 'r', precision).arg(z, 0, 'r', precision) << endl;  }  file.close();  //显示点云  std::vector<ccHObject*> allCloud;  allCloud.push_back(myPc);  ccHObject* CloudGroup = new ccHObject(QString("CloudGroup"));  for (size_t i = 0; i < allCloud.size(); i++)  {  CloudGroup->addChild(allCloud[i]);  }  m_app->addToDB(CloudGroup);  m_app->refreshAll();  m_app->updateUI();
}
3.显示点云

4.保存点云

参考资料:
[1] fandq1223. 创建点云文件、加载点云文件; 2016-11-15 [accessed 2023-04-17].
[2] 渡航奥. C/C++库函数及函数大全; 2019-09-05 [accessed 2023-04-17].
[3] 小修勾. 《QT+PCL 第一章》点云文件保存; 2022-03-20 [accessed 2023-04-17].
[4] 萘和. cloudCompare插件开发——保存点云颜色; 2021-08-13 [accessed 2023-04-17].
[5] kingkee. 【Qt】QString 格式化参数; 2019-12-01 [accessed 2023-04-17].
这篇关于CloudCompare插件开发之点云如何创建、保存并显示?的文章就介绍到这儿,希望我们推荐的文章对编程师们有所帮助!


