本文主要是介绍wpf prism左侧抽屉式菜单,希望对大家解决编程问题提供一定的参考价值,需要的开发者们随着小编来一起学习吧!
1.首先引入包MaterialDesignColors和MaterialDesignThemes
2.主页面布局
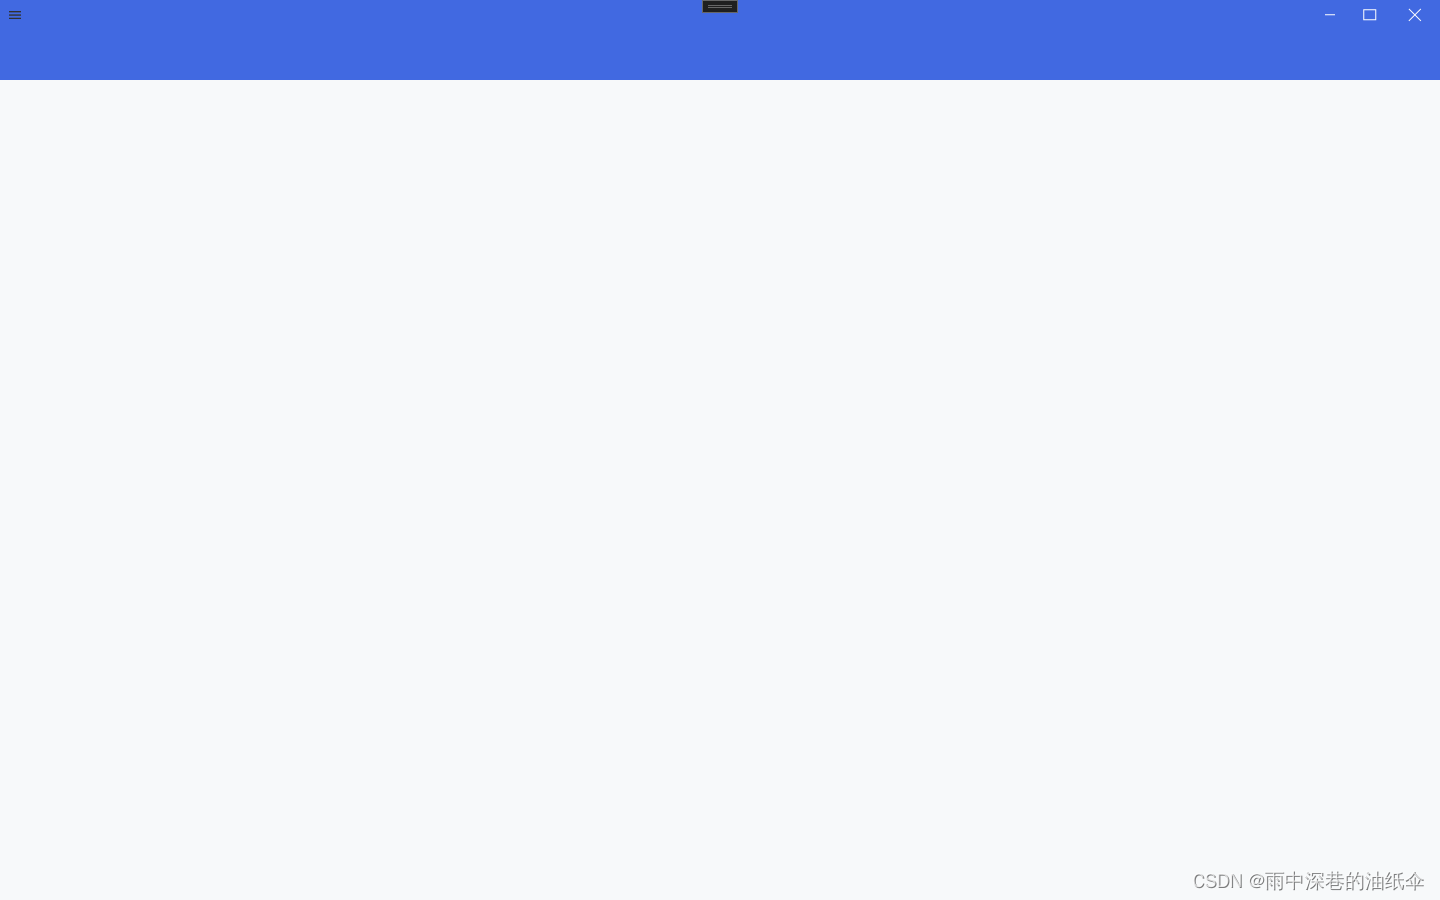
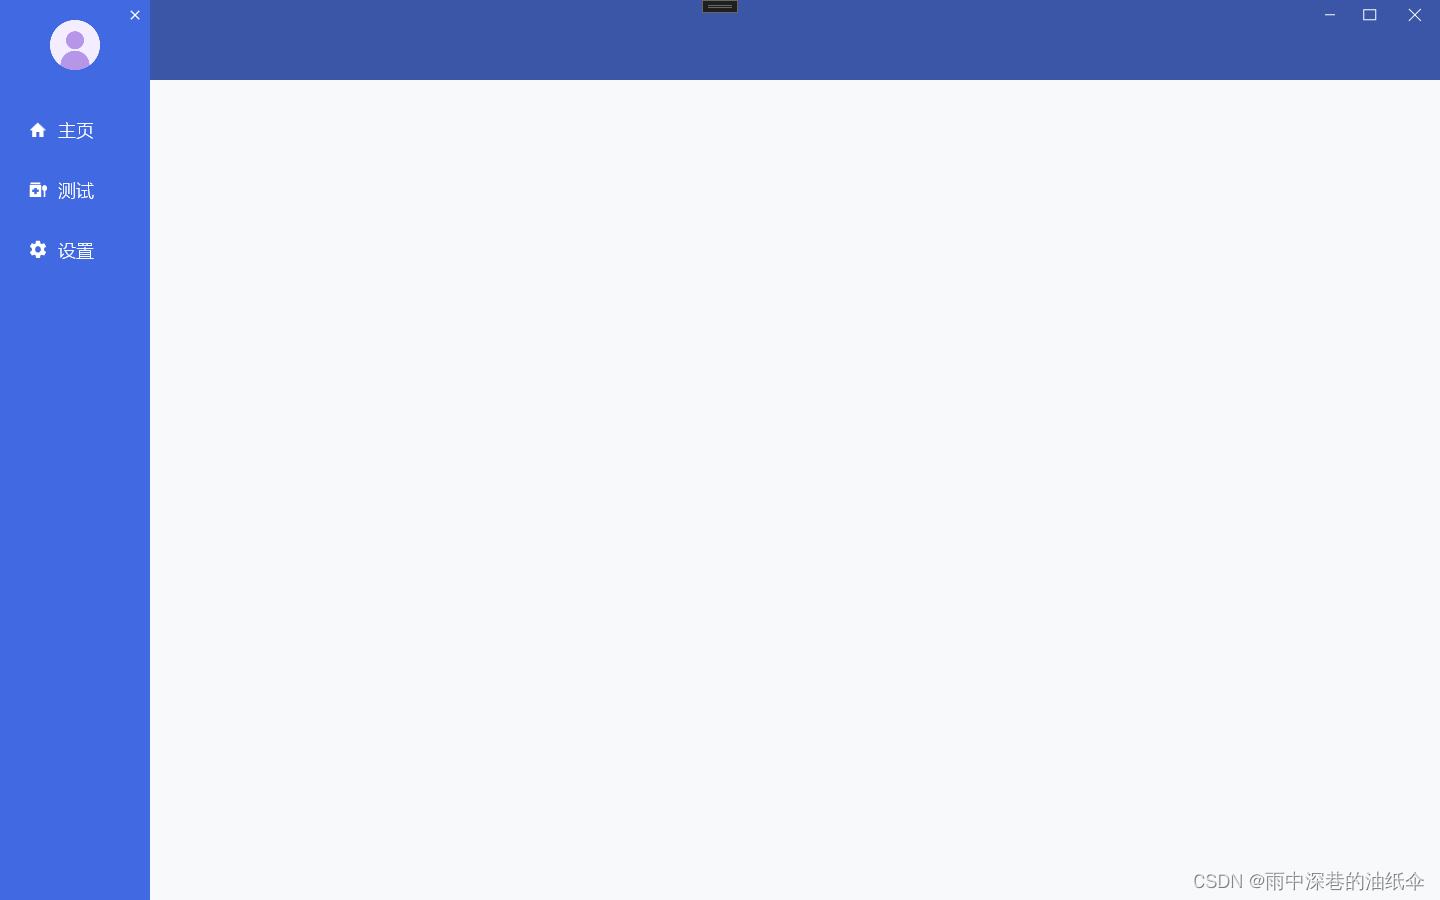
左侧菜单显示在窗体外,点击左上角菜单图标通过简单的动画呈现出来
3.左侧窗体外菜单
<Grid x:Name="GridMenu" Width="150" HorizontalAlignment="Left" Margin="-150 0 0 0" RenderTransformOrigin="0.5,0.5" Background="#4169E1"><Grid.RenderTransform><TransformGroup><ScaleTransform/><SkewTransform/><RotateTransform/><TranslateTransform/></TransformGroup></Grid.RenderTransform><StackPanel><Image Source="../Images/head.png"/ Margin="50,20"><ListView Foreground="White" FontFamily="Champagne & Limousines" FontSize="18" ItemsSource="{Binding MenuList}"><ListView.ItemTemplate><DataTemplate><StackPanel Orientation="Horizontal" Margin="0,10,0,0"><Button Style="{DynamicResource MenuButtonStyle}"Command="{Binding DataContext.ShowRegionCommand, RelativeSource={RelativeSource AncestorType={x:Type ListView}}}"CommandParameter="{Binding ElementName=txtRegion}"/><TextBlock Text="{Binding Path = RegionName}" Visibility="Collapsed" Name="txtRegion"/></StackPanel></DataTemplate></ListView.ItemTemplate></ListView></StackPanel><Button x:Name="ButtonClose" HorizontalAlignment="Right" VerticalAlignment="Top" Background="{x:Null}" Foreground="White" BorderBrush="{x:Null}" Width="30" Height="30" Padding="0"><materialDesign:PackIcon Kind="Close"/></Button>
</Grid>
这里头像的图片写死了,需要的自己替换。
4.菜单样式
<ResourceDictionary xmlns="http://schemas.microsoft.com/winfx/2006/xaml/presentation"xmlns:x="http://schemas.microsoft.com/winfx/2006/xaml"xmlns:materialDesign="http://materialdesigninxaml.net/winfx/xaml/themes"><Storyboard x:Key="CloseMenu"><DoubleAnimationUsingKeyFrames Storyboard.TargetProperty="(UIElement.RenderTransform).(TransformGroup.Children)[3].(TranslateTransform.X)" Storyboard.TargetName="GridMenu"><EasingDoubleKeyFrame KeyTime="0" Value="150"/><EasingDoubleKeyFrame KeyTime="0:0:0.5" Value="0"/></DoubleAnimationUsingKeyFrames><DoubleAnimationUsingKeyFrames Storyboard.TargetProperty="(UIElement.Opacity)" Storyboard.TargetName="GridBackground"><EasingDoubleKeyFrame KeyTime="0" Value="1"/><EasingDoubleKeyFrame KeyTime="0:0:0.5" Value="0"/></DoubleAnimationUsingKeyFrames><DoubleAnimationUsingKeyFrames Storyboard.TargetProperty="Width" Storyboard.TargetName="ContentGrid"><EasingDoubleKeyFrame KeyTime="0" Value="1290"/><!--初始宽度绑定到根Grid的宽度--><EasingDoubleKeyFrame KeyTime="0:0:0.5" Value="1440"/><!--减去菜单的宽度--></DoubleAnimationUsingKeyFrames><ObjectAnimationUsingKeyFrames  Storyboard.TargetProperty="(UIElement.Visibility)" Storyboard.TargetName="ButtonOpen"><DiscreteObjectKeyFrame  KeyTime="0"><DiscreteObjectKeyFrame.Value><Visibility>Visible</Visibility></DiscreteObjectKeyFrame.Value></DiscreteObjectKeyFrame></ObjectAnimationUsingKeyFrames></Storyboard><Storyboard x:Key="OpenMenu"><DoubleAnimationUsingKeyFrames Storyboard.TargetProperty="(UIElement.RenderTransform).(TransformGroup.Children)[3].(TranslateTransform.X)" Storyboard.TargetName="GridMenu"><EasingDoubleKeyFrame KeyTime="0" Value="0"/><EasingDoubleKeyFrame KeyTime="0:0:0.5" Value="150"/></DoubleAnimationUsingKeyFrames><DoubleAnimationUsingKeyFrames Storyboard.TargetProperty="(UIElement.Opacity)" Storyboard.TargetName="GridBackground"><EasingDoubleKeyFrame KeyTime="0" Value="0"/><EasingDoubleKeyFrame KeyTime="0:0:0.5" Value="1"/></DoubleAnimationUsingKeyFrames><DoubleAnimationUsingKeyFrames Storyboard.TargetProperty="Width" Storyboard.TargetName="ContentGrid"><EasingDoubleKeyFrame KeyTime="0" Value="1440"/><!--初始宽度绑定到根Grid的宽度--><EasingDoubleKeyFrame KeyTime="0:0:0.5" Value="1290"/><!--减去菜单的宽度--></DoubleAnimationUsingKeyFrames><ObjectAnimationUsingKeyFrames  Storyboard.TargetProperty="(UIElement.Visibility)" Storyboard.TargetName="ButtonOpen"><DiscreteObjectKeyFrame  KeyTime="0"><DiscreteObjectKeyFrame.Value><Visibility>Hidden</Visibility></DiscreteObjectKeyFrame.Value></DiscreteObjectKeyFrame></ObjectAnimationUsingKeyFrames></Storyboard><Style TargetType="Button" x:Key="MenuButtonStyle"><Setter Property="Template"><Setter.Value><ControlTemplate TargetType="Button"><Border Name="back" BorderThickness="0" Width="130"><StackPanel Orientation="Horizontal" Margin="0"><materialDesign:PackIcon Kind="{Binding Path = Icon}" Width="20" Height="20" Foreground="White" Margin="20,10,0,0" VerticalAlignment="Center"/><TextBlock Text="{Binding Path = Name}" Margin="10,10,0,0"  Foreground="White" FontFamily="微软雅黑" /></StackPanel></Border><ControlTemplate.Triggers><Trigger Property="IsPressed" Value="True"><Setter Property="Background" Value="Transparent" TargetName="back"/></Trigger><Trigger Property="IsMouseOver" Value="True"><Setter Property="Background" Value="Transparent" TargetName="back"/></Trigger></ControlTemplate.Triggers></ControlTemplate></Setter.Value></Setter></Style>
</ResourceDictionary>
5.主页面事件
<Window.Triggers><EventTrigger RoutedEvent="ButtonBase.Click" SourceName="ButtonClose"><BeginStoryboard x:Name="CloseMenu_BeginStoryboard" Storyboard="{StaticResource CloseMenu}"/></EventTrigger><EventTrigger RoutedEvent="ButtonBase.Click" SourceName="ButtonOpen"><BeginStoryboard Storyboard="{StaticResource OpenMenu}"/></EventTrigger>
</Window.Triggers>
6.主页面内容
    <Grid x:Name="ContentGrid" HorizontalAlignment="Right" Width="1440"><Grid.RowDefinitions><RowDefinition  Height="80"></RowDefinition><RowDefinition></RowDefinition></Grid.RowDefinitions><Grid Background="#4169E1"><Grid x:Name="GridBackground" Background="#55313131" Opacity="0"/><Button x:Name="ButtonOpen" HorizontalAlignment="Left" VerticalAlignment="Top" Background="{x:Null}" BorderBrush="{x:Null}" Width="30" Height="30" Padding="0"><materialDesign:PackIcon Kind="Menu" Foreground="#FF313131"/></Button><!--窗体控件按钮--><StackPanel Orientation="Horizontal" VerticalAlignment="Top" HorizontalAlignment="Right"><Button Width="40" Height="30" Style="{StaticResource PathButtonStyle}" Foreground="White" Tag="M0 0,10 0" /><Button Width="40" Height="30" Style="{StaticResource PathButtonStyle}" Foreground="White" Tag="M0 0,0 10,12 10,12 0Z" /><Button Width="50" Height="30" Style="{StaticResource PathButtonStyle}" Foreground="White" Tag="M0 0,12 12M0 12,12 0" /></StackPanel></Grid><ContentControl x:Name="Main" prism:RegionManager.RegionName="ContentRegion"  Grid.Row="1"/></Grid>
</Grid>
7.后台C#代码
private readonly IRegionManager _regionManager;public MainWindowViewModel(IRegionManager regionManager){_regionManager = regionManager;ShowRegionCommand = new DelegateCommand<object>(ShowRegion);InitMenus();}private void ShowRegion(object o){var text = (o as TextBlock).Text;_regionManager.RequestNavigate("ContentRegion", text);}private ObservableCollection<MenuModel> _menuList;public ObservableCollection<MenuModel> MenuList{get { return _menuList; }set{SetProperty(ref _menuList, value);}}
private void InitMenus()
{MenuList = new ObservableCollection<MenuModel>();MenuList.Add(new MenuModel(){Name = "主页",Icon = PackIconKind.Home,RegionName = "ContentView"});MenuList.Add(new MenuModel(){Name = "测试",Icon = PackIconKind.CovidTest,RegionName = "TestView"});MenuList.Add(new MenuModel(){Name = "设置",Icon = PackIconKind.Settings,RegionName = "SettingView"});
}
RegionName 对应每一个创建Control,具体的规则可以看一下prism的导航。
8.MenuModel类
public class MenuModel
{public string Name { get; set; }public PackIconKind Icon { get; set; }public string RegionName { get; set; }
}
9.prism 导航注册
prism 有个注册类ModuleModule
public class ModuleModule : IModule
{private readonly IRegionManager _regionManager;public ModuleModule(IRegionManager regionManager){_regionManager = regionManager;}/// <summary>/// 通知模块已被初始化。/// </summary>/// <param name="containerProvider"></param>public void OnInitialized(IContainerProvider containerProvider){_regionManager.RequestNavigate(RegionNames.ContentRegion, "ContentView");_regionManager.RequestNavigate(RegionNames.TestRegion, "TestView");_regionManager.RequestNavigate(RegionNames.SettingRegion, "SettingView");}/// <summary>/// 用于在您的应用程序将使用的容器中注册类型。/// </summary>/// <param name="containerRegistry"></param>public void RegisterTypes(IContainerRegistry containerRegistry){containerRegistry.RegisterForNavigation<ContentView>();containerRegistry.RegisterForNavigation<TestView>();containerRegistry.RegisterForNavigation<SettingView>();}
}
然后在App.xaml.cs中注册
protected override void ConfigureModuleCatalog(IModuleCatalog moduleCatalog){moduleCatalog.AddModule<ModuleModule>();}
10.RegionNames类
public static class RegionNames
{public const string TestRegion = "TestRegion";public const string SettingRegion = "SettingRegion";public const string ContentRegion = "ContentRegion";
}
ContentView 、TestView、SettingView是新建的用户控件,自己随便新建可以区分不同控件查看效果即可。
这篇关于wpf prism左侧抽屉式菜单的文章就介绍到这儿,希望我们推荐的文章对编程师们有所帮助!