本文主要是介绍【基于Ubuntu20.04的Autoware.universe安装过程】方案一:虚拟机 | 详细记录 | Vmware | 全过程图文 by.Akaxi,希望对大家解决编程问题提供一定的参考价值,需要的开发者们随着小编来一起学习吧!
目录
一、Autoware.universe背景
二、虚拟机配置
三、Ubuntu20.04安装
四、GPU显卡安装
五、ROS2-Galactic安装
六、ROS2-dev-tools安装
七、rmw-implementation安装
八、pacmod安装
九、autoware-core安装
十、autoware universe dependencies安装
十一、安装pre-commit
十二、CUDA安装
1.方法一
2.方法二
十三、cuDNN and TensorRT安装
十四、Autoware.Universe源码下载
十五、Autoware ROS依赖包安装
十六、编译空间
十七、Autoware-Universe测试【待进行】

注意:【此方案由于虚拟机不能很好调用主机的显卡,故推荐采用方案二】
方案二博客链接:【基于Ubuntu20.04的Autoware.universe安装过程】方案二:双系统 | 详细记录 | 全过程图文 by.Akaxi-CSDN博客
一、Autoware.universe背景
Autoware是一个基于ROS(机器人操作系统)开发的,开源的自动驾驶软件栈。它可以用于为各种各样的车辆,如汽车和卡车等,开发和部署先进辅助驾驶系统(ADAS)
Autoware版本:
Ai:基于ROS1
Auto:基于ROS2
Universe:商用/二次开发

官方文档:Autoware Universe Documentation
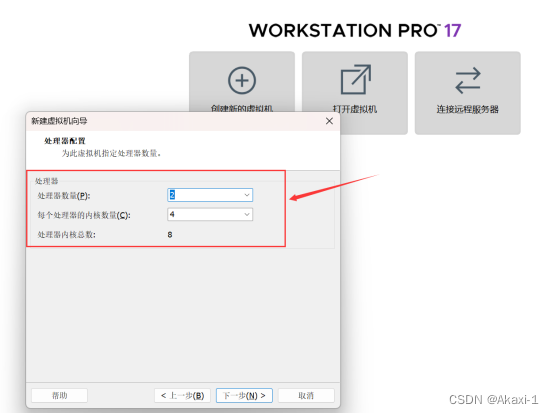
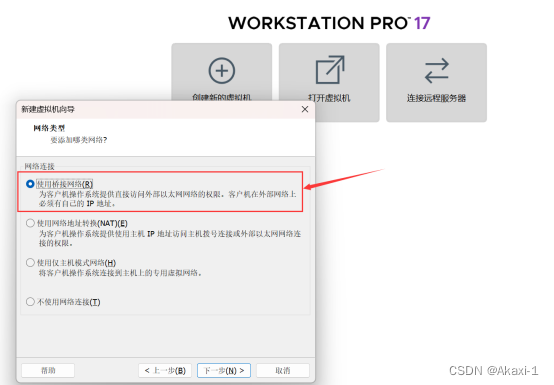
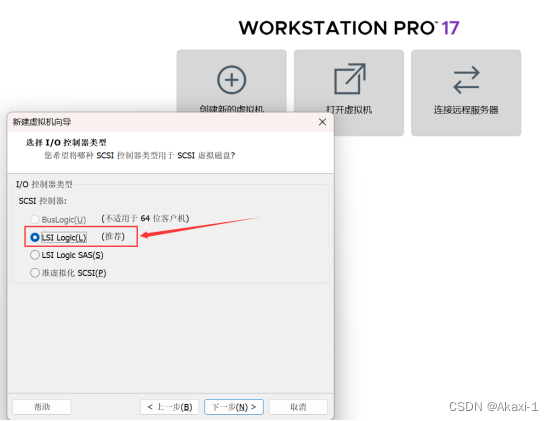
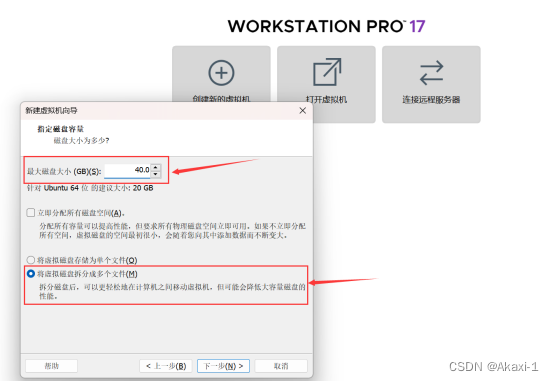
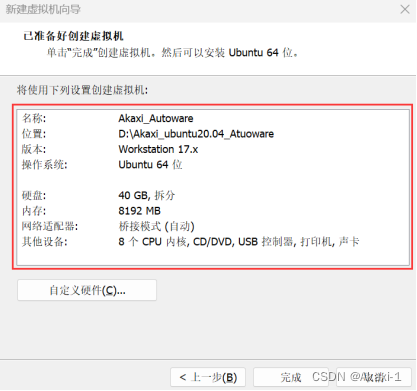
二、虚拟机配置

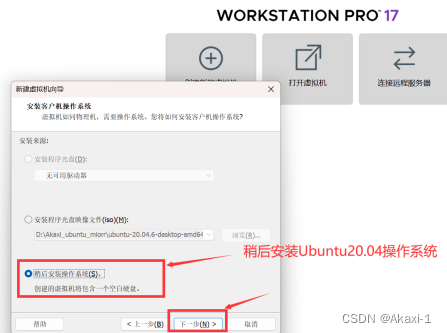


三、Ubuntu20.04安装
现在我们需要正式的给他安装一个操作系统——Ubuntu20.04
【Ubuntu镜像】http://mirrors.aliyun.com/ubuntu-releases/20.04/
这里选择Ubuntu版本20.04.6的桌面desktop-amd64位的iso镜像,如图,点击下载:

下载完成后,打开虚拟机的CD/DVD
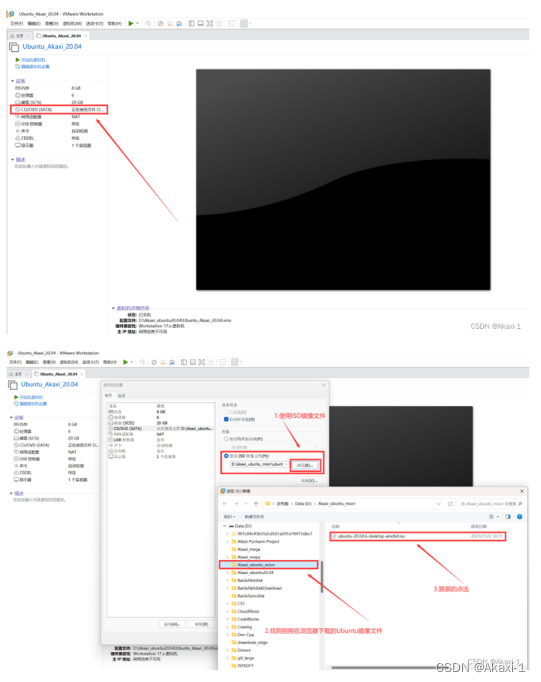
点击浏览,找到刚刚下载的Ubuntu20.04.6的镜像文件,使用ISO镜像文件打开,这样就在虚拟机插入了Ubuntu

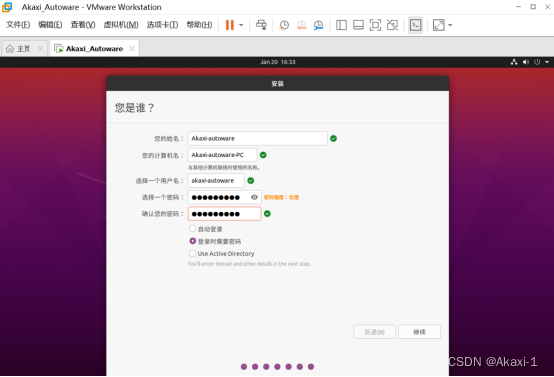
一路跟着指引走一遍就行啦
四、GPU显卡安装
参考博客:Vmware 中 Ubuntu 20.04 安装 NVIDIA CUDA以及 cuDNN_vmware cuda-CSDN博客
因为需要用到Awsim仿真,就需要用到GPU渲染
ubuntu-drivers devices
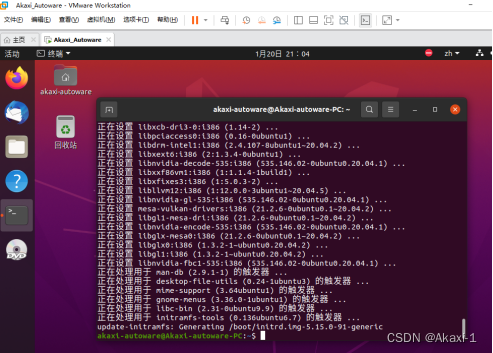
sudo apt-get install nvidia-driver-535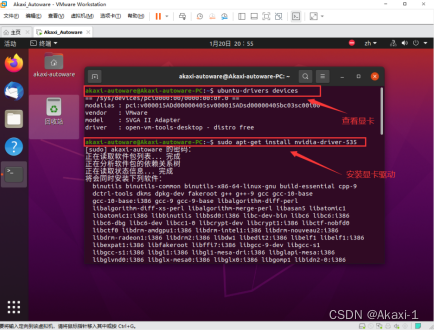
【虚拟机改成NAT模式】
一串输出之后即成功【这里很可能不成功】这里暂时不管,到后面第【十二章会进一步通过Vmware虚拟机安装NVIDIA驱动】再看
五、ROS2-Galactic安装
参考博客:
Autoware.universe部署01:Ubuntu20.04安装Autoware.universe并与Awsim联调_autoware universe-CSDN博客
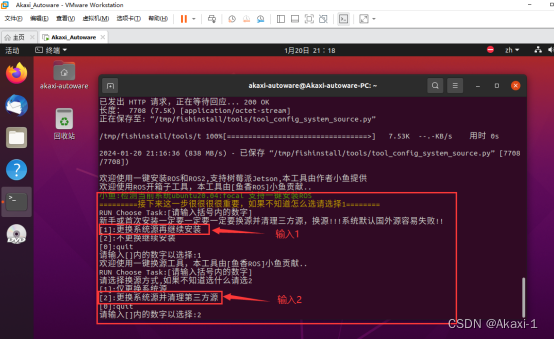
使用鱼香ROS一键安装
wget http://fishros.com/install -O fishros && . fishros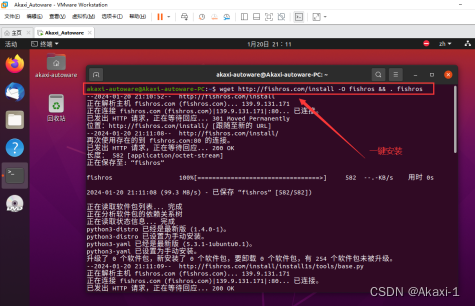
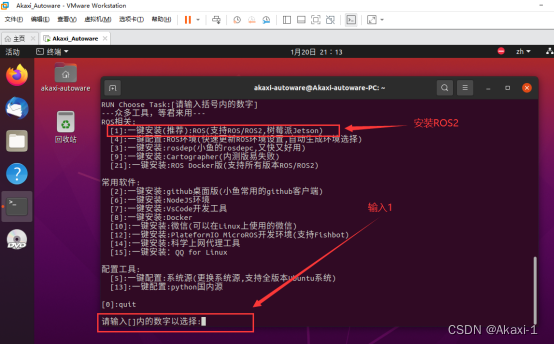
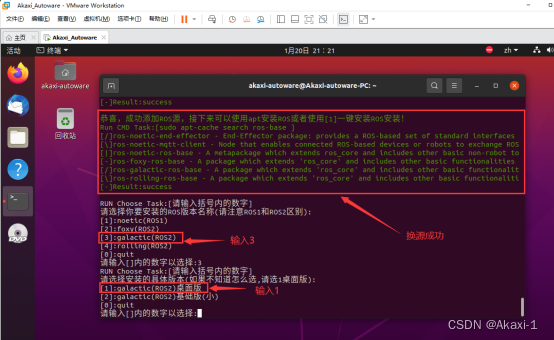
换源:
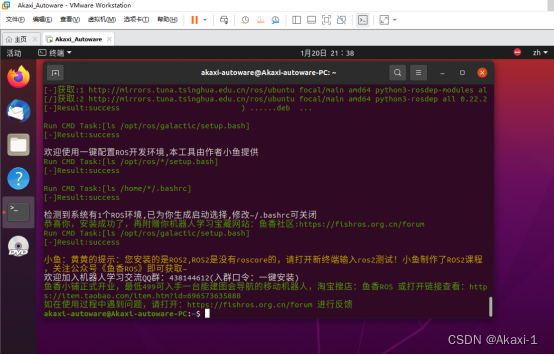
选择galactic(ROS2)版本,桌面版,一路安装【大概5min】
完成啦~~
六、ROS2-dev-tools安装
输入以下指令,直接复制粘贴
sudo apt update && sudo apt install -y \build-essential \cmake \git \python3-colcon-common-extensions \python3-flake8 \python3-pip \python3-pytest-cov \python3-rosdep \python3-setuptools \python3-vcstool \wget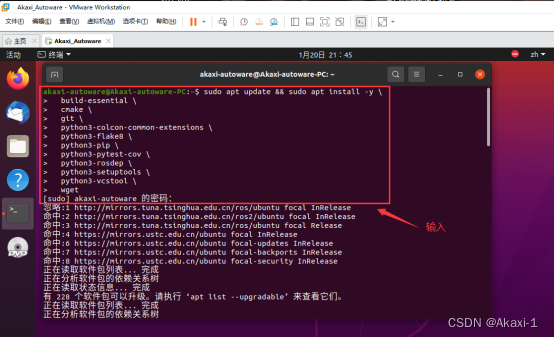
接下来安装【需要3min】
再输入以下指令:
python3 -m pip install -U \flake8-blind-except \flake8-builtins \flake8-class-newline \flake8-comprehensions \flake8-deprecated \flake8-docstrings \flake8-import-order \flake8-quotes \pytest-repeat \pytest-rerunfailures \pytest \setuptools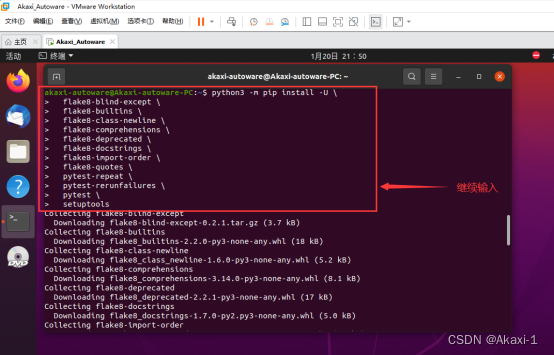
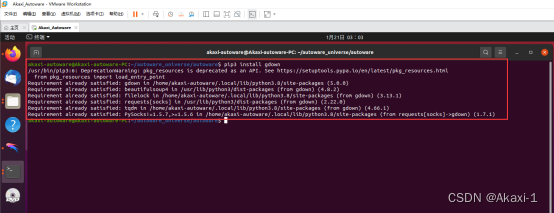
报错则安装相关的包
输入指令:
sudo apt install python3-testresources
再次输入以上的指令即可成功安装~

七、rmw-implementation安装
安装源码,注意需要科学上网哦~
sudo apt-get -y update
sudo apt-get -y install git
mkdir autoware_universe
cd autoware_universe/
git clone https://github.com/autowarefoundation/autoware.git -b galactic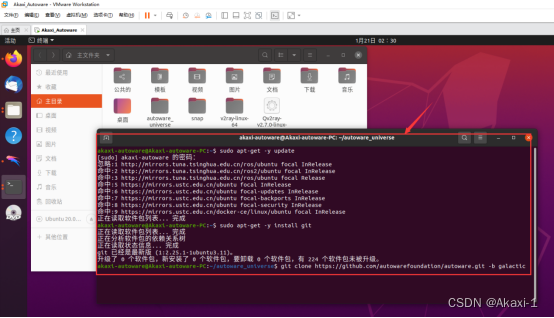
这里需要配置git的端口
git config --global http.proxy 127.0.0.1:8888git config --global https.proxy 127.0.0.1:8888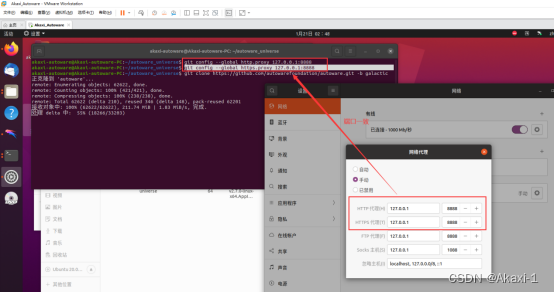
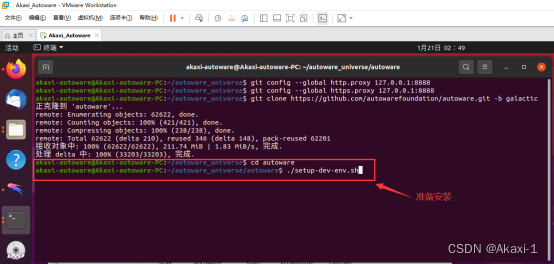
cd autoware_universe/
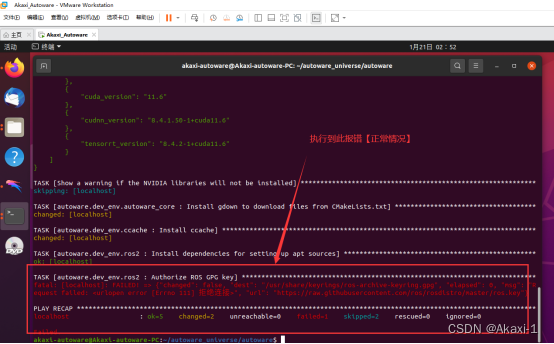
source amd64.env
# For details: https://docs.ros.org/en/galactic/How-To-Guides/Working-with-multiple-RMW-implementations.html
sudo apt update
rmw_implementation_dashed=$(eval sed -e "s/_/-/g" <<< "${rmw_implementation}")
sudo apt install ros-${rosdistro}-${rmw_implementation_dashed}# (Optional) You set the default RMW implementation in the ~/.bashrc file.
echo '' >> ~/.bashrc && echo "export RMW_IMPLEMENTATION=${rmw_implementation}" >> ~/.bashrc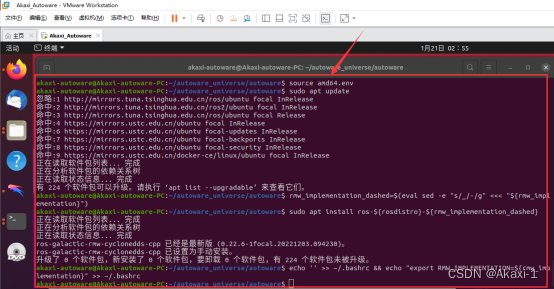
八、pacmod安装
# wget -O /tmp/amd64.env https://raw.githubusercontent.com/autowarefoundation/autoware/galactic/amd64.env && source /tmp/amd64.env
cd autoware_universe/
source amd64.env# Taken from https://github.com/astuff/pacmod3#installation
sudo apt install apt-transport-https
sudo sh -c 'echo "deb [trusted=yes] https://s3.amazonaws.com/autonomoustuff-repo/ $(lsb_release -sc) main" > /etc/apt/sources.list.d/autonomoustuff-public.list'
sudo apt update
sudo apt install ros-${rosdistro}-pacmod3
九、autoware-core安装
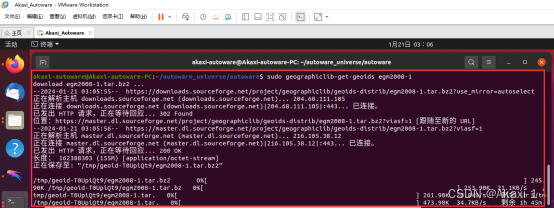
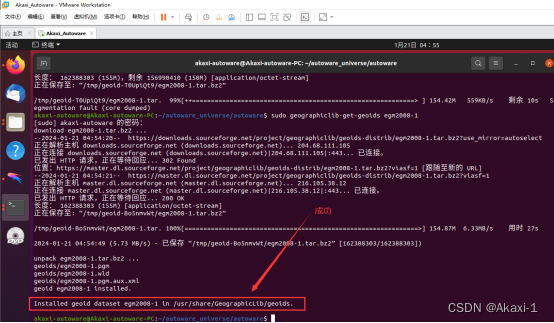
十、autoware universe dependencies安装
sudo apt install geographiclib-tools# 下面过程很慢,耐心等待sudo geographiclib-get-geoids egm2008-1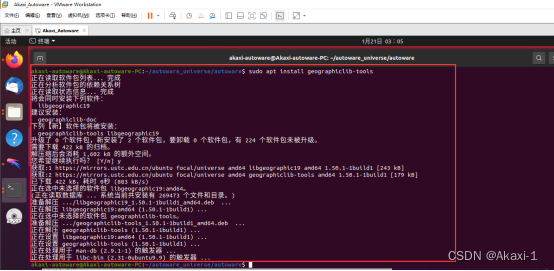
开始安装universe依赖【大概3h耗时间】
十一、安装pre-commit
clang_format_version=14.0.6
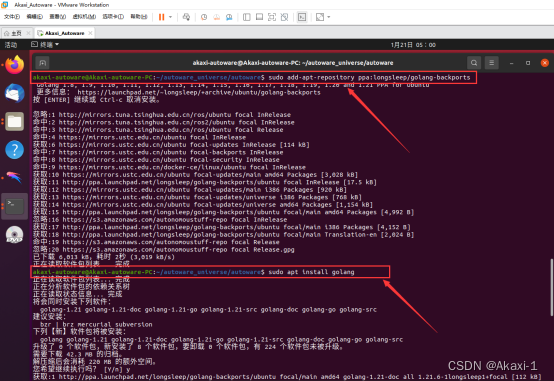
pip3 install pre-commit clang-format==${clang_format_version}# Install Golang (Add Go PPA for shfmt)
sudo add-apt-repository ppa:longsleep/golang-backports
sudo apt install golang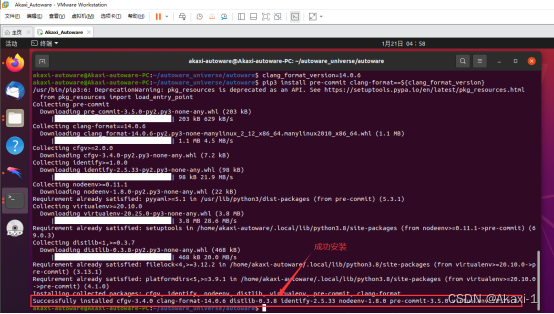
十二、CUDA安装
# wget -O /tmp/amd64.env https://raw.githubusercontent.com/autowarefoundation/autoware/galactic/amd64.env && source /tmp/amd64.env
cd autoware_universe/
source amd64.env# Modified from:
# https://developer.nvidia.com/cuda-11-4-4-download-archive?target_os=Linux&target_arch=x86_64&Distribution=Ubuntu&target_version=20.04&target_type=deb_network
wget https://developer.download.nvidia.com/compute/cuda/repos/ubuntu2004/x86_64/cuda-ubuntu2004.pin
sudo mv cuda-ubuntu2004.pin /etc/apt/preferences.d/cuda-repository-pin-600
sudo apt-key adv --fetch-keys https://developer.download.nvidia.com/compute/cuda/repos/ubuntu2004/x86_64/3bf863cc.pub
sudo add-apt-repository "deb https://developer.download.nvidia.com/compute/cuda/repos/ubuntu2004/x86_64/ /"
sudo apt-get update
cuda_version_dashed=$(eval sed -e "s/[.]/-/g" <<< "${cuda_version}")
sudo apt install cuda-${cuda_version_dashed} --no-install-recommends一个指令一个指令输入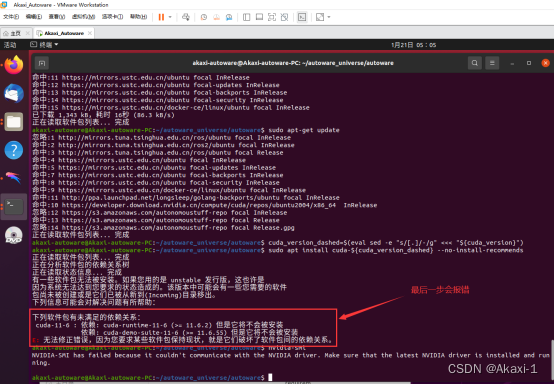
【由于这里在虚拟机显卡未成功安装】
需要将主机的NVIDIA显卡嫁接到Vmware虚拟机的Ubuntu20.04系统下
1.方法一
故需要参考博客,安装NVIDIA显卡:
Vmware 中 Ubuntu 20.04 安装 NVIDIA CUDA以及 cuDNN_vmware cuda-CSDN博客
从 VMware 网站 https://packages.vmware.com/bitfusion/ubuntu/ 下载适用于您的 Linux 分发包的 vSphere Bitfusion 客户端

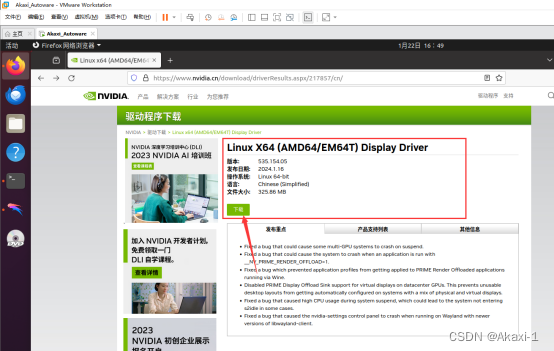
2.方法二
直接在Ubuntu20.04系统下载NVIDIA驱动

十三、cuDNN and TensorRT安装
【因为第十二步骤未完成,此步骤需要显卡驱动正确安装之后才能继续进行】
# wget -O /tmp/amd64.env https://raw.githubusercontent.com/autowarefoundation/autoware/galactic/amd64.env && source /tmp/amd64.envcd autoware_universe/source amd64.env# Taken from: https://docs.nvidia.com/deeplearning/tensorrt/install-guide/index.html#installingsudo apt-get install libcudnn8=${cudnn_version} libcudnn8-dev=${cudnn_version}sudo apt-mark hold libcudnn8 libcudnn8-devsudo apt-get install libnvinfer8=${tensorrt_version} libnvonnxparsers8=${tensorrt_version} libnvparsers8=${tensorrt_version} libnvinfer-plugin8=${tensorrt_version} libnvinfer-dev=${tensorrt_version} libnvonnxparsers-dev=${tensorrt_version} libnvparsers-dev=${tensorrt_version} libnvinfer-plugin-dev=${tensorrt_version}sudo apt-mark hold libnvinfer8 libnvonnxparsers8 libnvparsers8 libnvinfer-plugin8 libnvinfer-dev libnvonnxparsers-dev libnvparsers-dev libnvinfer-plugin-dev十四、Autoware.Universe源码下载
首先创建一个src文件夹
cd autoware_universe/
mkdir src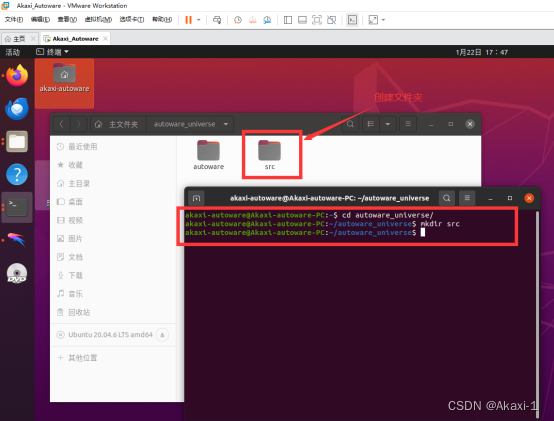
在autoware.repos 文件中,28行位置加入以下内容
universe/external/open_planner:type: giturl: https://github.com/ZATiTech/open_planner.gitversion: main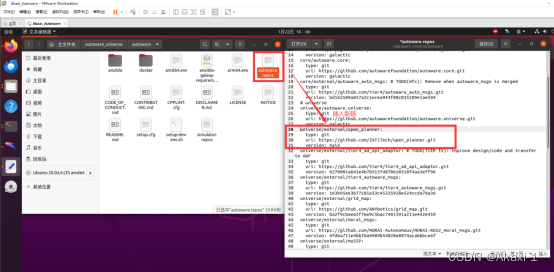
开始下载源码
vcs import src < autoware.repos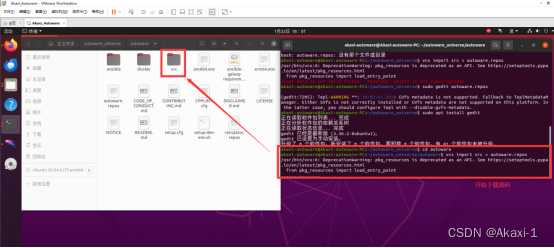

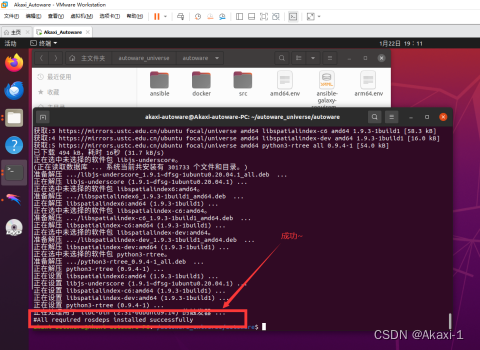
十五、Autoware ROS依赖包安装
【1】sudo mkdir -p /etc/ros/rosdep/sources.list.d/
【2】sudo curl -o /etc/ros/rosdep/sources.list.d/20-default.list https://mirrors.tuna.tsinghua.edu.cn/github-raw/ros/rosdistro/master/rosdep/sources.list.d/20-default.list
【3】export ROSDISTRO_INDEX_URL=https://mirrors.tuna.tsinghua.edu.cn/rosdistro/index-v4.yaml
【4】rosdep update --include-eol-distros
【5】echo 'export ROSDISTRO_INDEX_URL=https://mirrors.tuna.tsinghua.edu.cn/rosdistro/index-v4.yaml' >> ~/.bashrc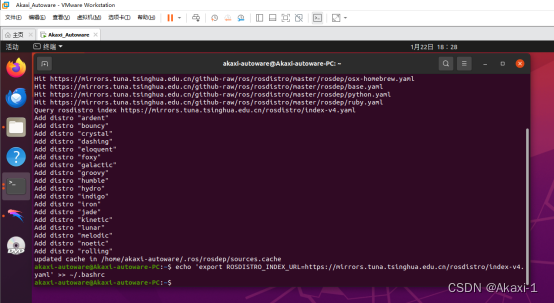
安装依赖:
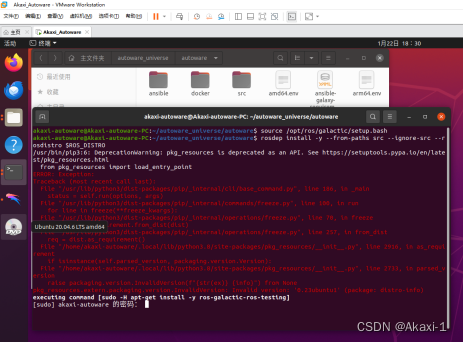
source /opt/ros/galactic/setup.bash
rosdep install -y --from-paths src --ignore-src --rosdistro $ROS_DISTRO
会报错,但是先输入密码,让他把其他安装包先下载好【过后再解决报错的包】:
十六、编译空间
colcon build --symlink-install --cmake-args -DCMAKE_BUILD_TYPE=Release
# 只编译指定包
colcon build --symlink-install --cmake-args -DCMAKE_BUILD_TYPE=Release --packages-select 包名
# 忽略指定包
colcon build --symlink-install --cmake-args -DCMAKE_BUILD_TYPE=Release --packages-ignore 包名
# 遇到编译错误继续编译其他模块
colcon build --symlink-install --cmake-args -DCMAKE_BUILD_TYPE=Release --continue-on-error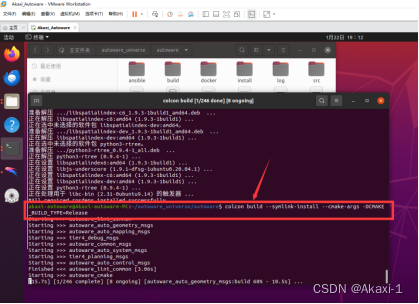
总共246个需要编译的模块【大概30min】
十七、Autoware-Universe测试【待进行】
简单运行Universe,$HOME/autoware_map/sample-map-planning为从官方下载的地图:gdown -O ~/autoware_map/ 'https://docs.google.com/uc?export=download&id=1499_nsbUbIeturZaDj7jhUownh5fvXHd'
unzip -d ~/autoware_map ~/autoware_map/sample-map-planning.zip
1
2
修改为你自己的路径source install/setup.bash
ros2 launch autoware_launch planning_simulator.launch.xml map_path:=$HOME/autoware_map/sample-map-planning vehicle_model:=sample_vehicle sensor_model:=sample_sensor_kit
应该会出现下面的地图~
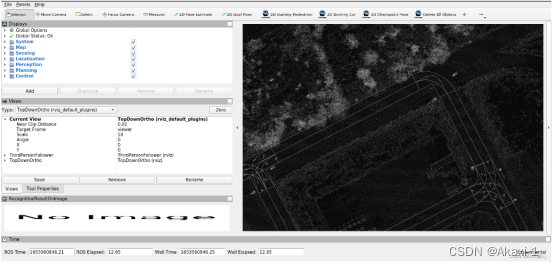
注意:【此方案由于虚拟机不能很好调用主机的显卡,故推荐采用方案二】
2024.2.25
渝北仙桃数据谷
这篇关于【基于Ubuntu20.04的Autoware.universe安装过程】方案一:虚拟机 | 详细记录 | Vmware | 全过程图文 by.Akaxi的文章就介绍到这儿,希望我们推荐的文章对编程师们有所帮助!


