本文主要是介绍【vue3+ts项目】配置eslint校验代码工具,eslint+prettier+stylelint,希望对大家解决编程问题提供一定的参考价值,需要的开发者们随着小编来一起学习吧!
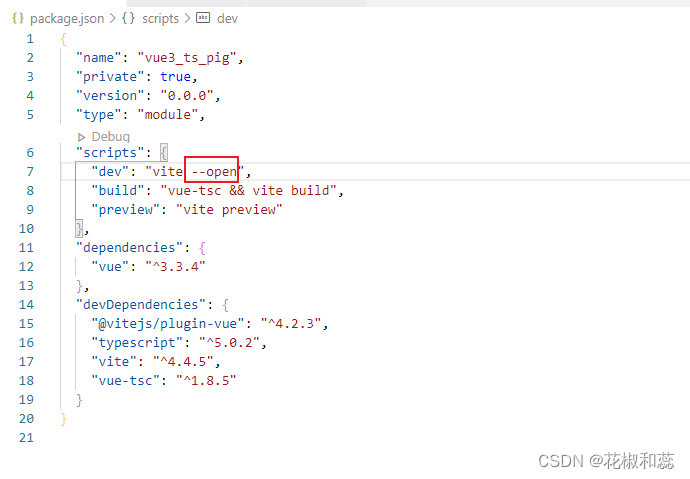
1、运行好后自动打开浏览器
package.json中 vite后面加上 --open
2、安装eslint
npm i eslint -D

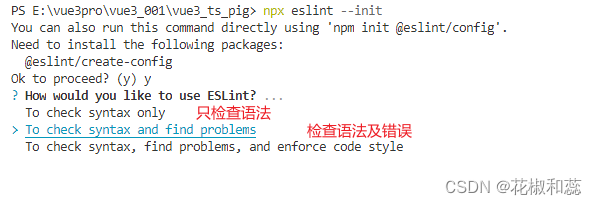
3、运行 eslint --init 之后,回答一些问题, 自动创建 .eslintrc 配置文件。
npx eslint --init
回答问题如下:
使用eslint仅检查语法,还是检查语法及错误,选第二个
使用的是什么模块,选第一个

项目使用的是什么框架,选vue

项目中使用TyoeScript ,选yes

项目运行在哪,选浏览器

创建的配置类型需要什么类型的,选Javascript

需要安装这些插件吗,检验ts语法,检验vue语法,选yes

用什么包管理工具,我这里是npm

安装完成

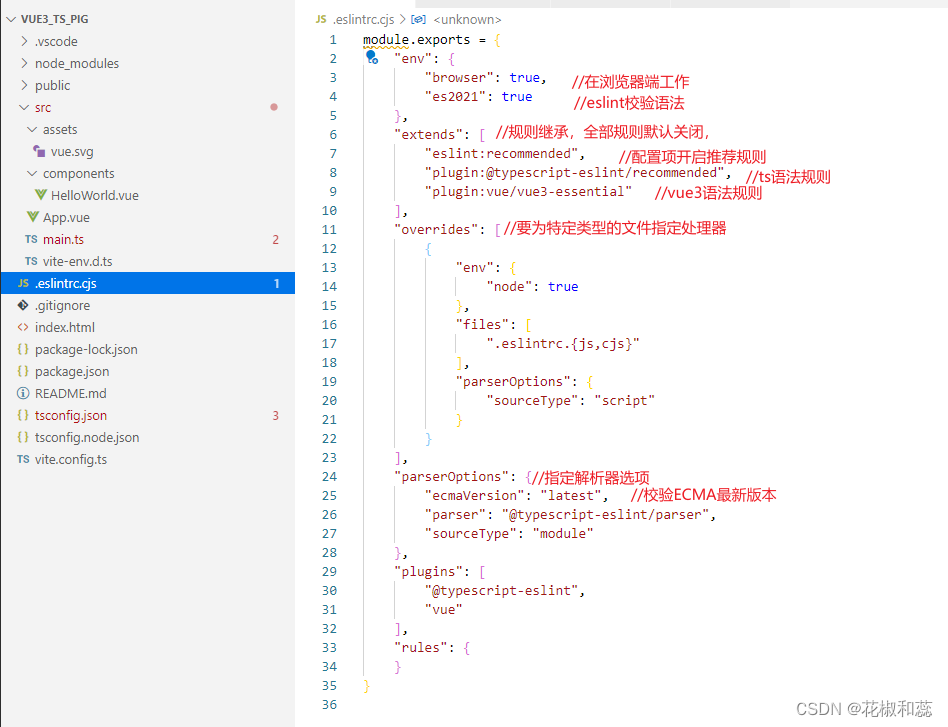
项目中会多一个.eslintrc.cjs文件
4、安装vue3环境代码校验插件
//让所有与prettier规则存在冲突的Eslint rules失效,并使用prettier进行代码检查
“eslint-config-prettier”: “^9.0.0”,
“eslint-plugin-import”: “^2.28.1”,
“eslint-plugin-node”: “^11.1.0”,
//运行更漂亮的Eslint插件,使prettier规则优先级更高,Eslint优先级低
“eslint-plugin-prettier”: “^5.0.0”,
//vue.js的Eslint插件(查找vue语法错误,发现错误指令,查找违规风格指南)
“eslint-plugin-vue”: “^9.17.0”,
//该解析器允许使用Eslint校验所有babel code
“@babel/eslint-parser”: “^7.22.10”,
npm install -D eslint-plugin-import eslint-plugin-vue eslint-plugin-node eslint-plugin-prettier eslint-config-prettier eslint-plugin-node @babel/eslint-parser

5、安装好后重新配置.eslintrc.cjs文件
module.exports = {env: {browser: true,es2021: true,node: true,jest: true,},// 指定如何解析语法parser: "vue-eslint-parser",//优先级低于parse的语法解析配置parserOptions: {ecmaVersion: "latest",parser: "@typescript-eslint/parser",sourceType: "module",jsxPragma: "Recat",ecmaFeatures: {jsx: true,},},//   继承已有的规则extends: ["eslint:recommended","plugin: @typescript-eslint/recommended","plugin: vue/vue3-essential","parser: pretter/recommended",],overrides: [{env: {node: true,},files: [".eslintrc.{js,cjs}"],parserOptions: {sourceType: "script",},},],/*** 'off' 或0  ==>关闭规则* 'warn'或1   ==>打开的规则作为警告* 'error'或2   ==>规则作为一个错误(代码不能执行,界面报错)*/plugins: ["@typescript-eslint", "vue"],rules: {"no-var": "error", //要求使用let或const而不是var"no-multiple-empty-lines": ["warn", { max: 1 }], //不允许多个空行"no-console": process.env.NODE_ENV == "production" ? "error" : "off","no-debugger": process.env.NODE_ENV == "production" ? "error" : "off","no-unexpected-multiline": "error", //禁止空余的多行"no-useless-escape": "off", //禁止不必要的转移字符"@typescript-eslint/no-unused-vars": "error", //禁止定义未使用的变量"@typescript-eslint/prefer-ts-expect-error": "error", //禁止使用@ts-ignore"@typescript-eslint/no-explicit-any": "off", //禁止使用any类型"@typescript-eslint/no-non-null-assertion": "off","@typescript-eslint/no-namespace": "off", //禁止使用自定义Typescript模板"@typescript-eslint/semi": "off","vue/multi-word-component-names": "off", //要求组件名称始终为'-'链接的单词"vue/script-setup-users-vars": "error", //防止<script setup>使用的变量<template>标记为未使用"vue/no-mutating-props": "off", //不允许组件props的改成"vue/attribute-hyphenation": "off", //对模板中的自定义组件强制执行属性命名样式},
};
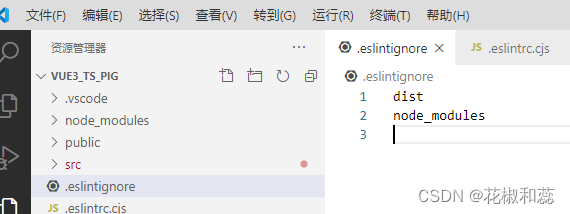
6、新建.eslintignore忽略文件,不需要校验
7、添加运行脚本,package.json中添加,npm run lint 检查语法,npm run fix 修改错误语法
"lint":"eslint src","fix":"eslint src --fix"

8、配置prettier
eslint保证js代码质量,prettier保证代码美观,统一格式,支持保护js在内的多种语言
npm install -D eslint-plugin-prettier eslint-config-prettier

9、新增.prettier.json
{"singleQuote":true,"semi":false,"bracketSpacing":true,"htmlWhitespaceSensitivity":"ignore","endOfLine":"auto","trailingComma":"all","tabWidth":2
}
10、新增.prettierignore
/dist/*
/html/*
.local
/node_modules/**
**/* .svg
**/* .sh
/public/*
运行npm run lint,遇到报错

把.eslintrc.cjs文件中所有的空格都删掉,比如rules中的空格
然后再运行npm run lint,又遇到报错


eslintrc.cjs文件中正确的是:
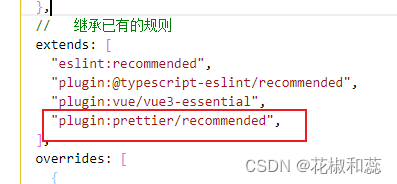
现在可以了
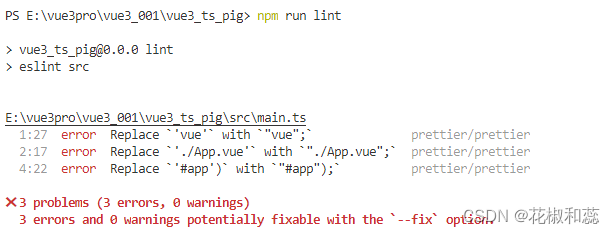
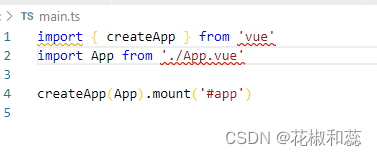
执行npm run fix之后

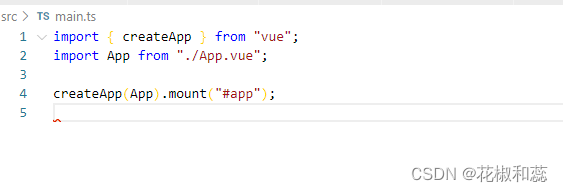
再执行npm run lint之后,没有错误提示了

11、安装stylint相关插件
npm add sass sass-loader stylelint postcss postcss-scss postcss-html stylelint-config-prettier stylelint-config-recess-order stylelint-config-recommended-scss stylelint-config-standard stylelint-config-standard-vue stylelint-scss stylelint-order stylelint-config-standard-scss -D
遇到报错
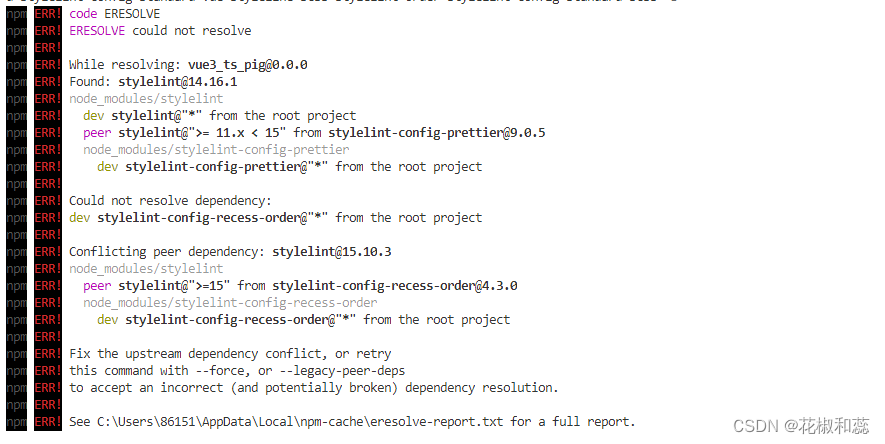
这个报错的意思是stylelint的版本目前是14.16.1,stylelint-config-prettier@9.0.5需要stylelint的版本在11-15之间
stylelint-config-recess-order@4.3.0需要stylelint的版本大于等于15
单独安装stylelint-config-prettier和stylelint
npm add stylelint-config-prettier@9.0.5
npm add stylelint@12
单独安装stylelint-config-recess-order
npm add stylelint-config-recess-order@4.3.0
这里会报错,因为stylelint装的是版本12
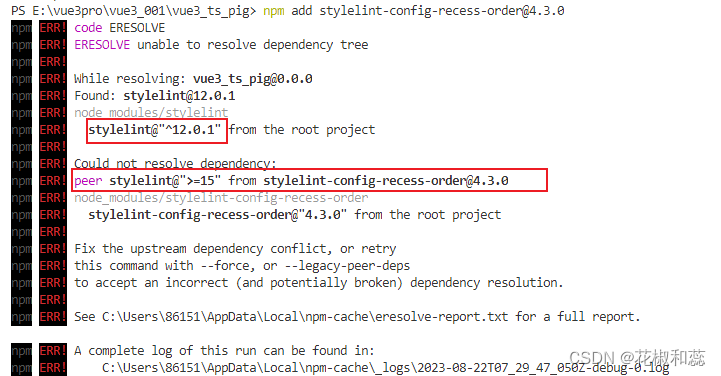
重新安装stylelint
npm add stylelint@15
警告还是有的,但不是err报错了
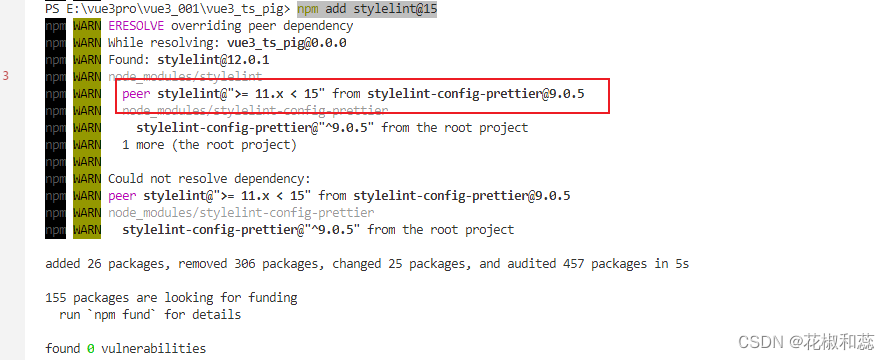
然后再将剩余的安装上
npm add sass sass-loader postcss postcss-scss postcss-html stylelint-config-recommended-scss stylelint-config-standard stylelint-config-standard-vue stylelint-scss stylelint-order stylelint-config-standard-scss -D
安装成功,开始配置stylelint
12、stylelint是css的lint工具,可格式化css代码,检查css语法错误和不合理的写法,指定css书写顺序等 新增.stylelintrc.cjs配置文件
module.export = {//官网https://stylelint.bootcss.com/extends: ['stylelint-config-standard',//配置stylelint拓展插件'stylelint-config-html/vue',//配置vue中template样式格式化'stylelint-config-standard-scss',//配置stylelint scss插件'stylelint-config-recommended-vue/scss',//配置vue中scss样式格式化'stylelint-config-recess-order',//配置stylelint css属性书写顺序插件'stylelint-config-prettier',//配置stylelint和prettier兼容],overrides: [{files: ['**/*.(scss|css|vue|html)'],customSyntax:'postcss-scss',},{files: ['**/*.(html|vue)'],customSyntax:'postcss-html',}],ignoreFiles: ['**/*.js','**/*.jsx','**/*.tsx','**/*.ts','**/*.json','**/*.md','**/*.yaml',],/*** null 关闭该规则* always 必须*/rules: {'value-keyword-case': null,//在css中使用v-bind不报错'no-descending-specificity': null,//禁止在具有较高优先级的选择器后出现被其覆盖的较低优先级的选择器'function-url-quotes': 'always',//要求或禁止URL的引号"always"必须加上引号,"never"没有引号'no-empty-source': null,//关闭禁止空源码'selector-class-pattern': null,//关闭强制选择器类名的格式'property-no-unknown': null,//禁止未知的属性,true为不允许'block-opening-brace-space-before': 'always',//大括号之前必须有一个空格或不能有空白符'value-no-vendor-prefix': null,//关闭属性值前缀  --webkit-box'property-no-vendor-prefix': null,//关闭属性前缀  --webkit-mask'selector-pseudo-class-no-unknown': [// 不允许未知的选择器true,{ignorePseudoClasses:['global','v-deep','deep'],//忽略属性,修改elememt默认样式的时候能使用到}]}
}
13、新增.stylelintignore忽略文件
/dist/*
/html/*
/node_modules/*
/public/*
14、添加运行脚本,package.json中添加
"format":"prettier --write\"./**/*.{html,vue,ts,js,jsom,md}\"","lint:eslint":"eslint src/**/*.{ts,vue} --cache --fix","lint:style":"stylelint src/**/*.{css,scss,vue} --cache --fix"
npm run format 会把代码直接格式化
这篇关于【vue3+ts项目】配置eslint校验代码工具,eslint+prettier+stylelint的文章就介绍到这儿,希望我们推荐的文章对编程师们有所帮助!


