本文主要是介绍【超详细】vue项目:Tinymce富文本使用教程以及踩坑总结+业务需要功能扩展,希望对大家解决编程问题提供一定的参考价值,需要的开发者们随着小编来一起学习吧!
【超详细】vue项目:Tinymce富文本使用教程以及踩坑总结+业务需要功能扩展
- 引言:
- 一、 开始
- 二、快速开始
- 1、安装Tinymce
- 三、配置说明
- 四、封装成Vue组件
- 1、文件结构
- 2、index.vue
- 3、dynamicLoadScript.js
- 4、plugin.js
- 5、toolbar.js
- 五、使用Tinymce组件
- 六、menubar(菜单)配置
- 1、什么是菜单
- 2、启用和停用菜单栏
- 3、配置菜单项
- 4、菜单栏相关补充
- 七、toolbar(工具栏)配置
- 1、什么是工具栏
- 2、禁用或启用菜单栏
- 3、启用多个工具栏
- 4、自定义工具栏
- 5、toolbar相关补充
- 八、contextmenu(上下文菜单)配置
- 1、什么是上下文菜单
- 2、禁用或启用上下文菜单
- a、启用
- b、禁用(如不行则特殊处理一下)
- 九、tinymce插件
- 十、获取TinyMCE编辑器中的内容
- 1、如果当前页面只有一个编辑器:
- 2、如果当前页面有多个编辑器(下面的“[0]”表示第一个编辑器,以此类推):
- 3、获取不带HTML标记的纯文本内容:
- 十一、TinyMCE上传图片
- 1、返回的josn数据格式为
- 2、样例:
- 十二、业务逻辑实现
- 1、添加页面只读模式,解决方案(`readonly: true`):
- - a、在组件中添加`props`
- - b、在组件初始化的时候添加该配置
- - c、使用组件时传参
- 2、数据处理:传数据给后端需要进行base64加密,但是会把标签尖括号变成中文,导致回显时错误,解决方案:
- - a、保存时转码之后再加密:
- - b、回显时解密再转码
- 3、打开页面时会出现Tinymce还未实例化的情况,页面展示空白,解决方案:
- - a、给Tinymce组件绑定**`key`** 值
- - b、在使用`Tinymce`组件的页面的 **`mouted`** 去实例化
- 4、在Tinymce编辑器上方自定义按钮,打开一个弹窗,选定一个参数添加至编辑器中鼠标点击的位置
- - a、工具栏自定义按钮
- - b、父组件调用showModal并打开弹窗
- - c、弹窗内容双击之后,调用Tinymce函数来进行内容插入
- - d、Tinymce中执行内容插入逻辑
- 5、实现首行缩进2字符
- - a、获取鼠标单击的当前行,并为当前行添加样式text-indent: 2em;
- - b、选中一段文本,并将其变成一个段落,并首行缩进2个字符;
- 8、关于tinymce内容改变后,编辑器光标位置重置的问题
- - a、原因
- - b、解决思路
- 7、在Tinymce编辑器实现右击可以选择只粘贴文本
引言:
在Vue项目的开发过程中,经常需要使用富文本编辑器来处理用户的输入内容。Tinymce 是一个功能强大且易于使用的富文本编辑器,它支持大多数常见的文本编辑功能,并且可以通过插件进行扩展。本文将详细介绍如何在Vue项目中使用Tinymce富文本编辑器。
一、 开始
官网文档:https://www.tiny.cloud/docs/
中文文档:http://tinymce.ax-z.cn/
社区版及开发版官方最新打包地址:https://www.tiny.cloud/get-tiny/self-hosted/
汉化包:http://tinymce.ax-z.cn/static/tiny/langs/zh_CN.js
二、快速开始
1、安装Tinymce
首先,在Vue项目的根目录下打开终端,运行以下命令来安装Tinymce:
npm install tinymce
上述命令会下载并安装Tinymce的依赖到你的项目中。
三、配置说明
{
width: '100%', //  设置富文本编辑器宽度
height: '100%', //  设置富文本编辑器高度
menubar: false, // 设置富文本编辑器菜单, 默认true
branding: false, // 关闭底部官网提示 默认true
statusbar: true, // 显示底部状态栏 默认true
readonly: false, // 设置只读属性 默认 false
resize: false, // 调节编辑器大小 默认 true
autosave_ask_before_unload: true, // 阻止有内容时浏览器阻塞行为, 默认 true  需引入插件autosave
autosave_interval: '3s', // 设置自动保存为草稿时间 单位只能为s 需引入插件autosave
autosave_prefix: `editor_${_this.$route.path}`, // 设置自动保存为草稿时前缀 本地localStorage中存储  需引入插件autosave
autosave_retention: '300m', // 自动草稿的有效期 单位只能为m  需引入插件autosave
contextmenu: 'copy paste cut link', // 上下文菜单 默认 false
draggable_modal: true, // 模态框拖动 默认false
placeholder: '开始编写吧', // 占位符
theme: 'silver', // 主题 必须引入
skin_url: '/tinymce/skins/ui/oxide', // 主题路径
icons: 'custom',  // 自定义图标名称
icons_url: '/tinymce/icons/icons.js', // 自定义图标路径
language_url: '/tinymce/langs/zh_CN.js', // 中文化 默认为英文
language: 'zh_CN', // 设置富文本编辑器语言
content_css: `/tinymce/skins/content/default`, // 富文本编辑器内容区域样式
content_style: 'body, p{font-size: 12px}', // 为内容区编辑自定义css样式
fontsize_formats: '12px 14px 16px 18px 20px 22px 24px 26px 36px 48px 56px', // 工具栏自定义字体大小选项
font_formats: "微软雅黑='微软雅黑'; 宋体='宋体'; 黑体='黑体'; 仿宋='仿宋'; 楷体='楷体'; 隶书='隶书'; 幼圆='幼圆'; 方正舒体='方正舒体'; 方正姚体='方正姚体'; 等线='等线'; 华文彩云='华文彩云'; 华文仿宋='华文仿宋'; 华文行楷='华文行楷'; 华文楷体='华文楷体'; 华文隶书='华文隶书'; Andale Mono=andale mono,times; Arial=arial; Arial Black=arial black;avant garde; Book Antiqua=book antiqua;palatino; Comic Sans MS=comic sans ms; Courier New=courier new;courier; Georgia=georgia; Helvetica=helvetica; Impact=impact;chicago; Symbol=symbol; Tahoma=tahoma;arial; sans-serif; Terminal=terminal,monaco; Times New Roman=times new roman,times; Trebuchet MS=trebuchet ms; Verdana=verdana;geneva; Webdings=webdings; Wingdings=wingdings", // 工具栏自定义字体选项
toolbar_sticky: true, // 粘性工具栏 默认false (在向下滚动网页直到不再可见编辑器时,将工具栏和菜单停靠在屏幕顶部)
toolbar_mode: 'sliding', // sliding生效条件toolbar必须为字符串,且有'|'区分,不能为数组
plugins: ['autosave help textpattern lineheight'], // 插件配置
toolbar: 'fontselect styleselect fontsizeselect restoredraft undo redo | bold italic underline strikethrough subscript superscript removeformat forecolor backcolor lineheight align outdent indent help', // 工具栏配置
images_upload_handler: (blobInfo, success, failure) => {// 发送请求, 获取图片路径后, 将路径传给successsuccess('http://pic.sc.chinaz.com/files/pic/pic9/202005/apic25209.jpg')
}, // 图片上传函数 需引入插件image
image_advtab: true, // 为上传图片窗口添加高级属性 需引入插件image
paste_data_images: true, // 粘贴data格式的图像 需引入插件paste 谷歌浏览器无法粘贴
paste_as_text: true, // 默认粘贴为文本 需引入插件paste 谷歌浏览器无法粘贴
templates: [{ title: '标题', description: '描述', content: '内容' }], // 内容模板 需引入插件templates
visual: false, // 颜色辅助
quickbars_selection_toolbar: 'bold italic underline strikethrough | link h2 h3 h4 blockquote', // 设置 快速选择 触发提供的工具栏 需引入插件  默认 'alignleft aligncenter alignright' 设置为false禁用
quickbars_insert_toolbar: 'quickimage quicktable', // 设置 快速插入 触发提供的工具栏 需引入插件quickbars 默认 quickimage quicktable 设置为false禁用
textpattern_patterns: [{ start: '*', end: '*', format: 'italic' },{ start: '**', end: '**', format: 'bold' },{ start: '#', format: 'h1' },{ start: '##', format: 'h2' },{ start: '###', format: 'h3' },{ start: '####', format: 'h4' },{ start: '#####', format: 'h5' },{ start: '######', format: 'h6' },{ start: '1. ', cmd: 'InsertOrderedList' },{ start: '* ', cmd: 'InsertUnorderedList' },{ start: '- ', cmd: 'InsertUnorderedList' }
], // 快速排版  类似于markdown 需引入插件textpattern
init_instance_callback: editor => { // 初始化结束后执行, 里面实现双向数据绑定功能if (_this.value) {editor.setContent(_this.value)}_this.hasInit = trueeditor.on('Input undo redo Change execCommand SetContent', (e) => {_this.hasChange = true// editor.getContent({ format: ''text }) // 获取纯文本_this.$emit('change', editor.getContent())})
},
setup: (editor) => { // 初始化前执行// 监听鼠标按下事件editor.on('keydown', (e) => {if (e.keyCode === 9) {if (e.shiftKey) {editor.execCommand('Outdent')} else {editor.execCommand('Indent')}e.preventDefault()e.stopPropagation()}})// 注册自定义上传按钮editor.ui.registry.addButton('upload', {text: `<i class="el-icon-upload" style="font-size: 24px"></i>`,tooltip: '自定义上传',onAction: () => {_this.config.show = true}})// 注册获取内容按钮editor.ui.registry.addButton('submit', {text: `<i class="el-icon-position" style="font-size: 18px"></i>`,tooltip: '获取内容',onAction: () => {console.log(editor.getContent())}})// 注册清空内容按钮editor.ui.registry.addButton('empty', {text: `<i class="el-icon-close" style="font-size: 18px"></i>`,tooltip: '清空内容',onAction: () => {_this.content = ''editor.setContent('')}})}
}
四、封装成Vue组件
1、文件结构
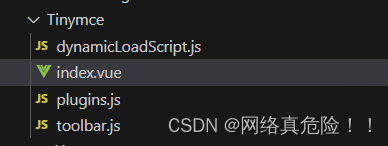
2、index.vue
<template><div :class="{ fullscreen: fullscreen }" class="tinymce-container" :style="{ width: containerWidth }"><textarea :id="tinymceId" class="tinymce-textarea" /></div>
</template><script>
/*** docs:* https://panjiachen.github.io/vue-element-admin-site/feature/component/rich-editor.html#tinymce*/
import plugins from './plugins'
import toolbar from './toolbar'
import load from './dynamicLoadScript'// why use this cdn, detail see https://github.com/PanJiaChen/tinymce-all-in-one
// http://cdn.jsdelivr.net无法访问了,将cdn.jsdelivr.net域名替换为fastly.jsdelivr.net或者gcore.jsdelivr.net
// const tinymceCDN = 'https://cdn.jsdelivr.net/npm/tinymce-all-in-one@4.9.3/tinymce.min.js'
const tinymceCDN = 'https://fastly.jsdelivr.net/npm/tinymce-all-in-one@4.9.3/tinymce.min.js'export default {name: 'Tinymce',props: {id: {type: String,default: function () {return 'vue-tinymce-' + +new Date() + ((Math.random() * 1000).toFixed(0) + '')}},value: {type: String,default: ''},toolbar: {type: Array,required: false,default() {return []}},menubar: {type: String,default: 'file edit insert view format table'},height: {type: [Number, String],required: false,default: 360},width: {type: [Number, String],required: false,default: 'auto'}},data() {return {hasChange: false,hasInit: false,tinymceId: this.id,fullscreen: false,languageTypeList: {en: 'en',zh: 'zh_CN',es: 'es_MX',ja: 'ja'}}},computed: {language() {return this.languageTypeList['zh']},containerWidth() {const width = this.widthif (/^[\d]+(\.[\d]+)?$/.test(width)) {// matches `100`, `'100'`return `${width}px`}return width}},watch: {value(val) {if (!this.hasChange && this.hasInit) {this.$nextTick(() => window.tinymce.get(this.tinymceId).setContent(val || ''))}},language() {// this.destroyTinymce()this.$nextTick(() => this.initTinymce())}},mounted() {this.init()},activated() {if (window.tinymce) {this.initTinymce()}},deactivated() {this.destroyTinymce()},destroyed() {this.destroyTinymce()},methods: {init() {// dynamic load tinymce from cdnload(tinymceCDN, (err) => {if (err) {this.$message.error(err.message)return}this.initTinymce()})},initTinymce() {const _this = thiswindow.tinymce.init({language: this.language,selector: `#${this.tinymceId}`,height: this.height,body_class: 'panel-body',branding: false,object_resizing: false,toolbar: this.toolbar.length > 0 ? this.toolbar : toolbar,menubar: this.menubar,plugins: plugins,toolbar_drawer: true,end_container_on_empty_block: true,powerpaste_word_import: 'clean',paste_data_images: true, //允许粘贴base64图片paste_enable_default_filters: false, //word文本设置code_dialog_height: 450,code_dialog_width: 1000,advlist_bullet_styles: 'default,circle,disc,square',//advlist_number_styles: 'default',imagetools_cors_hosts: ['www.tinymce.com', 'codepen.io'],default_link_target: '_blank',link_title: true,fontsize_formats: '12px 14px 16px 18px 24px 36px 48px 56px 72px',font_formats:'微软雅黑=Microsoft YaHei,Helvetica Neue,PingFang SC,sans-serif;苹果苹方=PingFang SC,Microsoft YaHei,sans-serif;宋体=simsun,serif;仿宋体=FangSong,serif;黑体=SimHei,sans-serif;Arial=arial,helvetica,sans-serif;Arial Black=arial black,avant garde;Book Antiqua=book antiqua,palatino;',nonbreaking_force_tab: true, // inserting nonbreaking space need Nonbreaking Space Pluginstatusbar: false,init_instance_callback: (editor) => {console.log('init_instance_callback', editor)if (_this.value) {editor.setContent(_this.value)}_this.hasInit = trueeditor.on('NodeChange Change KeyUp SetContent', () => {this.hasChange = truethis.$emit('input', editor.getContent())})},setup(editor) {editor.on('FullscreenStateChanged', (e) => {_this.fullscreen = e.state})},// it will try to keep these URLs intact// https://www.tiny.cloud/docs-3x/reference/configuration/Configuration3x@convert_urls/// https://stackoverflow.com/questions/5196205/disable-tinymce-absolute-to-relative-url-conversionsconvert_urls: false,// 整合七牛上传// images_dataimg_filter(img) {// setTimeout(() => {// const $image = $(img);// $image.removeAttr('width');// $image.removeAttr('height');// if ($image[0].height && $image[0].width) {// $image.attr('data-wscntype', 'image');// $image.attr('data-wscnh', $image[0].height);// $image.attr('data-wscnw', $image[0].width);// $image.addClass('wscnph');// }// }, 0);// return img// },images_upload_handler(blobInfo, success, failure, progress) {// progress(0);// const token = _this.$store.getters.token;// getToken(token).then(response => {// const url = response.data.qiniu_url;// const formData = new FormData();// formData.append('token', response.data.qiniu_token);// formData.append('key', response.data.qiniu_key);// formData.append('file', blobInfo.blob(), url);// upload(formData).then(() => {// success(url);// progress(100);// })// }).catch(err => {// failure('出现未知问题,刷新页面,或者联系程序员')// console.log(err);// });const img = `data:${blobInfo.blob().type};base64,${blobInfo.base64()}`success(img)}})},destroyTinymce() {const tinymce = window.tinymce.get(this.tinymceId)if (this.fullscreen) {tinymce.execCommand('mceFullScreen')}if (tinymce) {tinymce.destroy()}},setContent(value) {window.tinymce.get(this.tinymceId).setContent(value)},getContent() {window.tinymce.get(this.tinymceId).getContent()},imageSuccessCBK(arr) {arr.forEach((v) => window.tinymce.get(this.tinymceId).insertContent(`<img class="wscnph" src="${v.url}" >`))}}
}
</script><style lang="less" scoped>
.tinymce-container {position: relative;line-height: normal;/deep/ * {border-color: #efefef;white-space: pre-wrap;}
}.tinymce-container {::v-deep {.mce-fullscreen {z-index: 10000;}}
}.tinymce-textarea {visibility: hidden;z-index: -1;
}.editor-custom-btn-container {position: absolute;right: 4px;top: 4px;/*z-index: 2005;*/
}.fullscreen .editor-custom-btn-container {z-index: 10000;position: fixed;
}.editor-upload-btn {display: inline-block;
}
</style>3、dynamicLoadScript.js
//dynamicLoadScript.js 动态导入tinymce.js脚本
let callbacks = []function loadedTinymce() {// to fixed https://github.com/PanJiaChen/vue-element-admin/issues/2144// check is successfully downloaded scriptreturn window.tinymce
}const dynamicLoadScript = (src, callback) => {const existingScript = document.getElementById(src)const cb = callback || function () {}if (!existingScript) {const script = document.createElement('script')script.src = src // src url for the third-party library being loaded.script.id = srcdocument.body.appendChild(script)callbacks.push(cb)const onEnd = 'onload' in script ? stdOnEnd : ieOnEndonEnd(script)}if (existingScript && cb) {if (loadedTinymce()) {cb(null, existingScript)} else {callbacks.push(cb)}}function stdOnEnd(script) {script.onload = function () {// this.onload = null here is necessary// because even IE9 works not like othersthis.onerror = this.onload = nullfor (const cb of callbacks) {cb(null, script)}callbacks = null}script.onerror = function () {this.onerror = this.onload = nullcb(new Error('Failed to load ' + src), script)}}function ieOnEnd(script) {script.onreadystatechange = function () {if (this.readyState !== 'complete' && this.readyState !== 'loaded') returnthis.onreadystatechange = nullfor (const cb of callbacks) {cb(null, script) // there is no way to catch loading errors in IE8}callbacks = null}}
}export default dynamicLoadScript
4、plugin.js
// Any plugins you want to use has to be imported
// Detail plugins list see https://www.tinymce.com/docs/plugins/
// Custom builds see https://www.tinymce.com/download/custom-builds/const plugins = ['advlist anchor autolink autosave code codesample colorpicker colorpicker contextmenu directionality emoticons fullscreen hr image imagetools insertdatetime link lists media nonbreaking noneditable pagebreak paste preview print save searchreplace spellchecker tabfocus table template textcolor visualblocks visualchars wordcount']export default plugins
5、toolbar.js
// Here is a list of the toolbar
// Detail list see https://www.tinymce.com/docs/advanced/editor-control-identifiers/#toolbarcontrolsconst toolbar = ['searchreplace bold italic underline strikethrough alignleft aligncenter alignright outdent indent  blockquote undo redo removeformat subscript superscript code codesample hr bullist numlist link image charmap preview anchor pagebreak insertdatetime media table emoticons forecolor backcolor fullscreen','formatselect fontselect fontsizeselect'
]export default toolbar
五、使用Tinymce组件
<template><TinyMceref="tiny"v-model="mdlValue.fullText":toolbar="toolbar"height="400px":menubar="''"></TinyMce>
</template>
<script>
import TinyMce from '../Tinymce/index'
export default {components:{TinyMce },data(){toolbar: ['searchreplace bold italic underline strikethrough alignleft aligncenter alignright outdent indent  blockquote undo redo removeformat subscript superscript code codesample hr bullist numlist link image charmap preview insertdatetime emoticons forecolor backcolor','formatselect fontselect fontsizeselect'],}
}
</script>
六、menubar(菜单)配置
1、什么是菜单
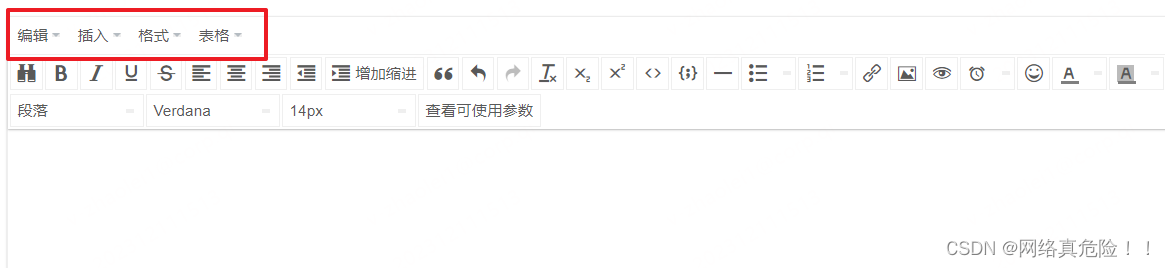
如图一个编辑器的工具部分。
分为两个部分,上面的文件、编辑...为 菜单栏 部分。
2、启用和停用菜单栏
通过init配置项menubar来配置菜单栏是否启用的项目和显示的顺序。
tinymce.init({selector: '#textarea1',  // change this value according to your HTML//启用菜单栏并显示如下项 [文件 编辑 插入 格式 表格]menubar: 'file edit insert view format table',
})tinymce.init({selector: '#textarea2',  // change this value according to your HTML//禁用菜单栏menubar: false,
})
3、配置菜单项
每个菜单在经过上面的配置后都会有一个默认的子菜单。
如果想自己定义每个菜单的子菜单项需要通过menu配置。
title对应在menubar中对应的项。items为在各个菜单总显示的功能的名称|为分割符号会将菜单分割为几个部分
tinymce.init({selector: '#textarea1',  // change this value according to your HTML//启用菜单栏并显示如下项 [文件 编辑 插入 格式 表格]menubar: 'file edit insert view format table',// 配置每个菜单栏的子菜单项(如下是默认配置)menu: {file: {title: 'File', items: 'newdocument'},edit: {title: 'Edit', items: 'undo redo | cut copy paste pastetext | selectall'},insert: {title: 'Insert', items: 'link media | template hr'},view: {title: 'View', items: 'visualaid'},format: {title: 'Format', items: 'bold italic underline strikethrough superscript subscript | formats | removeformat'},table: {title: 'Table', items: 'inserttable tableprops deletetable | cell row column'},}
})
4、菜单栏相关补充
- 菜单配置项指的是各个子菜单的项。
所属插件为核心的项为基本包里自带的功能,直接写在menu的items项里就可以,属于插件的项需要引入插件(plugins: '插件名')然后在menu的items中配置。
七、toolbar(工具栏)配置
1、什么是工具栏
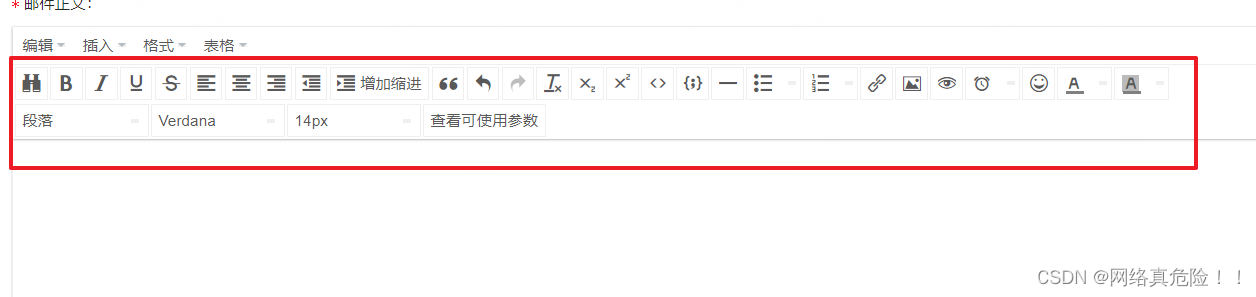
如图一个编辑器的工具部分。
分为两个部分,下面红框框住的为 工具栏 部分。
2、禁用或启用菜单栏
tinymce.init({selector: '#textarea1',  // change this value according to your HTML//启用工具栏并显示如下项 toolbar: 'undo redo | styleselect | bold italic | link image',
})tinymce.init({selector: '#textarea2',  // change this value according to your HTML//禁用工具栏toolbar: false,
})
3、启用多个工具栏
/* 启用多个工具栏 */tinymce.init({selector: '#textarea3',  // change this value according to your HTML// 启用多个工具栏toolbar: ['undo redo | styleselect | bold italic | link image','alignleft aligncenter alignright',]
})tinymce.init({selector: '#textarea4',  // change this value according to your html// 工具栏1toolbar1: 'undo redo | styleselect | bold italic | link image',// 工具栏2toolbar2: 'alignleft aligncenter alignright',
})
4、自定义工具栏
上面在工具栏中插入的都是编辑器自带的工具。
这里讲一下 如何插入自定义的按钮 。
主要的流程是:
- 在
init的toolbar中注册自定义按钮 - 在
setup方法中使用editor.addButton()定义按钮。
tinymce.init({selector: '#textarea',// 注册buttontoolbar: 'mybutton',setup: function (editor) {// 定义按钮,editor.addButton('mybutton', {// 按钮,名text: 'My button',// 是否显示图标icon: false,//onclick事件onclick: function () {// 这里点击后会插入一句话editor.insertContent(' <b>It\'s my button!</b> ')}})}
})
上面是最基本的配置方法,
还有一些其他属性可以配置:
tooltip: 就是鼠标滑过时的提示文字icon: 按钮的图标(这里指的是TinyMCE中自带的)image: 如果希望直接配置图标(可以是URL或者path)onclick: 点击事件onpostrender: 触发按钮渲染的事件(用来在合适的时机禁用按钮)cmd: 点击按钮时出发的编辑器事件(已经注册的)
更为深入的自定义按钮配置方法这里暂时不做说明。
可以参看TinyMCE Docs。
5、toolbar相关补充
所属插件为核心的项为基本包里自带的功能,直接写在toolbar里就可以,
属于插件的项需要引入插件(plugins: '插件名')然后在toolbar中配置。
| toolbar配置 | 功能 | 所需插件 |
|---|---|---|
| restoredraft | 恢复上次的草稿 | 无需引入插件 |
| undo | 撤销 | 无需引入插件 |
| redo | 恢复 | 无需引入插件 |
| fontselect | 字体选择 | 无需引入插件 |
| styleselect | 格式选择 | 无需引入插件 |
| fontsizeselect | 字号选择 | 无需引入插件 |
| cut | 剪切 | 无需引入插件 |
| copy | 复制 | 无需引入插件 |
| selectall | 全选 | 无需引入插件 |
| bold | 粗体 | 无需引入插件 |
| italic | 斜体 | 无需引入插件 |
| underline | 下划线 | 无需引入插件 |
| strikethrough | 删除线 | 无需引入插件 |
| subscript | 下标 | 无需引入插件 |
| superscript | 上标 | 无需引入插件 |
| removeformat | 清除格式 | 无需引入插件 |
| forecolor | 文字颜色 | 无需引入插件 |
| backcolor | 背景颜色 | 无需引入插件 |
| align | 对齐方式 | 无需引入插件 |
| outdent | 增加缩进 | 无需引入插件 |
| indent | 减少缩进 | 无需引入插件 |
| paste | 粘贴 | paste |
| ltr | 文字方向从左向右 | directionality |
| rtl | 文字方向从右向左 | directionality |
| anchor | 锚点 | anchor |
| lineheight | 行高 | lineheight |
| bullist | 符号列表 | advlist,lists(advlist依赖于lists) |
| numlist | 数字列表 | advlist,lists(advlist依赖于lists) |
| insertdatetime | 插入时间/日期 | insertdatetime |
| table | 表格 | table |
| tabledelete | 删除表格 | table |
| tableprops | 表格属性 | table |
| tablerowprops | 行属性 | table |
| tablecellprops | 单元格属性 | table |
| tableinsertrowbefore | 在上方插入 | table |
| tableinsertrowafter | 在下方插入 | table |
| tabledeleterow | 删除行 | table |
| tableinsertcolbefore | 在左侧插入 | table |
| tableinsertcolafter | 在右侧插入 | table |
| tabledeletecol | 删除列 | table |
| hr | 水平分割线 | hr |
| nonbreaking | 插入不间断空格 | nonbreaking |
| pagebreak | 分页符 | pagebreak |
| template | 内容模板 | template |
| charmap | 特殊字符 | charmap |
| emoticons | 表情插件 | emoticons |
| image | 插入编辑图片 | image |
| quickimage | 快捷插入图片 | image |
| media | 插入/编辑媒体资源 | media |
| link | 超链接 | link |
| toc | 目录生成器 | toc |
| code | 编辑源码 | code |
| quickbars | 快速工具栏 | quickbars |
| codesample | 代码示例 | codesample |
| fullpage | 文档属性 | fullpage |
| 打印 | ||
| searchreplace | 查找替换 | searchreplace |
| preview | 预览 | preview |
| fullscreen | 全屏 | fullscreen |
| wordcount | 字数统计 | wordcount |
| visualblocks | 显示区块边框 | visualblocks |
| visualchars | 显示不可见字符 | visualchars |
| help | 帮助 | help |
八、contextmenu(上下文菜单)配置
1、什么是上下文菜单
所谓上下文菜单,就是在编辑器内容出现的 右键关联菜单 。
1、菜单可根据不同的环境出现不同的内容:
- 在当鼠标在链接上时是编辑链接,
- 当鼠标在表格上时是编辑表格
2、其值为任何已注册的菜单项,允许使用“
|”作为分隔。
- 取值:
String- 默认:
link image imagetools table spellchecker
2、禁用或启用上下文菜单
a、启用
tinymce.init({selector: '#textarea1',contextmenu: "bold copy ",
});
b、禁用(如不行则特殊处理一下)
正常的话只需要把contextmenu给成false即可:
tinymce.init({selector: '#textarea1',contextmenu: false,
});
但是,有时候使用Tinymce时设置contextmenu为false没有效果,就需要我们特殊处理一下:
这里通过监听
contextmenu事件来禁用Tinymce的默认右键菜单,并通过preventDefault()方法来阻止浏览器上下文菜单的弹出。完整的配置示例如下:tinymce.init({selector: '#textarea1',plugins: 'contextmenu',contextmenu: false,setup: function (editor) {editor.on('contextmenu', function (e) {e.preventDefault();});} });
九、tinymce插件
来源于Tinymce中文文档
| plugin | 功能 | 备注 |
|---|---|---|
| advlist | 高级列表插件 | 官方地址 |
| anchor | 锚点插件 | 官方地址 |
| autolink | 自动链接插件 | 官方地址 |
| autoresize | 编辑器大小自适应 | 官方地址 |
| autosave | 自动存稿 | 官方地址 |
| bbcode | – | 官方地址 |
| bbcode | – | 官方地址 |
| charmap | 特殊字符插件 | 官方地址 |
| code | 编辑源码 | 官方地址 |
| codesample | 代码示例插件 | 官方地址 |
| directionality | 文字方向 | 官方地址 |
| emoticons | 表情插件 | 官方地址 |
| fullpage | 文档属性 | 官方地址 |
| fullscreen | 全屏 | 官方地址 |
| help | 帮助 | 官方地址 |
| hr | 水平分割线 | 官方地址 |
| image | 插入编辑图片 | 官方地址 |
| importcss | 引入css | 官方地址 |
| media | 插入编辑媒体 | 官方地址 |
| insertdatetime | 插入当前日期时间 | 官方地址 |
| legacyoutput | 输出HTML4 | 官方地址 |
| link | 超链接 | 官方地址 |
| lists | 列表插件 | 官方地址 |
| nonbreaking | 插入不间断空格 | 官方地址 |
| noneditable | 不可编辑元素 | 官方地址 |
| pagebreak | 插入分页符 | 官方地址 |
| paste | 粘贴插件 | 官方地址 |
| preview | 预览 | 官方地址 |
| 打印 | 官方地址 | |
| quickbars | 快速工具栏 | 官方地址 |
| save | 保存 | 官方地址 |
| searchreplace | 查找替换 | 官方地址 |
| spellchecker | 拼写检查 | 官方地址 |
| tabfocus | tab切入切出 | 官方地址 |
| table | 表格插件 | 官方地址 |
| template | 内容模板 | 官方地址 |
| textcolor | 文字颜色 | 无需引入,已集成官方地址 |
| textpattern | 快速排版 | 官方地址 |
| toc | 目录生成器 | 官方地址 |
| visualblocks | 显示块元素范围 | 官方地址 |
| visualchars | 显示不可见字符 | 官方地址 |
| wordcount | 字数统计 | 官方地址 |
十、获取TinyMCE编辑器中的内容
有时候需要验证tinyMCE编辑器中的内容是否符合规范(不为空)
需要获取里面的内容。
1、如果当前页面只有一个编辑器:
- 获取内容:
tinyMCE.activeEditor.getContent() - 设置内容:
tinyMCE.activeEditor.setContent(“需要设置的编辑器内容”)
2、如果当前页面有多个编辑器(下面的“[0]”表示第一个编辑器,以此类推):
- 获取内容:
tinyMCE.editors[0].getContent() - 设置内容:
tinyMCE.editors[0].setContent(“需要设置的编辑器内容”)
3、获取不带HTML标记的纯文本内容:
var activeEditor = tinymce.activeEditor;
var editBody = activeEditor.getBody();
activeEditor.selection.select(editBody);
var text = activeEditor.selection.getContent( { ‘format’ : ‘text’ } );
十一、TinyMCE上传图片
1、返回的josn数据格式为
{"location":"http://localhost/images/00C01FA6364DFF9757D1CF446748A47852B2D475.jpg"}
2、样例:
tinymce.init({selector: '#file-picker',language: 'zh-Hans',//语言height: 600,//编辑器高度branding: false,//是否禁用“Powered by TinyMCE”plugins: ['powerpaste table advlist autolink lists link charmap print preview hr anchor pagebreak','searchreplace wordcount visualblocks visualchars code fullscreen','insertdatetime nonbreaking save table contextmenu directionality','emoticons textcolor colorpicker textpattern image code codesample toc pagebreak'],toolbar1: 'code undo redo formatselect fontselect fontsizeselect insert styleselect bold italic underline alignleft aligncenter alignright alignjustify forecolor backcolor newdocument table insert bullist numlist outdent indent link image rotateleft rotateright flipv fliph print preview emoticons codesample pagebreak toc fullscreen superscript subscript ltr rtl hr',//toolbar2: 'print preview forecolor backcolor emoticons codesample pagebreak toc fullscreen',image_advtab: true,//images_upload_urlpaste_data_images: true,menubar: true,//禁用标题栏automatic_uploads: true,media_live_embeds: true,//查看上传的视频//图片选择上传images_upload_handler: function (blobInfo, success, failure) {var file = blobInfo.blob();//转化为易于理解的file对象var isLt10M = file.size / 1024 / 1024 < 4;if (!isLt10M) {failure('上传图片大小不能超过5MB哦!');return;}var xhr, formData;xhr = new XMLHttpRequest();xhr.withCredentials = false;xhr.open("POST", "http://localhost/Handler.ashx?API=uploadImg&UserName=" + document.getElementById("UserName").value);formData = new FormData();formData.append('file', file, file.name);console.log(formData);xhr.onload = function (e) {var json;if (xhr.status != 200) {failure('HTTP Error: ' + xhr.status);return;}json = JSON.parse(this.responseText);if (!json || typeof json.location != 'string') {failure('Invalid JSON: ' + xhr.responseText);return;}success(json.location);};xhr.send(formData);}});
十二、业务逻辑实现
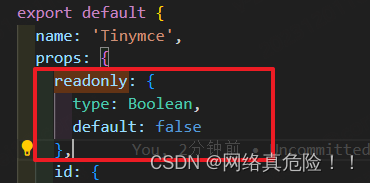
1、添加页面只读模式,解决方案(readonly: true):
通过查文档可以知道 readonly: true 可以配置Tinymce是否只读,然后把他封装到我们的组件里
- a、在组件中添加props
- b、在组件初始化的时候添加该配置
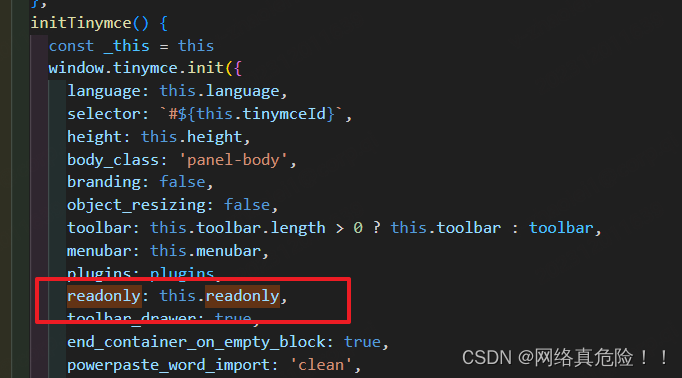
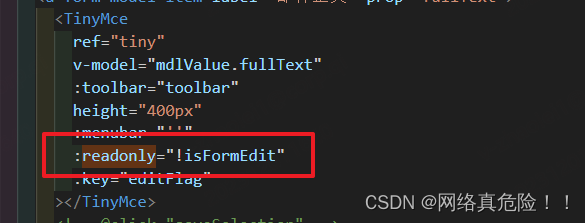
- c、使用组件时传参
2、数据处理:传数据给后端需要进行base64加密,但是会把标签尖括号变成中文,导致回显时错误,解决方案:
- a、保存时转码之后再加密:
this.fullText = Base64.encode(this.fullText.replace(/</g, '<').replace(/>/g,'>'))
- b、回显时解密再转码
this.fullText = Base64.decode(data.fullText).replace(/</g, '<').replace(/>/g, '>'))
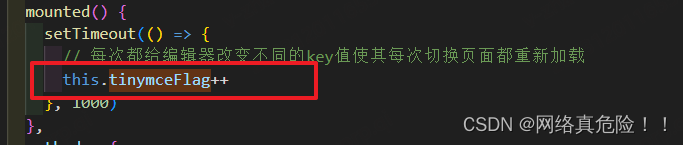
3、打开页面时会出现Tinymce还未实例化的情况,页面展示空白,解决方案:
- a、给Tinymce组件绑定**key** 值

- b、在使用Tinymce组件的页面的 mouted 去实例化
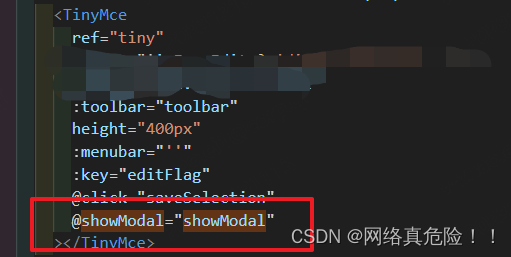
4、在Tinymce编辑器上方自定义按钮,打开一个弹窗,选定一个参数添加至编辑器中鼠标点击的位置
- a、工具栏自定义按钮
tinymce.init({selector: '#textarea',// 注册buttontoolbar: 'customButton',setup: function (editor) {// 绑定鼠标点击事件editor.on('click', function (e) {// 获取鼠标点击的位置坐标(如果不需要获取鼠标单击的当前行则不用绑定click时事件)_this.clickGetRng = editor.selection.getRng()})// 定义按钮,editor.addButton('customButton', {tooltip: '打开弹窗按钮',icon: 'indent',onclick: function () {// 在这里执行你想要的操作_this.$emit('showModal')}})}
})
这个代码里,自定义了一个按钮,告诉父组件去打开一个弹窗,然后在父组件去进行自己业务逻辑实现
- b、父组件调用showModal并打开弹窗
打开弹窗具体逻辑就不写了
- c、弹窗内容双击之后,调用Tinymce函数来进行内容插入
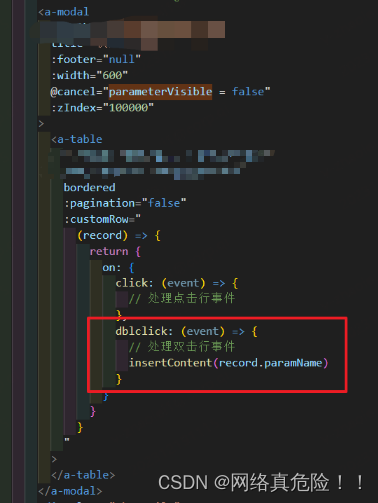

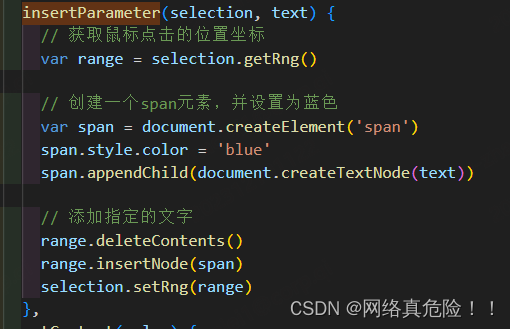
- d、Tinymce中执行内容插入逻辑
5、实现首行缩进2字符

工具栏的增加缩进点击默认是给当前行配置一个padding-left:40px的样式,需要把它改成text-indent: 2em
- 首先,我们要先在工具栏
自定义一个缩进的按钮:
tinymce.init({selector: '#textarea',// 注册buttontoolbar: 'mybutton',setup: function (editor) {// 绑定鼠标点击事件editor.on('click', function (e) {// 获取鼠标点击的位置坐标(如果不需要获取鼠标单击的当前行则不用绑定click时事件)_this.clickGetRng = editor.selection.getRng()})// 定义按钮,editor.addButton('customIndentButton', {tooltip: '增加缩进',icon: 'indent',onclick: function () {// 自定义的点击事件处理函数_this.indentCurrentLine(editor)}})}
})
- 然后
绑定在工具栏
tinymce.init({toolbar: ['customIndentButton']
})
- 根据业务需求来自定义点击该按钮之后的回调函数
- a、获取鼠标单击的当前行,并为当前行添加样式text-indent: 2em;
indentCurrentLine(editor) {// 获取鼠标单击的当前行,并为当前行添加样式text-indent: 2em;var rng = this.clickGetRng// 获取包含单击位置的最近的DOM元素var parentElement = editor.dom.getParent(rng.startContainer, editor.dom.isBlock)console.log(rng, parentElement)// 为该元素添加text-indent: 2em;样式const rm = editor.dom.getStyle(parentElement, 'text-indent')const em1 = rm.substring(0, rm.length - 2) - 0 + 2 + 'em'editor.dom.setStyle(parentElement, 'text-indent', em1)
},
- b、选中一段文本,并将其变成一个段落,并首行缩进2个字符;
indentCurrentLine(editor) {// 获取当前选中的文本行var selection = editor.selection.getContent({ format: 'text' })var selectedLines = selection.split('\n')console.log(selection, selectedLines)// 添加样式text-indent: 2em到每一行var indentedLines = selectedLines.map(function (line) {return '<p style="text-indent: 2em;">' + line + '</p>'})// 替换选中的文本为添加了样式的文本行editor.selection.setContent(indentedLines.join(''))
},
8、关于tinymce内容改变后,编辑器光标位置重置的问题
流程:通过监听
props的value,调用tinymce的setContent(),这一步会将内容的光标重置,回到开始位置。
- a、原因
这个问题出现的原因是在vue场景下才有的:传入的数据会进行一次格式整理,并触发Change更新组件外部的数据,然后会再触发一次数据传入。
比如,首次传入组件的数据是富文本正文,组件再传入tinymce后会被格式化为<p>富文本正文</p>,并触发tinymce的change事件,接下来组件emit通知更新外部数据来源,然后传入组件的原始数据会被改为<p>富文本正文</p>。数据再次传入组件后,两份数据没有变化才停止了更新至tinymce。
正是这个过程光标会重置。
- b、解决思路
watch: {value(newVal, oldVal) {// console.log(this.hasChange, this.hasInit);if (!this.hasChange && this.hasInit) {this.$nextTick(() => {window.tinymce && window.tinymce.get(this.tinymceId).setContent(newVal || '')// 让光标定位到未尾window.tinymce.activeEditor.selection.select(window.tinymce.activeEditor.getBody(), true)window.tinymce.activeEditor.selection.collapse(false)})}
},
7、在Tinymce编辑器实现右击可以选择只粘贴文本
tinymce.init({selector: '#myTextarea',plugins: 'paste',paste_as_text: true,  // 粘贴为纯文本paste_block_drop: true,  // 阻止粘贴带有格式的文本// 添加自定义选项:“粘贴”、“粘贴纯文本” 和 “全选” 选项contextmenu: 'paste | paste_text | selectall',  setup: function (editor) {editor.ui.registry.addMenuItem('paste_text', {text: '粘贴纯文本',onAction: function () {editor.execCommand('mceInsertContent', false, editor.clipboard.pasteText());}});}
});
这篇关于【超详细】vue项目:Tinymce富文本使用教程以及踩坑总结+业务需要功能扩展的文章就介绍到这儿,希望我们推荐的文章对编程师们有所帮助!


