本文主要是介绍FGSM方法生成交通信号牌的对抗图像样本,希望对大家解决编程问题提供一定的参考价值,需要的开发者们随着小编来一起学习吧!
背景:
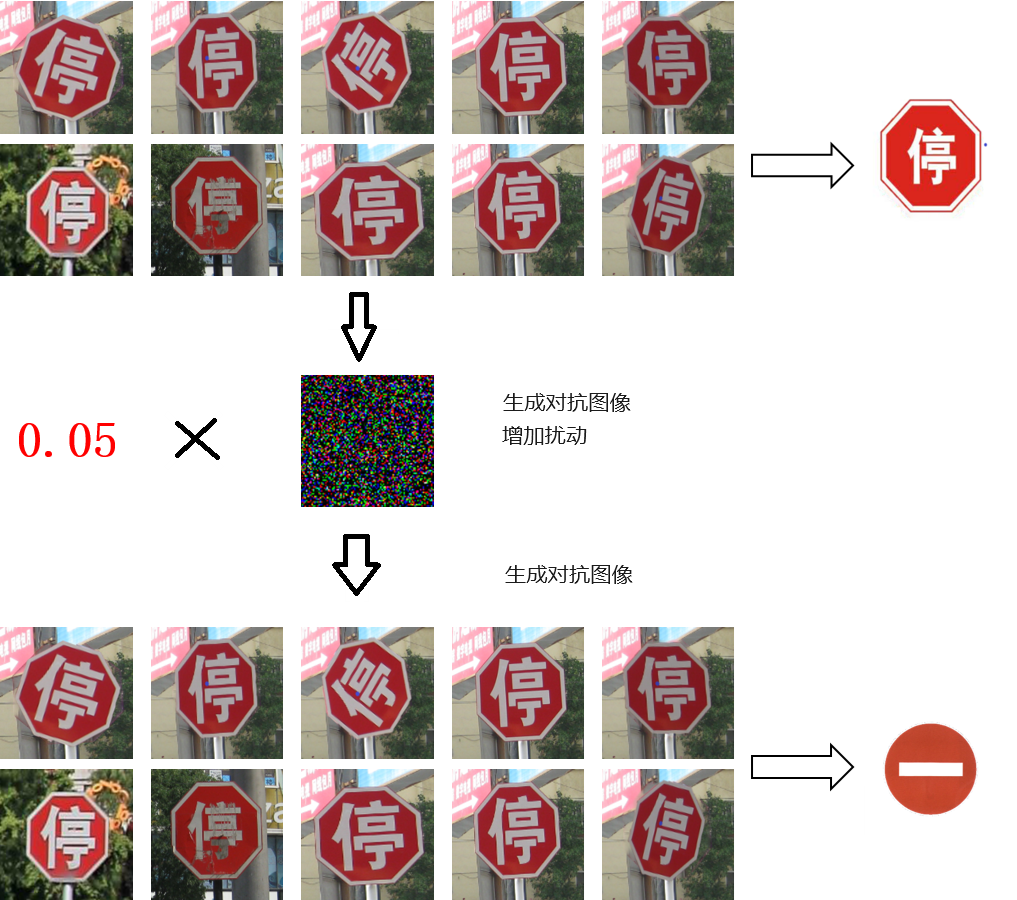
生成对抗样本,即扰动图像,让原本是“停车”的信号牌识别为“禁止驶入”
实验准备
模型:找一个训练好的,识别交通信号牌的CNN模型,灰度图像

模型地址:GitHub - Daulettulegenov/TSR_CNN: Traffic sign recognition
数据:Chinese Traffic Sign Database(CTSDB)
当下最受欢迎的国内交通标志数据集之一,该数据集容纳6164个交通标志图像,其中有58类交通标志。图像分为4170张图像的训练数据库和包含1994张图像的测试数据库两个子交通标志数据库。

官网链接:Traffic Sign Recogntion Database
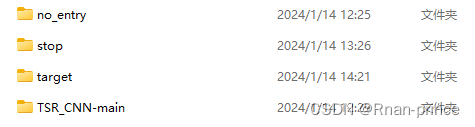
数据结构:
- 模型在TSR_CNN-main下
- 8张目标表图像在 target下
- stop下是停止图像
- no_entry下是禁止通行图像
对抗攻击
1、对抗步骤:
加载CNN模型预测原始的输出类型,可以看到并不能正确的分类,因为是中文字幕“停”而不是 STOP。需要迁移训练,让其识别中文的“停”测试是否可以识别中文的停预测新的输出类型,可以看到能正确的分类,即便是中文的“停”生成扰动图像,原始图像增加扰动,让其能识别识别为no entry保存扰动图像
2、代码如下:
ART-Adversarial Robustness Toolbox检测AI模型及对抗攻击的工具
import os
import cv2
import numpy as np
import tensorflow as tf
from art.estimators.classification import TensorFlowV2Classifier
from art.attacks.evasion import FastGradientMethod
from tensorflow.keras.models import load_model
from tensorflow.keras.models import Model
from tensorflow.keras.layers import Dense
from tensorflow.keras.optimizers import Adam
from tensorflow.keras.utils import to_categorical
from sklearn.model_selection import train_test_splitID_CLASS_MAP = {0: 'Speed Limit 20 km/h',1: 'Speed Limit 30 km/h',2: 'Speed Limit 50 km/h',3: 'Speed Limit 60 km/h',4: 'Speed Limit 70 km/h',5: 'Speed Limit 80 km/h',6: 'End of Speed Limit 80 km/h',7: 'Speed Limit 100 km/h',8: 'Speed Limit 120 km/h',9: 'No passing',10: 'No passing for vechiles over 3.5 metric tons',11: 'Right-of-way at the next intersection',12: 'Priority road',13: 'Yield',14: 'Stop',15: 'No vechiles',16: 'Vechiles over 3.5 metric tons prohibited',17: 'No entry',18: 'General caution',19: 'Dangerous curve to the left',20: 'Dangerous curve to the right',21: 'Double curve',22: 'Bumpy road',23: 'Slippery road',24: 'Road narrows on the right',25: 'Road work',26: 'Traffic signals',27: 'Pedestrians',28: 'Children crossing',29: 'Bicycles crossing',30: 'Beware of ice/snow',31: 'Wild animals crossing',32: 'End of all speed and passing limits',33: 'Turn right ahead',34: 'Turn left ahead',35: 'Ahead only',36: 'Go straight or right',37: 'Go straight or left',38: 'Keep right',39: 'Keep left',40: 'Roundabout mandatory',41: 'End of no passing',42: 'End of no passing by vechiles over 3.5 metric tons'
}def get_class_name(class_no):"""根据类别编号返回对应的交通信号牌的名称:param class_no: 类别编号:return: 交通信号牌的名称"""return ID_CLASS_MAP.get(class_no)def grayscale(img):"""将图像转换为灰度图像"""img = cv2.cvtColor(img, cv2.COLOR_BGR2GRAY)return imgdef equalize(img):"""进行直方图均衡化"""new_img = cv2.equalizeHist(img)return new_imgdef preprocessing(img):"""归一化处理"""img = equalize(img)img = img / 255return imgdef read_imgs(image_dir, label=0):"""读取图片:param image_dir::param label::return:"""image_files = os.listdir(image_dir)images = []labels = []for image_file in image_files:image_path = os.path.join(image_dir, image_file)image = cv2.imread(image_path, cv2.IMREAD_GRAYSCALE)  # 以灰度模式读取图片image = cv2.resize(image, (30, 30))img = preprocessing(image)images.append(img)labels.append(label)return images, labelsdef my_predict(model):"""读取指定目录下的所有图像,然后使用模型进行预测,并打印出预测结果。"""print('************my_predict*************')# 读取图片image_dir = r'D:\MyPython\adversarial\target'image_files = os.listdir(image_dir)images = []for image_file in image_files:image_path = os.path.join(image_dir, image_file)image = cv2.imread(image_path, cv2.IMREAD_GRAYSCALE)  # 以灰度模式读取图片image = cv2.resize(image, (30, 30))img = preprocessing(image)img = img.reshape(1, 30, 30, 1)images.append(img)# PREDICT IMAGEpredictions = model.predict(img)predict_x = model.predict(img)classIndex = np.argmax(predict_x)probabilityValue = np.amax(predictions)print("img path:", image_file, " ==> ", str(classIndex) + " " + str(get_class_name(classIndex)))print(str(round(probabilityValue * 100, 2)) + "%")def reset_model(model):"""修改模型的结构,移除最后的分类层,然后添加一个新的分类层。"""base_model = model# 移除最后的分类层base_model = Model(inputs=base_model.input, outputs=base_model.layers[-2].output)# 添加一个新的分类层output = Dense(2, activation='softmax', name='new_dense')(base_model.output)model = Model(inputs=base_model.input, outputs=output)# 编译模型model.compile(optimizer=Adam(), loss='categorical_crossentropy', metrics=['accuracy'])return modeldef retrain_with2label(model):"""取两个目录下的所有图像,然后使用这些图像和对应的标签来训练模型。"""print('************retrain_with2label*************')image_dir1 = r'D:\MyPython\adversarial\stop'image_dir2 = r'D:\MyPython\adversarial\no_entry'images1, labels1 = read_imgs(image_dir1, 0)images2, labels2 = read_imgs(image_dir2, 1)# 合并图片和标签images = images1 + images2labels = labels1 + labels2images = np.array(images, dtype='float32')# 如果模型的输入形状是(30, 30, 1),那么我们需要增加一个维度if model.input_shape[-1] == 1:images = np.expand_dims(images, axis=-1)labels = np.array(labels)labels = to_categorical(labels, num_classes=2)# 划分训练集和测试集train_images, test_images, train_labels, test_labels = train_test_split(images, labels, test_size=0.2)# 训练模型model.fit(train_images, train_labels, validation_data=(test_images, test_labels), epochs=10)def my_predict2(model):"""读取指定目录下的所有图像,然后使用模型进行预测,并返回预测结果和图像数据。"""# 选择stop的图像,扰动前的images, _ = read_imgs(r'D:\MyPython\adversarial\target')if model.input_shape[-1] == 1:images = np.expand_dims(images, axis=-1)preds = model.predict(images)print('Predicted before:', preds.argmax(axis=1))return imagesdef run_art(images):"""使用对抗性攻击来生成对抗样本,并保存对抗样本和平均扰动。"""# 创建一个目标标签(我们希望模型将0 stop识别为1 no entry)target_label = to_categorical(1, num_classes=2)target_label = np.tile(target_label, (len(images), 1))# 创建ART分类器classifier = TensorFlowV2Classifier(model=model,nb_classes=2,input_shape=(30, 30, 1),loss_object=tf.keras.losses.CategoricalCrossentropy(from_logits=True),clip_values=(0, 1))# 创建FGSM实例attack = FastGradientMethod(estimator=classifier, targeted=True)# 初始化对抗样本为原始图像adv_images = np.copy(images)for i in range(100):  # 最多迭代100次# 生成对抗样本的扰动perturbations = attack.generate(x=adv_images, y=target_label) - adv_images# 计算所有样本的平均扰动avg_perturbation = np.mean(perturbations, axis=0)# 将平均扰动添加到所有对抗样本上adv_images += avg_perturbation# 使用模型对对抗样本进行预测preds = model.predict(adv_images)print('Iteration:', i, 'Predicted after:', preds.argmax(axis=1))# 如果所有的预测结果都为1,那么停止迭代if np.all(preds.argmax(axis=1) == 1):break# 保存对抗样本for i in range(len(adv_images)):# 将图像的数据类型转换为uint8,并且将图像的值范围调整到[0, 255]img = (adv_images[i] * 255).astype(np.uint8)# 保存图像print(f'save adversarial picture: adversarial_image_{i}.png')cv2.imwrite(f'adversarial_image_{i}.png', img)# 归一化平均扰动并保存为图像avg_perturbation = (avg_perturbation - np.min(avg_perturbation)) / (np.max(avg_perturbation) - np.min(avg_perturbation))# 将平均扰动的值范围调整到[0, 255],并转换为uint8类型avg_perturbation = (avg_perturbation * 255).astype(np.uint8)# 将灰度图像转换为RGB图像avg_perturbation_rgb = cv2.cvtColor(avg_perturbation, cv2.COLOR_GRAY2RGB)# 保存图像print(f'save perturbation picture: perturbation_image.png')cv2.imwrite('perturbation_image.png', avg_perturbation_rgb)if __name__ == "__main__":# 加载CNN模型model = load_model(r'D:\MyPython\adversarial\TSR_CNN-main\CNN_model_3.h5', compile=False)# 预测原始的输出类型,可以看到并不能正确的分类,因为是中文字幕“停”而不是 STOP。my_predict(model)# 需要迁移训练,让其识别中文的“停”model = reset_model(model)# 测试是否可以识别中文的停retrain_with2label(model)# 预测新的输出类型,可以看到能正确的分类,即便是中文的“停”images = my_predict2(model)# 生成扰动图像,原始图像增加扰动,让其能识别识别为no entry,保存扰动图像run_art(images)
3、实验结果:
3.1运行日志
************my_predict*************
img path: 052_0001_j.png  ==>  28 Children crossing
99.83%
img path: 052_0005_j.png  ==>  3 Speed Limit 60 km/h
50.46%
img path: 052_0011.png  ==>  3 Speed Limit 60 km/h
52.22%
img path: 052_0013.png  ==>  8 Speed Limit 120 km/h
93.85%
img path: 052_1_0002_1_j.png  ==>  35 Ahead only
26.76%
img path: capture_20240114141426681.bmp  ==>  40 Roundabout mandatory
89.58%
img path: capture_20240114141515221.bmp  ==>  17 No entry
34.44%
img path: capture_20240114141530130.bmp  ==>  33 Turn right ahead
42.66%
************retrain_with2label*************
Epoch 1/10
3/3 [==============================] - 1s 107ms/step - loss: 1.2774 - accuracy: 0.4857 - val_loss: 0.2057 - val_accuracy: 1.0000
Epoch 2/10
3/3 [==============================] - 0s 32ms/step - loss: 0.2968 - accuracy: 0.8714 - val_loss: 0.1363 - val_accuracy: 1.0000
Epoch 3/10
3/3 [==============================] - 0s 33ms/step - loss: 0.1908 - accuracy: 0.9286 - val_loss: 0.1200 - val_accuracy: 1.0000
Epoch 4/10
3/3 [==============================] - 0s 31ms/step - loss: 0.1482 - accuracy: 0.9429 - val_loss: 0.1365 - val_accuracy: 1.0000
Epoch 5/10
3/3 [==============================] - 0s 31ms/step - loss: 0.0665 - accuracy: 1.0000 - val_loss: 0.1404 - val_accuracy: 1.0000
Epoch 6/10
3/3 [==============================] - 0s 32ms/step - loss: 0.0638 - accuracy: 0.9857 - val_loss: 0.1384 - val_accuracy: 1.0000
Epoch 7/10
3/3 [==============================] - 0s 31ms/step - loss: 0.0347 - accuracy: 0.9857 - val_loss: 0.1278 - val_accuracy: 1.0000
Epoch 8/10
3/3 [==============================] - 0s 30ms/step - loss: 0.0228 - accuracy: 0.9857 - val_loss: 0.1143 - val_accuracy: 0.8889
Epoch 9/10
3/3 [==============================] - 0s 32ms/step - loss: 0.0056 - accuracy: 1.0000 - val_loss: 0.1030 - val_accuracy: 0.8889
Epoch 10/10
3/3 [==============================] - 0s 32ms/step - loss: 0.0112 - accuracy: 1.0000 - val_loss: 0.0898 - val_accuracy: 0.8889
Predicted before: [0 0 0 0 0 0 0 0]
Iteration: 0 Predicted after: [0 0 0 0 1 1 0 0]
Iteration: 1 Predicted after: [1 1 1 1 1 1 1 1]
save adversarial picture: adversarial_image_0.png
save adversarial picture: adversarial_image_1.png
save adversarial picture: adversarial_image_2.png
save adversarial picture: adversarial_image_3.png
save adversarial picture: adversarial_image_4.png
save adversarial picture: adversarial_image_5.png
save adversarial picture: adversarial_image_6.png
save adversarial picture: adversarial_image_7.png
save perturbation picture: perturbation_image.png
3.2 结果分析
通过以上日志可知,迭代了两轮后,预测由“停”字标签==>变成了“禁止”标签
8张目标图像+扰动后的对抗图像如下,依稀可见“停”字:

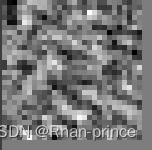
对抗扰动 如下:
参考:
https://www.cnblogs.com/bonelee/p/17797484.html
国内外交通标志数据集 - 知乎
Keras导入自定义metric模型报错: unknown metric function: Please ensure this object is passed to`custom_object‘_自定义的metric不被调用-CSDN博客
这篇关于FGSM方法生成交通信号牌的对抗图像样本的文章就介绍到这儿,希望我们推荐的文章对编程师们有所帮助!


