本文主要是介绍原生微信小程序AR(扫描指定图片显示glb模型),希望对大家解决编程问题提供一定的参考价值,需要的开发者们随着小编来一起学习吧!
效果
ar案例视频
准备:需要准备要扫描的图片地址和扫描成功后显示的模型
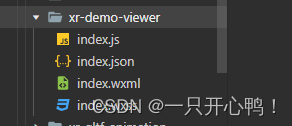
1.在components创建组件

index.js文件代码
Component({properties: {title: {type: String,value: '',},intro: {type: String,value: '',},hint: {type: String,value: '',},code: {type: String,value: '',},json: {type: String,value: '',},js: {type: String,value: '',},showBackBtn: {type: Boolean,value: false,},},data: {},lifetimes: {attached() {wx.xrTitle = this.data.title;}},methods: {onClickBack() {wx.navigateBack()},}
})
index.json代码
{"component": true,"usingComponents": {}
}
index.wxml代码
<view class="demo-wrap"><scroll-view class="demo-viewer" scroll-y="{{true}}"><block bind:sceneReady="handleSceneReady"><slot></slot></block><view class="intro"><view class="intro-detail"><view class="intro-title" ><text>{{title}}</text> <button class="share" open-type="share">分享给好友</button></view><view class="description" >{{intro}}</view></view></view><view wx:if="{{hint.length > 0}}"><view class="hint-wrap"><text class="hint-words" >{{hint}}</text></view></view><view wx:if="{{code.length > 0}}"><view class="intro"><view class="intro-detail"><view class="title">代码演示</view><view class="code-inner"><rich-text nodes="{{code}}"></rich-text></view></view></view></view><view wx:if="{{js.length > 0}}"><view class="intro"><view class="intro-detail"><view class="title">脚本演示</view><view class="code-inner"><rich-text nodes="{{js}}"></rich-text></view></view></view></view><view wx:if="{{json.length > 0}}"><view class="intro"><view class="intro-detail"><view class="title">动画数据结构</view><view class="code-inner"><rich-text nodes="{{json}}"></rich-text></view></view></view></view><view class="holder"></view></scroll-view><view class="back-btn-wrap" wx:if="{{showBackBtn}}" bind:tap="onClickBack"><view class="back-line-t"></view><view class="back-line-b"></view></view>
</view>
index.wxss代码
.demo-wrap {position: absolute;left: 0;top: 0;width: 100%;height: 100%;
}
.demo-viewer {position: absolute;left: 0;top: 0;width: 100%;height: 100%;
}.holder {height: 60rpx;
}.hint-wrap {text-align: center;
}.hint-words {display: inline-block;color: #000;text-align:center;font-weight:bold;max-width: 300px;padding: 10px 20px;border: 2px dashed #000;background-color: #fff;
}.intro {display: block;margin: 20rpx 0;background: #fff;
}.intro .title {font-size: 36rpx;padding-bottom: 20rpx;
}.intro .description {color: #8f8f8f;font-size: 28rpx;
}.intro-detail {padding: 30rpx;
}.code-inner {margin: 0rpx;padding: 30rpx;font-size: 30rpx;background-color: #f9f9fa;
}.code-inner rich-text {word-wrap: break-word;
}.block-name {display: inline-block;color: #b457ff;
}.attr-name {display: inline-block;color: #ff4d00;
}.ml20 {margin-left: 20rpx;
}.intro-title {font-size: 30rpx;font-weight: bold;display: flex;justify-content: space-between;align-items: baseline;margin-bottom: 24rpx;
}.share {margin: 0 !important;margin-left: 0 !important;margin-right: 0 !important;padding: 0;width: 160rpx !important;background: none;font-size: 28rpx;color: #ff4d00;
}.back-btn-wrap {position: absolute;left: 30rpx;top: 100rpx;width: 90rpx;height: 80rpx;
}
.back-line-t {position: absolute;left: 20rpx;top: 15rpx;width: 30rpx;height: 6rpx;background-color: #000;transform: rotate(-45deg);border-radius: 5rpx;
}
.back-line-b {position: absolute;left: 20rpx;top: 32rpx;width: 30rpx;height: 6rpx;background-color: #000;transform: rotate(45deg);border-radius: 5rpx;
}
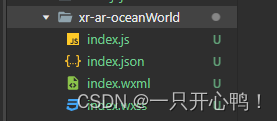
2.继续在components里面创建xr-ar-oceanWorld组件

index.js文件代码
Component({behaviors: [require('../common/share-behavior').default],//路径按照自己项目路径来miku: null,mikuTransform: null,mikuAnimator: null,animationRuning: false,isShow: false,properties: {//是否显示文字贴图默认不显示isShowDolphin: {type: false},},wxball: null,time1: null,time2: null,data: {loaded: false,arReady: false,},lifetimes: {async attached() {// console.log('data', this.data);}},methods: {handleReady({detail}) {const xrScene = this.scene = detail.value;const xrFrameSystem = wx.getXrFrameSystem();},handleAssetsProgress: function ({detail}) {},handleAssetsLoaded: function ({detail}) {// console.log('assets loaded', detail.value);this.setData({loaded: true});},handleTouchmiku: function() {//  console.log('miku TOUCH', this.animationRuning);// if (!this.animationRuning) {//   //   this.animationRuning = true;//   this.mikuAnimator.pauseToFrame('gltfAnimation', 1);//   this.mikuAnimator.pauseToFrame('gltfAnimation#0', 1);//   this.mikuAnimator.resume('gltfAnimation');//   this.mikuAnimator.resume('gltfAnimation#0');// }},handleAnimationStop: function() {console.log('animation Stop');},// 识别模型状态handleARTrackerState({detail}) {// 事件的值即为`ARTracker`实例const tracker = detail.value;// 获取当前状态和错误信息const {state, errorMessage} = tracker;// const video = this.scene.assets.getAsset('video-texture', 'hikari', 'white');console.log(state==2);if(state==2){console.log("状态识别成功", state)this.time1 = setTimeout(() => {this.setData({isShow: true})}, 1000)// this.time2 = setTimeout(() => {//   console.log("暂停动画")//   const animator1 = this.scene.getElementById('wxball-1').getComponent("animator");//   animator1.pause();//   const animator2 = this.scene.getElementById('wxball-2').getComponent("animator");//   animator2.pause();// }, 7000)}else{// clearTimeout(this.time1);// clearTimeout(this.time2);this.setData({isShow: false})}},// 识别海豚handleARTrackerState1({detail}) {// 事件的值即为`ARTracker`实例const tracker = detail.value;// 获取当前状态和错误信息const {state, errorMessage} = tracker;// const video = this.scene.assets.getAsset('video-texture', 'hikari', 'white');console.log(state==2);if(state==2){console.log("识别海豚", state);// this.triggerEvent('传递给父组件的自定义事件名称 newValue',传给父组件的数据 valueText)this.time1 = setTimeout(() => {this.triggerEvent('changeDolphin',{isShowDolphin:true})this.setData({isShow: true,isShowDolphin:true})}, 1000)// this.time2 = setTimeout(() => {//   console.log("暂停动画")//   const animator1 = this.scene.getElementById('wxball-1').getComponent("animator");//   animator1.pause();//   const animator2 = this.scene.getElementById('wxball-2').getComponent("animator");//   animator2.pause();// }, 7000)}else{this.triggerEvent('changeDolphin',{isShowDolphin:false})// clearTimeout(this.time1);// clearTimeout(this.time2);this.setData({isShow: false})}},handleARReady({detail}) {const xrFrameSystem = wx.getXrFrameSystem();const tracker = this.scene.getElementById('ar-tracker').getComponent(xrFrameSystem.ARTracker);// 初始状态const {state, errorMessage} = tracker;// 绑定事件tracker.el.event.add('ar-tracker-state', tracker => {const {state, errorMessage} = tracker;});},handleGLTFLoaded({detail}) {// console.log("进来了")// const el = detail.value.target;// const animator = el.getComponent("animator");// console.log("1111",animator)//  setTimeout(function(){//   console.log("暂停了")//   animator.pause();//  },3000)}}
})
index.json文件代码
{"component": true,"usingComponents": {"xr-demo-viewer": "../xr-demo-viewer/index"},"renderer": "xr-frame"
}
index.wxml
<xr-scene ar-system="modes:Marker;planeMode: 3" id="xr-scene" bind:ready="handleReady" bind:ar-ready="handleARReady" bind:log="handleLog"><xr-assets bind:progress="handleAssetsProgress" bind:loaded="handleAssetsLoaded"><xr-asset-load type="gltf" asset-id="miku" src="要是别的模型"/><xr-asset-load type="gltf" asset-id="miku2" src="要显示的模型glb格式"/></xr-assets><xr-env env-data="gz-haixinsha" /><xr-node><!-- 识别图片 --><xr-ar-tracker id="ar-tracker" mode="Marker" src="识别的图片" bind:ar-tracker-state="handleARTrackerState1"><xr-gltf id="wxball-1" position="0.2 0.7 -0.25" scale="0.025 0.025 0.025" rotation="-90 0 0" model="miku" anim-autoplay bind:gltf-loaded="handleGLTFLoaded" wx:if="{{isShow}}"></xr-gltf></xr-ar-tracker><!-- 识别图片 水母--><xr-ar-tracker id="ar-tracker" mode="Marker" src="识别的图片" bind:ar-tracker-state="handleARTrackerState"><!-- 最新使用 0 -1 1  0.45 0.45 0.45--><!-- <xr-gltf id="wxball-2"  position="0 -0.5 1" scale="0.45 0.45 0.45" rotation="-90 0 0" model="miku2" anim-autoplay bind:gltf-loaded="handleGLTFLoaded" wx:if="{{isShow}}"></xr-gltf> --><xr-gltf id="wxball-2"  position="0 0 0.5" scale="0.3 0.3 0.3" rotation="-90 0 0" model="miku2" anim-autoplay bind:gltf-loaded="handleGLTFLoaded" wx:if="{{isShow}}"></xr-gltf></xr-ar-tracker><xr-cameraid="camera" node-id="camera" position="1 1 1" clear-color="0.925 0.925 0.925 1"far="2000" background="ar" is-ar-camera></xr-camera></xr-node><xr-node node-id="lights"><xr-light type="ambient" color="1 1 1" intensity="2" /><xr-light type="directional" rotation="90 60 0" color="1 1 1" intensity="1" /></xr-node>
</xr-scene>
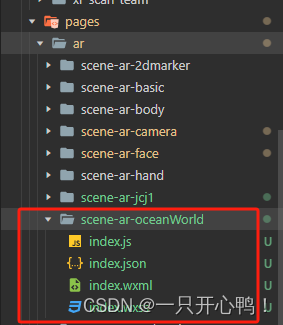
3.pages文件夹里创建scene-ar-oceanWorld文件

index.js代码
var sceneReadyBehavior = require('../../behavior-scene/scene-ready');//路径按照自己项目路径来
Page({behaviors: [sceneReadyBehavior],data: {isShowDolphin:false,//默认不是海豚isShow: false,show: false,video: false,progressFlag: 0,loadingAni: false,isbegin: true,time1: null,time2: null,time3: null,rotation: {x:0,y: 0,z: 0,},op_n:0,meshCount: 0,loading: 0,barIsShow: true,endShow:false,timer:"",deflautWidth:0,musicbg:null},onUnload(){this.musicbg.stop();// 清除video定时器// clearTimeout(this.data.time3);},onLoad(options) {wx.setNavigationBarTitle({title: "潜入海洋的梦里"})let that = this;// 背景音乐this.musicbg = wx.createInnerAudioContext()this.musicbg.src ="背景音乐地址";this.musicbg.volume=0.6;this.musicbg.loop = true;this.musicbg.play();let index = 0;this.data.timer=setInterval(() => { //注意箭头函数!!index += 1;that.setData({deflautWidth: index})if (that.data.deflautWidth == 100) {clearInterval(this.data.timer);}}, 1000);setTimeout(res=>{that.setData({deflautWidth: 100})},3000)// 关闭主页按钮wx.hideHomeButton();},// 场景加载成功回调loadedInfo(){},//获取海豚状态changeDolphin(e){console.log('获取海豚状态',e.detail);this.setData({isShowDolphin:e.detail.isShowDolphin})},end() {console.log("1111")},// 获取微信头像handleReady: function ({detail}) {this.scene = detail.value;// 该接口已废弃,请授权后,采用 getUserInfo 代替。wx.getUserInfo()({desc: '获取头像',success: (res) => {console.log("微信授权", res);this.scene.assets.loadAsset({type: 'texture', assetId: 'avatar', src: res.userInfo.avatarUrl}).then(() => this.setData({avatarTextureId: 'avatar'}));}})},/*** 获取识别状态* Detected识别成功* Detecting未识别*/handleARTrackerState({detail}) {console.log(detail,"识别");const {state,error} = detail;this.tracker = wx.getXrFrameSystem().ARTrackerconst {gesture} = this.tracker;this.gesture = gesture;let states = wx.getXrFrameSystem().EARTrackerState[state];if (states == "Detected") {// if (this.data.progressFlag == 0) {this.setData({progressFlag: 1})// 修改加载界面展示this.setData({show: true           })//识别成功this.data.time1 = setTimeout(() => {this.setData({show: false           })}, 1000)//识别成功// this.data.time2 = setTimeout(() => {//   this.setData({//     isShow: true,//   });//   // 在定时器回调中判断 isShow 的值//   if (this.data.isShow) {//     this.data.time3 = setTimeout(() => {//       console.log("进入if");//       this.setData({//         video: true,//       });//       // 关闭音乐//       this.musicbg.stop();//     }, 4500);//   }// }, 10000);// } else{//   this.setData({//     show: false           //   })// }} else {//识别失败console.log("识别失败", states);this.setData({show: false,// isShow:false,// video: false});clearTimeout(this.data.time1);clearTimeout(this.data.time2);}},/*** 生命周期函数--监听页面初次渲染完成*/onReady() {},onShow() {/*** 设置页面常亮*/wx.setKeepScreenOn({keepScreenOn: true,fail() {//如果失败 再进行调用wx.setKeepScreenOn({keepScreenOn: true});}});},onHide() {this.musicbg.stop();},/*** 页面相关事件处理函数--监听用户下拉动作*/onPullDownRefresh() {},/*** 页面上拉触底事件的处理函数*/onReachBottom() {},/*** 用户点击右上角分享*/onShareAppMessage() {}
})
index.json代码
{"usingComponents": {"xr-demo-viewer": "../../../components/xr-demo-viewer/index",//路径按照自己项目路径来"xr-ar-oceanWorld": "../../../components/xr-ar-oceanWorld/index"//路径按照自己项目路径来},"disableScroll": true
}
index.wxml文件代码
<xr-demo-viewer><xr-ar-oceanWorldisShowDolphin="{{isShowDolphin}}"bindchangeDolphin="changeDolphin"disable-scrollid="main-frame"width="{{renderWidth}}"height="{{renderHeight}}"style="width:{{width}}px;height:{{height}}px;top:{{top}}px;left:{{left}}px;display:block;"bind:arTrackerState="handleARTrackerState"/>
</xr-demo-viewer><view class="faceMask" style="width: 100vw; height: 100vh;background-repeat: no-repeat;background-size: cover;background-position:center;z-index: auto;" wx:if="{{show}}"><view class="head1"><view style="display: flex;align-items: center;justify-content: center;height: 100vh;box-sizing: border-box;padding-bottom: 18vh;"><view style="width: 400rpx;"><progress percent="100" color="#3787BC"  stroke-width="18" active duration="10" /></view></view></view></view><!-- 文字贴图 --><!-- <view  wx:if="{{isShowDolphin}}" style="color: aqua;font-size: 40RPX;text-align: center;width: 100VW;height: 100vh;position: relative;z-index: 9999999;"><view style="position: absolute;bottom: 66vw;left: 0;width: 100vw;"><image src="../../../assets/image/logo.png" mode="widthFix" style="width: 100%;"></image></view></view> -->
index.wxss代码
page{width: 100%;height: 100%;}
.mask_bg{width: 100%;height: 100%; background: rgba(0,0,0,0.3); position: absolute; top:0; left: 0; z-index: 10;}
.mask_Img{width: 100%; height: 100%;}
.mask_Box{width: 100%; position: relative; }
.rote{width: 100%; height: 100%;position: absolute; top:0;left: 0;}
.rote image{width: 95%;animation:rotate_music 5s linear infinite; transform-origin: 50% 50%;}
@keyframes rotate_music{0%{transform: rotate(0deg);} 50%{transform: rotate(180deg);} 100%{transform: rotate(360deg);}}
.Detecting{position: absolute;top:0; left: 0; width: 100%; height: 100%; overflow: hidden; border-radius: 100%;}
.Detecting image{animation:d1 4s linear infinite;}
@keyframes d1{0%,100%{transform: translateY(0);} 50%{transform: translateY(65vw);}}
.ar3d{width: 100%; height: 100%; position: absolute;top:0;left: 0; z-index: 10; display: none; }
.ar3d_box{width: 100%; height:90%;perspective:1px; perspective-origin:center center;}
.ar3d_box text{font-size: 1em;animation:tz 5s linear infinite; color:#fff;}
@keyframes tz{0%{transform: translateZ(-3px);} 100%{transform: translateZ(1px);}}
.loading{width: 100%; text-align: center; margin-top: 20%;}
.loading .box{width: 60%; margin: 0 auto; position: relative;}
.loading .bar{width: 100%; position: absolute; bottom: 2%; left: 0; height:40%;}
.loading .bar_loading{width: 100%; height: 100%;  }
.tips{width: 100%; text-align: center; margin-top: 5%;}
.tips image{width: 70%;}
.EndBox{position: absolute;top:0; left: 0; z-index: 2; width: 100%;height: 100%;}
.EndBox .box{width: 100%; height: 100%; background: url(https://cyvideo.i-oranges.com/ar/cdxg/index/ai1.gif) center no-repeat; background-size:cover}.faceMask{width: 100%; height: 100%;position: absolute;top:0;left: 0; z-index: 999999;}
/* .faceMask .head1{position: absolute;top:0; left: 0; width: 20%;} */
.faceMask .bottom1{position: absolute;bottom:0; left: 0; width: 100%;}
.faceMask .bottom1 image{vertical-align: middle;}
.faceMask .tips{position: absolute; bottom: 5%; width: 100%;}
.faceMask .tips .box{width: 45%; position: relative; margin: 0 auto;}
.faceMask .tips .close{position: absolute; width: 20%; right: -7%; top:-30%;}
4.在components组件里面创建common文件share-behavior.js

share-behavior.js代码
export default Behavior({created: function () {this.checkInitShare();},methods: {checkInitShare() {wx.xrScene = undefined;if (!this.scene) {setTimeout(() => {this.checkInitShare()}, 100);return;}if (this.scene.ar) {if (this.scene.ar.ready) {this.initARTrackerState(this.scene);    } else { this.scene.event.add('ar-ready', () => this.initARTrackerState(this.scene));}}if (!this.scene.share.supported) {console.warn('Not support xr-frame share system now!');return;}this.sharing = false;wx.xrScene = this.scene;},initARTrackerState(scene) {const xrFrameSystem = wx.getXrFrameSystem();scene.dfs(() => {}, undefined, true, el => {const comp = el.getComponent(xrFrameSystem.ARTracker);if (comp) {if (typeof comp.state === 'number') {this.triggerEvent('arTrackerState', {state: comp.state, error: comp.errorMessage});el.event.add('ar-tracker-state', tracker => {this.triggerEvent('arTrackerState', {state: tracker.state, error: tracker.errorMessage});});}return true;}});}}
})
4.在pages中创建behavior-scene项目

scene-ready.js文件代码
module.exports = Behavior({behaviors: [],properties: {},data: {left: 0,top: 0,width: 0,height: 0,renderWidth: 0,renderHeight: 0,windowHeight: 1000,heightScale: 1,showBackBtn: false,activeValues: [1],arTrackerShow: false,arTrackerState: 'Init',arTrackerError: ''},attached: function(){},ready() {const info = wx.getSystemInfoSync();const width = info.windowWidth;const windowHeight = info.windowHeight;const height = windowHeight * this.data.heightScale;const dpi = info.pixelRatio;this.setData({width,height,renderWidth: width * dpi,renderHeight: height * dpi,windowHeight});},methods: {onLoad(options) {wx.reportEvent("xr_frame", {"xr_page_path": options.path});},// onShareAppMessage() {//   try {//     if (wx.xrScene) {//       const buffer = wx.xrScene.share.captureToArrayBuffer({quality: 0.5});//       const fp = `${wx.env.USER_DATA_PATH}/xr-frame-share.jpg`;//       wx.getFileSystemManager().writeFileSync(fp, buffer, 'binary');//       return {//         title: this.getTitle(),//         imageUrl: fp//       };//     }//   } catch (e) {//     return {//       title: this.getTitle()//     };//   }// },// onShareTimeline() {//   try {//     if (wx.xrScene) {//       const buffer = wx.xrScene.share.captureToArrayBuffer({quality: 0.5});//       const fp = `${wx.env.USER_DATA_PATH}/xr-frame-share.jpg`;//       wx.getFileSystemManager().writeFileSync(fp, buffer, 'binary');//       return {//         title: this.getTitle(),//         imageUrl: fp//       };//     }//   } catch (e) {//     return {//       title: this.getTitle()//     }//   }// },getTitle() {return wx.xrTitle ? `${wx.xrTitle}` : 'AR';},handleARTrackerState({detail}) {const {state, error} = detail;this.setData({arTrackerShow: true,arTrackerState: wx.getXrFrameSystem().EARTrackerState[state],arTrackerError: error});}}
})
utils.js代码
var handleDecodedXML = function(decodedXml) {let rerurnXml = '';const blockArr = decodedXml.split('<');for (let i = 0; i < blockArr.length; i++) {let blockStr = blockArr[i];let handleBlockStr = '';let returnBlockStr = '';const sliceBlockStr = blockStr.split(' ');for(let j = 0; j < sliceBlockStr.length; j++) {const subBlockStr = sliceBlockStr[j];const eIndex = subBlockStr.indexOf('=');if (eIndex !== -1) {handleBlockStr += ' <span class="attr-name">' + subBlockStr.slice(0, eIndex) +'</span>' + subBlockStr.slice(eIndex);} else {handleBlockStr += subBlockStr;}}// console.log(sliceBlockStr);const blockEndIndexB = handleBlockStr.indexOf(' ');const blockEndIndexR = handleBlockStr.indexOf('>');// Handle XMLTagif (blockEndIndexB === -1 && blockEndIndexR === -1) {continue;}const endBlockFlag = handleBlockStr[0] === '/';if (blockEndIndexR !== -1) {handleBlockStr += '<br>'}if (blockEndIndexR < blockEndIndexB) {returnBlockStr = '<' + (endBlockFlag ? '/' : '') + '<span class="block-name">' + handleBlockStr.slice(endBlockFlag ? 1 : 0, blockEndIndexR) + '</span>' + handleBlockStr.slice(blockEndIndexR);} else if (blockEndIndexB !== -1) {returnBlockStr = '<' + (endBlockFlag ? '/' : '') +'<span class="block-name">' + handleBlockStr.slice(endBlockFlag ? 1 : 0, blockEndIndexB) + '</span>' + handleBlockStr.slice(blockEndIndexB);} else if (blockEndIndexR !== -1) {returnBlockStr = '<' + (endBlockFlag ? '/' : '') + '<span class="block-name">' + handleBlockStr.slice(endBlockFlag ? 1 : 0, blockEndIndexR) + '</span>' + handleBlockStr.slice(blockEndIndexR);}rerurnXml += returnBlockStr;}return rerurnXml;
}var escapeMarkup = function(dangerousInput) {const dangerousString = String(dangerousInput);const matchHtmlRegExp = /["'&<>]/;const match = matchHtmlRegExp.exec(dangerousString);if (!match) {return dangerousInput;}const encodedSymbolMap = {'"': '"','\'': ''','&': '&','<': '<','>': '>'};const dangerousCharacters = dangerousString.split('');const safeCharacters = dangerousCharacters.map(function (character) {return encodedSymbolMap[character] || character;});const safeString = safeCharacters.join('');return safeString;
}module.exports = {handleDecodedXML,escapeMarkup
}
这篇关于原生微信小程序AR(扫描指定图片显示glb模型)的文章就介绍到这儿,希望我们推荐的文章对编程师们有所帮助!


