本文主要是介绍04-Bresenham画线算法,希望对大家解决编程问题提供一定的参考价值,需要的开发者们随着小编来一起学习吧!

参考:https://www.bilibili.com/video/BV1RG411h7hJ/?spm_id_from=333.788.recommend_more_video.-1&vd_source=5b4cd3f84aab3b0261aa6b6791252d89
1.0至45度之间 算法
// 0 ≤ k ≤  1
void BresenhaLine1(HDC hdc, CP2 p1, CP2 p2)
{int dx = p2._x - p1._x;int dy = p2._y - p1._y;int e = -dx;for (int x = p1._x, y = p1._y; x < p2._x; x++){SetPixel(hdc, x, y, 0x00FF0000);e += ( dy + dy);if (e >= 0){y++;e -= (dx + dx);}}
}
2. Bresenham 通用算法
void BresenhaLine(HDC hdc, CP2 p1, CP2 p2)
{bool bInterChange = false;int dx = fabs(p2._x - p1._x);int dy = fabs(p2._y - p1._y);int e, signX, signY, temp;signX = (p2._x > p1._x) ? 1 : ((p2._x < p1._x) ? -1 : 0);signY = (p2._y > p1._y) ? 1 : ((p2._y < p1._y) ? -1 : 0);if (dy > dx){temp = dx;dx = dy;dy = temp;bInterChange = true;}e = -dx;int x = p1._x, y = p1._y;for (int i = 1; i < dx; i++){SetPixel(hdc, x, y, 0x009F0000);if (bInterChange)y += signY;elsex += signX;e += (dy + dy);if (e >= 0){if (bInterChange)x += signX;elsey += signY;e -= (dx + dx);}}
}
3. 完整代码
#ifndef UNICODE
#define UNICODE
#endif
#include <math.h>
#include <Windows.h>
#include <stdio.h>
#include <wchar.h>
#include <WinBase.h>
#define PI 3.1415926         // PI
#define ROUND(d) int(d+0.5)  // 四舍五入
// 点
class CP2
{
public:CP2():_x(0), _y(0){}CP2(double x, double y):_x(x), _y(y){}virtual ~CP2() {};
public:double _x;double _y;
};// 0 ≤ k ≤  1
void BresenhaLine1(HDC hdc, CP2 p1, CP2 p2)
{int dx = p2._x - p1._x;int dy = p2._y - p1._y;int e = -dx;for (int x = p1._x, y = p1._y; x < p2._x; x++){SetPixel(hdc, x, y, 0x00FF0000);e += ( dy + dy);if (e >= 0){y++;e -= (dx + dx);}}
}// Bresenham 算法
void BresenhaLine(HDC hdc, CP2 p1, CP2 p2)
{bool bInterChange = false;int dx = fabs(p2._x - p1._x);int dy = fabs(p2._y - p1._y);int e, signX, signY, temp;signX = (p2._x > p1._x) ? 1 : ((p2._x < p1._x) ? -1 : 0);signY = (p2._y > p1._y) ? 1 : ((p2._y < p1._y) ? -1 : 0);if (dy > dx){temp = dx;dx = dy;dy = temp;bInterChange = true;}e = -dx;int x = p1._x, y = p1._y;for (int i = 1; i < dx; i++){SetPixel(hdc, x, y, 0x009F0000);if (bInterChange)y += signY;elsex += signX;e += (dy + dy);if (e >= 0){if (bInterChange)x += signX;elsey += signY;e -= (dx + dx);}}
}LRESULT CALLBACK WindowProc(HWND hwnd, UINT uMsg, WPARAM wParam, LPARAM lParam)
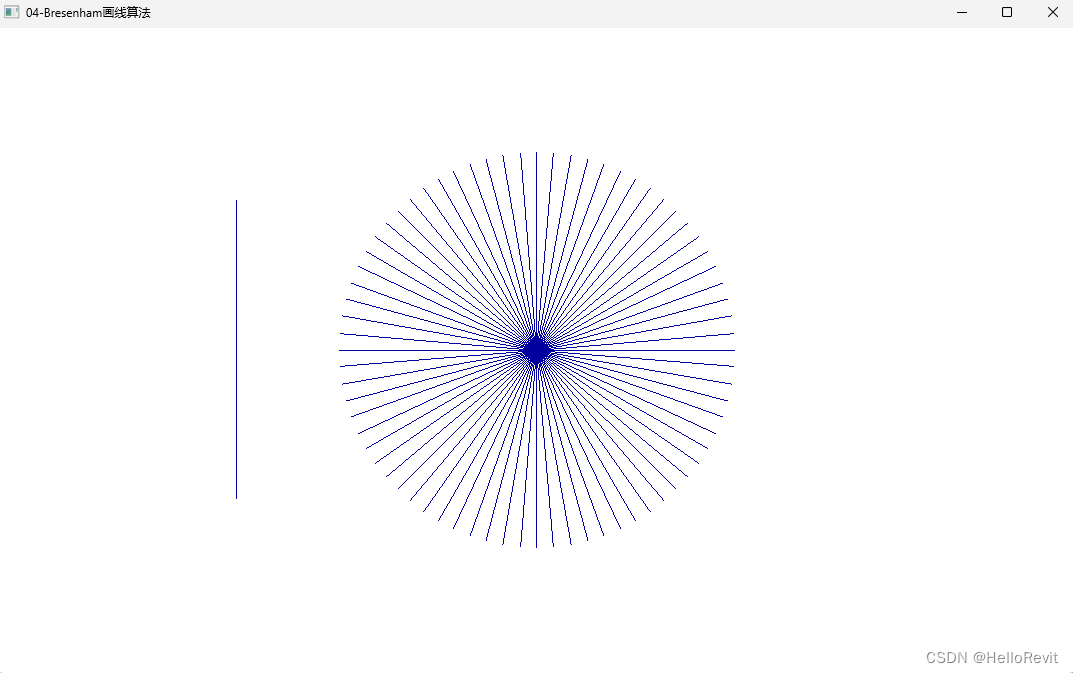
{PAINTSTRUCT ps;HDC hdc;RECT rc;switch (uMsg){case WM_DESTROY:PostQuitMessage(0);return 0;case WM_PAINT:{hdc = BeginPaint(hwnd, &ps);GetClientRect(hwnd, &rc);SetMapMode(hdc, MM_ANISOTROPIC);SetWindowExtEx(hdc, rc.right, rc.bottom, NULL);SetViewportExtEx(hdc, rc.right, -rc.bottom, NULL);SetViewportOrgEx(hdc, rc.right / 2, rc.bottom / 2, NULL);int r = 200;// 1. 绘制一条直线BresenhaLine(hdc, CP2(-300, 150), CP2(-300, -150));// 2. 直线角间隔 5°for (size_t i = 0; i < 360; i += 5){double angle = i * PI / 180.0;BresenhaLine(hdc, CP2(0, 0), CP2(ROUND(cos(angle) * r), ROUND(sin(angle) * r)));}EndPaint(hwnd, &ps);}return 0;}return DefWindowProc(hwnd, uMsg, wParam, lParam);
}int WINAPI wWinMain(HINSTANCE hInstance, HINSTANCE hPrevInstance, PWSTR pCmdLine, int nCmdShow)
{// Register the window class.const wchar_t CLASS_NAME[] = L"04-Bresenham画线算法";WNDCLASS wc = { };wc.style = CS_HREDRAW | CS_VREDRAW; // 重新绘制整个工作区wc.lpfnWndProc = WindowProc;wc.hInstance = hInstance;wc.lpszClassName = CLASS_NAME;wc.hbrBackground = (HBRUSH)(COLOR_WINDOW + 1);wc.hCursor = LoadCursor(NULL, IDC_ARROW);RegisterClass(&wc);HWND hwnd = CreateWindowEx(0,                              // Optional window styles.CLASS_NAME,                     // Window classL"04-Bresenham画线算法",               // Window textWS_OVERLAPPEDWINDOW,            // Window style// Size and positionCW_USEDEFAULT, CW_USEDEFAULT, CW_USEDEFAULT, CW_USEDEFAULT,NULL,       // Parent window    NULL,       // MenuhInstance,  // Instance handleNULL        // Additional application data);if (hwnd == NULL){return 0;}ShowWindow(hwnd, nCmdShow);MSG msg = { };while (GetMessage(&msg, NULL, 0, 0) > 0){TranslateMessage(&msg);DispatchMessage(&msg);}return 0;
}
这篇关于04-Bresenham画线算法的文章就介绍到这儿,希望我们推荐的文章对编程师们有所帮助!


