本文主要是介绍react二次封装Modal和Drawer组件,希望对大家解决编程问题提供一定的参考价值,需要的开发者们随着小编来一起学习吧!
目录
- react二次封装Modal和Drawer组件
- 01:Modal组件
- 01-1 BaseModal.jsx
- 01-2 使用BaseModal组件
- 01-3 效果
- 02:Drawer组件
- 02-1 BaseDrawer.jsx组件
- 02-2 使用BaseDrawer组件
- 02-3效果
react二次封装Modal和Drawer组件
npm i styled-components
01:Modal组件
01-1 BaseModal.jsx
import { Modal } from 'antd';
import React, { useState } from 'react';
import styled from "styled-components";
const BaseModal = (props) => {const { showModal, setShowModal } = propsconst [confirmLoading,setConfirmLoading] = useState(false) // 确定按钮的loadingconst modalText = '我是内容'// 确定 - 涉及异步请求const handleOk = () => {setConfirmLoading(true);setTimeout(() => {setShowModal(false)setConfirmLoading(false);}, 2000);};// 取消const handleCancel = () => {setShowModal(false)};return (<CustomModaltitle='标题'open={showModal}onOk={handleOk}confirmLoading={confirmLoading}onCancel={handleCancel}maskClosable={false}okText='确定1'cancelText='取消1'><p>{modalText}</p></CustomModal>);
};
export default BaseModal;// css
const CustomModal = styled(({ ...props }) => <Modal {...props} />)`.ant-modal-body {padding: 20px; // 设置自定义的padding值background: pink;}
`;
01-2 使用BaseModal组件
import { Button } from 'antd';
import React, { useState } from 'react';
import BaseModal from "./BaseModal";export default function App(props) {const [showModal, setShowModal] = useState(false)// 打开const openModal = () => {setShowModal(true)}return (<div className='content'><Button type="primary" onClick={openModal}>打开</Button><BaseModal showModal={showModal} setShowModal={setShowModal}></BaseModal></div>)
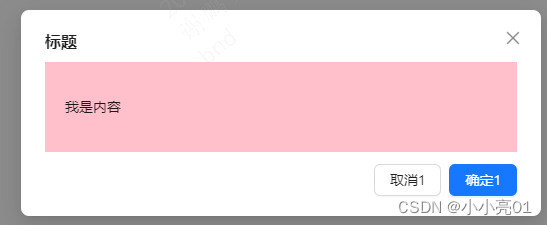
}01-3 效果
02:Drawer组件
02-1 BaseDrawer.jsx组件
import { Button, Drawer, Space } from "antd";
import React, { useState } from "react";
import styled from "styled-components";const BaseDrawer = (props) => {const { showDrawer, setShowDrawer } = props;const [confirmLoading, setConfirmLoading] = useState(false); // 确定按钮的loadingconst modalText = "我是内容";// 取消const onClose = () => {setShowDrawer(false);};// 确定const onSubmit = () => {setConfirmLoading(true);setTimeout(() => {setShowDrawer(false);setConfirmLoading(false);}, 2000);};return (<CustomDrawertitle="标题"placement="right"size="large"onClose={onClose}open={showDrawer}footer={<Space style={{ display: "flex", justifyContent: "end" }}><Button onClick={onClose}>取消</Button><Button type="primary" onClick={onSubmit} loading={confirmLoading}>确定</Button></Space>}maskClosable={false}getContainer={false}><p>{modalText}</p></CustomDrawer>);
};
export default BaseDrawer;// css
const CustomDrawer = styled(({ ...props }) => <Drawer {...props} />)`.ant-drawer-body {padding: 20px; // 设置自定义的padding值background: pink;}
`;
02-2 使用BaseDrawer组件
import { Button } from 'antd';
import React, { useState } from 'react';
import BaseDrawer from "./BaseDrawer";export default function App(props) {const [showDrawer, setShowDrawer] = useState(false)// 打开const openDrawer = () => {setShowDrawer(true)}return (<div className='content'><Button type="primary" onClick={openDrawer}>打开</Button><BaseDrawer showDrawer={showDrawer} setShowDrawer={setShowDrawer}></BaseDrawer></div>)
}
02-3效果

这篇关于react二次封装Modal和Drawer组件的文章就介绍到这儿,希望我们推荐的文章对编程师们有所帮助!


