本文主要是介绍OpenMMlab导出FCN模型并用onnxruntime推理,希望对大家解决编程问题提供一定的参考价值,需要的开发者们随着小编来一起学习吧!
导出onnx文件
直接使用脚本
import torch
from mmseg.apis init_modelconfig_file = 'configs/fcn/fcn_r18-d8_4xb2-80k_cityscapes-512x1024.py'
checkpoint_file = 'fcn_r18-d8_512x1024_80k_cityscapes_20201225_021327-6c50f8b4.pth'
model = init_model(config_file, checkpoint_file, device='cuda:0')
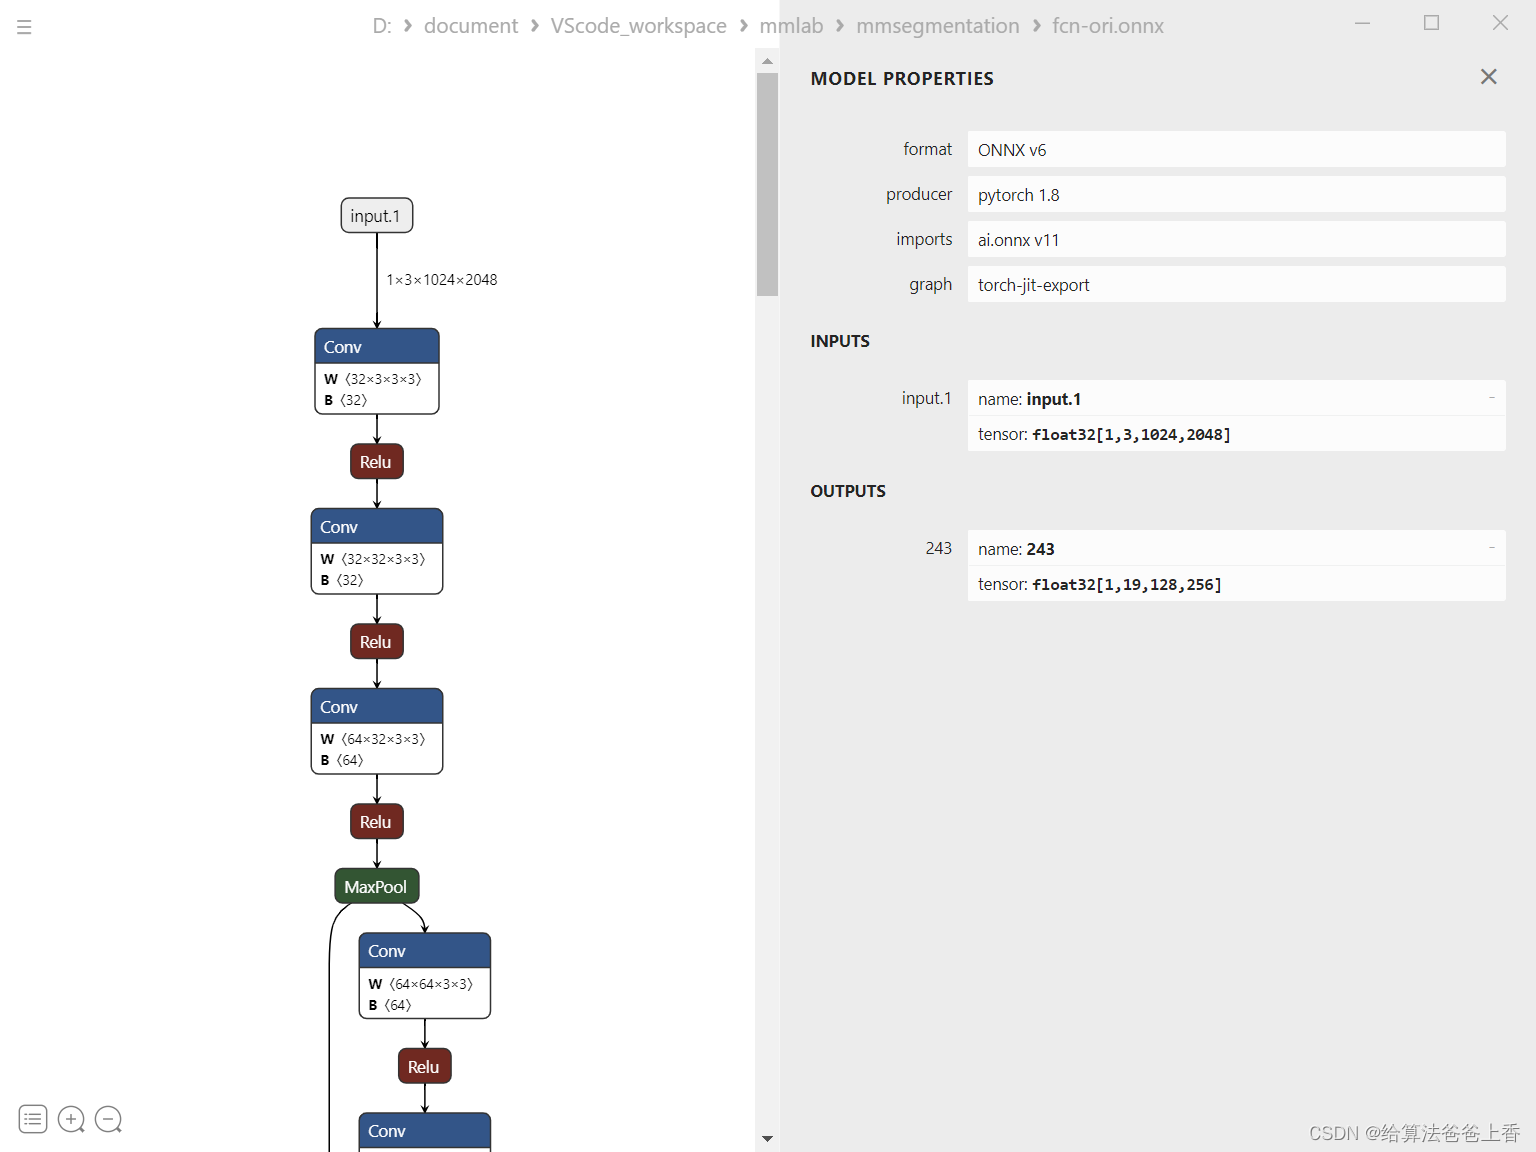
torch.onnx.export(model, torch.zeros(1, 3, 1024, 2048).cuda(), "fcn.onnx", opset_version=11)
导出的模型结构如下:
或者通过mmdeploy导出:
from mmdeploy.apis import torch2onnx
from mmdeploy.backend.sdk.export_info import export2SDKimg = 'demo.JPEG'
work_dir = './work_dir/onnx/fcn'
save_file = './end2end.onnx'
deploy_cfg = 'mmdeploy/configs/mmseg/segmentation_onnxruntime_dynamic.py'
model_cfg = 'mmsegmentation/configs/fcn/fcn_r18-d8_4xb2-80k_cityscapes-512x1024.py'
model_checkpoint = 'checkpoints/fcn_r18-d8_512x1024_80k_cityscapes_20201225_021327-6c50f8b4.pth'
device = 'cpu'# 1. convert model to onnx
torch2onnx(img, work_dir, save_file, deploy_cfg, model_cfg, model_checkpoint, device)# 2. extract pipeline info for sdk use (dump-info)
export2SDK(deploy_cfg, model_cfg, work_dir, pth=model_checkpoint, device=device)
onnxruntime推理
import cv2
import numpy as np
import onnxruntimepalette = [[128, 64, 128], [244, 35, 232], [70, 70, 70], [102, 102, 156], [190, 153, 153], [153, 153, 153], [250, 170, 30], [220, 220, 0], [107, 142, 35], [152, 251, 152], [70, 130, 180], [220, 20, 60], [255, 0, 0], [0, 0, 142], [0, 0, 70], [0, 60, 100], [0, 80, 100], [0, 0, 230], [119, 11, 32]]if __name__=="__main__":img = cv2.imread("demo/demo.png")input = cv2.resize(img, (2048,1024))input = input[:,:,::-1].transpose(2,0,1)  #BGR2RGB和HWC2CHWinput = input.astype(dtype=np.float32)input[0,:] = (input[0,:] - 123.675) / 58.395   input[1,:] = (input[1,:] - 116.28) / 57.12input[2,:] = (input[2,:] - 103.53) / 57.375input = np.expand_dims(input, axis=0)onnx_session = onnxruntime.InferenceSession("fcn.onnx", providers=['CPUExecutionProvider'])input_name = []for node in onnx_session.get_inputs():input_name.append(node.name)output_name = []for node in onnx_session.get_outputs():output_name.append(node.name)inputs = {}for name in input_name:inputs[name] = inputoutputs = onnx_session.run(None, inputs)[0]sem_seg = np.argmax(outputs[0], axis=0)img = cv2.resize(img, (sem_seg.shape[1],sem_seg.shape[0]))ids = np.unique(sem_seg)[::-1]legal_indices = ids < len(palette)ids = ids[legal_indices]labels = np.array(ids, dtype=np.int64)colors = [palette[label] for label in labels]mask = np.zeros_like(img, dtype=np.uint8)for label, color in zip(labels, colors):mask[sem_seg == label, :] = colormasks = sem_seg == labels[:, None, None]color_seg = (img * 0.5 + mask * 0.5).astype(np.uint8)cv2.imwrite("result.png", color_seg)
mmdeploy推理:
from mmdeploy_runtime import Segmentor
import cv2
import numpy as npimg = cv2.imread('mmsegmentation/demo/demo.png')# create a classifier
segmentor = Segmentor(model_path='work_dir/onnx/fcn', device_name='cpu')
#segmentor = Segmentor(model_path='work_dir/trt/fcn', device_name='cuda')
# perform inference
seg = segmentor(img)# visualize inference result
## random a palette with size 256x3
palette = np.random.randint(0, 256, size=(256, 3))
color_seg = np.zeros((seg.shape[0], seg.shape[1], 3), dtype=np.uint8)
for label, color in enumerate(palette):color_seg[seg == label, :] = color
# convert to BGR
color_seg = color_seg[..., ::-1]
img = img * 0.5 + color_seg * 0.5
img = img.astype(np.uint8)
cv2.imwrite('result.png', img)
这篇关于OpenMMlab导出FCN模型并用onnxruntime推理的文章就介绍到这儿,希望我们推荐的文章对编程师们有所帮助!


