本文主要是介绍Qt 翻金币游戏项目(具有代表性),希望对大家解决编程问题提供一定的参考价值,需要的开发者们随着小编来一起学习吧!
文章目录
- 效果展示
- 项目概述
- 功能实现
- 1,第一个场景构建
- 2、第二个场景功能
- 3、进入第三个场景
效果展示
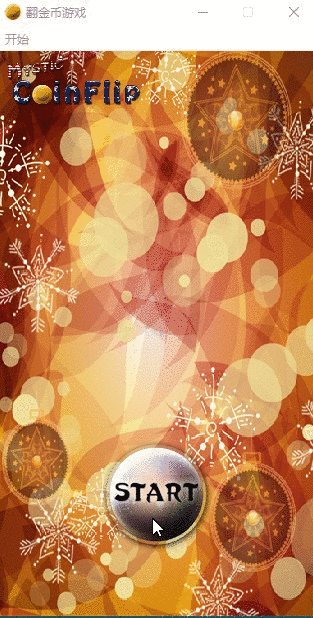
项目概述
打开游戏,点击开始按钮进入第二个场景,进行选择关卡,进入第三个游戏场景,翻动当前金币他的周围(上下左右)会进行切换,游戏胜利显示胜利图标,可以通过,back按钮退回第二个和第一个场景。
可以根据源码,看这个篇文章,这篇文章大概梳理了一下整个项目的思路,对细节方面描述比较少,
源码也还有很多地方需要优化(敬请期待下一个版本)
源码下载地址:
https://download.csdn.net/download/weixin_45715405/21976865?spm=1001.2014.3001.5503
功能实现
1,第一个场景构建

1.1、功能
第一个场景,主要涉及到,窗口标题、程序退出、窗口图标、背景图显示、标题图显示、自定义开始按钮封装,
1.2、项目搭建(直接创建一个QMainWindow,带菜单栏项目就可以)
1.3、窗口图标、标题、退出按钮
.h文件(主文件头文件)
#ifndef MAINWINDOW_H
#define MAINWINDOW_H
#pragma execution_character_set("utf-8")
#include <QMainWindow>
#include <QDebug>
#include "chooseleve.h"namespace Ui {
class MainWindow;
}class MainWindow : public QMainWindow
{Q_OBJECTpublic:explicit MainWindow(QWidget *parent = 0);~MainWindow();void paintEvent(QPaintEvent *event); // 绘图事件// 游戏窗口chooseleve* chos;private:Ui::MainWindow *ui;
};#endif // MAINWINDOW_H
.cpp(主文件cpp文件)
    connect(ui->actionquit,&QAction::triggered,[=](){this->close(); // 退出});// 设置固定大小this->setFixedSize(320,588);// 设置标题this->setWindowTitle("翻金币游戏");// 设置图片
//    this->setWindowIcon(QIcon(":/res/Coin0001.png"));this->setWindowIcon(QIcon("D:\\qt_project\\qt_GoldGame\\res\\Coin0001.png"));
1.4、背景图,标题图,QPainter画出来的(重写paintEvent,需要在.h文件中声明)
.cpp(主文件cpp文件)
void MainWindow::paintEvent(QPaintEvent *event)
{QPainter painter(this);QPixmap pix;
//    pix.load(":/res/PlayLevelSceneBg.png");pix.load("D:\\qt_project\\qt_GoldGame\\res\\PlayLevelSceneBg.png");painter.drawPixmap(0,0,this->width(),this->height(),pix);// 画标题图片pix.load("D:\\qt_project\\qt_GoldGame\\res\\Title.png");// 图片缩放pix = pix.scaled(pix.width()*0.5,pix.height()*0.5);painter.drawPixmap(10,30,pix);
}
1.5、自定义按钮封装(开始按钮)
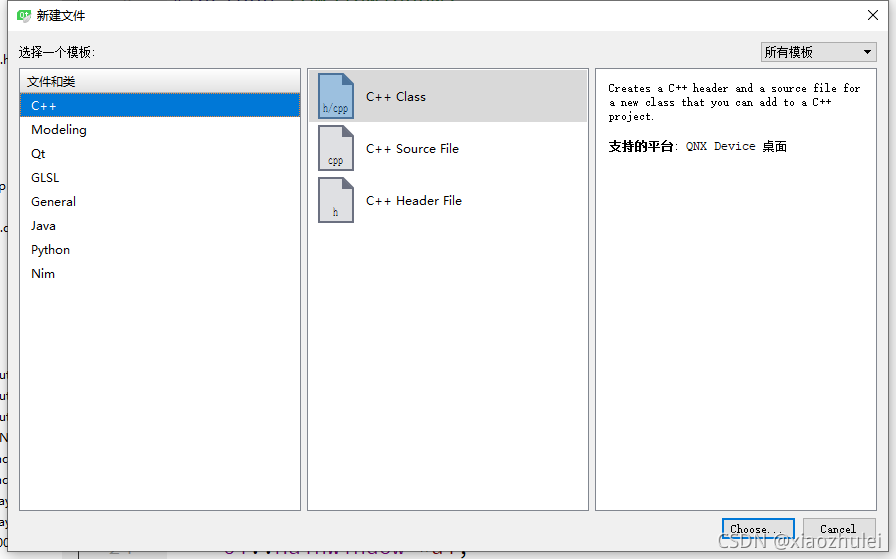
添加新文件,选择c++ Class
取一个名字,选择Qwidget

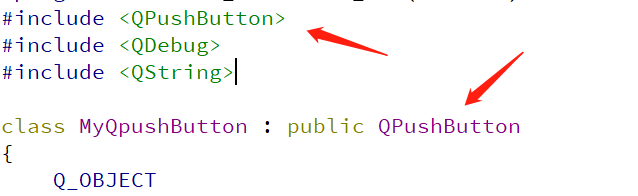
对创建的文件进行修改,三处需要修改,原继承Qwidget,改成继承QPushButton,.h文件
.cpp文件

自定义构造函数,需要传入两个值,一个显示用,一个点击之后显示,开始按钮,点击之后不进行图片切换,只有上下移动动画,所以封装两个接口,调用之后修改y值,实现上下移动动画,封装两个参数是为了后面back按钮,需要进行图片切换,所以第二个参数给了默认值,不需要的时候就不需要传入值,
.h文件(新建按钮头文件)
#ifndef MYQPUSHBUTTON_H
#define MYQPUSHBUTTON_H
#pragma execution_character_set("utf-8")
#include <QPushButton>
#include <QDebug>
#include <QString>class MyQpushButton : public QPushButton
{Q_OBJECT
public:
//    explicit MyQpushButton(QObject *parent = nullptr);// 自定义构造函数MyQpushButton(QString normalImg,QString pressImg="");// 默认显示图片路径QString normalImg;// 按下后显示图片路径QString pressImg;// 向下跳跃void zoom1();// 向上跳跃void zoom2();// 鼠标按下void mousePressEvent(QMouseEvent *e);// 鼠标释放void mouseReleaseEvent(QMouseEvent *e);signals:public slots:
};#endif // MYQPUSHBUTTON_H
.cpp文件代码(新建按钮cpp文件)
#include "myqpushbutton.h"
#include <QPropertyAnimation>//MyQpushButton::MyQpushButton(QObject *parent) : QPushButton(parent)
//{//}MyQpushButton::MyQpushButton(QString normalImg,QString pressImg)
{// 保存 正常显示路径, 选中后显示的路径this->normalImg = normalImg;this->pressImg = pressImg;QPixmap pix;bool ret = pix.load(this->normalImg);if(!ret){QString str = QString("%1图片加载失败").arg(this->normalImg);qDebug()<<str;return;}this->setFixedSize(pix.width(),pix.height());// 设置不规则图片样式this->setStyleSheet("QPushButton{border:0px;}");// 设置图片this->setIcon(pix);// 设置图片大小this->setIconSize(QSize(pix.width(),pix.height()));
}// 向下跳跃
void MyQpushButton::zoom1()
{QPropertyAnimation* animation = new QPropertyAnimation(this,"geometry");// 设置时间间隔animation->setDuration(200);// 设置动态对象起始位置animation->setStartValue(QRect(this->x(),this->y(),this->width(),this->height()));// 设置动画对象结束位置animation->setEndValue(QRect(this->x(),this->y()+10,this->width(),this->height()));// 设置曲线animation->setEasingCurve(QEasingCurve::OutBounce);// 执行动画animation->start();
}// 向上跳跃
void MyQpushButton::zoom2()
{QPropertyAnimation* animation = new QPropertyAnimation(this,"geometry");// 设置时间间隔animation->setDuration(200);// 设置动态对象起始位置animation->setStartValue(QRect(this->x(),this->y()+10,this->width(),this->height()));// 设置动画对象结束位置animation->setEndValue(QRect(this->x(),this->y(),this->width(),this->height()));// 设置曲线animation->setEasingCurve(QEasingCurve::OutBounce);// 执行动画animation->start();
}void MyQpushButton::mousePressEvent(QMouseEvent *e)
{QPixmap pix;if(this->pressImg != "") // 不传入选择图片就不替换{qDebug()<<"我进来啦鼠标按下";bool ret = pix.load(this->pressImg);if(!ret){QString str = QString("%1图片加载失败").arg(this->pressImg);qDebug()<<str;return;}this->setFixedSize(pix.width(),pix.height());// 设置不规则图片样式this->setStyleSheet("QPushButton{border:0px;}");// 设置图片this->setIcon(pix);// 设置图片大小this->setIconSize(QSize(pix.width(),pix.height()));}// 其他事件交给父类,去做QPushButton::mousePressEvent(e);
}// 鼠标释放
void MyQpushButton::mouseReleaseEvent(QMouseEvent *e)
{QPixmap pix;if(this->pressImg != "") // 不传入选择图片就不替换{qDebug()<<"我进来啦鼠标释放";bool ret = pix.load(this->normalImg);if(!ret){QString str = QString("%1图片加载失败").arg(this->normalImg);qDebug()<<str;return;}this->setFixedSize(pix.width(),pix.height());// 设置不规则图片样式this->setStyleSheet("QPushButton{border:0px;}");// 设置图片this->setIcon(pix);// 设置图片大小this->setIconSize(QSize(pix.width(),pix.height()));}// 其他事件交给父类,去做QPushButton::mouseReleaseEvent(e);
}
1.6、自定义按钮使用、new出 第二个选择关卡场景
.cpp(主文件cpp文件)
// 自定义按钮(开始)MyQpushButton* startbtn = new MyQpushButton("D:\\qt_project\\qt_GoldGame\\res\\MenuSceneStartButton.png");startbtn->setParent(this);// 设置位置startbtn->move(this->width()*0.5-startbtn->width()*0.5,this->height()*0.7);// 创建出 第二个选择关卡场景chos = new chooseleve;
1.7、绑定开始按钮点击事件,进入第二个场景

创建新文件,c++ Class,继承QMainWindow类,我的名字是chooseleve,上面new第二个场景,chos指针来维护,主要实现,点击开始按钮,执行上下移动动画,延时200毫秒,隐藏当前界面,设置第二场景窗口出现位置和当前窗口一致,显示第二场景窗口
connect(startbtn,&MyQpushButton::clicked,[=](){startbtn->zoom1();// 回弹startbtn->zoom2();// 延时进入第二个 延时500毫秒之后执行函数QTimer::singleShot(200,this,[=](){// 将自身隐藏this->hide();// 设置选择关卡场景位置chos->setGeometry(this->geometry());// 进入第二个场景页面chos->show();});});
2、第二个场景功能

2.1、主要功能
关卡按钮显示,标题图片显示、主图显示、返回按钮显示
.h(第二个场景头文件)
#ifndef CHOOSELEVE_H
#define CHOOSELEVE_H
#pragma execution_character_set("utf-8")
#include <QWidget>
#include <playscene.h>class chooseleve : public QWidget
{Q_OBJECT
public:explicit chooseleve(QWidget *parent = nullptr);// 重写绘图事件void paintEvent(QPaintEvent *event);// 维护游戏场景playScene* play;signals:// 自定义信号 只需要声明void chooseSenceBack();
public slots:
};#endif // CHOOSELEVE_H
.cpp(第三个场景cpp文件)
2.2、设置窗口标题,窗口图片,退出按钮、关卡设置
    // 设置固定大小this->setFixedSize(320,588);// 设置标题this->setWindowTitle("翻金币游戏");// 设置图片
//    this->setWindowIcon(QIcon(":/res/Coin0001.png"));this->setWindowIcon(QIcon("D:\\qt_project\\qt_GoldGame\\res\\Coin0001.png"));// 创建菜单栏QMenuBar *bar=new QMenuBar(this);// 添加开始菜单QMenu* startmenu = bar->addMenu("开始");// 创建菜单项QAction* quiAction = startmenu->addAction("退出");// 点击退出按钮connect(quiAction,&QAction::triggered,[=](){this->close();});
2.3、绘制背景图标题图
// 重写绘图事件
void chooseleve::paintEvent(QPaintEvent *event)
{QPainter painter(this);QPixmap pix;pix.load("D:\\qt_project\\qt_GoldGame\\res\\OtherSceneBg.png");painter.drawPixmap(0,0,this->width(),this->height(),pix);pix.load("D:\\qt_project\\qt_GoldGame\\res\\Title.png");painter.drawPixmap((this->width()-pix.width())*0.5,30,pix.width(),pix.height(),pix);
}
2.4、退出按钮
使用刚才我们封装的按钮类,这次我们会传入两个参数,一个是默认显示图片,一个是点击之后图片,因为我们对按钮类中的鼠标点击事件进行了重写,并设置了判断,要是传入了点击之后的图片就会触发,反之不会,鼠标按下图片显示为点击之后的,鼠标释放图片显示原图
// 构建自定义按钮 (返回)MyQpushButton* mybtn = new MyQpushButton("D:\\qt_project\\qt_GoldGame\\res\\BackButton.png","D:\\qt_project\\qt_GoldGame\\res\\BackButtonSelected.png");mybtn->setParent(this);// 设置位置mybtn->move(this->width()-mybtn->width(),this->height()-mybtn->height());connect(mybtn,&MyQpushButton::clicked,[=](){// 发送自定义信号 因为要返回到上一个页面,这里我们自定义个一个信号,然后在上一个页面进行捕获QTimer::singleShot(200,this,[=](){emit this->chooseSenceBack();});});
在第一个页面cpp文件中,捕获第二个页面发来的信号,将第二个页面进行隐藏,第一个页面显示

2.5、选择关卡按钮
通过,对每个按钮x,y坐标进行计算,用一个for实现,4*5的矩阵,每次进来,创建自定义按钮传入默认显示图片,使用QLabel标签进行按钮文字显示,给每个按钮添加事件,和第三个场景放回事件监听,点击之后把当前值代入第三个场景,
    // 选择关卡按钮play = NULL; // 第三个场景指针for(int i =0;i<20;i++){MyQpushButton* choosebtn = new MyQpushButton("D:\\qt_project\\qt_GoldGame\\res\\LevelIcon.png");choosebtn->setParent(this);choosebtn->move(25+(i%4)*70,150+(i/4)*70);connect(choosebtn,&MyQpushButton::clicked,[=](){
//            qDebug()<<i+1;// 隐藏自身this->hide();// 进入游戏场景play = new playScene(i+1);// 将游戏场景位置,同步选择关卡位置play->setGeometry(this->geometry());play->show();// 监听第三页面返回信号connect(play,&playScene::chooseSenceBacks,[=](){// 选择关卡场景 显示// 设置选择关卡的位置this->setGeometry(play->geometry());play->close();delete play;play=NULL;this->show();});});// 按钮添加文字QLabel * label = new QLabel(this);label->setFixedSize(choosebtn->width(),choosebtn->height());label->setText(QString::number(i+1));label->move(25+(i%4)*70,150+(i/4)*70);label->setAlignment(Qt::AlignHCenter | Qt::AlignVCenter);// 鼠标穿透label->setAttribute(Qt::WA_TransparentForMouseEvents);}}
3、进入第三个场景
和之前创建按钮类方式一样,创建一个金币类
.h(金币类头文件)
#ifndef MYCOIN_H
#define MYCOIN_H
#pragma execution_character_set("utf-8")
#include <QPushButton>
#include <QString>
#include <QTimer>class MyCoin : public QPushButton
{Q_OBJECT
public:
//    explicit MyCoin(QWidget *parent = nullptr);// 显示默认是金币还是银币MyCoin(QString CoinImg);// x坐标 y坐标 正反int posX;int posY;bool flag;// 改变表示,执行翻转效果void changFlag();// 正面翻到反面,定时器QTimer* timer1;// 反面翻到正面,定时器QTimer* timer2;// 最小图片,最大图片int min = 1;int max = 8;// 创建是否执行动画标识bool isAnimation;// 是否胜利标识bool isWin;// 重写鼠标按下类  优化金币翻转void mousePressEvent(QMouseEvent *e);signals:public slots:
};#endif // MYCOIN_H
.cpp文件(金币类cpp文件)
#include "mycoin.h"
#include <QPixmap>
#include <QMessageBox>
#include <QTimer>//MyCoin::MyCoin(QWidget *parent) : QPushButton(parent)
//{//}MyCoin::MyCoin(QString CoinImg)
{QPixmap pix;bool res = pix.load(CoinImg);if(!res){QMessageBox::critical(this,"加载失败","图片加载失败");return;}this->setFixedSize(pix.width(),pix.height());this->setStyleSheet("QPushButton{border:0px;}");this->setIcon(pix);this->setIconSize(QSize(pix.width(),pix.height()));timer1 = new QTimer(this);timer2 = new QTimer(this);// 初始化按钮是否执行动画标识this->isAnimation = false;// 初始化胜利标识this->isWin = false;// 监听定时器connect(timer1,&QTimer::timeout,[=](){QPixmap pix;QString str = QString("D:\\qt_project\\qt_GoldGame\\res\\Coin000%1.png").arg(this->min++);pix.load(str);this->setFixedSize(pix.width(),pix.height());this->setStyleSheet("QPushButton{border:0px;}");this->setIcon(pix);this->setIconSize(QSize(pix.width(),pix.height()));// 如果显示到, 最后一张图片,停止定时器if(this->min>this->max){this->isAnimation = false;this->min = 1;timer1->stop();}});// 硬币翻金币connect(timer2,&QTimer::timeout,[=](){QPixmap pix;QString str = QString("D:\\qt_project\\qt_GoldGame\\res\\Coin000%1.png").arg(this->max--);pix.load(str);this->setFixedSize(pix.width(),pix.height());this->setStyleSheet("QPushButton{border:0px;}");this->setIcon(pix);this->setIconSize(QSize(pix.width(),pix.height()));// 如果显示到, 最后一张图片,停止定时器if(this->max<this->min){this->isAnimation = false;this->max = 8;timer2->stop();}});}void MyCoin::changFlag()
{if(this->flag) // 当前是正面{// 同步执行动画this->isAnimation = true;// 开启 正面 翻 反面定时器timer1->start(30);this->flag = false;}else{// 同步执行动画this->isAnimation = true;timer2->start(30);this->flag = true;}
}// 重写鼠标按下类
void MyCoin::mousePressEvent(QMouseEvent *e)
{if(this->isAnimation || this->isWin){// 正在做动画,不做鼠标响应return;}else{// 交给父类默认处理QPushButton::mousePressEvent(e);}
}
创建第三个场景类,和之前创建第二个场景方式一样
.h(第三个场景头文件)
#ifndef PLAYSCENE_H
#define PLAYSCENE_H
#pragma execution_character_set("utf-8")
#include <mycoin.h>
#include <QMainWindow>class playScene : public QMainWindow
{Q_OBJECT
public:
//    explicit playScene(QWidget *parent = nullptr);// 自定义构造函数playScene(int index);// 记录当前本关的 关卡号int leaveindex;// 重写void paintEvent(QPaintEvent *event);// 游戏二维数组 维护里面金币或者硬币标志int gameArray[4][4];// 金币二维数组MyCoin* coinBtn[4][4];// 是否胜利bool iswin;signals:void chooseSenceBacks();
public slots:};#endif // PLAYSCENE_H
.cpp(第三个场景类cpp文件)
第三个场景,主要内容:窗口的标题,图片,退出,返回按钮,显示当前关卡,金币银币调整,周围金币翻转检测,胜利检测,显示胜利图标
#include "playscene.h"
#include <QMenuBar>
#include <QDebug>
#include <QToolBar>
#include "QMenu"
#include "QAction"
#include <QPainter>
#include <QPixmap>
#include "myqpushbutton.h"
#include <QTimer>
#include <QLabel>
#include <QString>
#include <mycoin.h>
#include <dataconfig.h>
#include <QPropertyAnimation>
#include <QSound>//playScene::playScene(QWidget *parent) : QMainWindow(parent)
//{//}
playScene::playScene(int index)
{this->leaveindex = index;// 设置固定大小this->setFixedSize(320,588);// 设置标题this->setWindowTitle("翻金币游戏");// 设置图片
//    this->setWindowIcon(QIcon(":/res/Coin0001.png"));this->setWindowIcon(QIcon("D:\\qt_project\\qt_GoldGame\\res\\Coin0001.png"));// 创建菜单栏QMenuBar *bar=new QMenuBar(this);// 添加开始菜单QMenu* startmenu = bar->addMenu(" 开始");// 创建菜单项QAction* quiAction = startmenu->addAction("退出");// 点击退出按钮connect(quiAction,&QAction::triggered,[=](){this->close();});// 默认是 未胜利iswin = false;// 返回按钮 音效QSound* backsound = new QSound("D:\\qt_project\\qt_GoldGame\\res\\BackButtonSound.wav",this);// 翻金币按钮, 胜利音效QSound* filpsound = new QSound("D:\\qt_project\\qt_GoldGame\\res\\ConFlipSound.wav",this);QSound* winsound = new QSound("D:\\qt_project\\qt_GoldGame\\res\\LevelWinSound.wav",this);// 构建自定义按钮 (返回)MyQpushButton* mybtn = new MyQpushButton("D:\\qt_project\\qt_GoldGame\\res\\BackButton.png","D:\\qt_project\\qt_GoldGame\\res\\BackButtonSelected.png");mybtn->setParent(this);mybtn->move(this->width()-mybtn->width(),this->height()-mybtn->height());connect(mybtn,&MyQpushButton::clicked,[=](){backsound->play();// 发送自定义信号QTimer::singleShot(200,this,[=](){emit this->chooseSenceBacks();});});// 显示具体关卡号QLabel* label = new QLabel(this);QString str = QString("level:%1").arg(this->leaveindex);QFont font;font.setFamily("华文新魏");font.setPointSize(20);// 让label使用上面字体label->setFont(font);label->setText(str);label->setGeometry(QRect(30,this->height()-50,120,50));// 初始化二位数组dataConfig data;for(int i=0;i<4;i++){for(int j=0;j<4;j++){this->gameArray[i][j] = data.mData[this->leaveindex][i][j];}}// 创建胜利图标QLabel* winLabel = new QLabel;QPixmap  pix;pix.load("D:\\qt_project\\qt_GoldGame\\res\\LevelCompletedDialogBg.png");// 设置大小winLabel->setGeometry(QRect(0,0,pix.width(),pix.height()));winLabel->setParent(this);winLabel->setPixmap(pix);winLabel->move((this->width()-pix.width())*0.5,-pix.height());// 创建金币的背景图片for(int i=0;i<4;i++){for(int j=0;j<4;j++){// QLabel显示图片QLabel* bg = new QLabel(this);QPixmap pix;pix.load("D:\\qt_project\\qt_GoldGame\\res\\BoardNode.png");bg->setGeometry(0,0,pix.width(),pix.height());bg->setPixmap(pix);bg->move(57+i*50,200+j*50);// 创建金币QString str;if(this->gameArray[i][j]==1){// 金币str = "D:\\qt_project\\qt_GoldGame\\res\\Coin0001.png";}else{// 银币str = "D:\\qt_project\\qt_GoldGame\\res\\Coin0008.png";}MyCoin* coin = new MyCoin(str);// 记录x y 正反面coin->posX = i;coin->posY = j;coin->flag = gameArray[i][j];coin->setParent(this);coin->move(59+i*50,204+j*50);// 将coin放入 到维护的金币的二维数组中coinBtn[i][j] = coin;connect(coin,&MyCoin::clicked,[=](){// 播放翻金币音效filpsound->play();coin->changFlag();// 同步矩阵gameArray[i][j]= gameArray[i][j] == 0?1:0;// 延时操作QTimer::singleShot(300,this,[=](){// 继续翻动,周围银币// 检测 翻右侧金币,并且翻转if(coin->posX+1<=3){coinBtn[coin->posX+1][coin->posY]->changFlag();gameArray[coin->posX+1][coin->posY]= gameArray[coin->posX+1][coin->posY] == 0?1:0;}// 检测左侧if(coin->posX-1>=0){coinBtn[coin->posX-1][coin->posY]->changFlag();gameArray[coin->posX-1][coin->posY]= gameArray[coin->posX-1][coin->posY] == 0?1:0;}// 检测下if(coin->posY+1<=3){coinBtn[coin->posX][coin->posY+1]->changFlag();gameArray[coin->posX][coin->posY+1]= gameArray[coin->posX][coin->posY+1] == 0?1:0;}// 检测上if(coin->posY-1>=0){coinBtn[coin->posX][coin->posY-1]->changFlag();gameArray[coin->posX][coin->posY-1]= gameArray[coin->posX][coin->posY-1] == 0?1:0;}// 在翻完周围硬币后,判断是否都是金币this->iswin = true;for(int i=0;i<4;i++){for(int j=0;j<4;j++){if(coinBtn[i][j]->flag == false){this->iswin = false;break;}}}if(this->iswin == true){qDebug()<<"游戏胜利";// 将所有硬币胜利标志,都设置truefor(int i=0;i<4;i++){for(int j=0;j<4;j++){coinBtn[i][j]->isWin = true;}}// 播放胜利音效winsound->play();// 将胜利图片显示出来QPropertyAnimation* animation = new QPropertyAnimation(winLabel,"geometry");animation->setDuration(1000);animation->setStartValue(QRect(winLabel->x(),winLabel->y(),winLabel->width(),winLabel->height()));animation->setEndValue(QRect(winLabel->x(),winLabel->y()+114,winLabel->width(),winLabel->height()));animation->setEasingCurve(QEasingCurve::OutBounce);animation->start();}});});}}}void playScene::paintEvent(QPaintEvent *event)
{QPainter painter(this);QPixmap pix;pix.load("D:\\qt_project\\qt_GoldGame\\res\\OtherSceneBg.png");painter.drawPixmap(0,0,this->width(),this->height(),pix);pix.load("D:\\qt_project\\qt_GoldGame\\res\\Title.png");pix = pix.scaled(pix.width()*0.5,pix.height()*0.5);painter.drawPixmap(10,30,pix.width(),pix.height(),pix);
}
有问题可以留言
这篇关于Qt 翻金币游戏项目(具有代表性)的文章就介绍到这儿,希望我们推荐的文章对编程师们有所帮助!


