本文主要是介绍图像质量评估——PSNR:峰值信噪比和SSIM:结构相似性(纯手撸代码),希望对大家解决编程问题提供一定的参考价值,需要的开发者们随着小编来一起学习吧!
目录
- PSNR
- 原理
- 代码
- 运行测试结果
- SSIM
- 原理
- 代码
- 运行测试结果
- 总结
PSNR
原理
PSNR 是一种衡量图像质量的指标,它是通过比较原始图像和失真图像之间的差异来计算的。具体来说,PSNR 是通过比较两幅图像的每个像素值来计算的。给定一个大小为 m×n 的干净图像 I 和噪声图像 K,均方误差 (MSE) 定义为:

然后 PSNR (dB) 就定义为:

其中 MAX_I^2
为图片可能的最大像素值。如果每个像素都由 8 位二进制来表示,那么就为 255。通常,如果像素值由 B 位二进制来表示,那么 MAX_I = 2^B-1。
PSNR 主要比较的是两幅图像的每个像素值的差异,这种差异被称为 “噪声”。如果两幅图像完全相同,那么噪声就为零,PSNR 就为无穷大。如果两幅图像有很大的差异,那么噪声就会很大,PSNR 就会相应地减小。因此,PSNR 越大,表示图像质量越好。
代码
import numpy as np
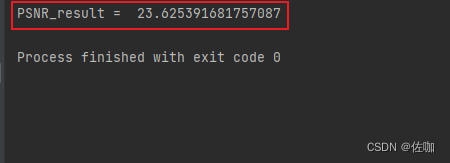
import cv2def reorder_image(img, input_order='HWC', output_order='HWC'):''' reorder_image '''if input_order not in ['HWC', 'CHW']:raise ValueError(f'Wrong input_order {input_order}. Supported input_orders are ' "'HWC' and 'CHW'")if output_order not in ['HWC', 'CHW']:raise ValueError(f'Wrong output_order {output_order}. Supported output_orders are ' "'HWC' and 'CHW'")if len(img.shape) == 2:img, input_order = img[..., None], 'CHW'if input_order == 'CHW' and output_order == 'HWC':img = img.transpose(1, 2, 0)elif input_order == 'HWC' and output_order == 'CHW':img = img.transpose(2, 0, 1)return imgdef _convert_input_type_range(img):''' convert input to [0, 1] '''img_type = img.dtypeimg = img.astype(np.float32)if img_type == np.float32:passelif img_type == np.uint8:img /= 255.else:raise TypeError(f'The img type should be np.float32 or np.uint8, but got {img_type}')return imgdef _convert_output_type_range(img, dst_type):''' convert output to dst_type '''if dst_type not in (np.uint8, np.float32):raise TypeError(f'The dst_type should be np.float32 or np.uint8, but got {dst_type}')if dst_type == np.uint8:img = img.round()else:img /= 255.return img.astype(dst_type)def bgr2ycbcr(img, y_only=False):''' bgr space to ycbcr space '''img_type = img.dtypeimg = _convert_input_type_range(img)if y_only:out_img = np.dot(img, [24.966, 128.553, 65.481]) + 16.0else:out_img = np.matmul(img, [[24.966, 112.0, -18.214], [128.553, -74.203, -93.786], [65.481, -37.797, 112.0]]) + [16, 128, 128]out_img = _convert_output_type_range(out_img, img_type)return out_imgdef calculate_psnr(img, img2, crop_border, input_order='HWC', test_y_channel=False, **_kwargs):''' calculate_psnr '''assert img.shape == img2.shape, (f'Image shapes are different: {img.shape}, {img2.shape}.')if input_order not in ['HWC', 'CHW']:raise ValueError(f'Wrong input_order {input_order}. Supported input_orders are ' '"HWC" and "CHW"')if not isinstance(crop_border, (list, tuple)):crop_border = (crop_border, crop_border)img = reorder_image(img, input_order=input_order).astype(np.float64)img2 = reorder_image(img2, input_order=input_order).astype(np.float64)if crop_border[0] != 0:img = img[crop_border[0]:-crop_border[0], ...]img2 = img2[crop_border[0]:-crop_border[0], ...]if crop_border[1] != 0:img = img[:, crop_border[1]:-crop_border[1], ...]img2 = img2[:, crop_border[1]:-crop_border[1], ...]if test_y_channel:img = bgr2ycbcr(img.astype(np.float32) / 255., y_only=True) * 255img2 = bgr2ycbcr(img2.astype(np.float32) / 255., y_only=True) * 255mse = np.mean((img - img2)**2) # MSE均方误差if mse == 0:return float('inf')PSNR_result = 20. * np.log10(255. / np.sqrt(mse))return PSNR_resultif __name__ == '__main__':img1 = cv2.imread("datasets/Set5/GTmod12/hh74.png") # 读入图片1img2 = cv2.imread("visualization/Set5/hh74_ETDS_M4C32_x4.png") # 读入图片2PSNR_result = calculate_psnr(img1, img2, 4)print("PSNR_result = ",PSNR_result)运行测试结果
SSIM
原理
SSIM(结构相似性)是一种衡量两幅图像相似度的指标。相对 PSNR 而言,SSIM 在评价图像质量上更能符合人类的视觉特性。SSIM 使用的两张图像中,一张为未经压缩的无失真图像,另一张为失真后的图像。SSIM 公式基于样本 x 和 y 之间的三个比较衡量:亮度 (luminance)、对比度 (contrast) 和结构 (structure)。具体的计算公式如下所示:


SSIM 主要比较的是两幅图像的亮度、对比度和结构。这三个因素都是人类视觉系统在评价图像质量时的重要因素。因此,SSIM 能够更好地反映人类视觉系统对图像质量的感知。
代码
import numpy as np
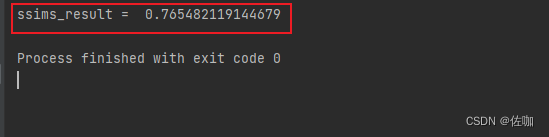
import cv2def reorder_image(img, input_order='HWC', output_order='HWC'):''' reorder_image '''if input_order not in ['HWC', 'CHW']:raise ValueError(f'Wrong input_order {input_order}. Supported input_orders are ' "'HWC' and 'CHW'")if output_order not in ['HWC', 'CHW']:raise ValueError(f'Wrong output_order {output_order}. Supported output_orders are ' "'HWC' and 'CHW'")if len(img.shape) == 2:img, input_order = img[..., None], 'CHW'if input_order == 'CHW' and output_order == 'HWC':img = img.transpose(1, 2, 0)elif input_order == 'HWC' and output_order == 'CHW':img = img.transpose(2, 0, 1)return imgdef _convert_input_type_range(img):''' convert input to [0, 1] '''img_type = img.dtypeimg = img.astype(np.float32)if img_type == np.float32:passelif img_type == np.uint8:img /= 255.else:raise TypeError(f'The img type should be np.float32 or np.uint8, but got {img_type}')return imgdef _convert_output_type_range(img, dst_type):''' convert output to dst_type '''if dst_type not in (np.uint8, np.float32):raise TypeError(f'The dst_type should be np.float32 or np.uint8, but got {dst_type}')if dst_type == np.uint8:img = img.round()else:img /= 255.return img.astype(dst_type)def bgr2ycbcr(img, y_only=False):''' bgr space to ycbcr space '''img_type = img.dtypeimg = _convert_input_type_range(img)if y_only:out_img = np.dot(img, [24.966, 128.553, 65.481]) + 16.0else:out_img = np.matmul(img, [[24.966, 112.0, -18.214], [128.553, -74.203, -93.786], [65.481, -37.797, 112.0]]) + [16, 128, 128]out_img = _convert_output_type_range(out_img, img_type)return out_imgdef _ssim(img, img2):''' ssim '''c1, c2 = (0.01 * 255)**2, (0.03 * 255)**2img = img.astype(np.float64)img2 = img2.astype(np.float64)kernel = cv2.getGaussianKernel(11, 1.5)window = np.outer(kernel, kernel.transpose())mu1 = cv2.filter2D(img, -1, window)[5:-5, 5:-5]mu2 = cv2.filter2D(img2, -1, window)[5:-5, 5:-5]mu1_sq, mu2_sq = mu1**2, mu2**2mu1_mu2 = mu1 * mu2sigma1_sq = cv2.filter2D(img**2, -1, window)[5:-5, 5:-5] - mu1_sqsigma2_sq = cv2.filter2D(img2**2, -1, window)[5:-5, 5:-5] - mu2_sqsigma12 = cv2.filter2D(img * img2, -1, window)[5:-5, 5:-5] - mu1_mu2ssim_map = ((2 * mu1_mu2 + c1) * (2 * sigma12 + c2)) / ((mu1_sq + mu2_sq + c1) * (sigma1_sq + sigma2_sq + c2))return ssim_map.mean()def calculate_ssim(img, img2, crop_border, input_order='HWC', test_y_channel=False, **_kwargs):''' calculate_ssim '''assert img.shape == img2.shape, (f'Image shapes are different: {img.shape}, {img2.shape}.')if input_order not in ['HWC', 'CHW']:raise ValueError(f'Wrong input_order {input_order}. Supported input_orders are ' '"HWC" and "CHW"')if not isinstance(crop_border, (list, tuple)):crop_border = (crop_border, crop_border)img = reorder_image(img, input_order=input_order)img2 = reorder_image(img2, input_order=input_order)img = img.astype(np.float64)img2 = img2.astype(np.float64)if crop_border[0] != 0:img = img[crop_border[0]:-crop_border[0], ...]img2 = img2[crop_border[0]:-crop_border[0], ...]if crop_border[1] != 0:img = img[:, crop_border[1]:-crop_border[1], ...]img2 = img2[:, crop_border[1]:-crop_border[1], ...]if test_y_channel:img = bgr2ycbcr(img.astype(np.float32) / 255., y_only=True)[..., None] * 255img2 = bgr2ycbcr(img2.astype(np.float32) / 255., y_only=True)[..., None] * 255ssims = []for i in range(img.shape[2]):ssims.append(_ssim(img[..., i], img2[..., i]))ssims_result = np.array(ssims).mean()return ssims_resultif __name__ == '__main__':img1 = cv2.imread("datasets/Set5/GTmod12/hh74.png") # 读入图片1img2 = cv2.imread("visualization/Set5/hh74_ETDS_M4C32_x4.png") # 读入图片2ssims_result = calculate_ssim(img1, img2, 4)print("PSNR_result = ", ssims_result)
运行测试结果
总结
以上就是图像质量评估——PSNR:峰值信噪比和SSIM:结构相似性的原理及详细代码,希望能帮到你,总结不易,撸码不易,三连多多支持,谢谢!
这篇关于图像质量评估——PSNR:峰值信噪比和SSIM:结构相似性(纯手撸代码)的文章就介绍到这儿,希望我们推荐的文章对编程师们有所帮助!


