本文主要是介绍【autodesk】浏览器中渲染rvt模型,希望对大家解决编程问题提供一定的参考价值,需要的开发者们随着小编来一起学习吧!
使用Forge完成渲染
Forge是什么 为什么能够渲染出来rvt模型
- Forge是由Autodesk开发的一套云端开发平台和工具集。
- 在Forge平台中,有一个名为"Model Derivative"的服务,它可以将包括RVT(Revit)在内的多种BIM(Building Information Modeling)文件格式转换为可在Web上浏览和渲染的格式。
- 具体来说,"Model Derivative"服务可以将RVT(Revit)文件转换为SVF(Scalable Vector Graphics)格式。
- SVF是一种基于Web的轻量级3D模型表示格式,可以实现高性能的3D模型渲染和交互。通过将RVT文件转换为SVF格式,可以在Web端使用Forge提供的Viewer组件加载和展示RVT模型
Forge与Autodesk的关系
- Autodesk是一家设计软件公司,Forge可以视为Autodesk的云端扩展
渲染步骤:
首先要注册autodesk平台,并创建项目 获取自己的client_id与client_secret
官网地址:Autodesk Platform Services (formerly Forge)
如下图:
 配置postman环境
下面我们演示通过postman上传模型到Forge云端,然后配置Forge的js渲染出来
post环境文件:
BIM.postman collection.json
{"info": {"_postman_id": "aedeb5db-ab5a-4b0e-ba31-d329f6ef66ba","name": "Beijing-Workshop","schema": "https://schema.getpostman.com/json/collection/v2.0.0/collection.json","_exporter_id": "24665034"},"item": [{"name": "1获取access token","event": [{"listen": "test","script": {"exec": ["var data = JSON.parse(responseBody);","postman.setEnvironmentVariable(\"access_token\", data.access_token);","postman.setEnvironmentVariable(\"expires_in\", data.expires_in);","postman.setEnvironmentVariable(\"token_type\", data.token_type);"],"type": "text/javascript"}}],"request": {"method": "POST","header": [{"key": "Content-Type","value": "application/x-www-form-urlencoded"}],"body": {"mode": "urlencoded","urlencoded": [{"key": "client_id","value": "{{client_id}}","type": "text"},{"key": "client_secret","value": "{{client_secret}}","type": "text"},{"key": "grant_type","value": "client_credentials","type": "text"},{"key": "scope","value": "data:read data:write bucket:create bucket:read","type": "text"},{"key": "expires_in","value": "360000","type": "text"}]},"url": "{{base_domain}}/authentication/v1/authenticate"},"response": []},{"name": "2创建的存储桶(bucket)","event": [{"listen": "prerequest","script": {"exec": ["if (request.data) {"," var requestData = JSON.parse(request.data);"," postman.setEnvironmentVariable(\"bucketKey\", requestData.bucketKey);"," postman.setEnvironmentVariable(\"bucketPolicy\", requestData.policyKey);","}"],"type": "text/javascript"}}],"request": {"method": "POST","header": [{"key": "Authorization","value": "Bearer {{access_token}}"},{"key": "Content-Type","value": "application/json"}],"body": {"mode": "raw","raw": "{\n \"bucketKey\":\"ac-persistent-bucket-test8\",\n \"policyKey\":\"persistent\"\n}"},"url": "{{base_domain}}/oss/v2/buckets"},"response": []},{"name": "3 查看bucket是否创建成功","request": {"method": "GET","header": [{"key": "Authorization","value": "Bearer {{access_token}}"}],"url": {"raw": "{{base_domain}}/oss/v2/buckets?limit=10","host": ["{{base_domain}}"],"path": ["oss","v2","buckets"],"query": [{"key": "limit","value": "10"}]}},"response": []},{"name": "4往bucket里放置object模型","event": [{"listen": "test","script": {"exec": ["if (responseCode.code === 200) {"," var data = JSON.parse(responseBody);"," postman.setEnvironmentVariable(\"urn\", data.objectId);"," postman.setEnvironmentVariable(\"urnBase64\", window.btoa(data.objectId));"," postman.setEnvironmentVariable(\"file_location\", data.location);","}",""],"type": "text/javascript"}}],"request": {"method": "PUT","header": [{"key": "Authorization","value": "Bearer {{access_token}}"}],"body": {"mode": "file","file": {"src": "/C:/Users/ac135/Desktop/rvtText/data/textOne.rvt"}},"url": "{{base_domain}}/oss/v2/buckets/{{bucketKey}}/objects/aggregate-1.rvt"},"response": []},{"name": "5检查对象模型是否成功上传","request": {"method": "GET","header": [{"key": "Authorization","value": "Bearer {{access_token}}"}],"url": "{{base_domain}}/oss/v2/buckets/{{bucketKey}}/objects"},"response": []},{"name": "6将模型在云端转换成SVF格式","event": [{"listen": "test","script": {"exec": ["var data = JSON.parse(responseBody);","","var setEnvVar = function (tar, src) {"," if (!src) {"," return;"," }"," postman.setEnvironmentVariable(tar, src);","}","","if (data) {"," if (data.urn) {"," setEnvVar(\"urnBase64\", data.urn);"," }","}"],"type": "text/javascript"}}],"request": {"method": "POST","header": [{"key": "Authorization","value": "Bearer {{access_token}}"},{"key": "Content-Type","value": "application/json"},{"key": "x-ads-force","value": "true"}],"body": {"mode": "raw","raw": "{\n \"input\": {\n \"urn\": \"{{urnBase64}}\" \n },\n \"output\": {\n \"destination\": {\n \"region\": \"us\"\n },\n \"formats\": [\n {\n \"type\": \"svf\",\n \"views\":[\"2d\", \"3d\"]\n }]\n }\n}"},"url": "{{base_domain}}/modelderivative/v2/designdata/job"},"response": []},{"name": "7检查模型是否转化完成","request": {"method": "GET","header": [{"key": "Authorization","value": "Bearer {{access_token}}"},{"key": "Accept","value": "application/vnd.api+json,application/json"}],"url": "{{base_domain}}/modelderivative/v2/designdata/{{urnBase64}}/manifest"},"response": []},{"name": "04-POST job","event": [{"listen": "test","script": {"type": "text/javascript","exec": ["var data = JSON.parse(responseBody);","","","if (data) {"," if (data.urn) {"," postman.setEnvironmentVariable(\"urnBase64\", data.urn);"," }","}"]}}],"request": {"method": "POST","header": [{"key": "Authorization","value": "Bearer {{access_token}}"},{"key": "Content-Type","value": "application/json"},{"key": "x-ads-force","value": "true"}],"body": {"mode": "raw","raw": "{\n \"input\": {\n \"urn\": \"{{urnBase64}}\" \n },\n \"output\": {\n \"destination\": {\n \"region\": \"us\"\n },\n \"formats\": [\n {\n \"type\": \"svf\",\n \"views\":[\"2d\", \"3d\"]\n }]\n }\n}"},"url": "{{base_domain}}/modelderivative/v2/designdata/job"},"response": []},{"name": "06-GET metadata","request": {"method": "GET","header": [{"key": "Authorization","value": "Bearer {{access_token}}"}],"url": "{{base_domain}}/modelderivative/v2/designdata/{{urnBase64}}/metadata"},"response": []},{"name": "07-GET metadata/:guid","request": {"method": "GET","header": [{"key": "Authorization","value": "Bearer {{access_token}}"},{"key": "Accept-Encoding","value": "gzip"}],"url": "{{base_domain}}/modelderivative/v2/designdata/{{urnBase64}}/metadata/{{metadata_guid}}"},"response": []},{"name": "08-GET :urn/metadata/:guid/properties","request": {"method": "GET","header": [{"key": "Authorization","value": "Bearer {{access_token}}"}],"url": "{{base_domain}}/modelderivative/v2/designdata/{{urnBase64}}/metadata/{{metadata_guid}}/properties"},"response": []},{"name": "09-bucket details","event": [{"listen": "test","script": {"type": "text/javascript","exec": ["if (responseCode.code === 200 && responseBody) {"," var data = JSON.parse(responseBody);"," postman.setEnvironmentVariable(\"bucketKey\", data.bucketKey);","}"]}}],"request": {"method": "GET","header": [{"key": "Authorization","value": "Bearer {{access_token}}"}],"url": "{{base_domain}}/oss/v2/buckets/{{bucketKey}}/details"},"response": []},{"name": "12-GET formats","request": {"method": "GET","header": [{"key": "Authorization","value": "Bearer {{access_token}}"}],"url": "{{base_domain}}/modelderivative/v2/designdata/formats"},"response": []}]
}BIM.postman environment,.json
{"id": "63cf71cf-bae6-411f-8e53-7319cf62fd9a","name": "Beijing-Workshop","values": [{"key": "base_domain","value": "https://developer.api.autodesk.com","type": "text","enabled": true},{"key": "client_id","value": "xxxxxxxxx","type": "text","enabled": true},{"key": "client_secret","value": "xxxxxxxxxxx","type": "text","enabled": true},{"key": "urnBase64","value": "dXJuOmFkc2sub2JqZWN0czpvcy5vYmplY3Q6YWMtcGVyc2lzdGVudC1idWNrZXQtdGVzdDMvYWdncmVnYXRlLTEucnZ0","type": "text","enabled": true},{"key": "access_token","value": "eyJhbGciOiJIUzI1NiIsImtpZCI6Imp3dF9zeW1tZXRyaWNfa2V5In0.eyJjbGllbnRfaWQiOiJNbDhXdWJFdW52WVRaRk1za2xpQ200YnZCM0dkREVibyIsImV4cCI6MTUyNjExNDc3OCwic2NvcGUiOlsiZGF0YTpyZWFkIiwiZGF0YTp3cml0ZSIsImJ1Y2tldDpjcmVhdGUiLCJidWNrZXQ6cmVhZCJdLCJhdWQiOiJodHRwczovL2F1dG9kZXNrLmNvbS9hdWQvand0ZXhwNjAiLCJqdGkiOiIxMEV2aEVpcGhQMGszTm9FNkFOa2NnR1pKOVJUaUhDazA3dXhWMDFFc1R1M2twS2tVNnB4a2d5d3A5QXBFakpDIn0.prPXmCc9e1oxZcPFSEgPOlonHG8po16RdzDciborQlg","type": "text","enabled": true},{"key": "guid","value": "57873878-6d98-b389-aa22-fead1053823f","type": "text","enabled": true},{"key": "bucketKey","value": "xiaodong-persistent-bucket-test8","type": "text","enabled": true},{"key": "guid","value": "e22cc916-cabd-4b97-9ccd-1ab1e613f707","type": "text","enabled": true},{"key": "objectKey","value": "RevitNative.rvt","type": "text","enabled": true},{"key": "expires_in","value": "3599","type": "text","enabled": true},{"key": "token_type","value": "Bearer","type": "text","enabled": true},{"key": "bucketPolicy","value": "persistent","type": "text","enabled": true},{"key": "urn","value": "urn:adsk.objects:os.object:xiaodong-persistent-bucket-test8/workshop-2.rvt","type": "text","enabled": true},{"key": "file_location","value": "https://developer.api.autodesk.com/oss/v2/buckets/xiaodong-persistent-bucket-test8/objects/workshop-2.rvt","type": "text","enabled": true}],"_postman_variable_scope": "environment","_postman_exported_at": "2023-07-15T15:06:21.850Z","_postman_exported_using": "Postman/10.16.0"
}
client_secret与client_id记住改成自己的,然后就开始用postman请求上传了
获取access token
https://developer.api.autodesk.com/authentication/v1/authenticate
是用于获取 Autodesk API 的访问令牌(access token)的认证
请求中包含必要的认证信息
- 客户端 ID(client_id)
- 客户端密钥(client_secret)
grant_type:授权类型,通常为 "client_credentials"(客户端凭据模式)scope:请求的权限范围,用空格分隔多个权限(如 "data:read data:write")- expires_in:设置合适的过期时间,单位毫秒
响应结果: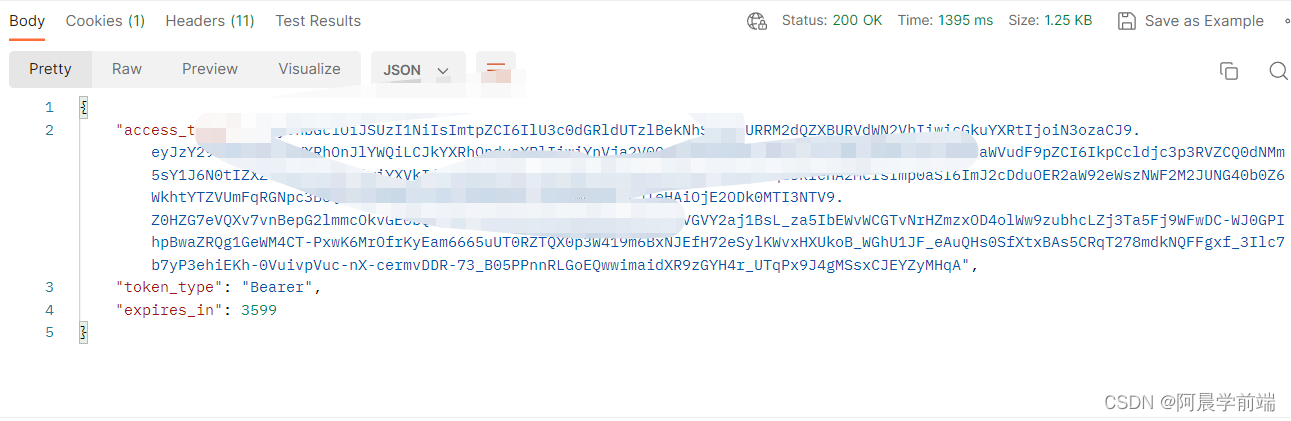
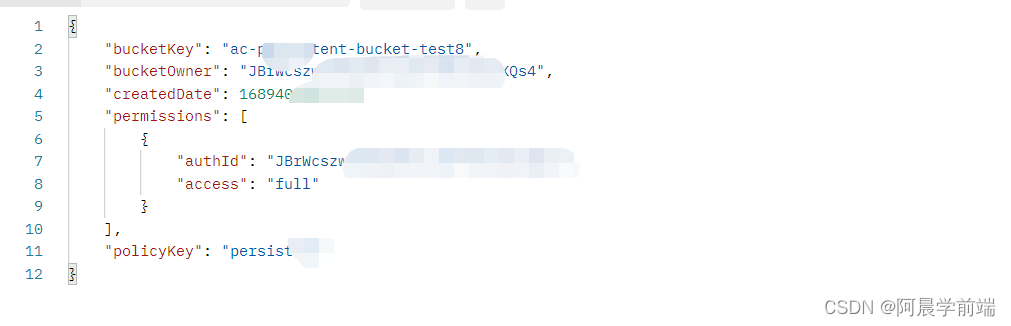
创建 Autodesk Forge 中的存储桶(bucket)
https://developer.api.autodesk.com/oss/v2/buckets
请求中包含必要的认证信息:
- Authorization:Authorization: Bearer {{access_token}}
bucketKey:存储桶的唯一标识符,它必须是全局唯一的。可以使用小写字母、数字、连字符-和下划线_来命名。长度应在3到128个字符之间。policyKey:存储桶的访问策略。默认为transient,表示存储桶中的对象在30天后过期;persistent,表示永久保存
响应结果:
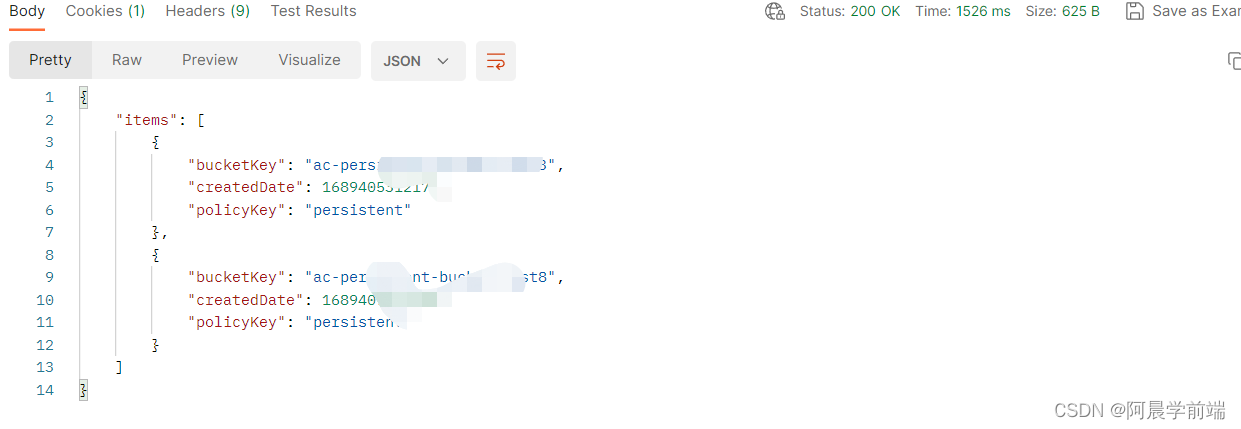
查看bucket是否创建成功
https://developer.api.autodesk.com/oss/v2/buckets
请求中包含必要的认证信息:
- Authorization:Authorization: Bearer {{access_token}}
请求可选的参数信息:
limit:指定要返回的存储桶数量的限制。例如,返回最多 10 个存储桶,默认为 10
响应结果:
往bucket里放置object模型
https://developer.api.autodesk.com/oss/v2/buckets/{bucketKey}/objects/{objectName}
请求中包含必要的认证信息:
- Authorization:Authorization: Bearer {{access_token}}
- 选择需要放置的rvt模型
- objectName:每个文件在存储桶中都有一个唯一的标识符
响应结果:
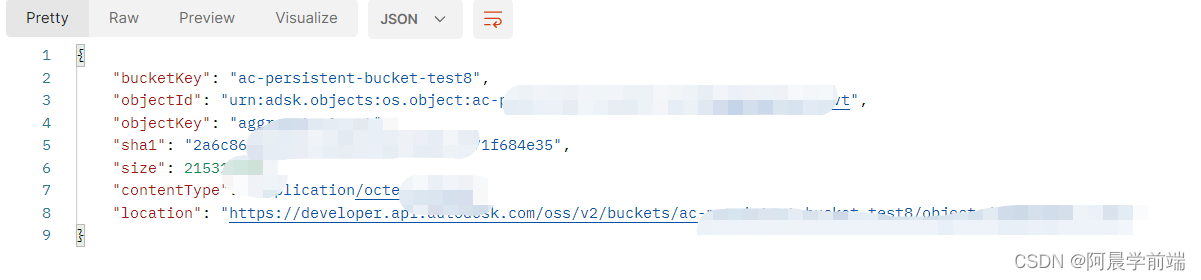
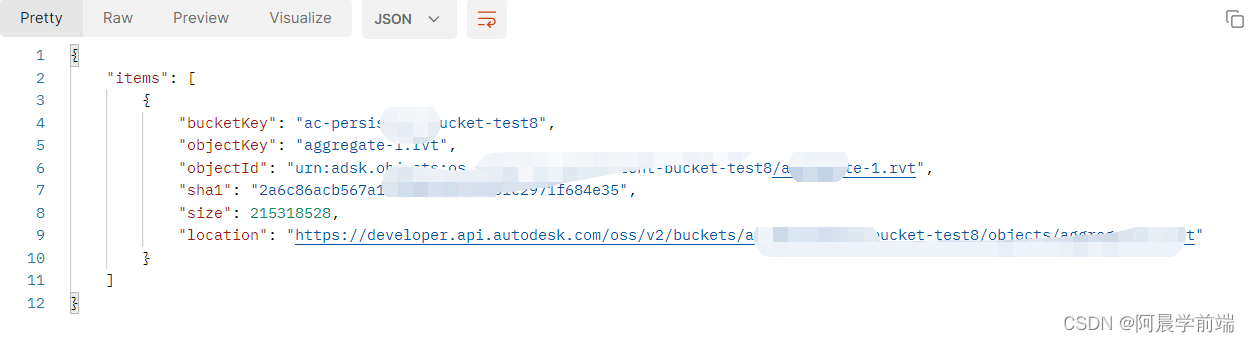
检查对象模型是否成功上传到 Autodesk Forge 存储桶(bucket)中
https://developer.api.autodesk.com/oss/v2/buckets/{{bucketKey}}/objects
请求中包含必要的认证信息:
- Authorization:Authorization: Bearer {{access_token}}
- bucketKey:查询的存储桶的实际标识符
响应结果:
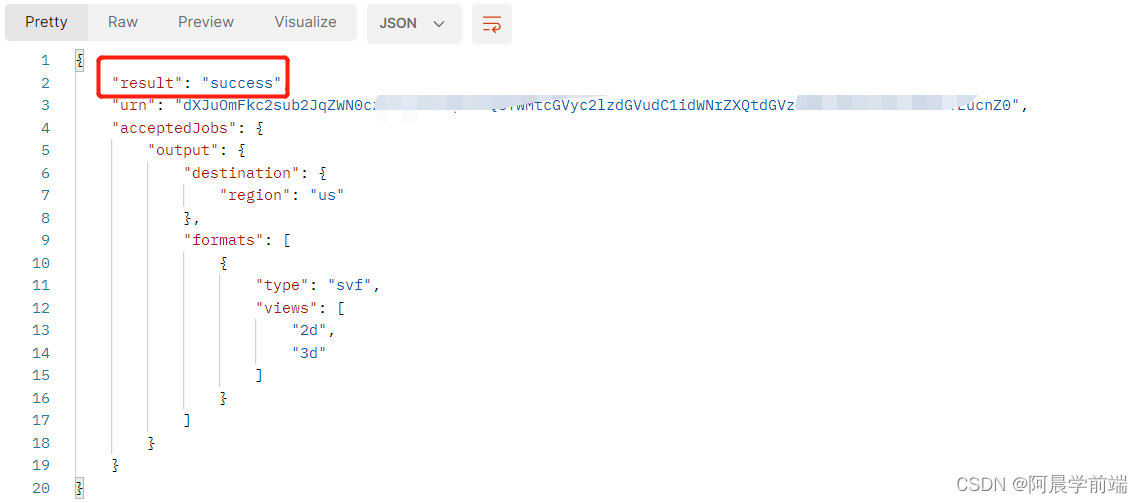
将模型在云端转换成SVF格式
https://developer.api.autodesk.com/modelderivative/v2/designdata/job
请求中包含必要的认证信息:
- Authorization:Authorization: Bearer {{access_token}}
input:指定要转换的对象的 URN(Uniform Resource Name)。将 object_id 的 URN 作为输入。output:指定要生成的输出格式和文件类型。在这里,你可以指定 SVF 格式作为输出。例如,{"formats": [{"type": "svf", "views": ["2d", "3d"]}]}
备注:input中的urn是 objectId转化为Base64格式
响应结果:
检查模型是否转化完成
https://developer.api.autodesk.com/modelderivative/v2/designdata/{base64_urn}/manifest
请求中包含必要的认证信息:
- Authorization:Authorization: Bearer {{access_token}}
- base64_urn:经过 Base64 编码的 URN
响应结果:
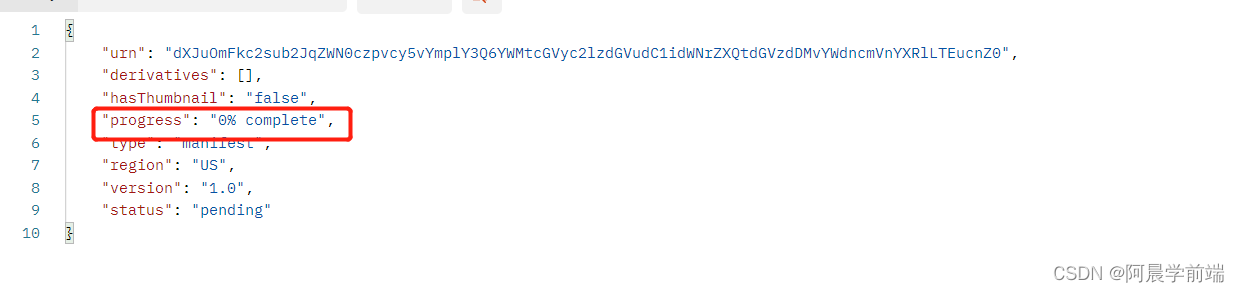
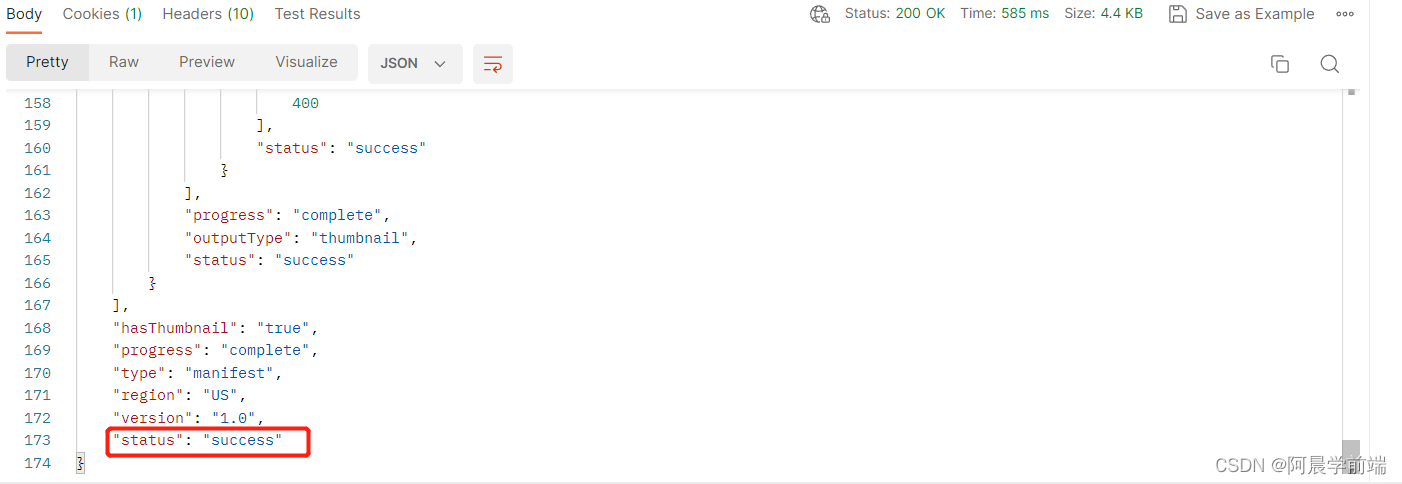 图一表示进度,图二代表成功
浏览器渲染:
html渲染模板 将accessToken与documentId替换掉就行
<!DOCTYPE html>
<html><head><title>Autodesk Forge: 3D Viewer App Sample</title><meta http-equiv="cache-control" content="max-age=0" /><meta http-equiv="cache-control" content="no-cache" /><meta http-equiv="expires" content="0" /><meta http-equiv="expires" content="Tue, 01 Jan 1980 1:00:00 GMT" /><meta http-equiv="pragma" content="no-cache" /><!-- Third Party package --><script src="https://code.jquery.com/jquery-3.3.1.min.js"></script><!-- Autodesk Forge Viewer files (IMPORTANT) --><link rel="stylesheet" href="https://developer.api.autodesk.com/modelderivative/v2/viewers/7.51/style.min.css"type="text/css"><script src="https://developer.api.autodesk.com/modelderivative/v2/viewers/7.51/viewer3D.min.js"></script><style>/** Just simple CSS styling to make this page a little nicer **/body {margin: 0;padding: 0;}</style>
</head><body><!-- The Viewer will be instantiated here --><div id="MyViewerDiv"></div><!-- Custom script --><script>var viewer;var options = {env: 'AutodeskProduction',api: 'derivativeV2', // TODO: for models uploaded to EMEA change this option to 'derivativeV2_EU'// getAccessToken: getForgeTokenaccessToken: 'eyJhbGciOiJSUzI1NiIsImtpZCI6IlU3c0dGRldUTzlBekNhSzBqZURRM2dQZXBURVdWN2VhIiwicGkuYXRtIjoiN3ozaCJ9.eyJzY29wZSI6WyJkYXRhOnJlYWQiLCJkYXRhOndyaXRlIiwiYnVja2V0OmNyZWF0ZSIsImJ1Y2tldDpyZWFkIl0sImNsaWVudF9pZCI6IkpCcldjc3p3RVZCQ0dNMm5sY1J6N0tIZXZTbXpYUXM0IiwiYXVkIjoiaHR0cHM6Ly9hdXRvZGVzay5jb20vYXVkL2Fqd3RleHA2MCIsImp0aSI6ImJjWXBRalcwekh5aTZyUEd3QU1kNjdjamlWS1Q2dDZIYXNqcjFmOXR4OUExeGhZY05JWkhINVlibkdDeHVaTWoiLCJleHAiOjE2ODk5MTI0ODB9.JdpIFQAmWmsGc-t2g3tpU677G1Y11RwF4ndTxbwSa4hE5tOjYtLsMK7pR-jGGWIHAEHUkScvDixQWFIUG_o5UWpwhAdH7r06126QhGFNk_Wf1d8OvoDknqdKt9aXns_1xvxucOdPs3VkJ8BWH6j65B3fxZ7GB5jub3zeF7sGuYd1zBL9FdAcQ5_uQUBpEXh8uP4yZ_Y3yDe_mnTx2OxTMyRXsHw7quWjtxXDQXweGq0xDn3ENayOTkYnsru3_GJmGXUE4b-Zl1csHENJyyegkDqrfbaLbMeKagCWxY-RnCikmg80iWDqOd6KvIejRbQdqpjdQWz4i3Qx6Wnj6Lzf4w'};// var documentId = 'urn:' + getUrlParameter('urn');var documentId = 'urn:dXJuOmFkc2sub2JqZWN0czpvcy5vYmplY3Q6YWMtcGVyc2lzdGVudC1idWNrZXQtdGVzdDMvYWdncmVnYXRlLTEucnZ0'// 初始化和加载文档的部分Autodesk.Viewing.Initializer(options, function onInitialized() {// Find the element where the 3d viewer will live. var htmlElement = document.getElementById('MyViewerDiv');if (htmlElement) {// Create and start the viewer in that element viewer = new Autodesk.Viewing.GuiViewer3D(htmlElement);viewer.start();// Load the document into the viewer.Autodesk.Viewing.Document.load(documentId, onDocumentLoadSuccess, onDocumentLoadFailure);$('.adsk-viewing-viewer').css('height', '80%')$('.adsk-viewing-viewer').css('width', '42%')}});/*** 加载模型的回调函数*/function onDocumentLoadSuccess(doc) {// Load the default viewable geometry into the viewer.// Using the doc, we have access to the root BubbleNode,// which references the root node of a graph that wraps each object from the Manifest JSON.var viewable = doc.getRoot().getDefaultGeometry();if (viewable) {viewer.loadDocumentNode(doc, viewable).then(function (result) {console.log('Viewable Loaded!');}).catch(function (err) {console.log('Viewable failed to load.');console.log(err);})}}/*** 文档加载失败时的回调函数*/function onDocumentLoadFailure(viewerErrorCode) {console.error('onDocumentLoadFailure() - errorCode: ' + viewerErrorCode);jQuery('#MyViewerDiv').html('<p>Translation in progress... Please try refreshing the page.</p>');}</script>
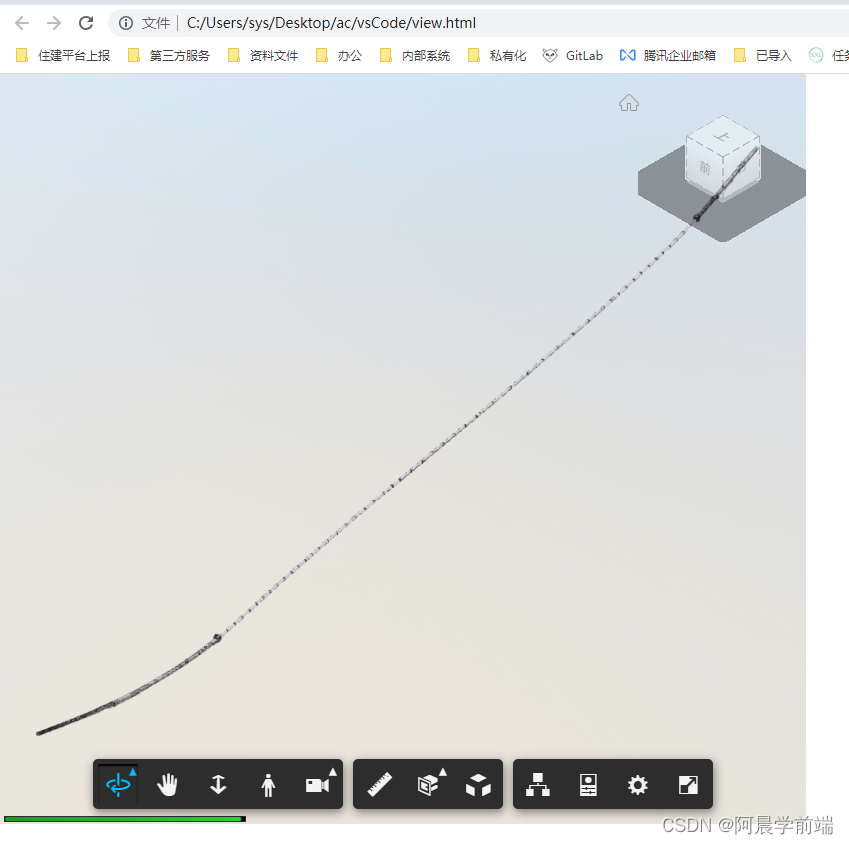
</body></html>效果图如下:
 其他资源分享:
视频教程:通过Forge十分钟实现Web端3D模型浏览_哔哩哔哩_bilibili
有其他问题可以留言 或者私信
这篇关于【autodesk】浏览器中渲染rvt模型的文章就介绍到这儿,希望我们推荐的文章对编程师们有所帮助!


