本文主要是介绍声音生成结果比较方法综述——FAD、JSD、NDB多种衡量参数,希望对大家解决编程问题提供一定的参考价值,需要的开发者们随着小编来一起学习吧!
文章目录
- 引言
- 正文
- Generation quality 生成质量
- FAD距离
- FAD论文总结
- FAD代码下载和安装
- FAD的使用
- 通过分类准确率衡量
- 实现代码
- Generation Deversity生成多样性
- NDB
- JSD
- NDB和JSD的实现代码
- 代码修改和结果理解
- NDB和JSD应用到声音生成
- 总结
引言
- 之前自己并没有对这方面的内容进行研究过,每一次遇到一片论文,想到的都是将模型跑起来就行了,并没有关注过实验部分,以及对生成结果的测试部分。最近着手修改模型,才发现,我并不知道如何更好地衡量自己修改的模型生成声音的好坏,所以现在回来补以前欠下的技术债。
- 这篇文章,主要是总结所见的论文中,常见的评测生成声音好坏的方法,并给出相关的实现方法。这篇文章主要是关注客观指标。
正文
- 本文主要关注客观衡量指标,因为主观衡量指标并不容易复现,消耗的成本多,而且差异性太大。对于客观指标,本文主要从生成质量、生成多样性两个方面进行陈述。每一个方面的指标的都可以量化为具体的数值,衡量模型具体的性能。
- 每个模块的指标,我都会先介绍构想,然后在介绍具体的实现原理,然后给出相关的实现代码。相关代码已经放在我的github上。
Generation quality 生成质量
生成质量解释
-
含义:
- 生成声音与真实声音之间的相似性或者接近性。
-
详解:
- 对于真实性的理解需要从以下几个角度出发。
- 音质:生成声音是否包含噪声,或者失真
- 逼真度:生成的声音是否和实际声音的生源类似,是否和实际声音很类似
- 准确性:不同于语音合成,这里的准确性指的是,是否是特定类别的声音。并不是准确表达某种语言文本的内容。
- 对于真实性的理解需要从以下几个角度出发。
-
总结:如果模型生成的声音质量越好,那么音质会越好,没有那么多噪声,并且和原来的声音十分相近,都十分逼真。除此之外,还能准确表示特定的类别。
-
应用:模型的生成质量越高,生成的声音可以直接用来数据增强,或者电影配音。
衡量方法
-
人工评估: 通过人工检查生成样本来评估多样性。
-
信噪比SNR: 通过计算生成声音的信噪比来衡量声音的好坏。
-
语谱距离Spectral Distance:衡量生成声音和目标声音在频谱上的差异。
-
任务特定指标: 在某些情况下,你可能需要开发针对你的特定任务的多样性指标。
-
这里,本文主要后三种指标,分别是信噪比、语谱距离还有任务特定指标。
- 语谱距离:这里将计算对应的FAD距离
- 任务特定指标:将通过语音分类模型,对生成声音进行分类,通过分类的准确率还衡量生成质量的好坏。
FAD距离
- 这里使用了FAD距离,相关链接如下
- 对应论文链接
- 对应代码链接
FAD论文总结
-
省流:这个更贴近人的感官,而且不需要参考,更好更准确。
-
FAD全称是Frechet Audio Distance,是一种新型、无参考评估指标,专门用来评价声音生成算法的指标。传统的评估指标,无法准确衡量各种扭曲效应的感知影响。具体而言,就是衡量给定音频片段和干净、录音室录制的音乐相比如何,效果是否相近。FAD更加关注声音对于人的感知质量。FAD是从评价图像生成模型的Frechet Inception Distance模型转变而来的。
-
FAD并不是评估单个音频剪辑,用于通过比较由其输出生成的embeding的统计数据与在大量干净音乐上生成的embedding的统计数据来衡量音乐增强算法的质量。与其他指标不同,FAD 可以仅使用算法的增强音乐输出来计算,无需访问原始干净音乐或噪声信号。
-
FAD是使用VGGish处理声音,生成对应的embedding,然后在对应embedding上计算对应的高斯分布,最后计算两个高斯分布的距离。
-
通过测试大量、多样的人工失真,我们证明了 FAD 在衡量给定失真强度方面是有用的。我们将其与传统的基于信号的评估指标(如 SDR)进行了比较,发现 FAD 对于那些总是导致低 SDR 分数的失真特别有用,而不论失真强度如何。我们使用人类评估员进行的评估表明,FAD 与人类评分的相关性优于 SDR。
-
这些结果突显了 FAD 作为衡量增强音乐质量的指标的有用性,我们希望其他人也能采用它来报告他们的结果。FAD 的源代码在 GitHub 上可用。我们鼓励从事音频生成任务的人尝试使用它。
FAD代码下载和安装
- 对应下载链接
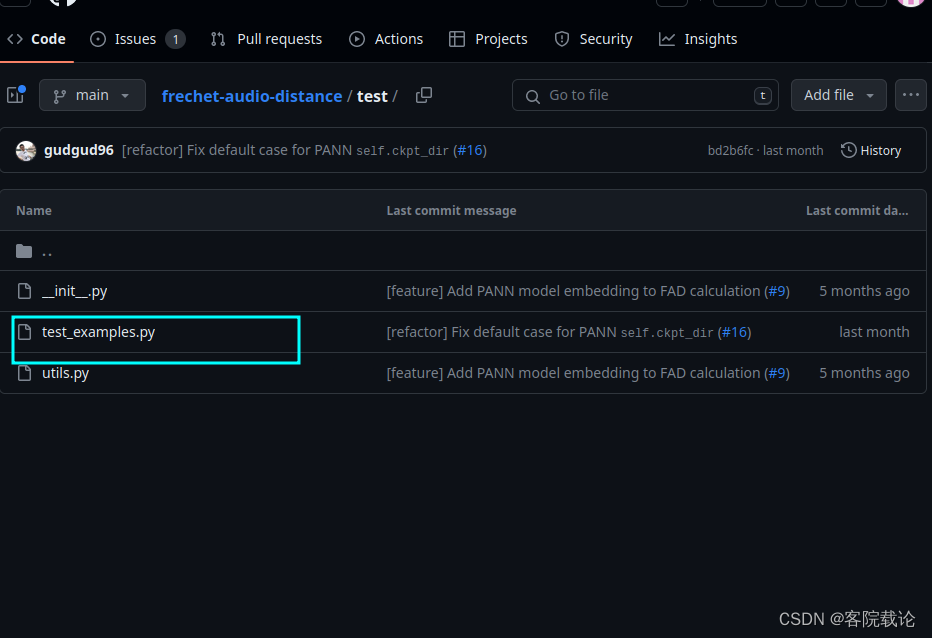
- 直接运行他的test目录下方的test_example.py文件,具体目录如下
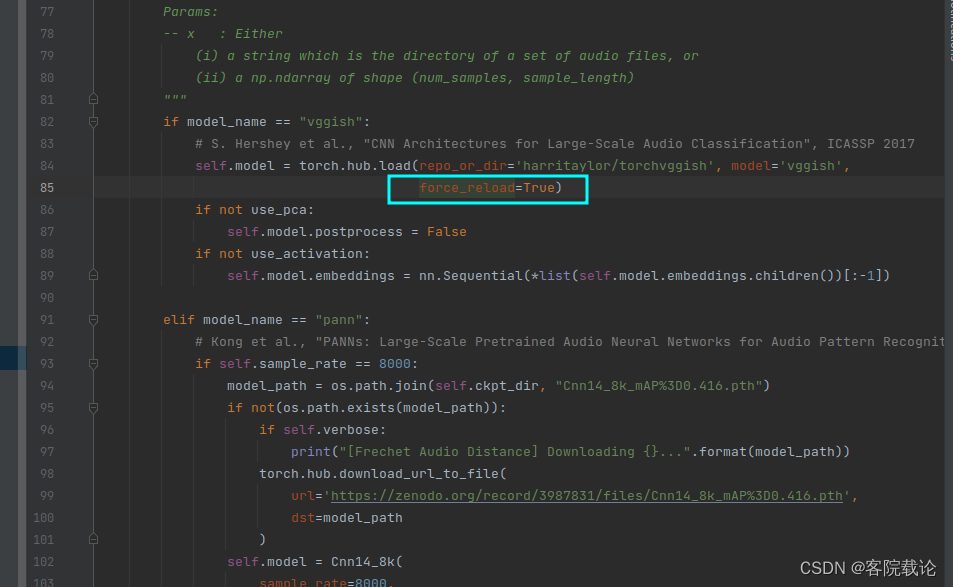
VGGish的异常
- 使用VGGish进行测试,遇到如下问题
Traceback (most recent call last):File "/home/yunlong/PycharmProjects/VAEGenerate/src/SoundAnalysis/CalFAD.py", line 107, in <module>test_vggish_sine_wave()File "/home/yunlong/PycharmProjects/VAEGenerate/src/SoundAnalysis/CalFAD.py", line 55, in test_vggish_sine_wavefrechet = FrechetAudioDistance(File "/home/yunlong/miniconda3/envs/soundgeneration/lib/python3.10/site-packages/frechet_audio_distance/fad.py", line 72, in __init__self.__get_model(model_name=model_name, use_pca=use_pca, use_activation=use_activation)File "/home/yunlong/miniconda3/envs/soundgeneration/lib/python3.10/site-packages/frechet_audio_distance/fad.py", line 84, in __get_modelself.model = torch.hub.load(repo_or_dir='harritaylor/torchvggish', model='vggish')File "/home/yunlong/miniconda3/envs/soundgeneration/lib/python3.10/site-packages/torch/hub.py", line 539, in loadrepo_or_dir = _get_cache_or_reload(repo_or_dir, force_reload, trust_repo, "load",File "/home/yunlong/miniconda3/envs/soundgeneration/lib/python3.10/site-packages/torch/hub.py", line 180, in _get_cache_or_reloadrepo_owner, repo_name, ref = _parse_repo_info(github)File "/home/yunlong/miniconda3/envs/soundgeneration/lib/python3.10/site-packages/torch/hub.py", line 134, in _parse_repo_infowith urlopen(f"https://github.com/{repo_owner}/{repo_name}/tree/main/"):File "/home/yunlong/miniconda3/envs/soundgeneration/lib/python3.10/urllib/request.py", line 216, in urlopenreturn opener.open(url, data, timeout)File "/home/yunlong/miniconda3/envs/soundgeneration/lib/python3.10/urllib/request.py", line 519, in openresponse = self._open(req, data)File "/home/yunlong/miniconda3/envs/soundgeneration/lib/python3.10/urllib/request.py", line 536, in _openresult = self._call_chain(self.handle_open, protocol, protocol +File "/home/yunlong/miniconda3/envs/soundgeneration/lib/python3.10/urllib/request.py", line 496, in _call_chainresult = func(*args)File "/home/yunlong/miniconda3/envs/soundgeneration/lib/python3.10/urllib/request.py", line 1391, in https_openreturn self.do_open(http.client.HTTPSConnection, req,File "/home/yunlong/miniconda3/envs/soundgeneration/lib/python3.10/urllib/request.py", line 1352, in do_openr = h.getresponse()File "/home/yunlong/miniconda3/envs/soundgeneration/lib/python3.10/http/client.py", line 1375, in getresponseresponse.begin()File "/home/yunlong/miniconda3/envs/soundgeneration/lib/python3.10/http/client.py", line 318, in beginversion, status, reason = self._read_status()File "/home/yunlong/miniconda3/envs/soundgeneration/lib/python3.10/http/client.py", line 287, in _read_statusraise RemoteDisconnected("Remote end closed connection without"
http.client.RemoteDisconnected: Remote end closed connection without response
- 在fad.py文件中__get_model函数中,第84行,增加如下指令
- 如果不行,多运行几次就行了,或者看看有没有打开代理
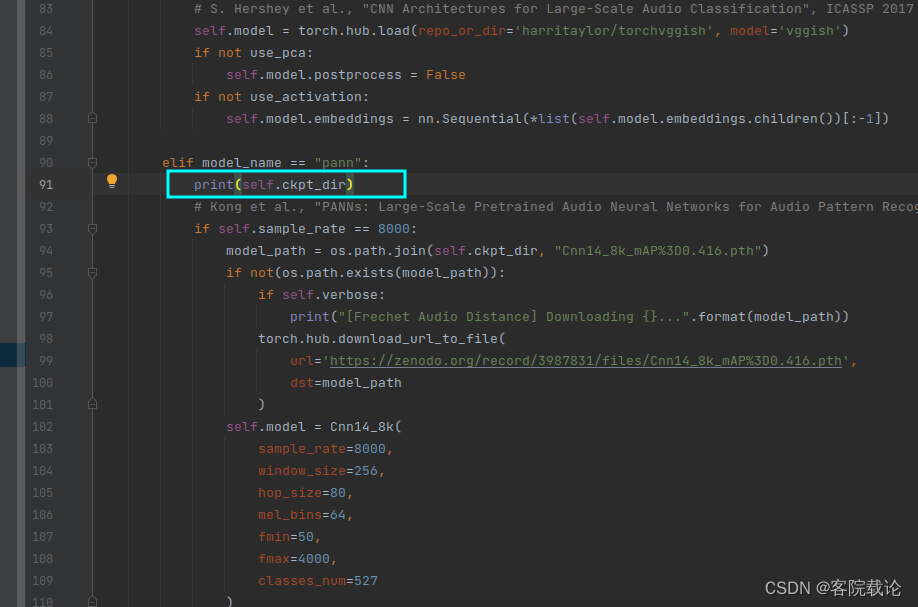
pann的异常
- 在运行pann的测试代码过程中,遇到了如下异常,现实网络异常。
Traceback (most recent call last):File "/home/yunlong/miniconda3/envs/soundgeneration/lib/python3.10/urllib/request.py", line 1348, in do_openh.request(req.get_method(), req.selector, req.data, headers,File "/home/yunlong/miniconda3/envs/soundgeneration/lib/python3.10/http/client.py", line 1283, in requestself._send_request(method, url, body, headers, encode_chunked)File "/home/yunlong/miniconda3/envs/soundgeneration/lib/python3.10/http/client.py", line 1329, in _send_requestself.endheaders(body, encode_chunked=encode_chunked)File "/home/yunlong/miniconda3/envs/soundgeneration/lib/python3.10/http/client.py", line 1278, in endheadersself._send_output(message_body, encode_chunked=encode_chunked)File "/home/yunlong/miniconda3/envs/soundgeneration/lib/python3.10/http/client.py", line 1038, in _send_outputself.send(msg)File "/home/yunlong/miniconda3/envs/soundgeneration/lib/python3.10/http/client.py", line 976, in sendself.connect()File "/home/yunlong/miniconda3/envs/soundgeneration/lib/python3.10/http/client.py", line 1448, in connectsuper().connect()File "/home/yunlong/miniconda3/envs/soundgeneration/lib/python3.10/http/client.py", line 942, in connectself.sock = self._create_connection(File "/home/yunlong/miniconda3/envs/soundgeneration/lib/python3.10/socket.py", line 845, in create_connectionraise errFile "/home/yunlong/miniconda3/envs/soundgeneration/lib/python3.10/socket.py", line 833, in create_connectionsock.connect(sa)
ConnectionRefusedError: [Errno 111] Connection refusedDuring handling of the above exception, another exception occurred:Traceback (most recent call last):File "/home/yunlong/PycharmProjects/VAEGenerate/src/SoundAnalysis/CalFAD.py", line 111, in <module>test_pann_sine_wave()File "/home/yunlong/PycharmProjects/VAEGenerate/src/SoundAnalysis/CalFAD.py", line 88, in test_pann_sine_wavefrechet = FrechetAudioDistance(File "/home/yunlong/miniconda3/envs/soundgeneration/lib/python3.10/site-packages/frechet_audio_distance/fad.py", line 72, in __init__self.__get_model(model_name=model_name, use_pca=use_pca, use_activation=use_activation)File "/home/yunlong/miniconda3/envs/soundgeneration/lib/python3.10/site-packages/frechet_audio_distance/fad.py", line 115, in __get_modeltorch.hub.download_url_to_file(File "/home/yunlong/miniconda3/envs/soundgeneration/lib/python3.10/site-packages/torch/hub.py", line 597, in download_url_to_fileu = urlopen(req)File "/home/yunlong/miniconda3/envs/soundgeneration/lib/python3.10/urllib/request.py", line 216, in urlopenreturn opener.open(url, data, timeout)File "/home/yunlong/miniconda3/envs/soundgeneration/lib/python3.10/urllib/request.py", line 519, in openresponse = self._open(req, data)File "/home/yunlong/miniconda3/envs/soundgeneration/lib/python3.10/urllib/request.py", line 536, in _openresult = self._call_chain(self.handle_open, protocol, protocol +File "/home/yunlong/miniconda3/envs/soundgeneration/lib/python3.10/urllib/request.py", line 496, in _call_chainresult = func(*args)File "/home/yunlong/miniconda3/envs/soundgeneration/lib/python3.10/urllib/request.py", line 1391, in https_openreturn self.do_open(http.client.HTTPSConnection, req,File "/home/yunlong/miniconda3/envs/soundgeneration/lib/python3.10/urllib/request.py", line 1351, in do_openraise URLError(err)
urllib.error.URLError: <urlopen error [Errno 111] Connection refused>Process finished with exit code 1
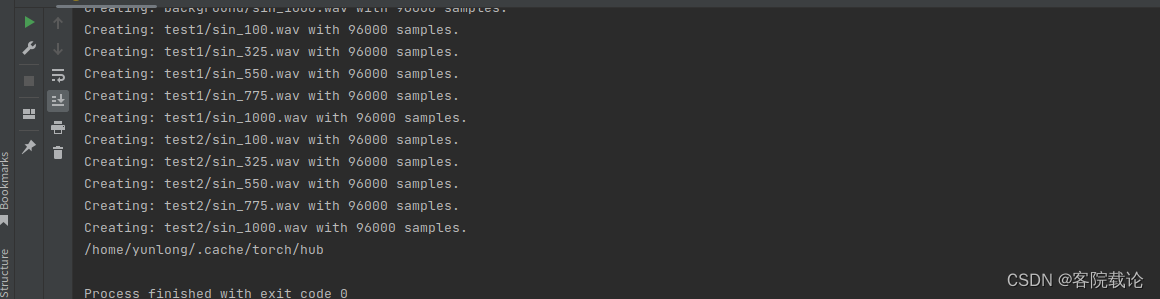
- 解决办法
- 直接复制fad.py文件中的第99行的网址,然后自动下载,将之复制到对应的目录下方
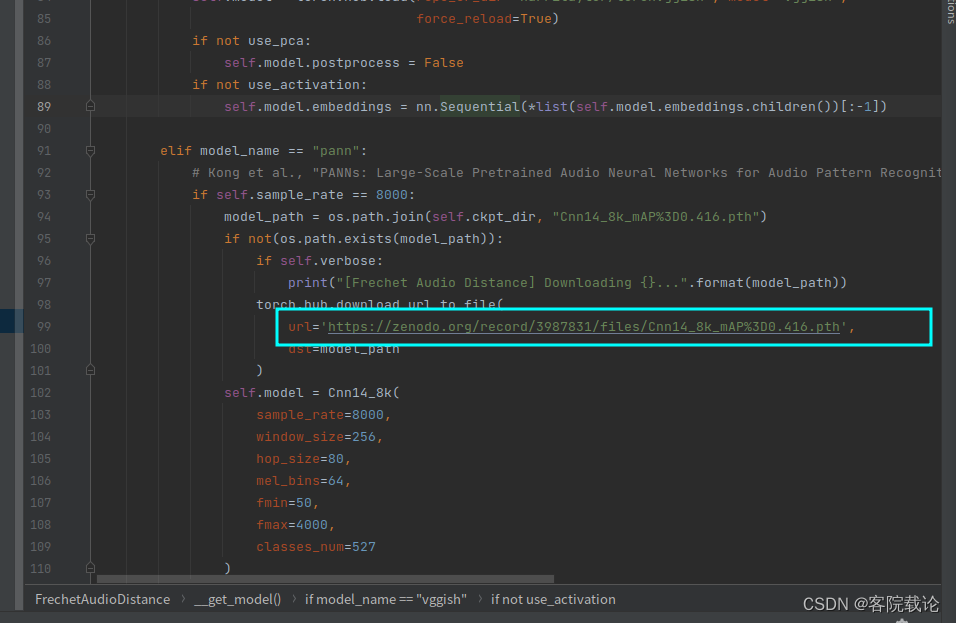
- 在这个函数前方加一个路径输出
- 我这里是‘/home/yunlong/.cache/torch/hub’,这里因情况而定
- 下载之后,将之复制到上述路径下方,改个名就可以正常运行。这里改的名字,需要和代码里的名字一样。
FAD的使用
- 声明FrechetAudioDistance对象,并指定传入的作为参考的背景声,和作为测试的生成音两个路径,具体如下
from frechet_audio_distance import FrechetAudioDistance# 使用VGGish模型,声明对应的FrechetAudioDistance对象
frechet = FrechetAudioDistance(model_name="vggish",use_pca=False, use_activation=False,verbose=False
)# 调用score方法,传入做为参考的背景音和测试的目标音
fad_score = frechet.score("/path/to/background/set", "/path/to/eval/set", dtype="float32")- 注意,这里直接传入声音是需要使用模型计算对应embedding,这里可以将计算出来的embedding进行保存,然后可以节省运算时间
# 指定需要保存embedding的路径,
background_embds_path = "/path/to/saved/background/embeddings.npy"
eval_embds_path = "/path/to/saved/eval/embeddings.npy"# 这里会计算对应的score,如果embedding不存在,会创建对应的目录,并将生成的embedding保存在特定路径下方。
fad_score = frechet.score("/path/to/background/set","/path/to/eval/set",background_embds_path=background_embds_path,eval_embds_path=eval_embds_path,dtype="float32"
)
通过分类准确率衡量
-
单纯从声音的目的出发,如果生成的声音能够被正确识别分类,那么至少在使用上,声音的质量是可靠的。通过阅读论文发现,在以下两篇文章中,都是使用声音分类的准确率来衡量声音的质量。
- Acoustic Scene Generation with Conditional Samplernn
- Conditional Sound Generation Using Neural Discrete Time-Frequency Representation Learning,对应学习链接
-
在上面的两篇文章中,都是使用VGG11作为分类模型,对声音进行分类,通过分类准确率来衡量,生成声音的质量。分类的准确率越高,生成声音的质量越高。分类的准确率越低,生成声音的质量越低。
-
虽然单纯通过分类的准确率并不能直观地表示生成声音的感知质量,但是能够在机器识别的局部,衡量生成声音的质量。
-
经过搜索,发现VGG11是专门针对图片进行分类的,是2014年提出来的,需要将声音转变为频谱图,然后在对频谱图进行分类,后续在2018年出了VGGish,是直接对音频进行分类的,模型里面包括了转成mel频谱图的一部分,所以不需要我自己在进行转变。这里顺着找了一下,发现,两种网络,一种是resnetish,还有一种是VGGish,啃了一下对比结果分,发现resnetish的效果会更好,所以下面的代码主要是围绕着resnetish进行展开。
实现代码
- 网上找到一个比较好用的代码,但是还是需要自己重头看一下,部署一下,所以具体信息可以看专门讲述声音分类的博客。跳转链接。
Generation Deversity生成多样性
多样性解释
-
含义:
- 生成多样性指的是模型能否生成多种不同但是仍然有效的输出。
-
详解:
- 一般的模型,如果陷入模式崩溃,那么它只能生成和输入的数据相似或者完全相同的输出,这样的输出并没有任何意义,说明模型并没有并没有捕捉到数据中的类别特征。有效的生成结果应该是,生成同类别,但是不同的声音。比如说,狗叫,也有哀嚎、嘶吼和低鸣示威等好几种形态。 一个好的模型,接受到狗叫的哀嚎声,应该能生成具有其他特色的叫声,他们同属一个类别,但是不尽相同,各有特色。
-
总结:如果模型生成的声音多样性越好,同一类别的声音,能够生成各具特色不尽相同的声音。能够被正确分类的同时,又和原来的声音不尽相同。
-
应用:模型的生成多样性越好,实用性越高,可以用来做数据增强,艺术创作还有推荐系统等。
衡量方法
-
定性分析: 通过人工检查生成样本来评估多样性。
-
多样性指标: 使用数学指标来量化多样性,例如计算生成样本之间的余弦相似度或使用聚类算法来评估生成的多样性。
-
与训练数据的相似性: 检查生成的样本是否能涵盖训练数据中的多个模式,而不是仅仅复制训练样本。
-
任务特定指标: 在某些情况下,你可能需要开发针对你的特定任务的多样性指标。
-
这里,本文主要介绍针对训练数据的相似性的两种指标,反而别是NDB(Number of Statistically-Different Bins)和JSD(Jensen-Shannon Divergence),他们都是用来衡量生成数据和训练数据分布相似性的指标。
NDB
基本介绍
- 主要是先对训练数据进行聚类,将之分成若干个聚类,然后在比较生成的每一个数据样本和这些聚类的分布差异。
计算步骤
-
一、聚类训练数据
- 对训练数据进行K-means聚类,K是bin的数量,然后计算每一个bin的数量所占训练总样本数的比例
-
二、分配生成数据到bins
- 找到每一个生成样本距离最近的bins,然后将之归为当前的bins.同时,计算每一个bin占据总的生成样本的比例。
-
三、统计检验
- 比较每一个bin,生成数据和训练数据的样本比例。同时和阈值进行比较,如果阈值小于这个水平,至少说明在当前bin上,生成数据和训练数据在统计上是不同的。
-
四、计算所有NDB
- 计算所有不符合阈值的bin数量,这个就是NDB
总结
- NDB越小,就说明分布越近似,模型的性能越好。是一种更细粒度的分布比较方法,能够之处特定区域存在的显著差异。
- 适用于深度了解生成模型在哪些方面做的好或者不好。
JSD
基本介绍
- 是詹森-香农散度,用于衡量两个概率分布相似性的指标,是KL散度的变体,是一种对称平滑版本。
计算步骤
-
一、计算中间分布
- 计算需要衡量的两个分布的平均分布
-
二、计算两件事的KL散度
- 分别计算两个分布的KL散度
-
三、计算JSD
- 平均两个KL散度,获得JSD,最终结果是在0和1之间,0表示分布完全相同,1表示两个分布完全不同。
-
总结
-
JSD是对称的,和KL散度不同,衡量整体的数据分布,两个概率分布的相似性或者距离,是一种快速全局的比较方式。
NDB和JSD的实现代码
- 下述代码中的evaluate中包含了对于NDB和JSD的计算
- 简而言之,JSD 更适合于全局性的、快速的分布比较,而 NDB 更适用于需要更多细节和统计严谨性的场合。在实际应用中,可能会同时使用这两种度量来从不同角度评估生成模型的性能。
- 下述代码包括了最终的测试代码,可以直接运行。
import os
import numpy as np
from sklearn.cluster import KMeans
from scipy.stats import norm
from matplotlib import pyplot as plt
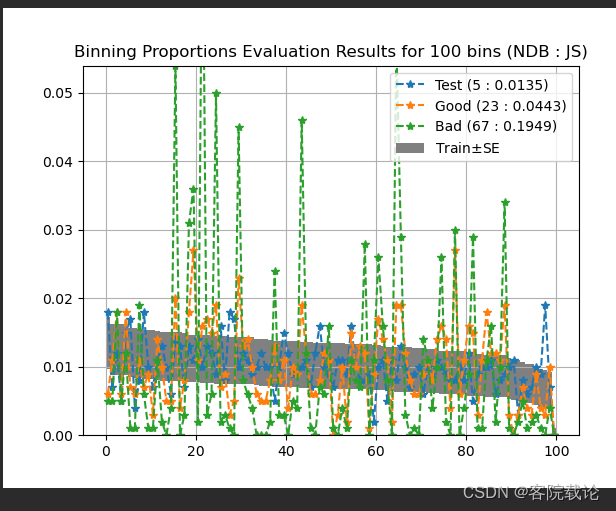
import pickle as pklclass NDB:def __init__(self, training_data=None, number_of_bins=100, significance_level=0.05, z_threshold=None,whitening=False, max_dims=None, cache_folder=None):"""NDB Evaluation Class:param training_data: Optional - the training samples - array of m x d floats (m samples of dimension d):param number_of_bins: Number of bins (clusters) default=100:param significance_level: The statistical significance level for the two-sample test:param z_threshold: Allow defining a threshold in terms of difference/SE for defining a bin as statistically different:param whitening: Perform data whitening - subtract mean and divide by per-dimension std:param max_dims: Max dimensions to use in K-means. By default derived automatically from d:param bins_file: Optional - file to write / read-from the clusters (to avoid re-calculation)"""self.number_of_bins = number_of_binsself.significance_level = significance_levelself.z_threshold = z_thresholdself.whitening = whiteningself.ndb_eps = 1e-6self.training_mean = 0.0self.training_std = 1.0self.max_dims = max_dimsself.cache_folder = cache_folderself.bin_centers = Noneself.bin_proportions = Noneself.ref_sample_size = Noneself.used_d_indices = Noneself.results_file = Noneself.test_name = 'ndb_{}_bins_{}'.format(self.number_of_bins, 'whiten' if self.whitening else 'orig')self.cached_results = {}if self.cache_folder:self.results_file = os.path.join(cache_folder, self.test_name+'_results.pkl')if os.path.isfile(self.results_file):# print('Loading previous results from', self.results_file, ':')self.cached_results = pkl.load(open(self.results_file, 'rb'))# print(self.cached_results.keys())if training_data is not None or cache_folder is not None:bins_file = Noneif cache_folder:os.makedirs(cache_folder, exist_ok=True)bins_file = os.path.join(cache_folder, self.test_name+'.pkl')self.construct_bins(training_data, bins_file)def construct_bins(self, training_samples, bins_file):"""Performs K-means clustering of the training samples:param training_samples: An array of m x d floats (m samples of dimension d)"""if self.__read_from_bins_file(bins_file):returnn, d = training_samples.shapek = self.number_of_binsif self.whitening:self.training_mean = np.mean(training_samples, axis=0)self.training_std = np.std(training_samples, axis=0) + self.ndb_epsif self.max_dims is None and d > 1000:# To ran faster, perform binning on sampled data dimension (i.e. don't use all channels of all pixels)self.max_dims = d//6whitened_samples = (training_samples-self.training_mean)/self.training_stdd_used = d if self.max_dims is None else min(d, self.max_dims)self.used_d_indices = np.random.choice(d, d_used, replace=False)print('Performing K-Means clustering of {} samples in dimension {} / {} to {} clusters ...'.format(n, d_used, d, k))print('Can take a couple of minutes...')if n//k > 1000:print('Training data size should be ~500 times the number of bins (for reasonable speed and accuracy)')clusters = KMeans(n_clusters=k, max_iter=100, n_jobs=-1).fit(whitened_samples[:, self.used_d_indices])bin_centers = np.zeros([k, d])for i in range(k):bin_centers[i, :] = np.mean(whitened_samples[clusters.labels_ == i, :], axis=0)# Organize bins by sizelabel_vals, label_counts = np.unique(clusters.labels_, return_counts=True)bin_order = np.argsort(-label_counts)self.bin_proportions = label_counts[bin_order] / np.sum(label_counts)self.bin_centers = bin_centers[bin_order, :]self.ref_sample_size = nself.__write_to_bins_file(bins_file)print('Done.')def evaluate(self, query_samples, model_label=None):"""Assign each sample to the nearest bin center (in L2). Pre-whiten if required. and calculate the NDB(Number of statistically Different Bins) and JS divergence scores.:param query_samples: An array of m x d floats (m samples of dimension d):param model_label: optional label string for the evaluated model, allows plotting results of multiple models:return: results dictionary containing NDB and JS scores and array of labels (assigned bin for each query sample)"""n = query_samples.shape[0]query_bin_proportions, query_bin_assignments = self.__calculate_bin_proportions(query_samples)# print(query_bin_proportions)different_bins = NDB.two_proportions_z_test(self.bin_proportions, self.ref_sample_size, query_bin_proportions,n, significance_level=self.significance_level,z_threshold=self.z_threshold)ndb = np.count_nonzero(different_bins)js = NDB.jensen_shannon_divergence(self.bin_proportions, query_bin_proportions)results = {'NDB': ndb,'JS': js,'Proportions': query_bin_proportions,'N': n,'Bin-Assignment': query_bin_assignments,'Different-Bins': different_bins}if model_label:print('Results for {} samples from {}: '.format(n, model_label), end='')self.cached_results[model_label] = resultsif self.results_file:# print('Storing result to', self.results_file)pkl.dump(self.cached_results, open(self.results_file, 'wb'))print('NDB =', ndb, 'NDB/K =', ndb/self.number_of_bins, ', JS =', js)return resultsdef print_results(self):print('NSB results (K={}{}):'.format(self.number_of_bins, ', data whitening' if self.whitening else ''))for model in sorted(list(self.cached_results.keys())):res = self.cached_results[model]print('%s: NDB = %d, NDB/K = %.3f, JS = %.4f' % (model, res['NDB'], res['NDB']/self.number_of_bins, res['JS']))def plot_results(self, models_to_plot=None):"""Plot the binning proportions of different methods:param models_to_plot: optional list of model labels to plot"""K = self.number_of_binsw = 1.0 / (len(self.cached_results)+1)assert K == self.bin_proportions.sizeassert self.cached_results# Used for plotting onlydef calc_se(p1, n1, p2, n2):p = (p1 * n1 + p2 * n2) / (n1 + n2)return np.sqrt(p * (1 - p) * (1/n1 + 1/n2))if not models_to_plot:models_to_plot = sorted(list(self.cached_results.keys()))# Visualize the standard errors using the train proportions and size and query sample sizetrain_se = calc_se(self.bin_proportions, self.ref_sample_size,self.bin_proportions, self.cached_results[models_to_plot[0]]['N'])plt.bar(np.arange(0, K)+0.5, height=train_se*2.0, bottom=self.bin_proportions-train_se,width=1.0, label='Train$\pm$SE', color='gray')ymax = 0.0for i, model in enumerate(models_to_plot):results = self.cached_results[model]label = '%s (%i : %.4f)' % (model, results['NDB'], results['JS'])ymax = max(ymax, np.max(results['Proportions']))if K <= 70:plt.bar(np.arange(0, K)+(i+1.0)*w, results['Proportions'], width=w, label=label)else:plt.plot(np.arange(0, K)+0.5, results['Proportions'], '--*', label=label)plt.legend(loc='best')plt.ylim((0.0, min(ymax, np.max(self.bin_proportions)*4.0)))plt.grid(True)plt.title('Binning Proportions Evaluation Results for {} bins (NDB : JS)'.format(K))plt.show()def __calculate_bin_proportions(self, samples):if self.bin_centers is None:print('First run construct_bins on samples from the reference training data')assert samples.shape[1] == self.bin_centers.shape[1]n, d = samples.shapek = self.bin_centers.shape[0]D = np.zeros([n, k], dtype=samples.dtype)print('Calculating bin assignments for {} samples...'.format(n))whitened_samples = (samples-self.training_mean)/self.training_stdfor i in range(k):print('.', end='', flush=True)D[:, i] = np.linalg.norm(whitened_samples[:, self.used_d_indices] - self.bin_centers[i, self.used_d_indices],ord=2, axis=1)print()labels = np.argmin(D, axis=1)probs = np.zeros([k])label_vals, label_counts = np.unique(labels, return_counts=True)probs[label_vals] = label_counts / nreturn probs, labelsdef __read_from_bins_file(self, bins_file):if bins_file and os.path.isfile(bins_file):print('Loading binning results from', bins_file)bins_data = pkl.load(open(bins_file,'rb'))self.bin_proportions = bins_data['proportions']self.bin_centers = bins_data['centers']self.ref_sample_size = bins_data['n']self.training_mean = bins_data['mean']self.training_std = bins_data['std']self.used_d_indices = bins_data['d_indices']return Truereturn Falsedef __write_to_bins_file(self, bins_file):if bins_file:print('Caching binning results to', bins_file)bins_data = {'proportions': self.bin_proportions,'centers': self.bin_centers,'n': self.ref_sample_size,'mean': self.training_mean,'std': self.training_std,'d_indices': self.used_d_indices}pkl.dump(bins_data, open(bins_file, 'wb'))@staticmethoddef two_proportions_z_test(p1, n1, p2, n2, significance_level, z_threshold=None):# Per http://stattrek.com/hypothesis-test/difference-in-proportions.aspx# See also http://www.itl.nist.gov/div898/software/dataplot/refman1/auxillar/binotest.htmp = (p1 * n1 + p2 * n2) / (n1 + n2)se = np.sqrt(p * (1 - p) * (1/n1 + 1/n2))z = (p1 - p2) / se# Allow defining a threshold in terms as Z (difference relative to the SE) rather than in p-values.if z_threshold is not None:return abs(z) > z_thresholdp_values = 2.0 * norm.cdf(-1.0 * np.abs(z)) # Two-tailed testreturn p_values < significance_level@staticmethoddef jensen_shannon_divergence(p, q):"""Calculates the symmetric Jensen–Shannon divergence between the two PDFs"""m = (p + q) * 0.5return 0.5 * (NDB.kl_divergence(p, m) + NDB.kl_divergence(q, m))@staticmethoddef kl_divergence(p, q):"""The Kullback–Leibler divergence.Defined only if q != 0 whenever p != 0."""assert np.all(np.isfinite(p))assert np.all(np.isfinite(q))assert not np.any(np.logical_and(p != 0, q == 0))p_pos = (p > 0)return np.sum(p[p_pos] * np.log(p[p_pos] / q[p_pos]))if __name__ == "__main__":dim=100k=100n_train = k*100n_test = k*10train_samples = np.random.uniform(size=[n_train, dim])ndb = NDB(training_data=train_samples, number_of_bins=k, whitening=True)test_samples = np.random.uniform(high=1.0, size=[n_test, dim])ndb.evaluate(test_samples, model_label='Test')test_samples = np.random.uniform(high=0.9, size=[n_test, dim])ndb.evaluate(test_samples, model_label='Good')test_samples = np.random.uniform(high=0.75, size=[n_test, dim])ndb.evaluate(test_samples, model_label='Bad')ndb.plot_results(models_to_plot=['Test', 'Good', 'Bad'])
运行结果如下

代码修改和结果理解
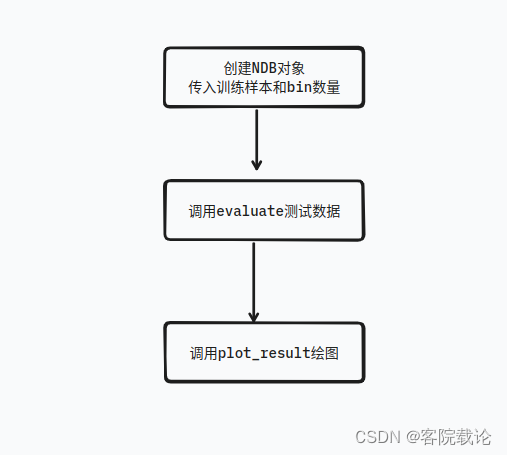
- 这里不对代码的具体的原理进行逐步解释,应为并不是研究的重点,主要是讲解这个代码如何使用,以及最终的结果如何进行分析。
- 这里主要对main函数进行分析,具体流程图如下
dim=100 # 数据样本的维度
k=100   # bin的个数,聚类的数量
n_train = k*100 # 训练样本的数量
n_test = k*10   # 测试样本的数量# 生成训练数据,并适用训练数据和指定的bin数量初始化NDB
# 白化:将数据的均值变为0,方差变为1。主要是为了去除数据的相关性,使得数据更加符合高斯分布
train_samples = np.random.uniform(size=[n_train, dim])
ndb = NDB(training_data=train_samples, number_of_bins=k, whitening=True)# 生成测试数据,并评估NDB的性能,上限为1.0,下限为0.0
test_samples = np.random.uniform(high=1.0, size=[n_test, dim])
ndb.evaluate(test_samples, model_label='Test')# 生成测试数据,并评估NDB的性能,上限为0.9,下限为0.0
test_samples = np.random.uniform(high=0.9, size=[n_test, dim])
ndb.evaluate(test_samples, model_label='Good')# 生成测试数据,并评估NDB的性能,上限为0.75,下限为0.0
test_samples = np.random.uniform(high=0.75, size=[n_test, dim])
ndb.evaluate(test_samples, model_label='Bad')# 画出NDB的性能图
ndb.plot_results(models_to_plot=['Test', 'Good', 'Bad'])
- 图表分析
- 下述图表体现出了整体数据集的NDB的JSD,每一个点表示当前bin的NDB比例。通过这个图,可以从整体和局部两个方面看到两个数据的分布相似度。

NDB和JSD应用到声音生成
- 这里是将声音转变为频谱图,也就是时频信号,然后在对时频信号进行比对。
- 这里具体的处理细节,需要将训练数据转成TF领域的数据,然后在将之转变成一个完整的numpy数组,直接进行处理。
总结
- 我觉得,这个过程很慢长,很痛苦,因为我需要一点一点看,需要一个一个去找,然后一个一个学习。不过这部分搞不顶,怎么确保我的实验是正确的,怎么看出来,我每一次的修改结果是有效的。
- 这篇文章暂时就到这里,已经写了很久了,后续在根据实验继续完善 。
这篇关于声音生成结果比较方法综述——FAD、JSD、NDB多种衡量参数的文章就介绍到这儿,希望我们推荐的文章对编程师们有所帮助!


