本文主要是介绍[js高手之路] html5 canvas系列教程 - 线形渐变,径向渐变与阴影设置,希望对大家解决编程问题提供一定的参考价值,需要的开发者们随着小编来一起学习吧!
接着上文[js高手之路] html5 canvas系列教程 - 像素操作(反色,黑白,亮度,复古,蒙版,透明)继续.
一、线形渐变
线形渐变指的是一条直线上发生的渐变。
用法:
var linear = cxt.createLinearGradient( x1, y1, x2, y2 );
linear.addColorStop( value1, color1 );
linear.addColorStop( value2, color2 );
.....
oGc.fillStyle = linear
oGc.fill();
1) createLinearGradient创建一个线形渐变对象. x1, y1表示渐变的起点. x2, y2表示渐变的终点.
2)addColorStop在某处添加渐变颜色值
3)fillStyle:把渐变对象作为填充样式
4)调用fill及其他相关图形进行渐变填充
水平渐变
 1 <head>
 2 <meta charset='utf-8' />
 3 <style>
 4 #canvas{
 5     border:1px dashed #aaa;
 6 }
 7 </style>
 8 <script>
 9 window.onload = function(){
10     var oCanvas = document.querySelector( "#canvas" ),
11         oGc = oCanvas.getContext( '2d' );
12     var linear = oGc.createLinearGradient( 0, 400, 500, 400 );
13     linear.addColorStop( 0, 'red' );
14     linear.addColorStop( 1, '#09f' );
15     oGc.fillStyle = linear;
16     oGc.fillRect( 0, 0, 500, 400 );
17 }
18 </script>
19 </head>
20 <body>
21 <canvas id="canvas" width="500" height="400"></canvas>
22 </body>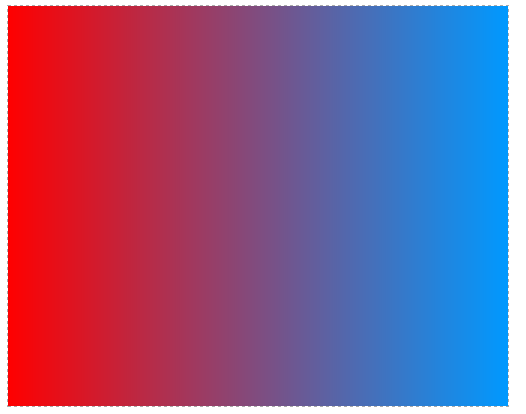
垂直渐变:
 1 <head>
 2     <meta charset='utf-8' />
 3     <style>
 4     #canvas{
 5         border:1px dashed #aaa;
 6     }
 7     </style>
 8     <script>
 9     window.onload = function(){
10         var oCanvas = document.querySelector( "#canvas" ),
11             oGc = oCanvas.getContext( '2d' );
12         var linear = oGc.createLinearGradient( 400, 0, 400, 500 );
13         linear.addColorStop( 0, 'red' );
14         linear.addColorStop( 1, '#09f' );
15         oGc.fillStyle = linear;
16         oGc.fillRect( 0, 0, 500, 400 );
17     }
18     </script>
19 </head>
20 <body>
21     <canvas id="canvas" width="500" height="400"></canvas>
22 </body>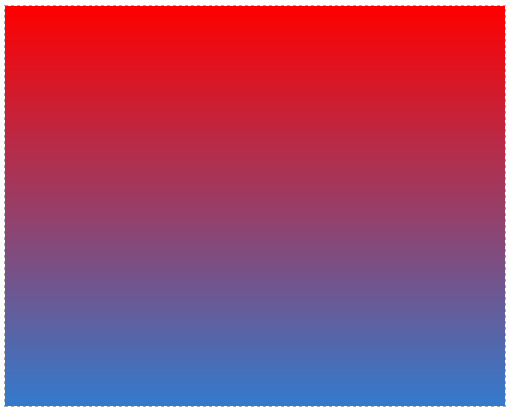
对角线渐变:
 1 <head>
 2     <meta charset='utf-8' />
 3     <style>
 4     #canvas{
 5         border:1px dashed #aaa;
 6     }
 7     </style>
 8     <script>
 9     window.onload = function(){
10         var oCanvas = document.querySelector( "#canvas" ),
11             oGc = oCanvas.getContext( '2d' );
12         var linear = oGc.createLinearGradient( 0, 0, 400, 500 );
13         linear.addColorStop( 0, 'red' );
14         linear.addColorStop( 1, '#09f' );
15         oGc.fillStyle = linear;
16         oGc.fillRect( 0, 0, 500, 400 );
17     }
18     </script>
19 </head>
20 <body>
21     <canvas id="canvas" width="500" height="400"></canvas>
22 </body>
为文字添加线形渐变效果
 1 <head>
 2     <meta charset='utf-8' />
 3     <style>
 4     #canvas{
 5         border:1px dashed #aaa;
 6     }
 7     </style>
 8     <script>
 9     window.onload = function(){
10         var oCanvas = document.querySelector( "#canvas" ),
11             oGc = oCanvas.getContext( '2d' ),
12             text = '跟着ghostwu学习html5 canvas教程';
13
14             oGc.font = '22px bold 微软雅黑';
15         var linear = oGc.createLinearGradient( 20, 100, 400, 100 );
16         linear.addColorStop( 0, 'red' );
17         linear.addColorStop( 1, '#09f' );
18         oGc.fillStyle = linear;
19         oGc.fillText( text, 50, 100 );
20     }
21     </script>
22 </head>
23 <body>
24     <canvas id="canvas" width="500" height="400"></canvas>
25 </body>
二、径向渐变
颜色渐变从一个起点向各个方向渐变,用法跟线形渐变差不多,只不过创建渐变的时候用的是另一个函数
var radial = cxt.createRadialGradient( x1, y1, r1, x2, y2, r2 )
....下面的步骤跟线形渐变一样,不再重复了
x1, y1起始点的圆心坐标,r1: 起始点 圆的半径
x2,y2结束点的圆心坐标,r2:结束点 圆所在的半径
 1 <head>
 2     <meta charset='utf-8' />
 3     <style>
 4     #canvas{
 5         border:1px dashed #aaa;
 6     }
 7     </style>
 8     <script>
 9     window.onload = function(){
10         var oCanvas = document.querySelector( "#canvas" ),
11             oGc = oCanvas.getContext( '2d' ),
12             width = oCanvas.width, height = oCanvas.height;
13
14         oGc.beginPath();
15         oGc.arc( 100, 100, 100, 0, 360 * Math.PI / 180, false );
16         oGc.closePath();
17
18         var radial = oGc.createRadialGradient( 150, 50, 10, 100, 100, 100 );
19         radial.addColorStop( 0.1, 'white' );
20         radial.addColorStop( 0.6, 'orange' );
21         radial.addColorStop( 1, 'red' );
22         oGc.fillStyle = radial;
23         oGc.fill();
24
25         oGc.beginPath();
26         oGc.arc( 320, 100, 100, 0, 360 * Math.PI / 180, false );
27         oGc.closePath();
28
29         var radial2 = oGc.createRadialGradient( 280, 50, 10, 320, 100, 100 );
30         radial2.addColorStop( 0.1, 'white' );
31         radial2.addColorStop( 0.6, 'orange' );
32         radial2.addColorStop( 1, 'rgba( 255, 0, 0, 0.5 )' );
33         oGc.fillStyle = radial2;
34         oGc.fill();
35
36         oGc.beginPath();
37         oGc.lineWidth = 1;
38         oGc.strokeStyle = '#eee';
39         for( var i = 0; i < width; i  = 10 ){
40             oGc.moveTo( i, 0 );
41             oGc.lineTo( i, height );
42         }
43         for( var j = 0; j < height; j  = 10 ){
44             oGc.moveTo( 0, j );
45             oGc.lineTo( width, j );
46         }
47         oGc.closePath();
48         oGc.stroke();
49
50         oGc.beginPath();
51         oGc.fillStyle = 'red';
52         oGc.strokeStyle = 'blue';
53         oGc.moveTo( 150, 0 );
54         oGc.lineTo( 150, height );
55
56         oGc.moveTo( 0, 50 );
57         oGc.lineTo( width, 50 );
58         oGc.fillText( '(150,50)', 170, 30 );
59         oGc.stroke();
60         oGc.closePath();
61
62         oGc.beginPath();
63         oGc.strokeStyle = 'yellow';
64         oGc.fillStyle = 'black';
65         oGc.moveTo( 100, 0 );
66         oGc.lineTo( 100, height );
67         oGc.moveTo( 0, 100 );
68         oGc.lineTo( width, 100 );
69         oGc.fillText( '(100,100)', 30, 120 );
70         oGc.stroke();
71     }
72     </script>
73 </head>
74 <body>
75     <canvas id="canvas" width="500" height="400"></canvas>
76 </body>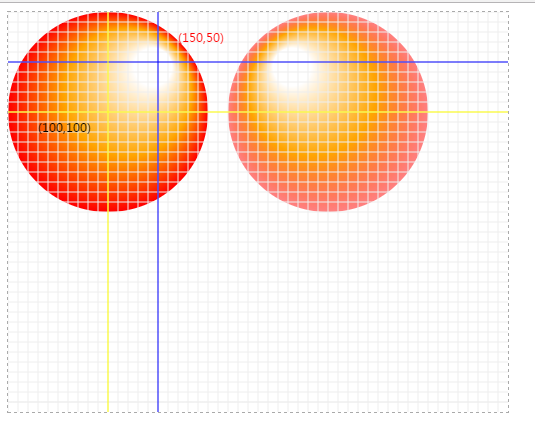
我在图中做出了第一个径向渐变的圆心坐标,便于观看
同心圆渐变:
 1 <head>
 2     <meta charset='utf-8' />
 3     <style>
 4     #canvas{
 5         border:1px dashed #aaa;
 6     }
 7     </style>
 8     <script>
 9     window.onload = function(){
10         var oCanvas = document.querySelector( "#canvas" ),
11             oGc = oCanvas.getContext( '2d' ),
12             width = oCanvas.width, height = oCanvas.height;
13
14         var radial = oGc.createRadialGradient( 100, 100, 0, 100, 100, 100 );
15         radial.addColorStop( 0, 'red' );
16         radial.addColorStop( 0.25, 'orange' );
17         radial.addColorStop( 0.5, 'yellow' );
18         radial.addColorStop( 0.75, 'green' );
19         radial.addColorStop( 1, '#09f' );
20         oGc.fillStyle = radial;
21         oGc.fillRect( 10, 10, 200, 200 );
22     }
23     </script>
24 </head>
25 <body>
26     <canvas id="canvas" width="500" height="400"></canvas>
27 </body>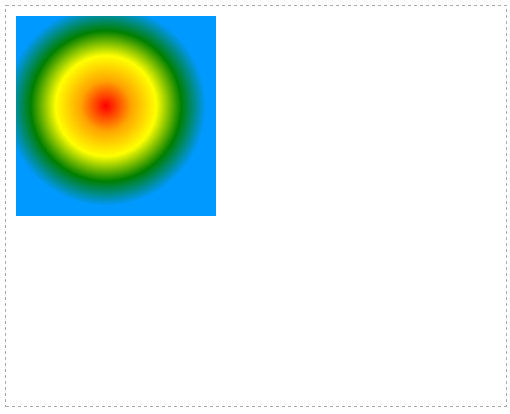
三、阴影设置
跟css3的边框阴影用法差不多.
cxt.shadowOffsetX: 水平阴影,可以设置正负数, 正数->向右偏移,负数->向左偏移
cxt.shadowOffsetY: 垂直阴影,可以设置正负数,正数->向下偏移,负数->向上偏移
cxt.shadowColor: 阴影的颜色
cxt.shadowBlur: 阴影的模糊范围
 1 <head>
 2     <meta charset='utf-8' />
 3     <style>
 4     #canvas{
 5         border:1px dashed #aaa;
 6     }
 7     </style>
 8     <script>
 9     window.onload = function(){
10         var oCanvas = document.querySelector( "#canvas" ),
11             oGc = oCanvas.getContext( '2d' ),
12             width = oCanvas.width, height = oCanvas.height;
13
14             oGc.shadowOffsetX = 5;
15             oGc.shadowOffsetY = 5;
16             oGc.shadowColor = '#09f';
17             oGc.shadowBlur = 10;
18             oGc.fillStyle = 'red';
19             oGc.fillRect( 10, 10, 100, 100 );
20
21             oGc.shadowOffsetX = -5;
22             oGc.shadowOffsetY = -5;
23             oGc.shadowColor = '#09f';
24             oGc.shadowBlur = 10;
25             oGc.fillStyle = 'red';
26             oGc.fillRect( 140, 20, 100, 100 );
27     }
28     </script>
29 </head>
30 <body>
31     <canvas id="canvas" width="500" height="400"></canvas>
32 </body>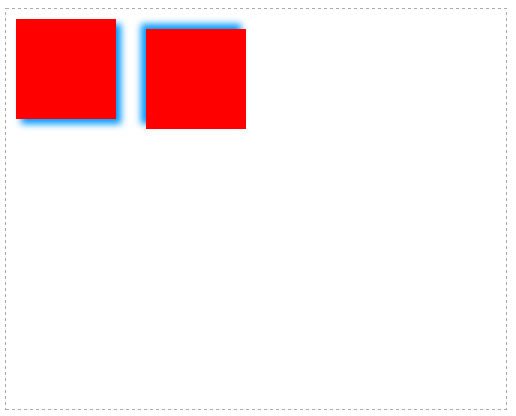
给文字设置阴影:
 1 <head>
 2     <meta charset='utf-8' />
 3     <style>
 4     #canvas{
 5         border:1px dashed #aaa;
 6     }
 7     </style>
 8     <script>
 9     window.onload = function(){
10         var oCanvas = document.querySelector( "#canvas" ),
11             oGc = oCanvas.getContext( '2d' ),
12             width = oCanvas.width, height = oCanvas.height;
13
14             oGc.shadowOffsetX = 2;
15             oGc.shadowOffsetY = 2;
16             oGc.shadowColor = '#09f';
17             oGc.shadowBlur = 1;
18             oGc.font = '30px bold 微软雅黑';
19             oGc.fillText( '跟着ghostwu学习html5 canvas', 20, 100 );
20     }
21     </script>
22 </head>
23 <body>
24     <canvas id="canvas" width="500" height="400"></canvas>
25 </body>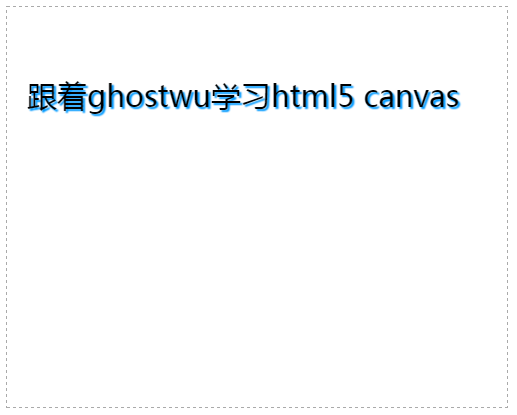
给图片设置阴影
 1 <head>
 2     <meta charset='utf-8' />
 3     <style>
 4     #canvas{
 5         border:1px dashed #aaa;
 6     }
 7     </style>
 8     <script>
 9     window.onload = function(){
10         var oCanvas = document.querySelector( "#canvas" ),
11             oGc = oCanvas.getContext( '2d' ),
12             width = oCanvas.width, height = oCanvas.height;
13
14             var oImg = new Image();
15             oImg.src = './img/mv.jpg';
16
17             oImg.onload = function(){
18                 oGc.shadowOffsetX = 5;
19                 oGc.shadowOffsetY = 5;
20                 // oGc.shadowOffsetX = 0;
21                 // oGc.shadowOffsetY = 0;
22                 oGc.shadowColor = '#888';
23                 oGc.shadowBlur = 20;
24                 oGc.fillRect( 50, 20, 200, 200 );
25                 oGc.drawImage( oImg, 50, 20 );
26             }
27     }
28     </script>
29 </head>
30 <body>
31     <canvas id="canvas" width="500" height="400"></canvas>
32 </body>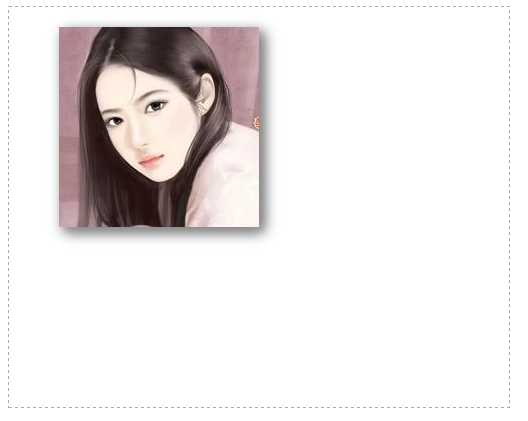
给图片的四周设置阴影:
把shadowOffsetX和shadowOffsetY都设置为0,那么就会在四周产生阴影效果
 1 <head>
 2     <meta charset='utf-8' />
 3     <style>
 4     #canvas{
 5         border:1px dashed #aaa;
 6     }
 7     </style>
 8     <script>
 9     window.onload = function(){
10         var oCanvas = document.querySelector( "#canvas" ),
11             oGc = oCanvas.getContext( '2d' ),
12             width = oCanvas.width, height = oCanvas.height;
13
14             var oImg = new Image();
15             oImg.src = './img/mv.jpg';
16
17             oImg.onload = function(){
18                 oGc.shadowOffsetX = 0;
19                 oGc.shadowOffsetY = 0;
20                 oGc.shadowColor = '#888';
21                 oGc.shadowBlur = 20;
22                 oGc.fillRect( 50, 20, 200, 200 );
23                 oGc.drawImage( oImg, 50, 20 );
24             }
25     }
26     </script>
27 </head>
28 <body>
29     <canvas id="canvas" width="500" height="400"></canvas>
30 </body>
这篇关于[js高手之路] html5 canvas系列教程 - 线形渐变,径向渐变与阴影设置的文章就介绍到这儿,希望我们推荐的文章对编程师们有所帮助!


