本文主要是介绍使用tensorflow object detection API实现目标检测,希望对大家解决编程问题提供一定的参考价值,需要的开发者们随着小编来一起学习吧!
环境
Windows7 x64
conda 4.3.30
1、TensorFlow安装
首先在conda中创建TensorFlow环境
conda create -n tensorflow python=3.6.2
激活tensorflow环境
activate tensorflow
安装tensorflow
pip install tensorflow==1.12.0
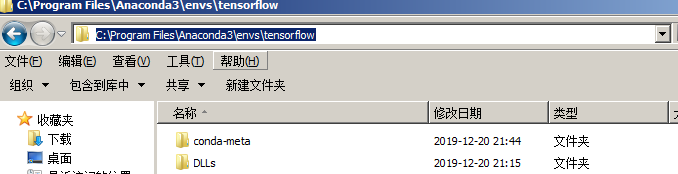
安装完成后会在anaconda安装路径envs文件下自动创建tensorflow目录
2、tensorflow object detection API安装
下载安装包:https://github.com/xizhonghuai/tensorflow_object_detection_demo

下载完成后解压,将tensorflow_models文件夹拷贝到不含中文任意路径下,如:

在anaconda安装路径下找到刚才新创建的tensorflow环境目录

在\Lib\site-packages下创建tensorflow_model.pth文件,内容如下:
E:\python\workspace\tensorflow_models\research
E:\python\workspace\tensorflow_models\research\slim
进入E:\python\workspace\tensorflow_models\research\slim文件夹下分别执行一下命令:
python setup.py build
python setup.py install
运行后如果出现error: could not create ‘build’,请删掉\slim文件夹下BUILD文件,在重新执行。
进入E:\python\workspace\tensorflow_models\research文件夹下分别执行一下命令:
python setup.py build
python setup.py install
这个过程时间稍长,若出现报错情况,请仔细查看报错信息是否提示缺少相关依赖,手动通过pip安装。
测试tensorflow object detection API是否安装成功,在E:\python\workspace\tensorflow_models\research下执行
object_detection/builders/model_builder_test.py
无报错表示安装成功。
说明:
报错信息提示找不到相关模块,请卸载tensorflow,重新安装其他版本。
报错信息提示DLL相关错误,请卸载tensorflow,在以下链接中安装 https://github.com/fo40225/tensorflow-windows-wheel
3、测试
下载官方已训练好的模型到本地,这里我们使用ssd_mobilenet_v1_coco(模型包含90种常见物体的识别)
https://github.com/xizhonghuai/tensorflow_object_detection_demo/blob/master/tensorflow_models/research/object_detection/g3doc/detection_model_zoo.md

点击下载ssd_mobilenet_v1_coco模型你解压到本地。
打开iead,创建python工程,创建com包,在com包下分别创建,data、test_images、model文件夹
将刚才解压模型包中的frozen_inference_graph.pb文件拷贝到model文件下。
在E:\python\workspace\tensorflow_models\research\object_detection\data_back_up文件夹下拷贝mscoco_label_map.pbtxt文件到data文件下。
在网上随便找一张图片重命名为image1.jpg存放到test_images下
项目结构如下:

在com包下创建py代码:
import numpy as np
import os
import six.moves.urllib as urllib
import sys
import tarfile
import tensorflow as tf
import zipfilefrom collections import defaultdict
from io import StringIO
# from matplotlib import pyplot as plt
from PIL import Image
## Env setup
# This is needed to display the images.# This is needed since the notebook is stored in the object_detection folder.
sys.path.append("..")from object_detection.utils  import label_map_util
from object_detection.utils  import visualization_utils as vis_utilos.environ["TF_CPP_MIN_LOG_LEVEL"] = "3"# Model preparation
## Variables#Any model exported using the `export_inference_graph.py` tool can be loaded here #simply by changing `PATH_TO_CKPT` to point to a new .pb file.
#By default we use an "SSD with Mobilenet" model here. See the [detection model zoo](https://github.com/tensorflow/models/blob/master/object_detection/g3doc/detection_mo#del_zoo.md) for a list of other models that can be run out-of-the-box with varying #speeds and accuracies.# Path to frozen detection graph. This is the actual model that is used for the object detection.
PATH_TO_CKPT = 'model/frozen_inference_graph.pb'PATH_TO_LABELS = os.path.join('data', 'mscoco_label_map.pbtxt')NUM_CLASSES = 1## Load a (frozen) Tensorflow model into memory.
detection_graph = tf.Graph()
with detection_graph.as_default():od_graph_def = tf.GraphDef()with tf.gfile.GFile(PATH_TO_CKPT, 'rb') as fid:print(PATH_TO_CKPT)serialized_graph = fid.read()od_graph_def.ParseFromString(serialized_graph)tf.import_graph_def(od_graph_def, name='')label_map = label_map_util.load_labelmap(PATH_TO_LABELS)
categories = label_map_util.convert_label_map_to_categories(label_map, max_num_classes=NUM_CLASSES, use_display_name=True)
category_index = label_map_util.create_category_index(categories)## Helper code
def load_image_into_numpy_array(image):(im_width, im_height) = image.sizereturn np.array(image.getdata()).reshape((im_height, im_width, 3)).astype(np.uint8)# Detection
# For the sake of simplicity we will use only 2 images:
# image1.jpg
# image2.jpg
# If you want to test the code with your images, just add path to the images to the TEST_IMAGE_PATHS.
PATH_TO_TEST_IMAGES_DIR = 'test_images'
TEST_IMAGE_PATHS = [ os.path.join(PATH_TO_TEST_IMAGES_DIR, 'image{}.jpg'.format(i)) for i in range(1, 2) ]
#TEST_IMAGE_PATHS = ['test_images']
# Size, in inches, of the output images.
IMAGE_SIZE = (12, 8)with detection_graph.as_default():with tf.Session(graph=detection_graph) as sess:for image_path in TEST_IMAGE_PATHS:image = Image.open(image_path)# the array based representation of the image will be used later in order to prepare the# result image with boxes and labels on it.image_np = load_image_into_numpy_array(image)# Expand dimensions since the model expects images to have shape: [1, None, None, 3]image_np_expanded = np.expand_dims(image_np, axis=0)image_tensor = detection_graph.get_tensor_by_name('image_tensor:0')# Each box represents a part of the image where a particular object was detected.boxes = detection_graph.get_tensor_by_name('detection_boxes:0')# Each score represent how level of confidence for each of the objects.# Score is shown on the result image, together with the class label.scores = detection_graph.get_tensor_by_name('detection_scores:0')classes = detection_graph.get_tensor_by_name('detection_classes:0')num_detections = detection_graph.get_tensor_by_name('num_detections:0')# Actual detection.(boxes, scores, classes, num_detections) = sess.run([boxes, scores, classes, num_detections],feed_dict={image_tensor: image_np_expanded})# Visualization of the results of a detection.vis_util.visualize_boxes_and_labels_on_image_array(image_np,np.squeeze(boxes),np.squeeze(classes).astype(np.int32),np.squeeze(scores),category_index,use_normalized_coordinates=True,line_thickness=8)# plt.figure(figsize=IMAGE_SIZE)            # plt.imshow(image_np)# plt.show()im = Image.fromarray(image_np)im.save("ret.jpeg")
print("OK")
测试:
执行python代码,运行成功后将生成识别结果并保存图片到com包下。


这篇关于使用tensorflow object detection API实现目标检测的文章就介绍到这儿,希望我们推荐的文章对编程师们有所帮助!


