本文主要是介绍Unity MiniCPM-V 让引擎拥有视觉,希望对大家解决编程问题提供一定的参考价值,需要的开发者们随着小编来一起学习吧!
Unity MiniCPM-V 让引擎拥有视觉
- 前言
- 项目
- Python环境布置
- Unity场景布置
- 代码编写
- 添加并设置脚本
- 总结
- 鸣谢
- AI提示
前言
新发布的MiniCPM-V,忍不住玩一下,可以让之前制作的语音助手拥有一定的视觉能力(不是OpenCV不行,而是AI更加符合一个助手所需要的观察力)。这个简单的小项目中我只实现了少量交互代码,大部分全部由ChatGPT 3.5完成,可以在文末链接查看对话记录。
项目
Python环境布置
参考官网配置: https://github.com/OpenBMB/MiniCPM-V/tree/main
除了官网的配置还要安装一下flask库
pip install flask
将脚本放到根目录下,并运行
from flask import Flask, request, jsonify
from chat import MiniCPMVChat, img2base64
import torch
import json
import base64
from io import BytesIO
from PIL import Image# Initialize Flask app
app = Flask(__name__)# Initialize the chat model
torch.manual_seed(0)
chat_model = MiniCPMVChat('openbmb/MiniCPM-Llama3-V-2_5')def pil_image_to_base64(img):buffer = BytesIO()img.save(buffer, format="PNG")return base64.b64encode(buffer.getvalue()).decode()@app.route('/analyze', methods=['POST'])
def analyze_image():try:data = request.jsonprint(f"Received data: {data}")  # Debug: Log the received dataimage_base64 = data.get('image')question = data.get('question')if not image_base64 or not question:return jsonify({'error': 'Missing image or question'}), 400# Decode base64 imageimage_data = base64.b64decode(image_base64)image = Image.open(BytesIO(image_data))im_64 = pil_image_to_base64(image)  # Convert PIL image to base64 string# Prepare the inputs for the modelmsgs = [{"role": "user", "content": question}]inputs = {"image": im_64, "question": json.dumps(msgs)}print(f"Inputs for model: {inputs}")  # Debug: Log the inputs for the model# Get the answer from the modelanswer = chat_model.chat(inputs)# Prepare the responseresponse = {'answer': answer,'context': msgs}return jsonify(response)except Exception as e:print(f"Error: {str(e)}")  # Debug: Log any error that occursreturn jsonify({'error': str(e)}), 500if __name__ == '__main__':app.run(host='127.0.0.1', port=5000)
Unity场景布置
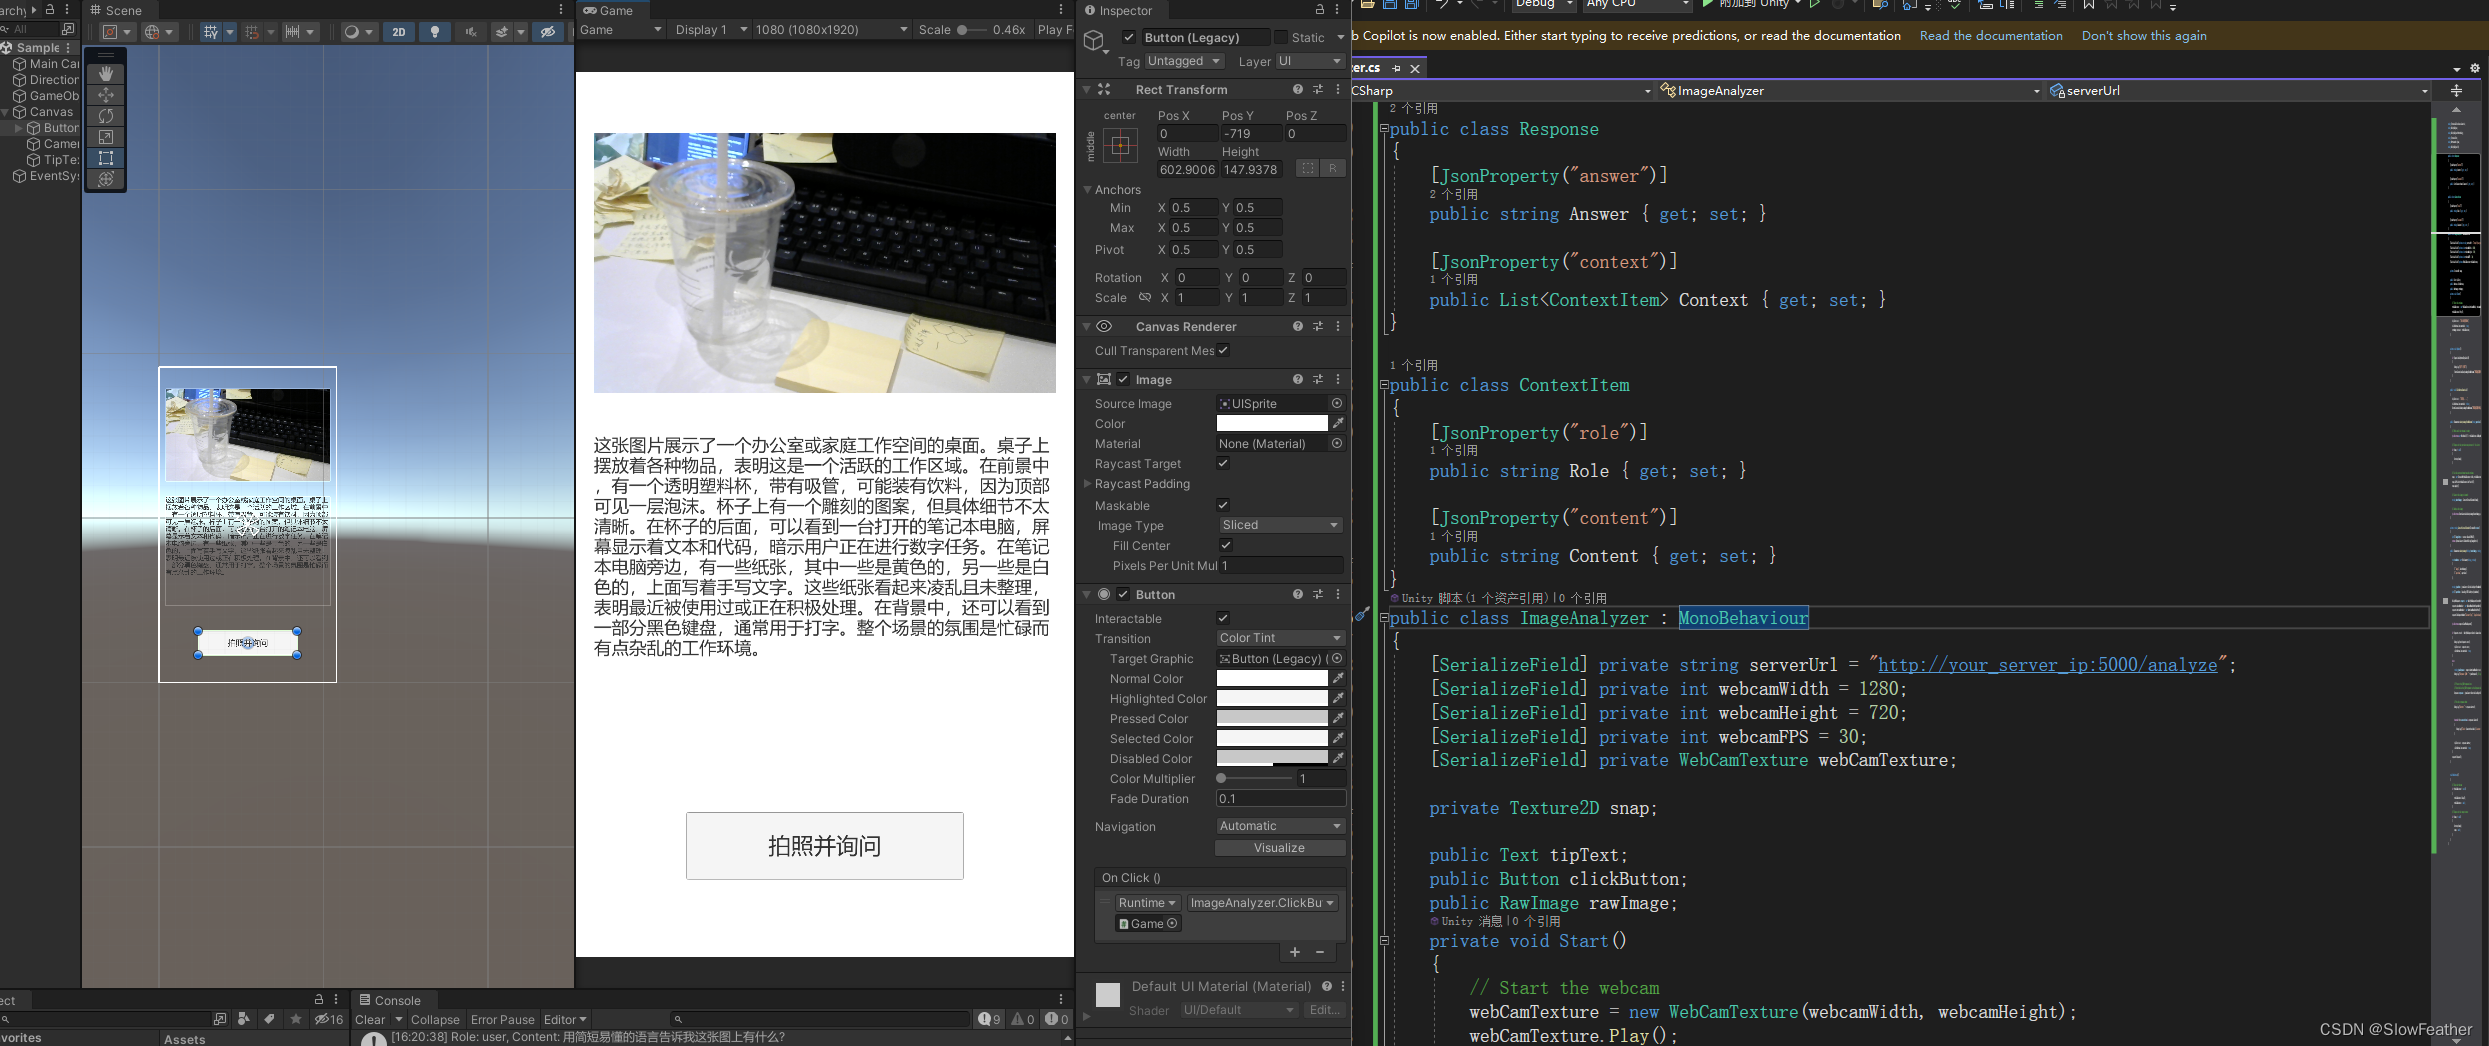
代码编写
创建并挂载ImageAnalyzer.cs脚本
using System.Collections;
using System.Collections.Generic;
using UnityEngine;
using UnityEngine.Networking;
using System.Text;
using Newtonsoft.Json;
using UnityEngine.UI;public class Response
{[JsonProperty("answer")]public string Answer { get; set; }[JsonProperty("context")]public List<ContextItem> Context { get; set; }
}public class ContextItem
{[JsonProperty("role")]public string Role { get; set; }[JsonProperty("content")]public string Content { get; set; }
}
public class ImageAnalyzer : MonoBehaviour
{[SerializeField] private string serverUrl = "http://your_server_ip:5000/analyze";[SerializeField] private int webcamWidth = 1280;[SerializeField] private int webcamHeight = 720;[SerializeField] private int webcamFPS = 30;[SerializeField] private WebCamTexture webCamTexture;private Texture2D snap;public Text tipText;public Button clickButton;public RawImage rawImage;private void Start(){// Start the webcamwebCamTexture = new WebCamTexture(webcamWidth, webcamHeight);webCamTexture.Play();tipText.text = "请点击按钮询问";clickButton.interactable = true;rawImage.texture = webCamTexture;}private void Update(){if (Input.GetKeyDown(KeyCode.Q)){Debug.Log("按下了按钮");StartCoroutine(AnalyzeImageFromWebcam("用简短易懂的语言告诉我这张图上有什么?"));}}public void ClickButtonFunction(){tipText.text = "请等待。。。";clickButton.interactable = false;StartCoroutine(AnalyzeImageFromWebcam("用简短易懂的语言告诉我这张图上有什么?"));}public IEnumerator AnalyzeImageFromWebcam(string question){// Wait until the webcam is readyyield return new WaitUntil(() => webCamTexture.didUpdateThisFrame);// Dispose of the previous snap texture if it existsif (snap != null){Destroy(snap);}// Get the current frame from the webcamsnap = new Texture2D(webCamTexture.width, webCamTexture.height);snap.SetPixels(webCamTexture.GetPixels());snap.Apply();// Convert the image to base64string base64Image = ConvertTextureToBase64(snap);// Analyze the imageyield return StartCoroutine(AnalyzeImage(base64Image, question));}private string ConvertTextureToBase64(Texture2D texture){byte[] imageBytes = texture.EncodeToPNG();return System.Convert.ToBase64String(imageBytes);}public IEnumerator AnalyzeImage(string base64Image, string question){var formData = new Dictionary<string, string>{{ "image", base64Image },{ "question", question }};string jsonData = JsonConvert.SerializeObject(formData);byte[] postData = Encoding.UTF8.GetBytes(jsonData);UnityWebRequest request = new UnityWebRequest(serverUrl, "POST");request.uploadHandler = new UploadHandlerRaw(postData);request.downloadHandler = new DownloadHandlerBuffer();request.SetRequestHeader("Content-Type", "application/json");yield return request.SendWebRequest();if (request.result == UnityWebRequest.Result.ConnectionError || request.result == UnityWebRequest.Result.ProtocolError){Debug.LogError(request.error);tipText.text = request.error;clickButton.interactable = true;}else{string jsonResponse = request.downloadHandler.text;Debug.Log("Response JSON: " + jsonResponse); // Log the response for debugging// Process the JSON response here// Deserialize the JSON response to the Response objectResponse response = JsonConvert.DeserializeObject<Response>(jsonResponse);// Use the response dataDebug.Log("Answer: " + response.Answer);foreach (var contextItem in response.Context){Debug.Log($"Role: {contextItem.Role}, Content: {contextItem.Content}");}tipText.text = response.Answer;clickButton.interactable = true;}request.Dispose();}void OnDestroy(){// Stop the webcamif (webCamTexture != null){webCamTexture.Stop();webCamTexture = null;}// Dispose of the snap textureif (snap != null){Destroy(snap);snap = null;}}
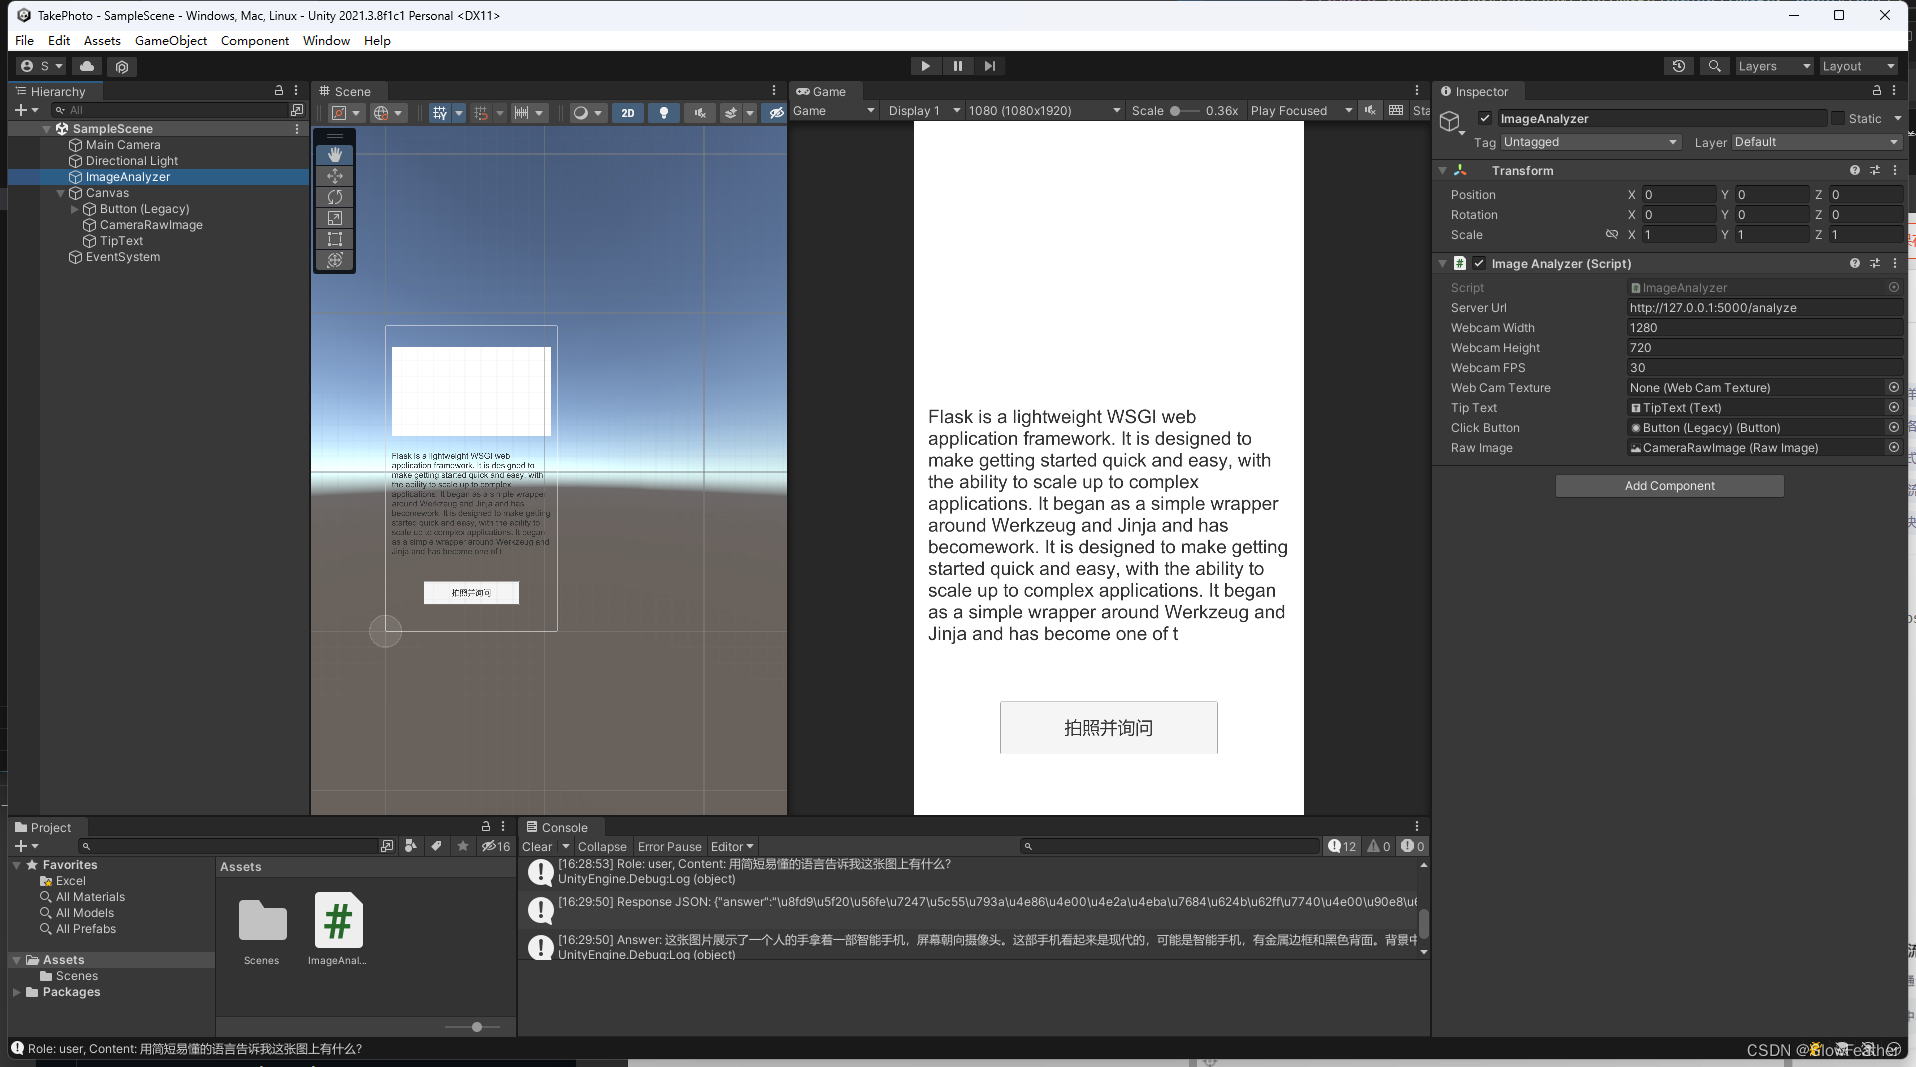
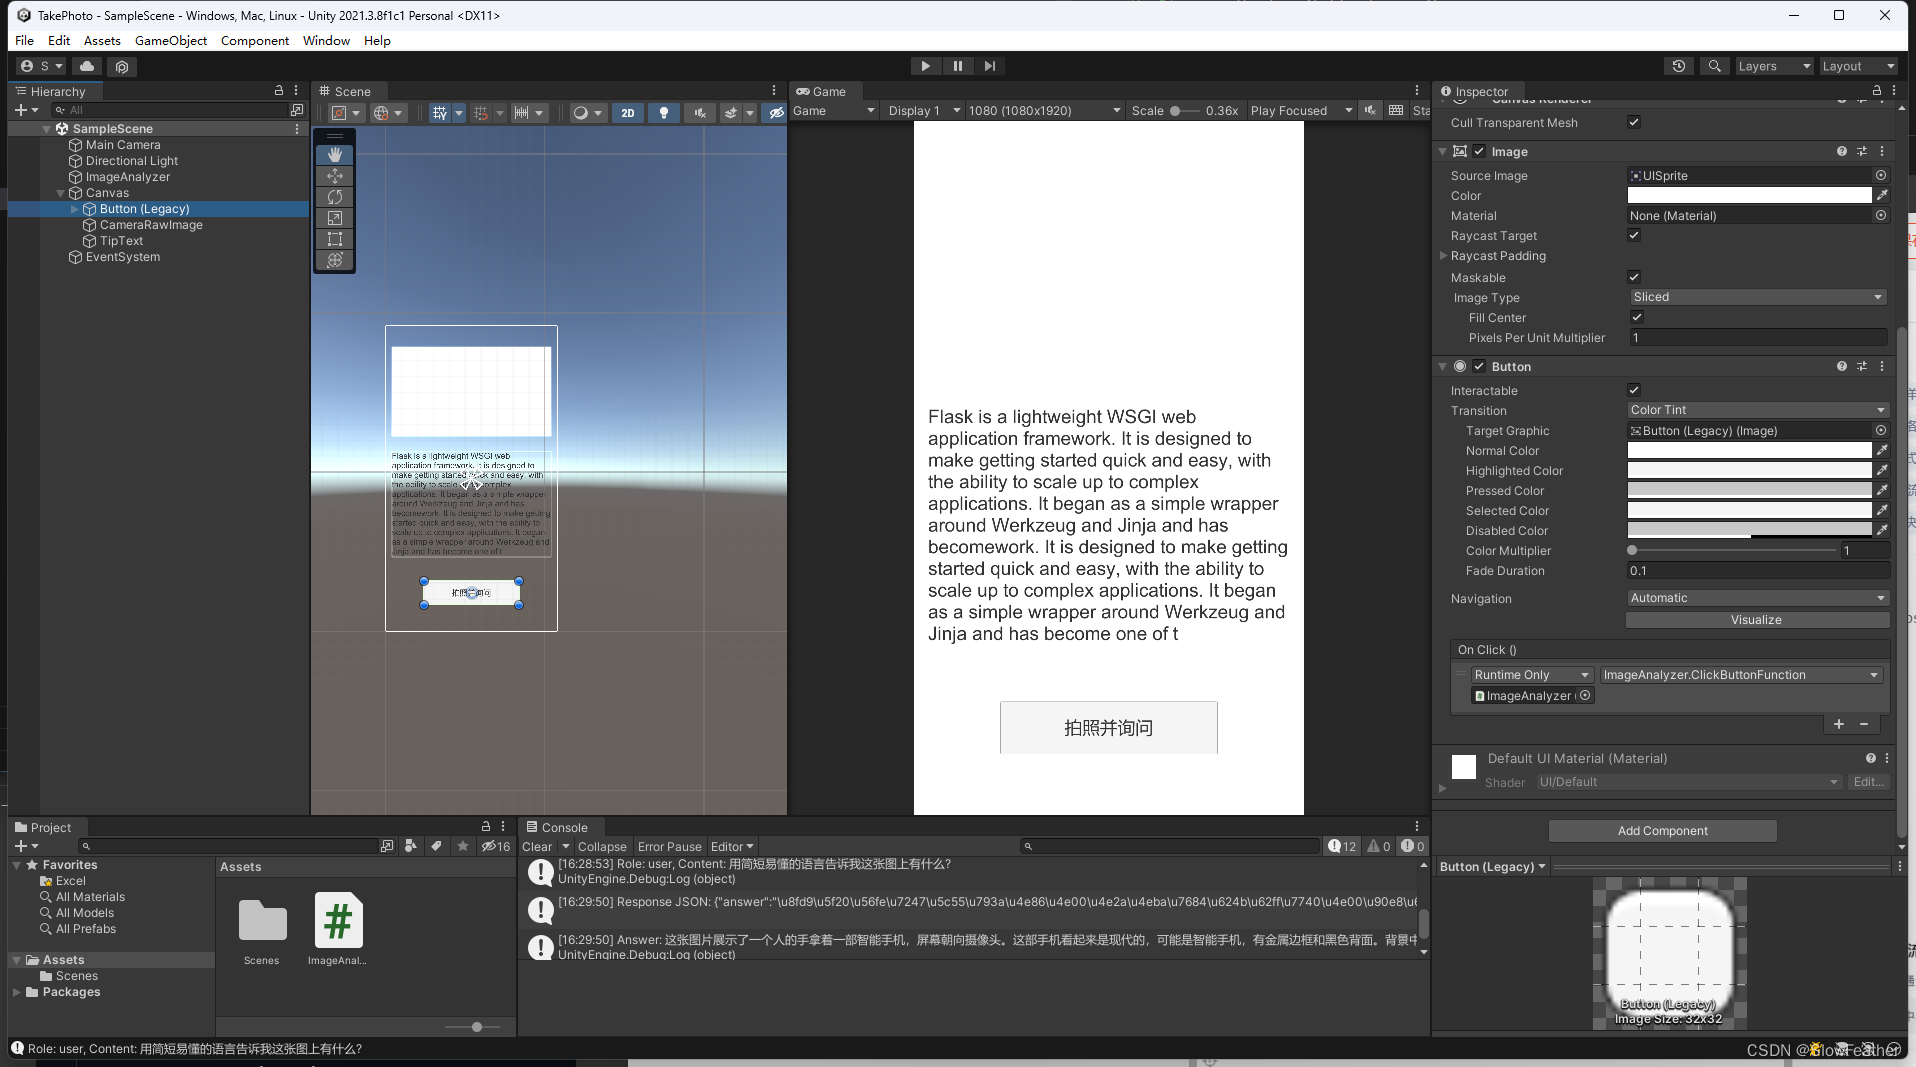
}添加并设置脚本
在按钮上添加一下事件,给ImageAnalyzer物体赋值即可
总结
除了交互部分,一行代码没写,这也是未来趋势,提前适应一下。
鸣谢
https://chatgpt.com/
https://github.com/OpenBMB/MiniCPM-V/tree/main
AI提示
点击下方链接可以查看我和ChatGPT 3.5的聊天记录并了解详细开发过程
Image Q&A Service
这篇关于Unity MiniCPM-V 让引擎拥有视觉的文章就介绍到这儿,希望我们推荐的文章对编程师们有所帮助!


