本文主要是介绍基于心电疾病分类的深度学习模型部署应用于OrangePi Kunpeng Pro开发板,希望对大家解决编程问题提供一定的参考价值,需要的开发者们随着小编来一起学习吧!
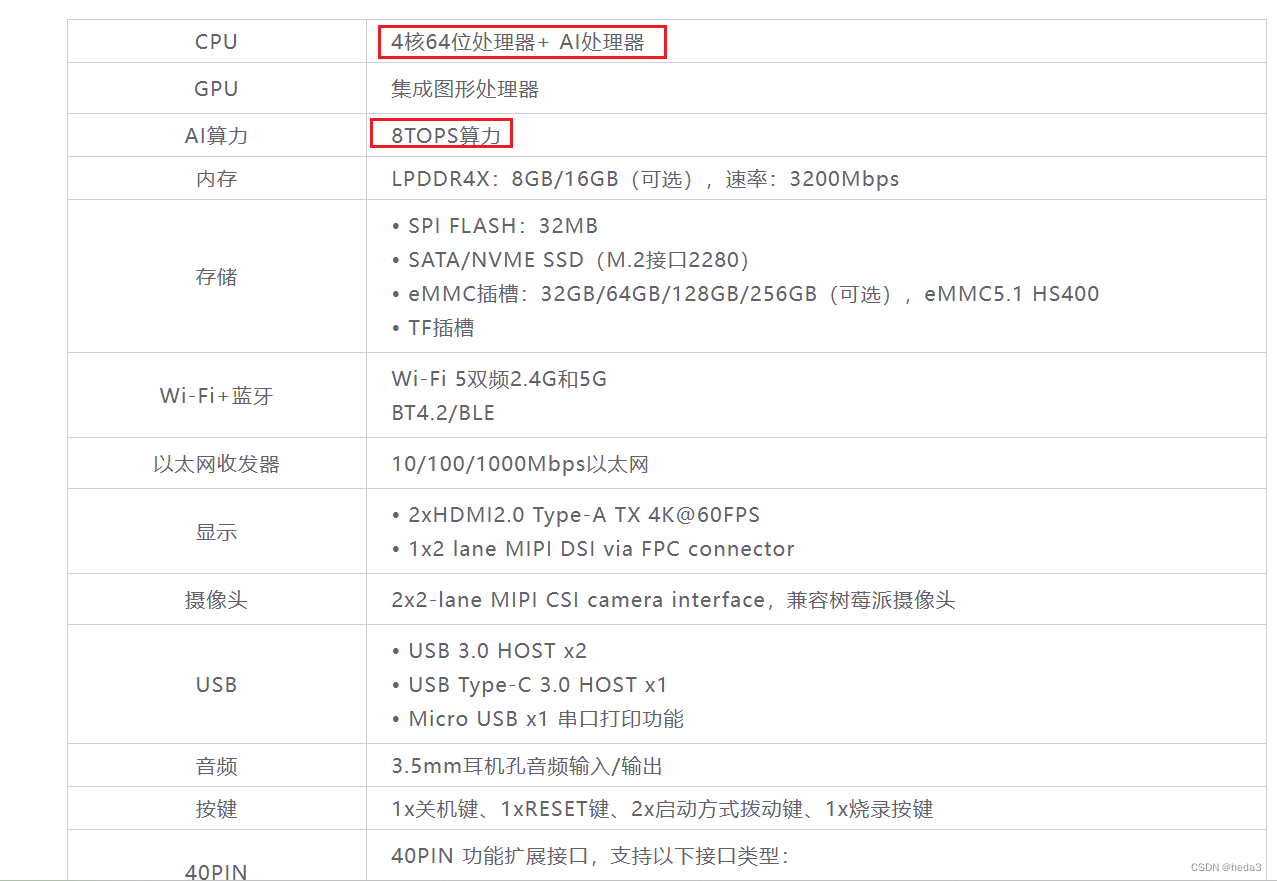
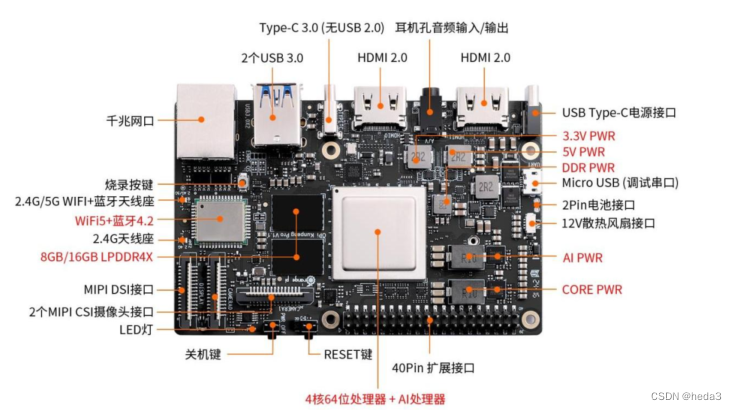
一、开发板资源介绍


该板具有4核心64位的处理器和8TOPS的AI算力,让我们验证一下,在该板上跑深度学习模型的效果如何?
二、配网及远程SSH登录访问系统
在通过microusb连接串口进入开发板调试,在命令行终端执行以下命令
1)搜索wifi名称
nmcli dev wifi2)连接wifi
sudo nmcli dev wifi connect wifi_name password wifi_passwd3)查看IP地址
ip a s wlan04)ssh访问
通过xshell工具访问该开发板

三、安装开发环境
3.1 安装python环境
1)安装openssl
sudo yum update -y
sudo yum -y groupinstall "Development tools"
sudo yum install openssl-devel bzip2-devel expat-devel gdbm-devel readline-devel sqlite-devel psmisc libffi-devel gcc mariadb-devel
2)下载安装包
cd /usr/local
sudo wget https://www.python.org/ftp/python/3.7.0/Python-3.7.0.tgz
sudo tar -zxvf Python-3.7.0.tgz

3)切换目录并执行安装
cd Python-3.7.0
sudo ./configure --prefix=/usr/local/python3
sudo make && make install

4)环境配置
ln -s /usr/local/python3/bin/python3.7 /usr/bin/python3
ln -s /usr/local/python3/bin/pip3.7 /usr/bin/pip3
3.2 创建虚拟环境
virtualenv ~/ecgclassification/venv --python=python3.9
其它相关配置
# 激活虚拟环境
source ~/ecgclassification/venv/bin/activate
#查看虚拟环境下的python路径
which python
# 安装相关包
pip install numpy  -i https://pypi.tuna.tsinghua.edu.cn/simple
# 退出虚拟环境
deactivate
3.3 安装相关依赖
pip install h5py  -i https://pypi.tuna.tsinghua.edu.cn/simplepip install tensorflow==2.11.0  -i https://pypi.tuna.tsinghua.edu.cn/simple
pip install keras==2.11.0  -i https://pypi.tuna.tsinghua.edu.cn/simplepip install scikit-learn  -i https://pypi.tuna.tsinghua.edu.cn/simplepip install matplotlib -i https://pypi.tuna.tsinghua.edu.cn/simple
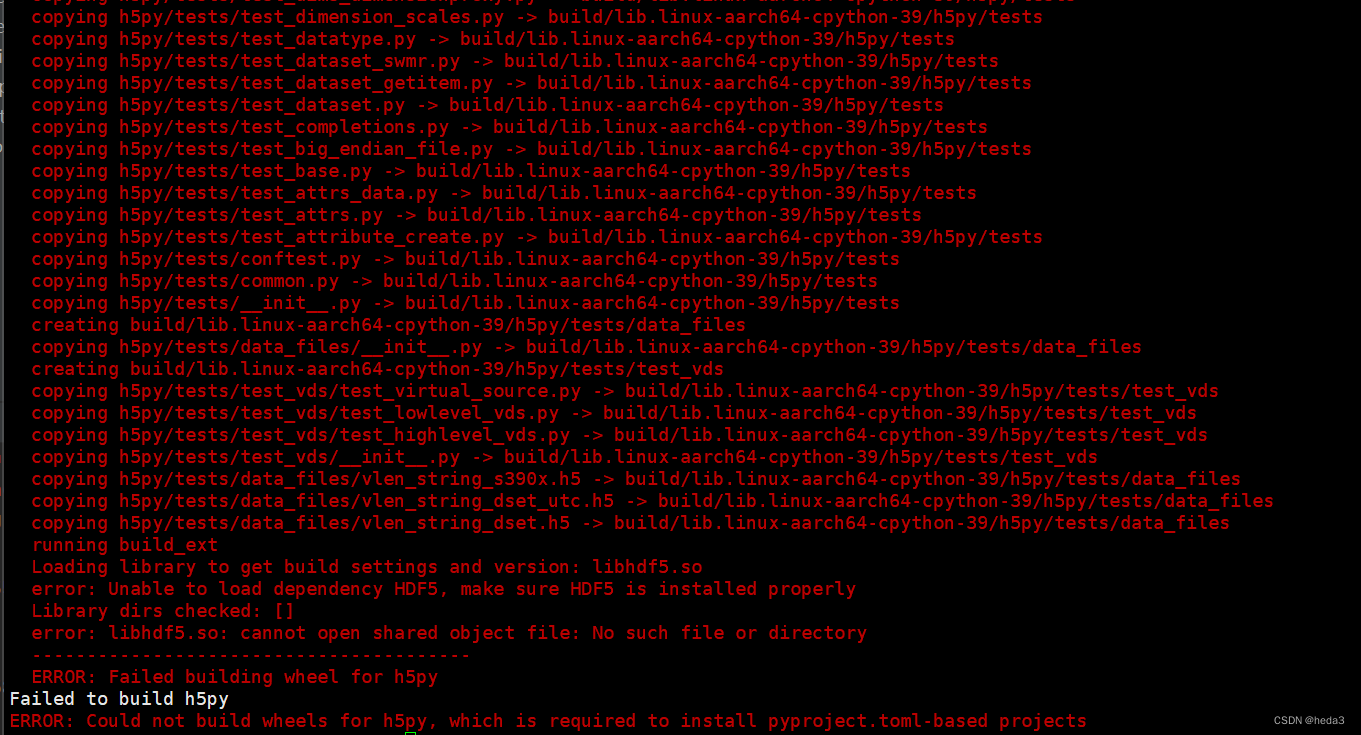
报错:
(venv) [root@openEuler ECGclassification]# pip install tensorFlow i https://pypi.tuna.tsinghua.edu.cn/simple Collecting https://pypi.tuna.tsinghua.edu.cn/simple Downloading https://pypi.tuna.tsinghua.edu.cn/simple (32.5 MB) ━━━━━━━━━━━━━━━━━━━━━━━━━━━━━━━━━━━━━━━━ 32.5/32.5 MB 1.1 MB/s eta 0:00:00 ERROR: Cannot unpack file /tmp/pip-unpack-s5nhhe64/simple.html (downloaded from /tmp/pip-req-build-89nbvw_j, content-type: text/html); cannot detect archive format ERROR: Cannot determine archive format of /tmp/pip-req-build-89nbvw_j
安装包名大小写敏感,更改正确!

解决方式:
sudo yum install hdf5-devel

再次安装tensoflow成功


四、心电疾病分类任务介绍及移植深度学习模型
依据采集的单导联心电数据,构建的深度学习模型进行数据训练,基于训练生成的模型对心电数据进行疾病的分类任务(多分类-具体为7分类)。将该模型部署于该开发板上进行运行测试。
执行模型:
python3 ./PredictOnly.py报错:
model = tf.keras.models.load_model(model_path) File "/usr/local/lib/python3.9/site-packages/keras/src/saving/saving_api.py", line 193, in load_model raise ValueError( ValueError: File format not supported: filepath=save/CNN. Keras 3 only supports V3 `.keras` files and legacy H5 format files (`.h5` extension). Note that the legacy SavedModel format is not supported by `load_model()` in Keras 3. In order to reload a TensorFlow SavedModel as an inference-only layer in Keras 3, use `keras.layers.TFSMLayer(save/CNN, call_endpoint='serving_default')` (note that your `call_endpoint` might have a different name).
原因是安装TensorFlow版本不对,将2.16.0降到2.11.0后,以及keras从3.3.0降到2.9.0后正常。
模型为:CNN架构
模型大小:pd格式,40Mb左右。
五、测试结果
5.1 以pd格式的模型加载进行预测结果对比
1)在R900p电脑上运行
执行时间1.04s

2)在该板子上的执行时间:
执行时间3.48s:

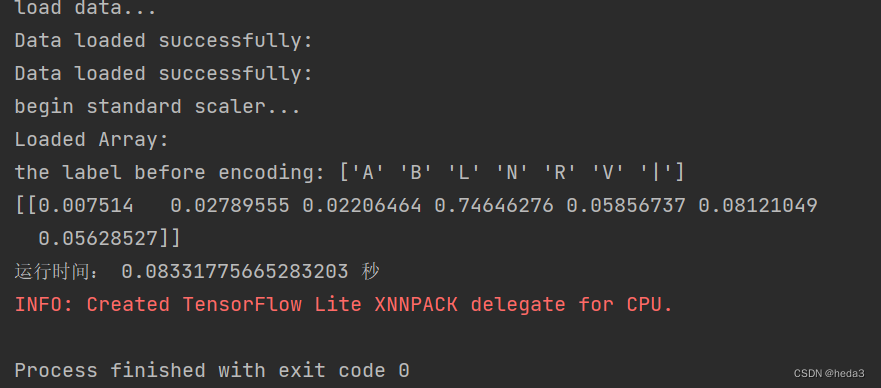
5.2 以pd格式的模型转换为tflite格式并进行预测结果对比
1)在R900p电脑上运行
执行时间0.08s

2)在该板子上的执行时间:
执行时间0.07s:

六、体验总结
对于深度学习模型的数据预测推理结果对比情况,在加载pd模型进行预测时:预测结果时间在3.48s。转换为tflite格式后部署,在笔记本电脑上运行的时间和在该开发板上运行的时间相当,在0.1s内,而且在该板子上运行的时间明显更快一些。因此通过对比结果来看,该开发板的计算性能不错,板子的运算能力能在实际场景下满足深度学习模型实时预测分类的需求。
这篇关于基于心电疾病分类的深度学习模型部署应用于OrangePi Kunpeng Pro开发板的文章就介绍到这儿,希望我们推荐的文章对编程师们有所帮助!


