本文主要是介绍OpenCV4.9如何将失焦图片去模糊滤镜(67),希望对大家解决编程问题提供一定的参考价值,需要的开发者们随着小编来一起学习吧!
返回:OpenCV系列文章目录(持续更新中......)
上一篇:OpenCV4.9的基于距离变换和分水岭算法的图像分割(66)
下一篇 :OpenCV4.9去运动模糊滤镜(68)

目标
在本教程中,您将学习:
- 什么是退化图像模型
- 失焦图像的 PSF 是多少
- 如何恢复模糊的图像
- 什么是维纳过滤器
理论
注意
该解释基于书籍[108]和[325]。另外,您可以参考 Matlab 的教程 Matlab 中的图像去模糊 和文章 SmartDeblur.
图像去模糊
图像的模糊或退化可能由许多因素引起:
-
在图像捕获过程中,通过相机移动或长时间移动 曝光时间由受试者使用
-
失焦光学元件、使用广角镜头、大气湍流或 曝光时间短,可减少捕获的光子数量
-
共聚焦显微镜中的散射光畸变
模糊或退化的图像可以用以下方程 g = Hf + n 近似描述。
| g | 模糊的图像 |
| H | 失真算子,也称为点扩散 函数 (PSF)。在空间域中,PSF 描述光学系统模糊(扩散)的程度 光点。PSF 是 光传递函数 (OTF)。在频域中,OTF 描述了线性、位置不变系统对 冲动。OTF 是点差的傅里叶变换 函数 (PSF)。失真运算符,当与 图像,创建失真。点扩散引起的失真 功能只是失真的一种类型。 |
| f | 原始真实图像 注意 图像 f 并没有真正 存在。这张图片代表了如果你拥有的话,你会拥有什么 完美的图像采集条件。 |
| n | 图像采集过程中引入的加法噪声会损坏 图像 |
基于该模型,去模糊的基本任务是对模糊进行反卷积 具有准确描述失真的 PSF 的图像。反卷积是一个过程 逆转卷积的影响。
注意
去模糊图像的质量主要取决于对 PSF。
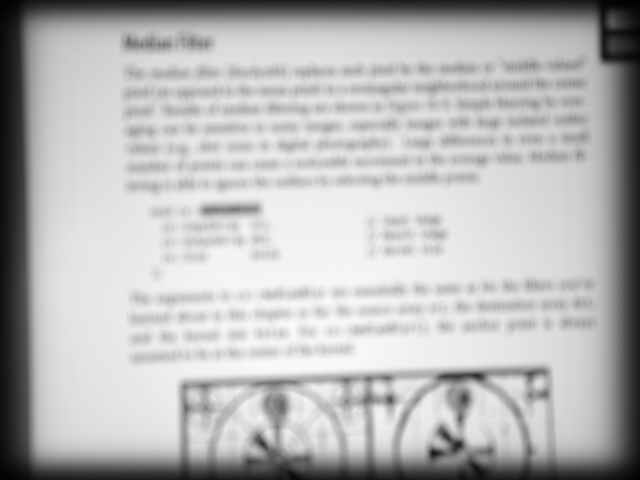
此页面上的失焦图像是真实世界的图像。失焦是通过相机光学器件手动实现的。
什么是退化图像模型?
以下是频域表示中图像退化的数学模型:

其中(S)是模糊(退化)图像的频谱,(U)是原始真实(未退化)图像的频谱,(H)是点扩散函数(PSF)的频率响应,(N)是加性噪声的频谱。
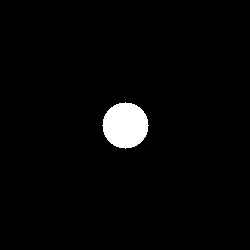
圆形 PSF 是离焦失真的一个很好的近似值。这样的 PSF 仅由一个参数指定 - 半径(R)。本工作使用圆形 PSF。

圆形点扩散功能
如何恢复模糊的图像?
恢复(去模糊)的目的是获得原始图像的估计值。频域中的恢复公式为:
![]()
其中(U)是原始图像(U)的估计光谱,(H_w)是恢复滤波器,例如维纳滤波器。
什么是维纳过滤器?
维纳滤镜是一种恢复模糊图像的方法。假设PSF是一个真实对称的信号,原始真实镜像和噪声的功率谱是未知的,那么一个简化的维纳公式是:

其中(SNR)是信噪比。
因此,为了通过维纳滤波器恢复失焦图像,它需要知道圆形PSF的(SNR)和(R)。
源代码
您可以在 OpenCV 源代码库中找到源代码。samples/cpp/tutorial_code/ImgProc/out_of_focus_deblur_filter/out_of_focus_deblur_filter.cpp
#include <iostream>
#include "opencv2/highgui.hpp"
#include "opencv2/imgproc.hpp"
#include "opencv2/imgcodecs.hpp"using namespace cv;
using namespace std;void help();
void calcPSF(Mat& outputImg, Size filterSize, int R);
void fftshift(const Mat& inputImg, Mat& outputImg);
void filter2DFreq(const Mat& inputImg, Mat& outputImg, const Mat& H);
void calcWnrFilter(const Mat& input_h_PSF, Mat& output_G, double nsr);const String keys =
"{help h usage ? | | print this message }"
"{image |original.jpg | input image name }"
"{R |5 | radius }"
"{SNR |100 | signal to noise ratio}"
;int main(int argc, char *argv[])
{help();CommandLineParser parser(argc, argv, keys);if (parser.has("help")){parser.printMessage();return 0;}int R = parser.get<int>("R");int snr = parser.get<int>("SNR");string strInFileName = parser.get<String>("image");samples::addSamplesDataSearchSubDirectory("doc/tutorials/imgproc/out_of_focus_deblur_filter/images");if (!parser.check()){parser.printErrors();return 0;}Mat imgIn;imgIn = imread(samples::findFile( strInFileName ), IMREAD_GRAYSCALE);if (imgIn.empty()) //check whether the image is loaded or not{cout << "ERROR : Image cannot be loaded..!!" << endl;return -1;}Mat imgOut;// it needs to process even image onlyRect roi = Rect(0, 0, imgIn.cols & -2, imgIn.rows & -2);//Hw calculation (start)Mat Hw, h;calcPSF(h, roi.size(), R);calcWnrFilter(h, Hw, 1.0 / double(snr));//Hw calculation (stop)// filtering (start)filter2DFreq(imgIn(roi), imgOut, Hw);// filtering (stop)imgOut.convertTo(imgOut, CV_8U);normalize(imgOut, imgOut, 0, 255, NORM_MINMAX);imshow("Original", imgIn);imshow("Debluring", imgOut);imwrite("result.jpg", imgOut);waitKey(0);return 0;
}void help()
{cout << "2018-07-12" << endl;cout << "DeBlur_v8" << endl;cout << "You will learn how to recover an out-of-focus image by Wiener filter" << endl;
}void calcPSF(Mat& outputImg, Size filterSize, int R)
{Mat h(filterSize, CV_32F, Scalar(0));Point point(filterSize.width / 2, filterSize.height / 2);circle(h, point, R, 255, -1, 8);Scalar summa = sum(h);outputImg = h / summa[0];
}void fftshift(const Mat& inputImg, Mat& outputImg)
{outputImg = inputImg.clone();int cx = outputImg.cols / 2;int cy = outputImg.rows / 2;Mat q0(outputImg, Rect(0, 0, cx, cy));Mat q1(outputImg, Rect(cx, 0, cx, cy));Mat q2(outputImg, Rect(0, cy, cx, cy));Mat q3(outputImg, Rect(cx, cy, cx, cy));Mat tmp;q0.copyTo(tmp);q3.copyTo(q0);tmp.copyTo(q3);q1.copyTo(tmp);q2.copyTo(q1);tmp.copyTo(q2);
}void filter2DFreq(const Mat& inputImg, Mat& outputImg, const Mat& H)
{Mat planes[2] = { Mat_<float>(inputImg.clone()), Mat::zeros(inputImg.size(), CV_32F) };Mat complexI;merge(planes, 2, complexI);dft(complexI, complexI, DFT_SCALE);Mat planesH[2] = { Mat_<float>(H.clone()), Mat::zeros(H.size(), CV_32F) };Mat complexH;merge(planesH, 2, complexH);Mat complexIH;mulSpectrums(complexI, complexH, complexIH, 0);idft(complexIH, complexIH);split(complexIH, planes);outputImg = planes[0];
}void calcWnrFilter(const Mat& input_h_PSF, Mat& output_G, double nsr)
{Mat h_PSF_shifted;fftshift(input_h_PSF, h_PSF_shifted);Mat planes[2] = { Mat_<float>(h_PSF_shifted.clone()), Mat::zeros(h_PSF_shifted.size(), CV_32F) };Mat complexI;merge(planes, 2, complexI);dft(complexI, complexI);split(complexI, planes);Mat denom;pow(abs(planes[0]), 2, denom);denom += nsr;divide(planes[0], denom, output_G);
}
解释
失焦图像恢复算法包括 PSF 生成、Wiener 滤波器生成和频域模糊图像滤波:
// it needs to process even image onlyRect roi = Rect(0, 0, imgIn.cols & -2, imgIn.rows & -2);//Hw calculation (start)Mat Hw, h;calcPSF(h, roi.size(), R);calcWnrFilter(h, Hw, 1.0 / double(snr));//Hw calculation (stop)// filtering (start)filter2DFreq(imgIn(roi), imgOut, Hw);// filtering (stop)函数 calcPSF()根据输入参数半径(R)形成一个圆形 PSF:
void calcPSF(Mat& outputImg, Size filterSize, int R)
{Mat h(filterSize, CV_32F, Scalar(0));Point point(filterSize.width / 2, filterSize.height / 2);circle(h, point, R, 255, -1, 8);Scalar summa = sum(h);outputImg = h / summa[0];
}
函数 calcWnrFilter()根据上述公式合成简化的 Wiener 过滤器(H_w):
void calcWnrFilter(const Mat& input_h_PSF, Mat& output_G, double nsr)
{Mat h_PSF_shifted;fftshift(input_h_PSF, h_PSF_shifted);Mat planes[2] = { Mat_<float>(h_PSF_shifted.clone()), Mat::zeros(h_PSF_shifted.size(), CV_32F) };Mat complexI;merge(planes, 2, complexI);dft(complexI, complexI);split(complexI, planes);Mat denom;pow(abs(planes[0]), 2, denom);denom += nsr;divide(planes[0], denom, output_G);
}
函数 fftshift()重新排列 PSF。此代码刚刚从离散傅里叶变换教程中复制而来:
void fftshift(const Mat& inputImg, Mat& outputImg)
{outputImg = inputImg.clone();int cx = outputImg.cols / 2;int cy = outputImg.rows / 2;Mat q0(outputImg, Rect(0, 0, cx, cy));Mat q1(outputImg, Rect(cx, 0, cx, cy));Mat q2(outputImg, Rect(0, cy, cx, cy));Mat q3(outputImg, Rect(cx, cy, cx, cy));Mat tmp;q0.copyTo(tmp);q3.copyTo(q0);tmp.copyTo(q3);q1.copyTo(tmp);q2.copyTo(q1);tmp.copyTo(q2);
}
函数 filter2DFreq()过滤频域中的模糊图像:
void filter2DFreq(const Mat& inputImg, Mat& outputImg, const Mat& H)
{Mat planes[2] = { Mat_<float>(inputImg.clone()), Mat::zeros(inputImg.size(), CV_32F) };Mat complexI;merge(planes, 2, complexI);dft(complexI, complexI, DFT_SCALE);Mat planesH[2] = { Mat_<float>(H.clone()), Mat::zeros(H.size(), CV_32F) };Mat complexH;merge(planesH, 2, complexH);Mat complexIH;mulSpectrums(complexI, complexH, complexIH, 0);idft(complexIH, complexIH);split(complexIH, planes);outputImg = planes[0];
}
结果
下面你可以看到真实的失焦图像:

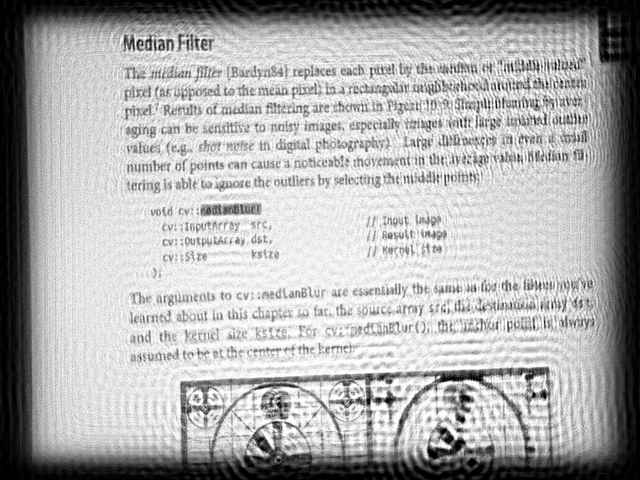
使用(R)= 53 和(SNR)= 5200 参数计算得出以下结果:

使用维纳滤波器,手动选择(R)和(SNR)的值,以提供最佳的视觉效果。我们可以看到结果并不完美,但它为我们提供了图像内容的提示。虽然有些困难,但文本是可读的。
注意
参数(R)是最重要的。所以你应该先调整(R),然后调整(SNR)。
有时,您可以在恢复的图像中观察到振铃效应。这种影响可以通过几种方法减少。例如,您可以逐渐缩小输入图像边缘。
参考文献:
1、《Out-of-focus Deblur Filter》---Karpushin Vladislav
这篇关于OpenCV4.9如何将失焦图片去模糊滤镜(67)的文章就介绍到这儿,希望我们推荐的文章对编程师们有所帮助!


