本文主要是介绍实操——使用uploadify插件(php版和Java版) 与 Dropzone.js插件分别实现附件上传,希望对大家解决编程问题提供一定的参考价值,需要的开发者们随着小编来一起学习吧!
实操——使用uploadify插件(php版和Java版)与 Dropzone.js插件分别实现附件上传
- 1. 使用uploadify插件上传
- 1.1 简介
- 1.1.1 简介
- 1.1.2 参考GitHub
- 1.2 后端PHP版本的uploadify
- 1.2.1 下载项目的目录结构
- 1.2.2 测试看界面效果
- 1.2.3 附页面代码 和 PHP代码
- 1.3 后端Java版本的uploadify
- 1.3.1 先看一下项目结构
- 1.3.2 web.xml配置
- 1.3.3 Java实现代码
- 1.3.4 效果
- 1.4 uploadify的优化一丢丢(不够完美)
- 1.4.1 说明
- 1.4.2 先看效果
- 1.4.3 代码不同之处
- 2. 使用Dropzone.js插件上传
- 2.1 项目结构
- 2.2 看效果
- 2.3 核心代码
- 2.4 参考
- 3. 附项目下载
- 4. 可能遇到问题
- 4.1 idea中导入eclipse项目
1. 使用uploadify插件上传
1.1 简介
1.1.1 简介
- uploadify是一个基于jQuery的文件上传插件,它提供了简单易用的界面和丰富的功能来实现文件上传操作。通过uploadify,用户可以选择文件并将其上传到服务器上。
- uploadify具有以下特点:
多文件上传、文件类型限制、文件大小限制、进度显示、事件回调(提供了多个事件回调函数,例如上传成功、上传失败等,方便开发者进行相应的处理)、自定义样式等。
1.1.2 参考GitHub
- 原PHP项目如下(如果有PHP环境,原作者的项目下载下来即可运行,支持):
https://github.com/Double-Lv/Huploadify.
1.2 后端PHP版本的uploadify
1.2.1 下载项目的目录结构
- 下载地址就是上面参考的GitHub地址,项目目录如下:

1.2.2 测试看界面效果
- 下载之后放到PHP环境的某一站点下,直接运行即可,如下:
1.2.3 附页面代码 和 PHP代码
- demo.html
<!DOCTYPE html PUBLIC "-//W3C//DTD XHTML 1.0 Transitional//EN" "http://www.w3.org/TR/xhtml1/DTD/xhtml1-transitional.dtd"> <html xmlns="http://www.w3.org/1999/xhtml"> <head> <meta http-equiv="Content-Type" content="text/html; charset=utf-8" /> <title>无标题文档</title> <link rel="stylesheet" type="text/css" href="Huploadify.css"/> <script type="text/javascript" src="jquery.js"></script> <script type="text/javascript" src="jquery.Huploadify.js"></script> <style type="text/css"> </style> <script type="text/javascript"> $(function(){var up = $('#upload').Huploadify({// formData:{key:123456,key2:'vvvv'},auto:false,// fileTypeExts:'*.*',fileTypeExts:'*.jpg;*.jpge;*.gif;*.png;*.jpeg;*.txt;*.doc;*.docx;*.pdf;*.xls;*.xlsx;*.ppt;*.pptx;*.zip,',multi:true,fileSizeLimit:99999999999,showUploadedPercent:true,showUploadedSize:true,removeTimeout:9999999,uploader:'upload.php',onUploadStart:function(file){console.log(file.name+'开始上传');},onInit:function(obj){console.log('初始化');console.log(obj);},onUploadComplete:function(file){console.log(file.name+'上传完成');},onCancel:function(file){console.log(file.name+'删除成功');},onClearQueue:function(queueItemCount){console.log('有'+queueItemCount+'个文件被删除了');},onDestroy:function(){console.log('destroyed!');},onSelect:function(file){console.log(file.name+'加入上传队列');},onQueueComplete:function(queueData){console.log('队列中的文件全部上传完成',queueData);}});}); </script> </head><body><div id="upload"></div></body> </html> - upload.php
<?php$filename = iconv('UTF-8', 'GBK', $_FILES['file']['name']); $key = $_POST['key'];$key2 = $_POST['key2'];// echo $key;// echo $key2;// echo $filename;// echo "aaaa";if ($filename) {move_uploaded_file($_FILES["file"]["tmp_name"],"upload_images/" . $filename);}?>
1.3 后端Java版本的uploadify
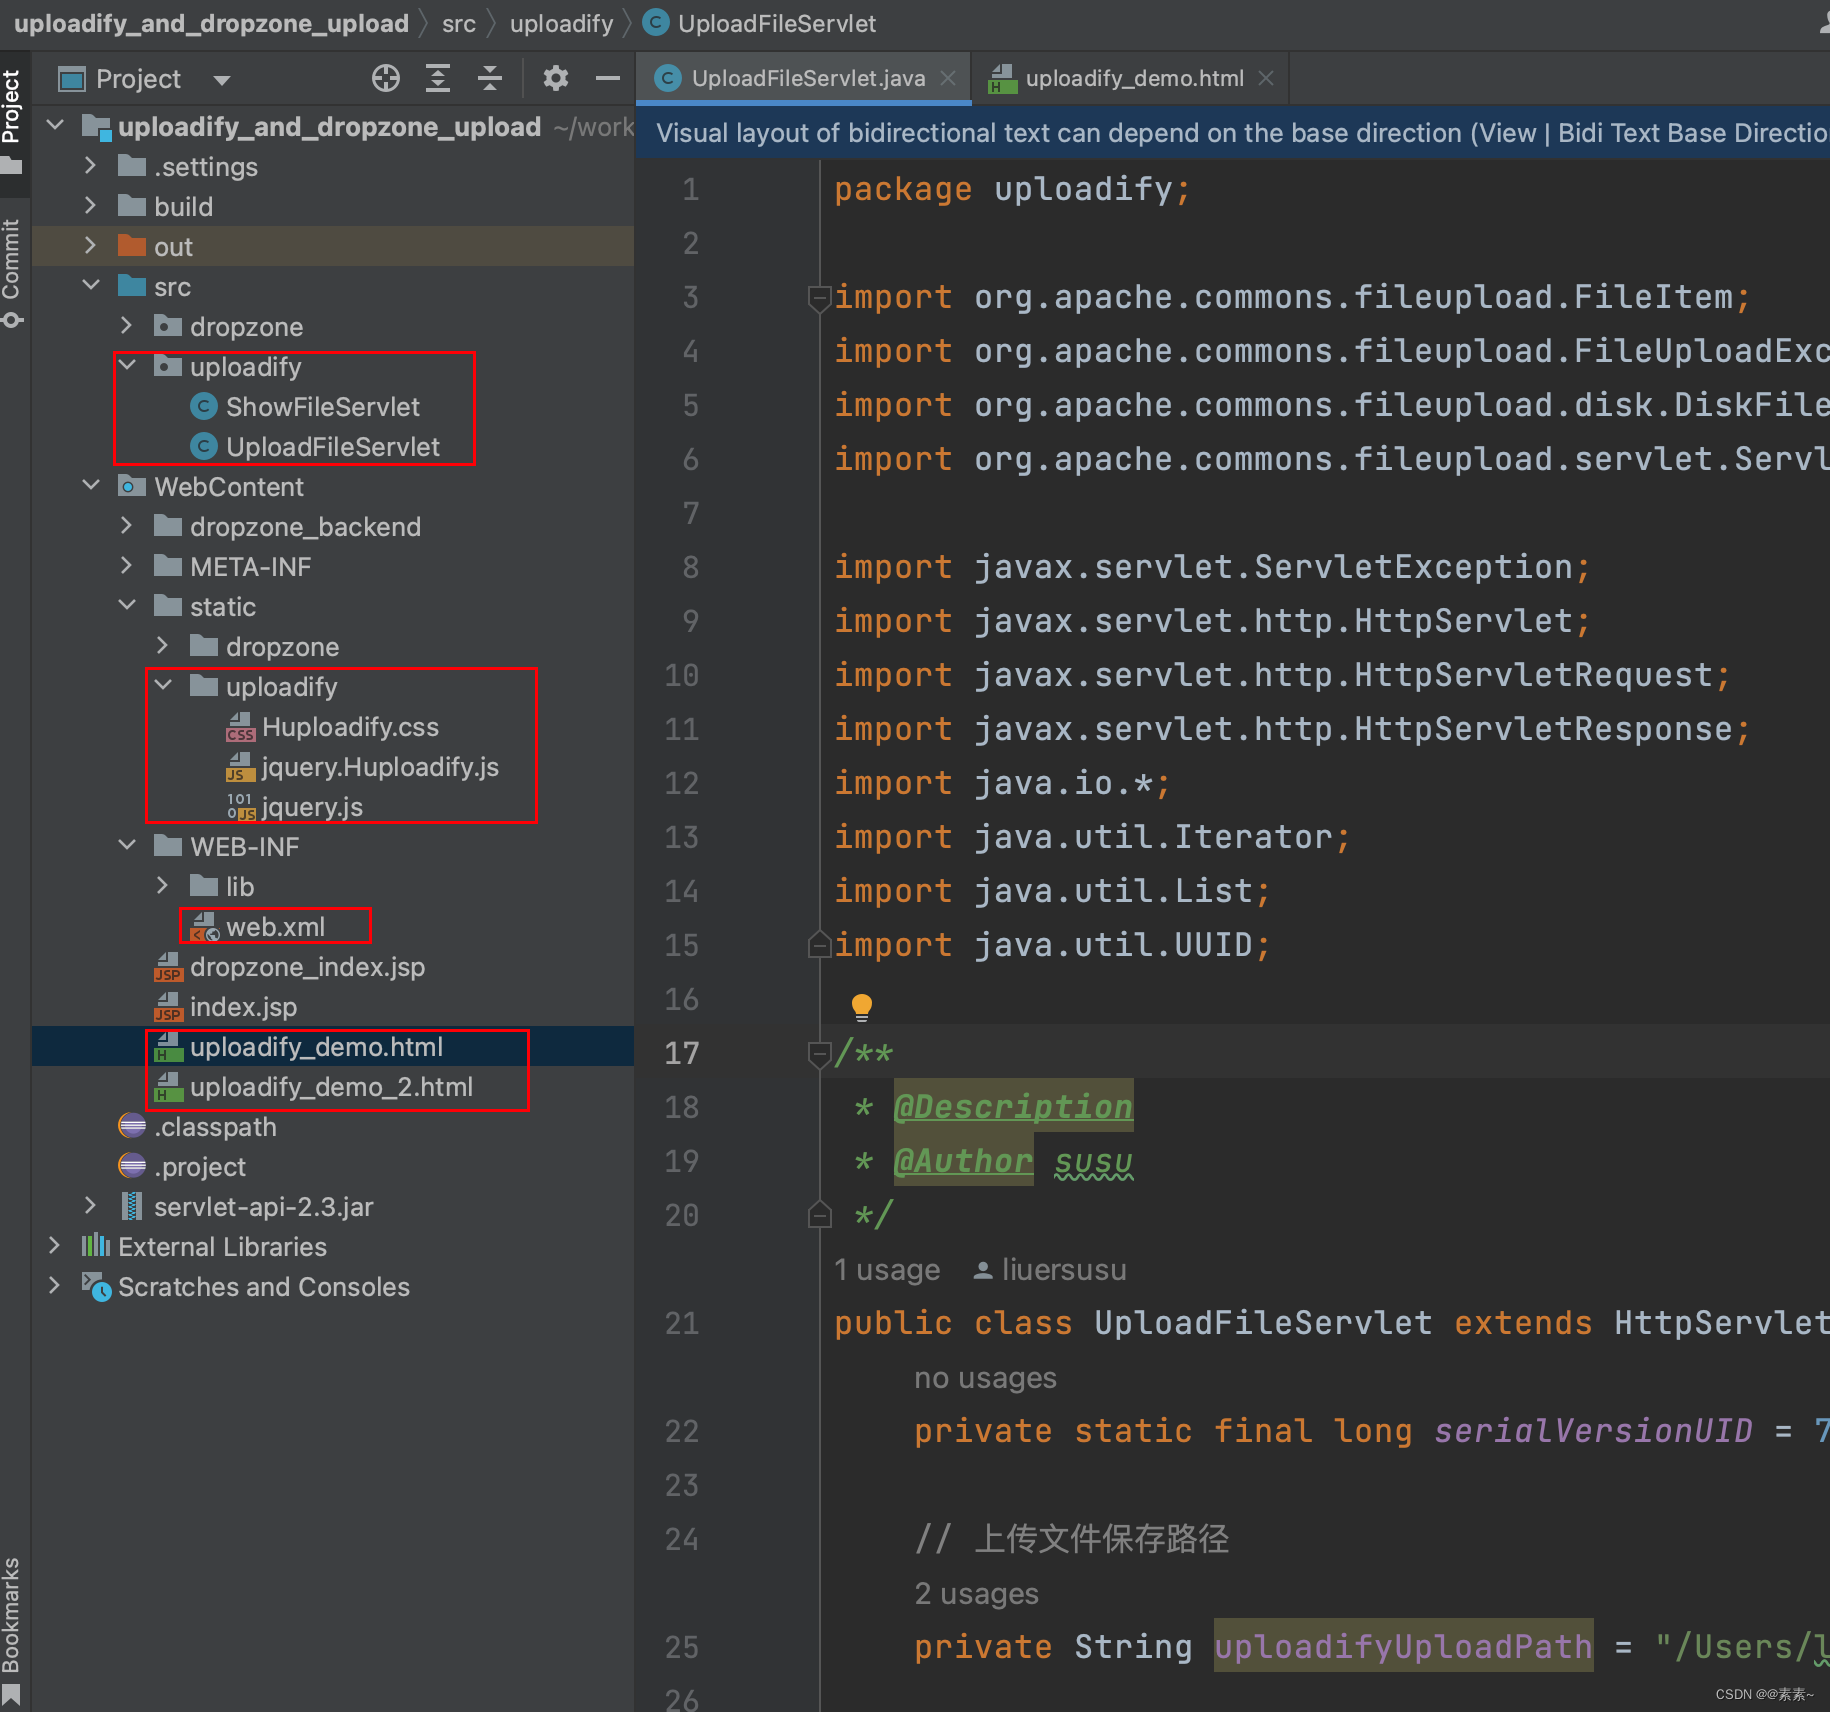
1.3.1 先看一下项目结构
- 这个项目里除了使用uploadify插件上传,还有包含了适用dropzone插件上传,先介绍uploadify,后面再说dropzone,结构如下(除了后端实现换成了Java,html页面几乎一样,js、css都是不变):
1.3.2 web.xml配置
- 如下:
<?xml version="1.0" encoding="UTF-8"?>
<web-app xmlns:xsi="http://www.w3.org/2001/XMLSchema-instance"xmlns="http://java.sun.com/xml/ns/javaee"xmlns:web="http://java.sun.com/xml/ns/javaee/web-app_2_5.xsd"xsi:schemaLocation="http://java.sun.com/xml/ns/javaee http://java.sun.com/xml/ns/javaee/web-app_2_5.xsd"id="WebApp_ID" version="2.5"><display-name>dropzone_upload</display-name><servlet><servlet-name>uploadifyUpload</servlet-name><servlet-class>uploadify.UploadFileServlet</servlet-class></servlet><servlet-mapping><servlet-name>uploadifyUpload</servlet-name><url-pattern>/uploadifyUpload</url-pattern></servlet-mapping><servlet><servlet-name>showUploadifyFile</servlet-name><servlet-class>uploadify.ShowFileServlet</servlet-class></servlet><servlet-mapping><servlet-name>showUploadifyFile</servlet-name><url-pattern>/showUploadifyFile</url-pattern></servlet-mapping><welcome-file-list><welcome-file>index.jsp</welcome-file><welcome-file>index.html</welcome-file><welcome-file>index.htm</welcome-file><welcome-file>dropzone_index.html</welcome-file><welcome-file>uploadify_demo.html</welcome-file><welcome-file>uploadify_demo_2.html</welcome-file></welcome-file-list></web-app>
1.3.3 Java实现代码
- UploadFileServlet.java 如下:
package uploadify;import org.apache.commons.fileupload.FileItem; import org.apache.commons.fileupload.FileUploadException; import org.apache.commons.fileupload.disk.DiskFileItemFactory; import org.apache.commons.fileupload.servlet.ServletFileUpload;import javax.servlet.ServletException; import javax.servlet.http.HttpServlet; import javax.servlet.http.HttpServletRequest; import javax.servlet.http.HttpServletResponse; import java.io.*; import java.util.Iterator; import java.util.List; import java.util.UUID;/*** @Description 使用 uploadify 实现附件上传* @Author susu*/ public class UploadFileServlet extends HttpServlet {private static final long serialVersionUID = 7434128027715196789L;// 上传文件保存路径private String uploadifyUploadPath = "/Users/susu/file_test/file_upload/uploadify_upload";public void doGet(HttpServletRequest request, HttpServletResponse response) throws ServletException, IOException {this.doPost(request, response);}public void doPost(HttpServletRequest request, HttpServletResponse response) throws ServletException, IOException {String ret_fileName = null; //返回给前端已修改的图片名称request.setCharacterEncoding("UTF-8");response.setContentType("text/html; charset=UTF-8");PrintWriter out = response.getWriter();String tempPath = this.getServletContext().getRealPath("/");File dirFile = new File(uploadifyUploadPath);if (!dirFile.exists()) {dirFile.mkdirs();}File dirTempFile = new File(tempPath);if (!dirTempFile.exists()) {dirTempFile.mkdirs();}DiskFileItemFactory factory = new DiskFileItemFactory();factory.setSizeThreshold(20 * 1024 * 1024); // 设定使用内存超过5M时,将产生临时文件并存储于临时目录中。factory.setRepository(new File(tempPath)); // 设定存储临时文件的目录。ServletFileUpload upload = new ServletFileUpload(factory);upload.setHeaderEncoding("UTF-8");try {List<?> items = upload.parseRequest(request);Iterator<?> itr = items.iterator();while (itr.hasNext()) {FileItem item = (FileItem) itr.next();String fileName = item.getName();if (fileName != null) {String endstr = fileName.substring(fileName.indexOf("."), fileName.length());fileName = UUID.randomUUID() + endstr;ret_fileName = fileName;}if (!item.isFormField()) {try {File uploadedFile = new File(uploadifyUploadPath, fileName);OutputStream os = new FileOutputStream(uploadedFile);InputStream is = item.getInputStream();byte buf[] = new byte[1024];int length = 0;while ((length = is.read(buf)) > 0) {os.write(buf, 0, length);}os.flush();os.close();is.close();} catch (Exception e) {e.printStackTrace();}}}} catch (FileUploadException e) {e.printStackTrace();}//将已修改的图片名称返回前端out.print(ret_fileName);out.flush();out.close();}} - 参考如下:
Uploadify v3.2.1 上传图片并预览.
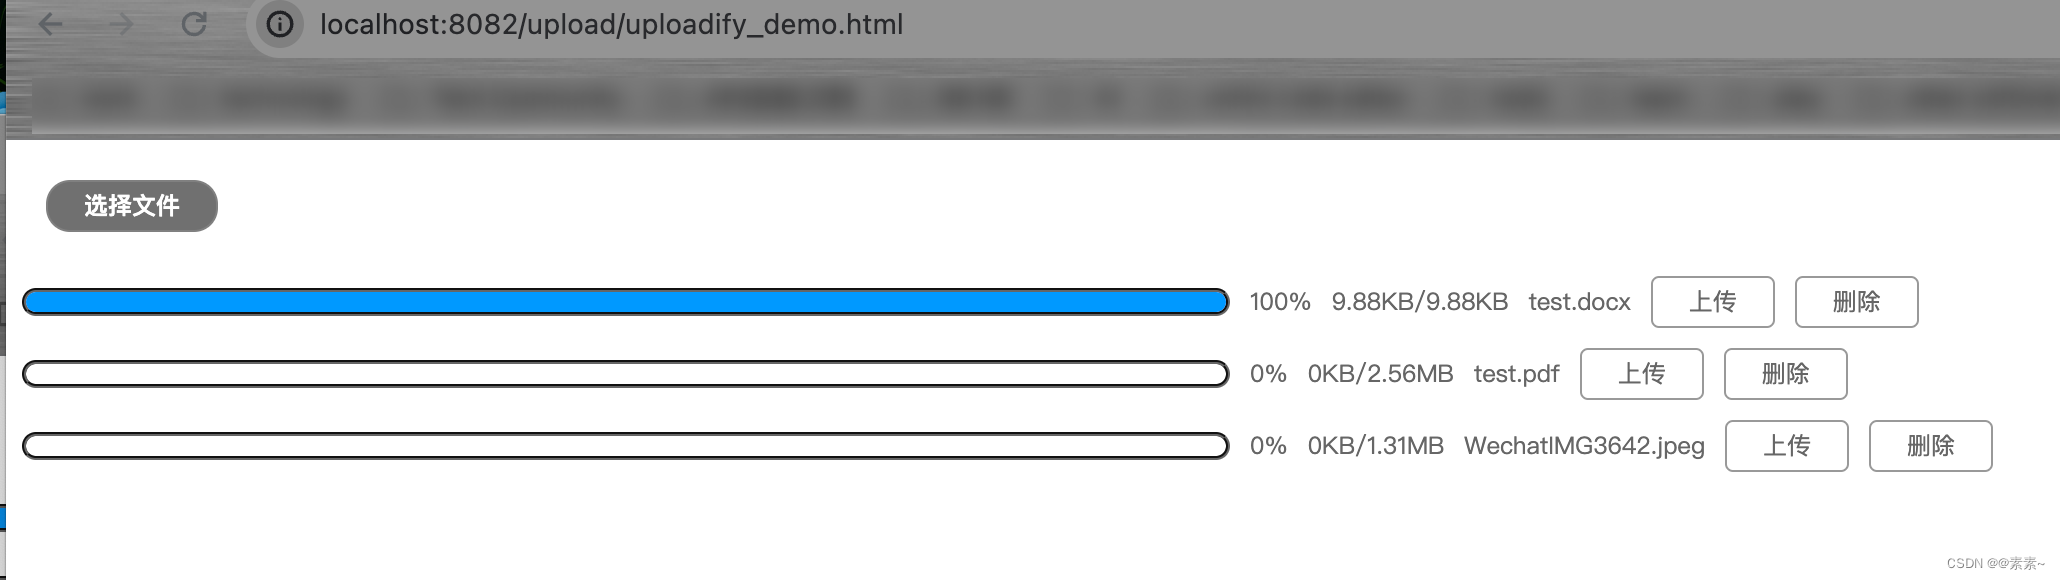
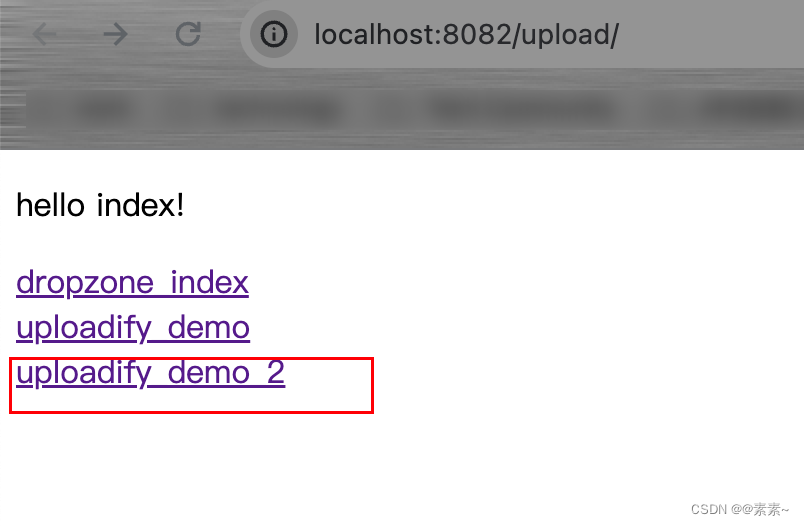
1.3.4 效果
- 如下:
1.4 uploadify的优化一丢丢(不够完美)
1.4.1 说明
- 下面优化不够完美,只能说可以往这个方向优化,下面只是一个demo,如果上述已经满足你可以不用看下面的,因为如果实现完美可能还需要你自己去优化!!!
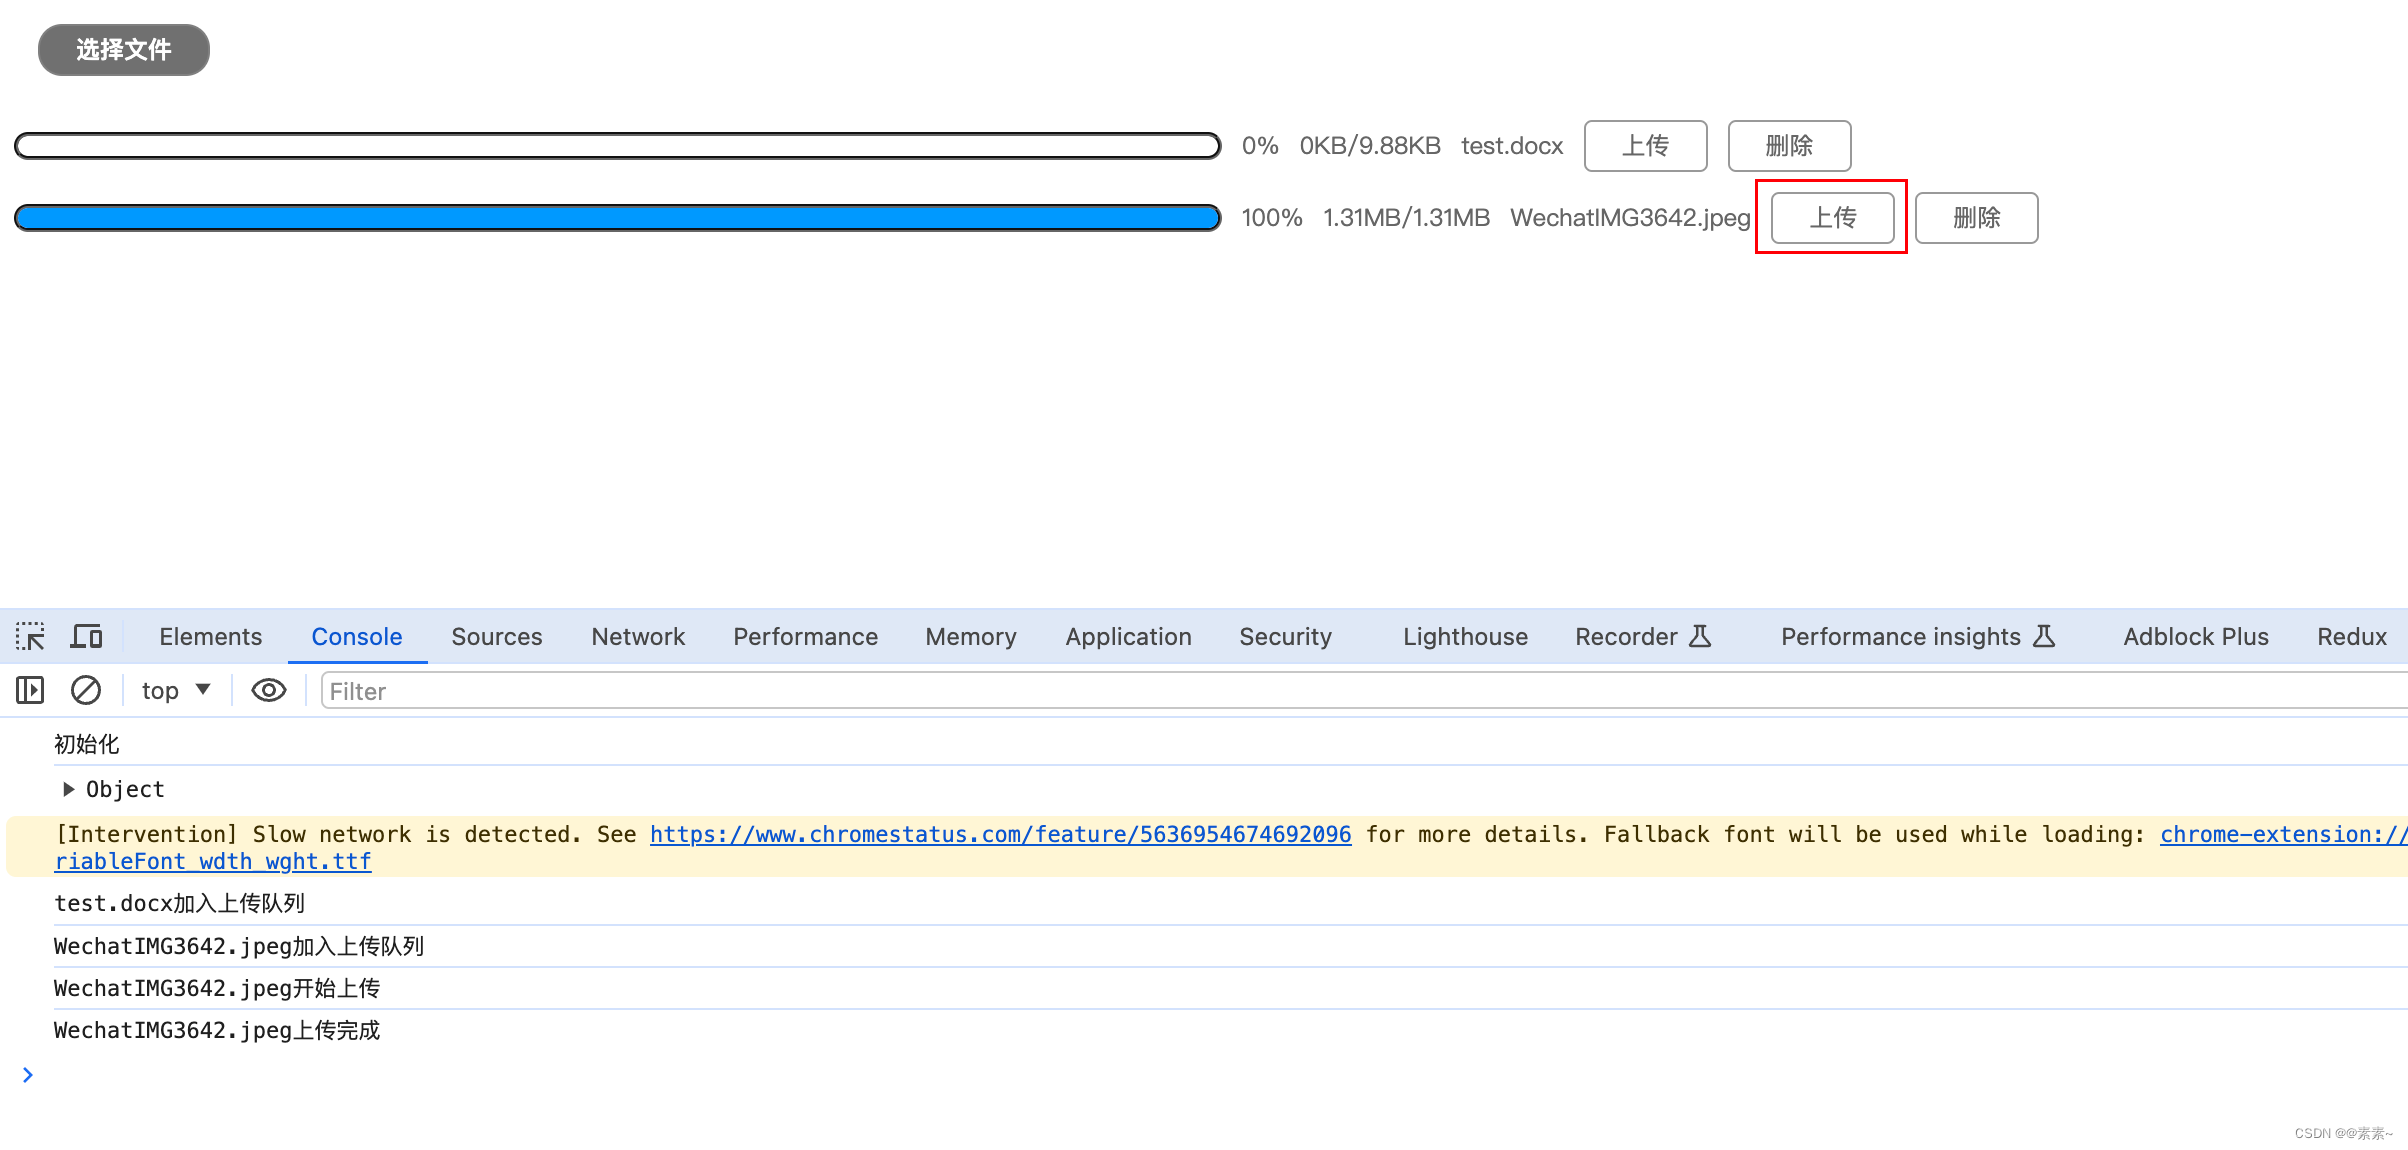
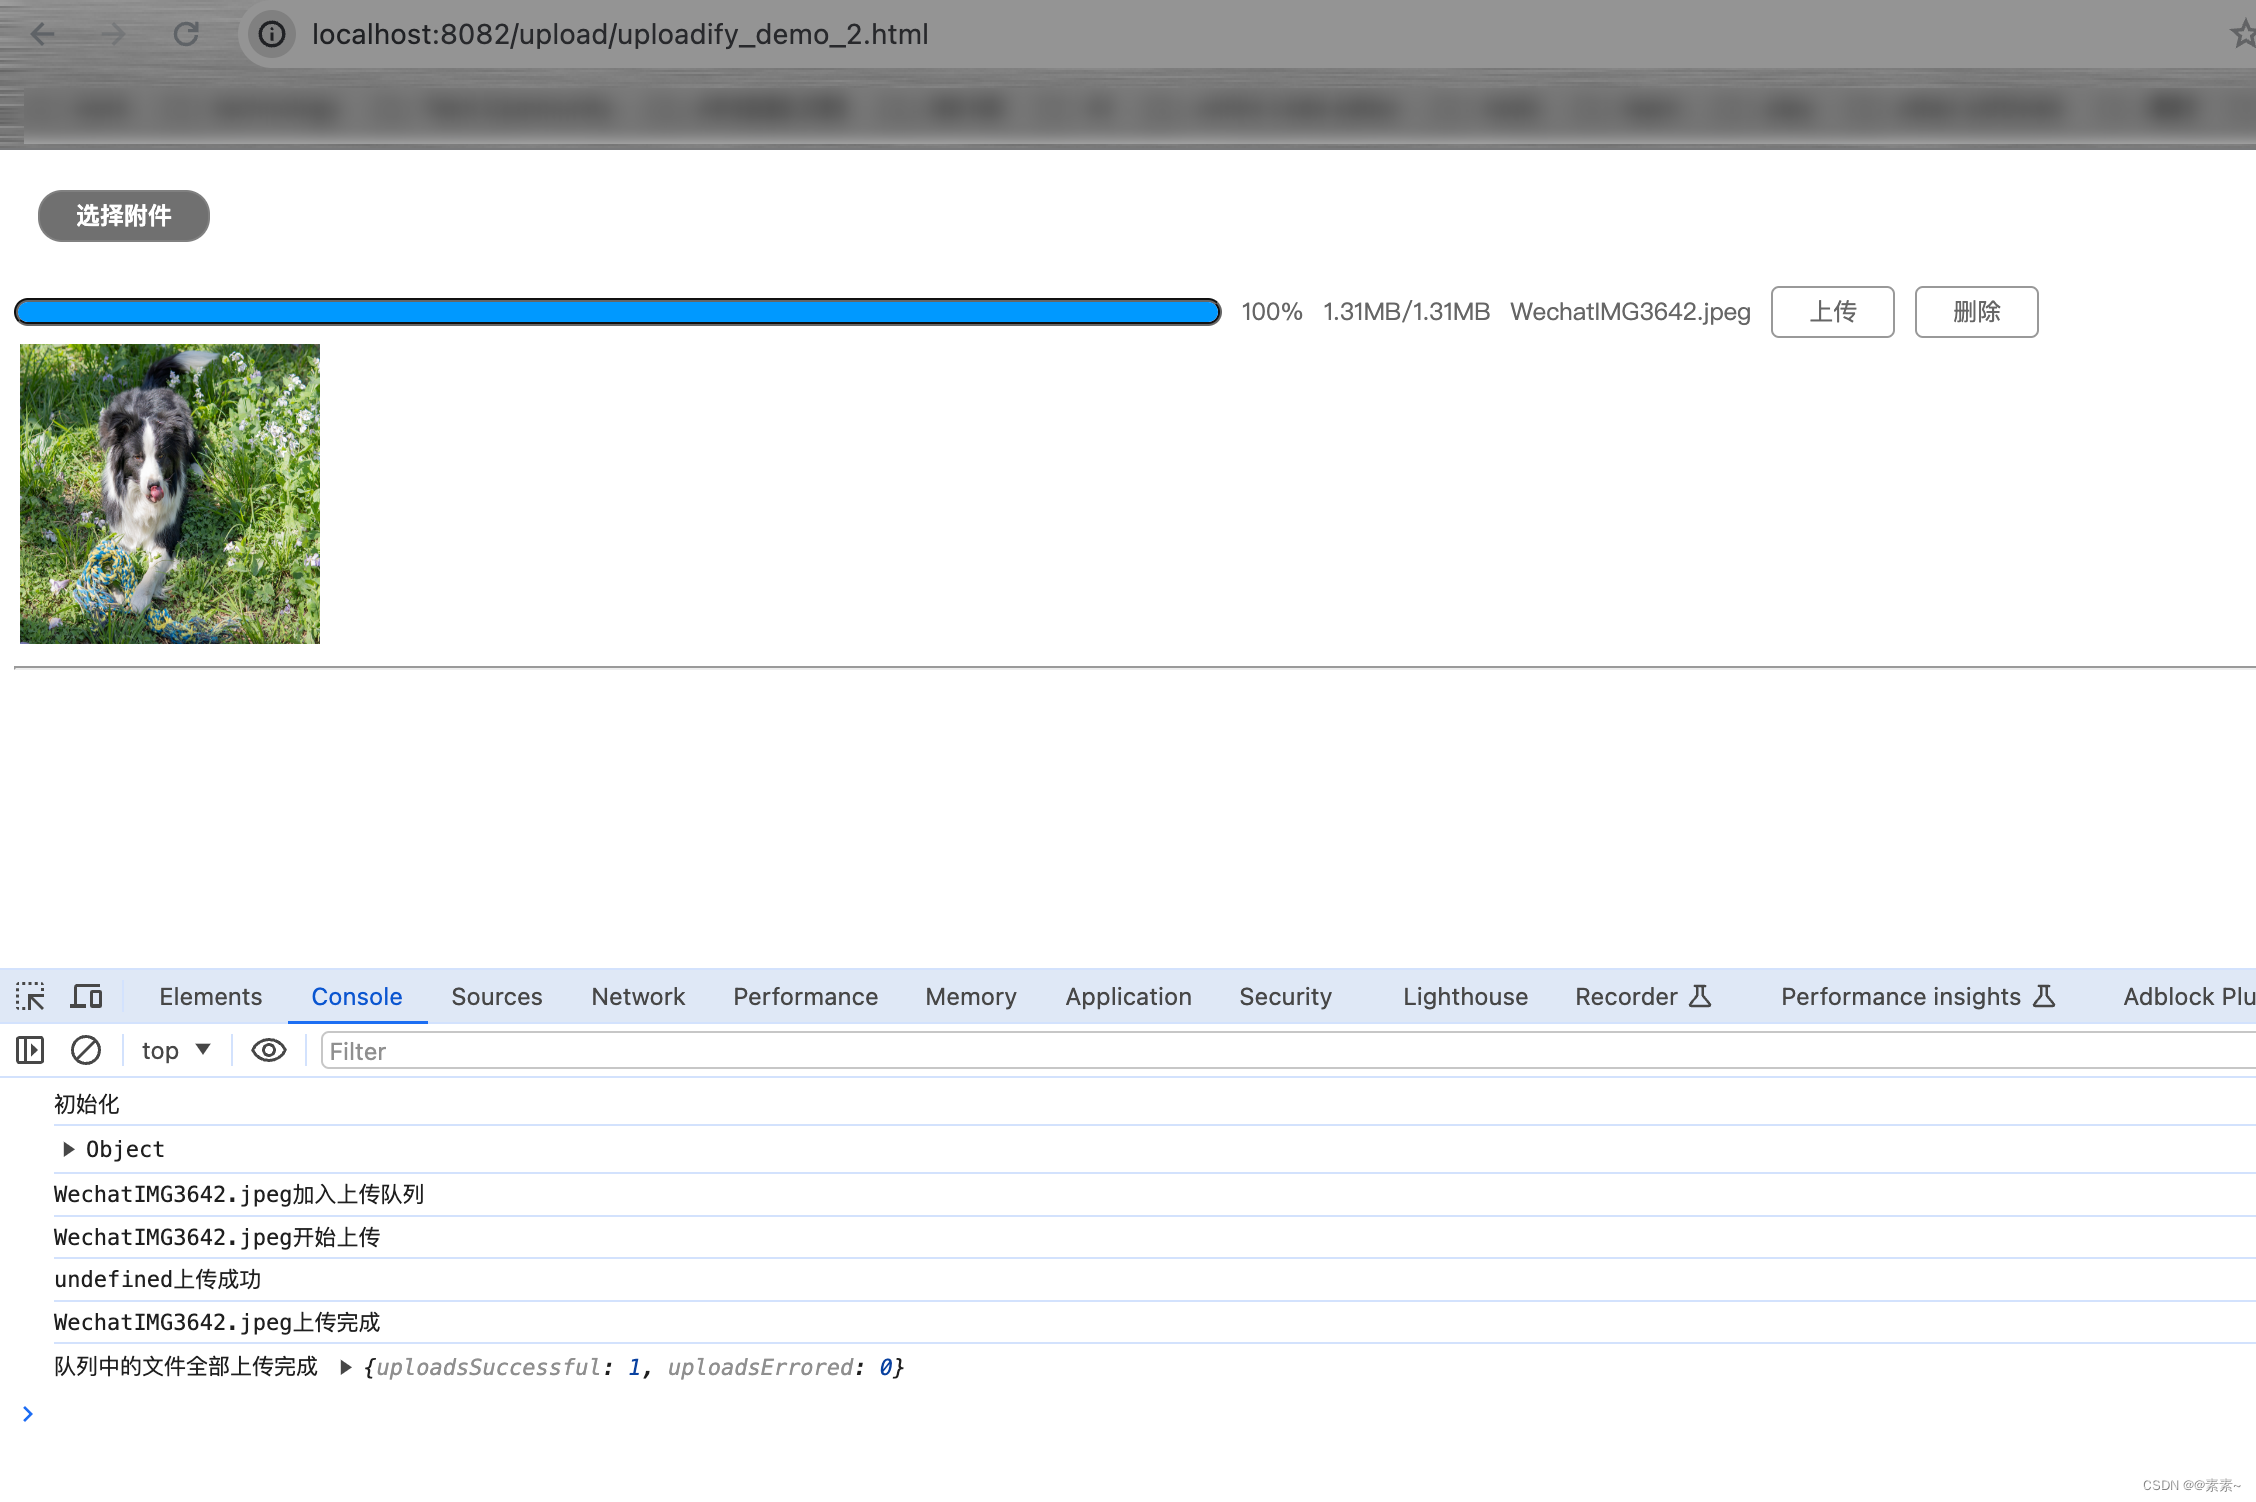
1.4.2 先看效果
- 效果就是如果上传的是图片可以展示在页面,但是问题是不够动态,不支持多张,所以后续的优化方向是无论是图片还是附件上传之后都可以展示缩略图,好了只是方向,需要的自己去优化吧,先看单个图片效果:
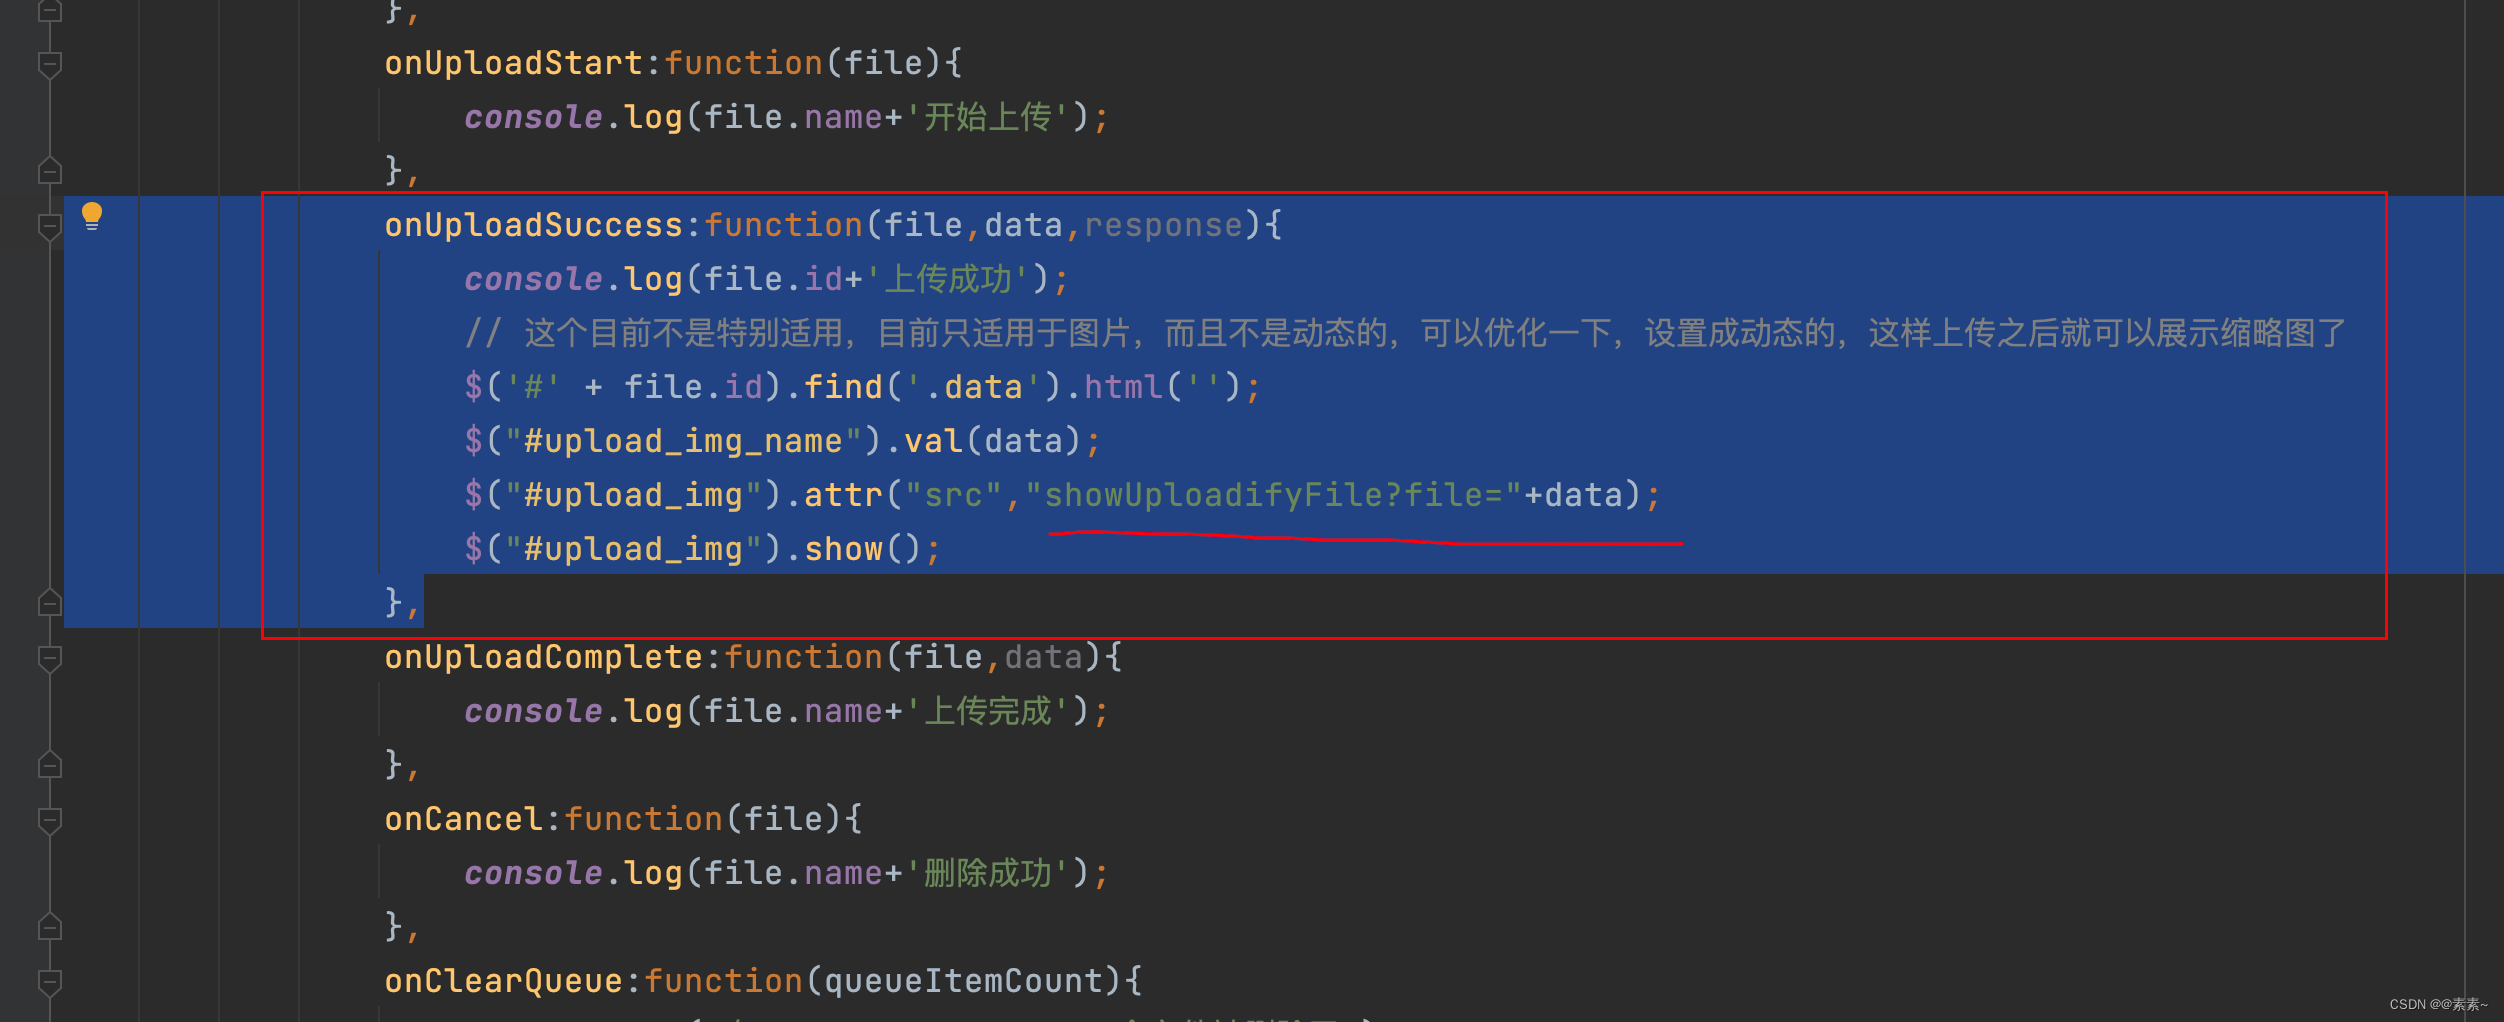
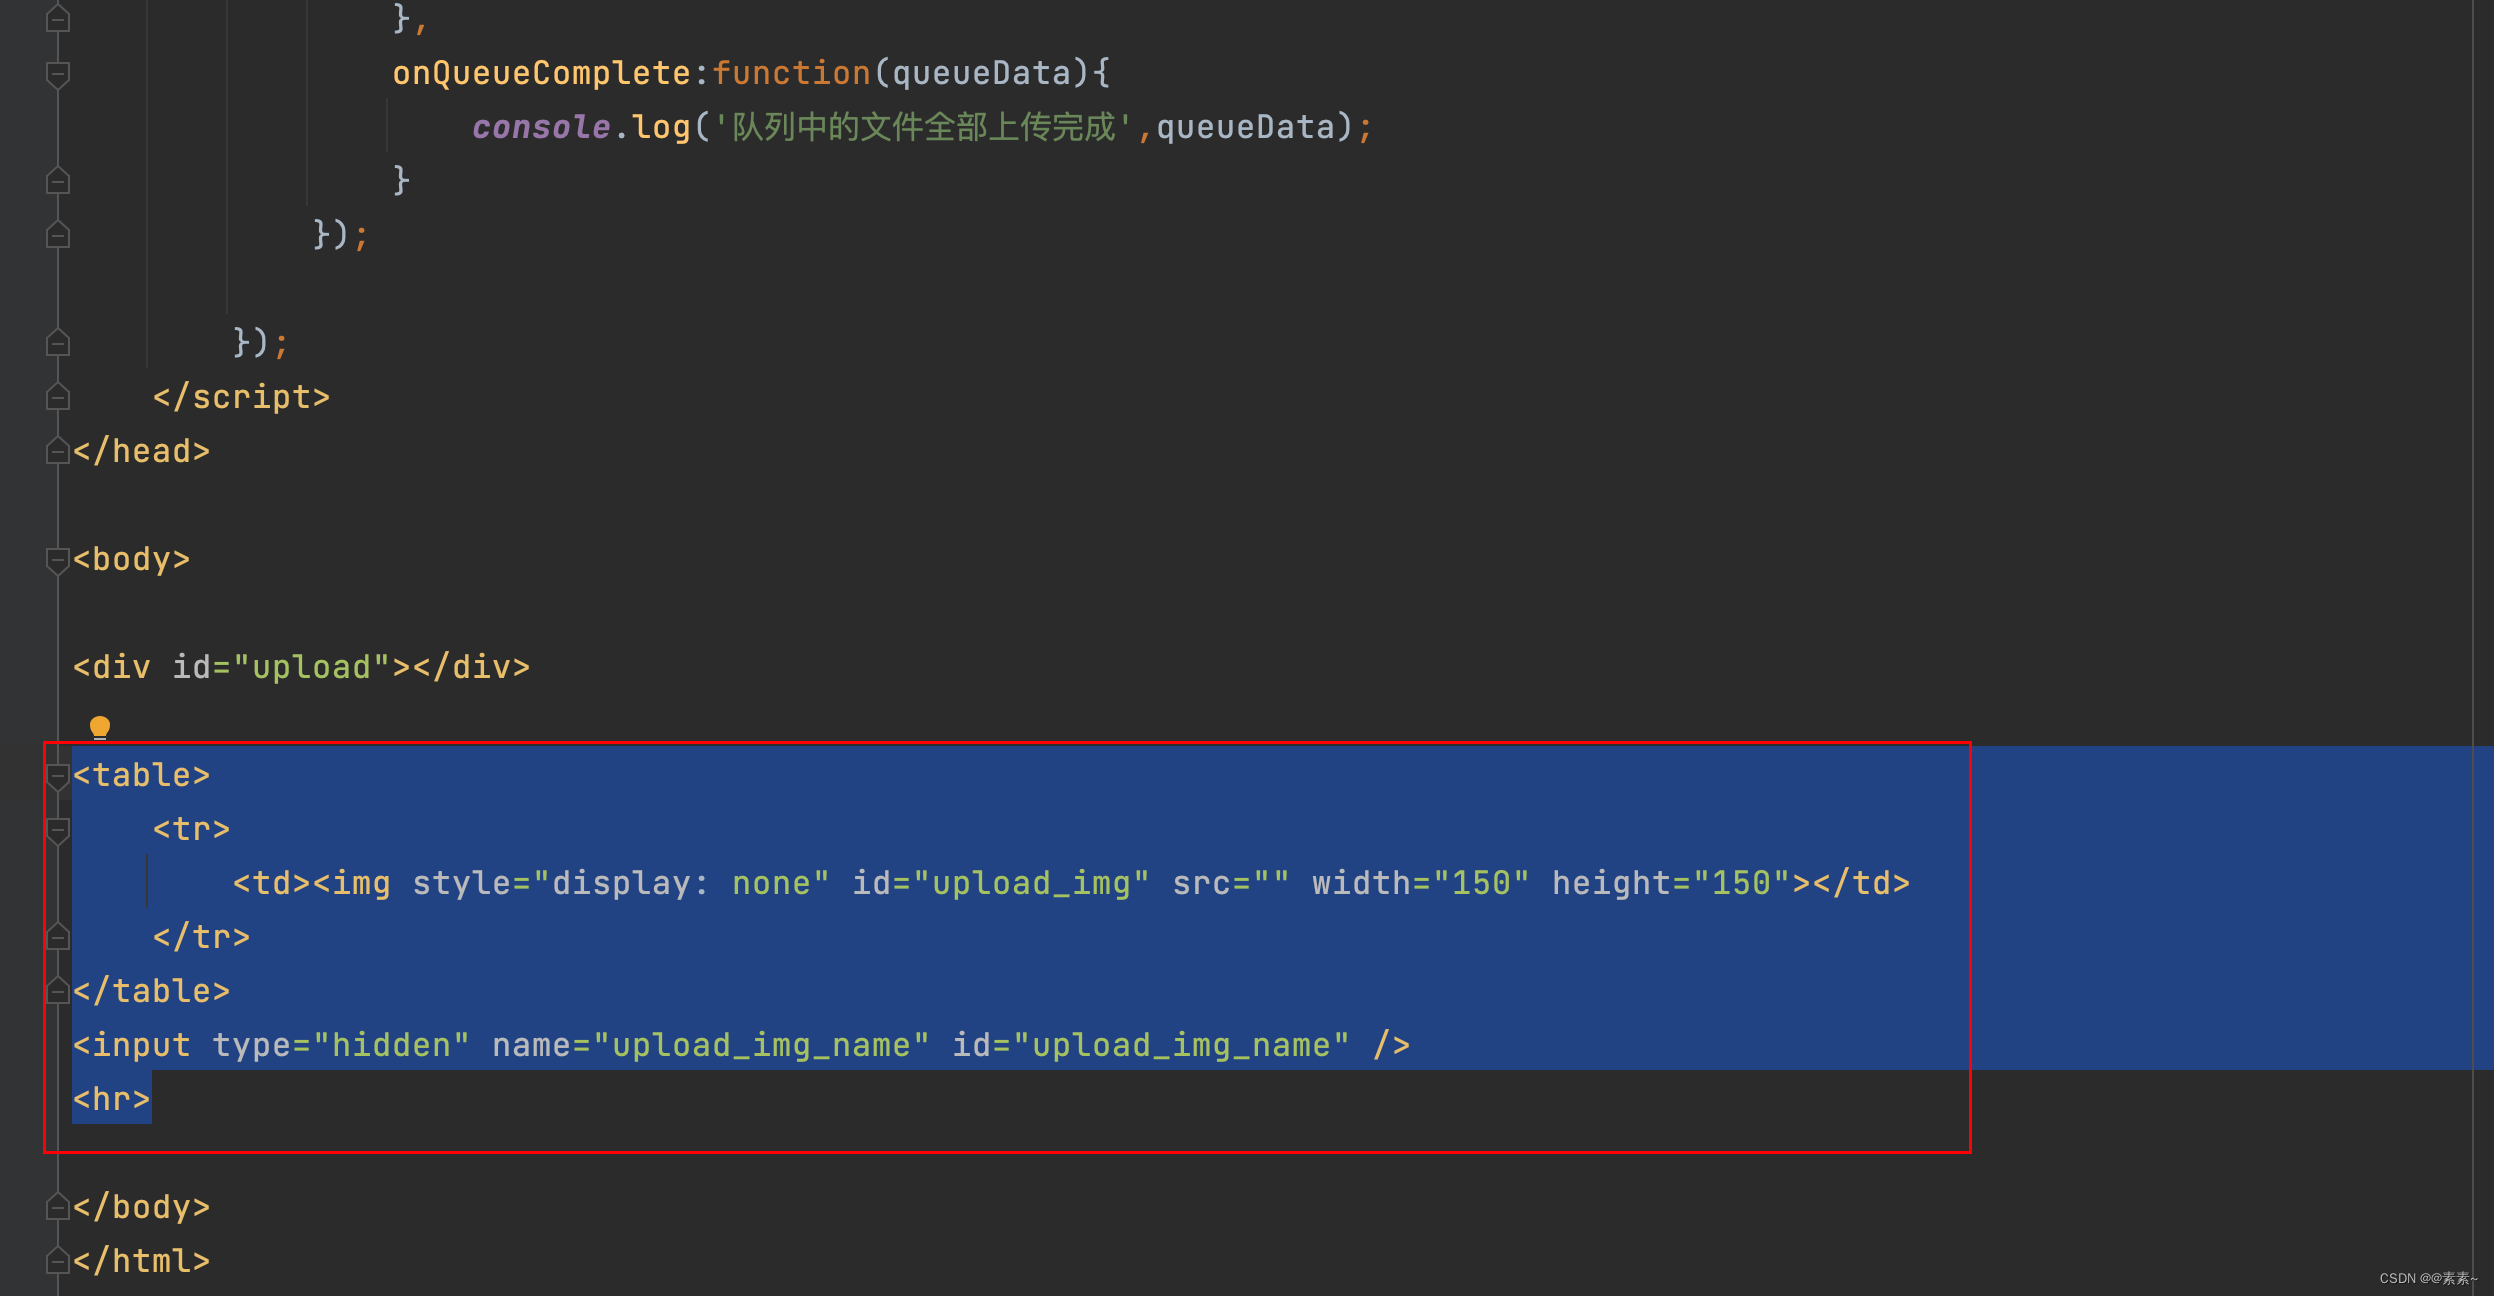
1.4.3 代码不同之处
- html页面,因为目前实现的效果不是特别好,所以直接截图了,如下:
- ShowFileServlet.java 如下:
package uploadify;import javax.servlet.ServletException;
import javax.servlet.http.HttpServlet;
import javax.servlet.http.HttpServletRequest;
import javax.servlet.http.HttpServletResponse;
import java.io.File;
import java.io.FileInputStream;
import java.io.IOException;
import java.io.OutputStream;/*** @Description* @Author susu*/
public class ShowFileServlet extends HttpServlet {private static final long serialVersionUID = 2761789171087122738L;private String uploadifyUploadPath = "/Users/susu/file_test/file_upload/uploadify_upload";public void doGet(HttpServletRequest req, HttpServletResponse resp) throws ServletException, IOException {this.doPost(req, resp);}@Overrideprotected void doPost(HttpServletRequest req, HttpServletResponse resp) throws ServletException, IOException {String file = req.getParameter("file");File getFile = new File(uploadifyUploadPath + File.separator + file);FileInputStream fis = new FileInputStream(getFile);OutputStream os = resp.getOutputStream();try {byte[] bytes = new byte[1024 * 1024];while (fis.read(bytes) != -1)os.write(bytes);os.flush();} catch (IOException e) {e.printStackTrace();} finally {if (os != null)os.close();if (fis != null)fis.close();}}}
2. 使用Dropzone.js插件上传
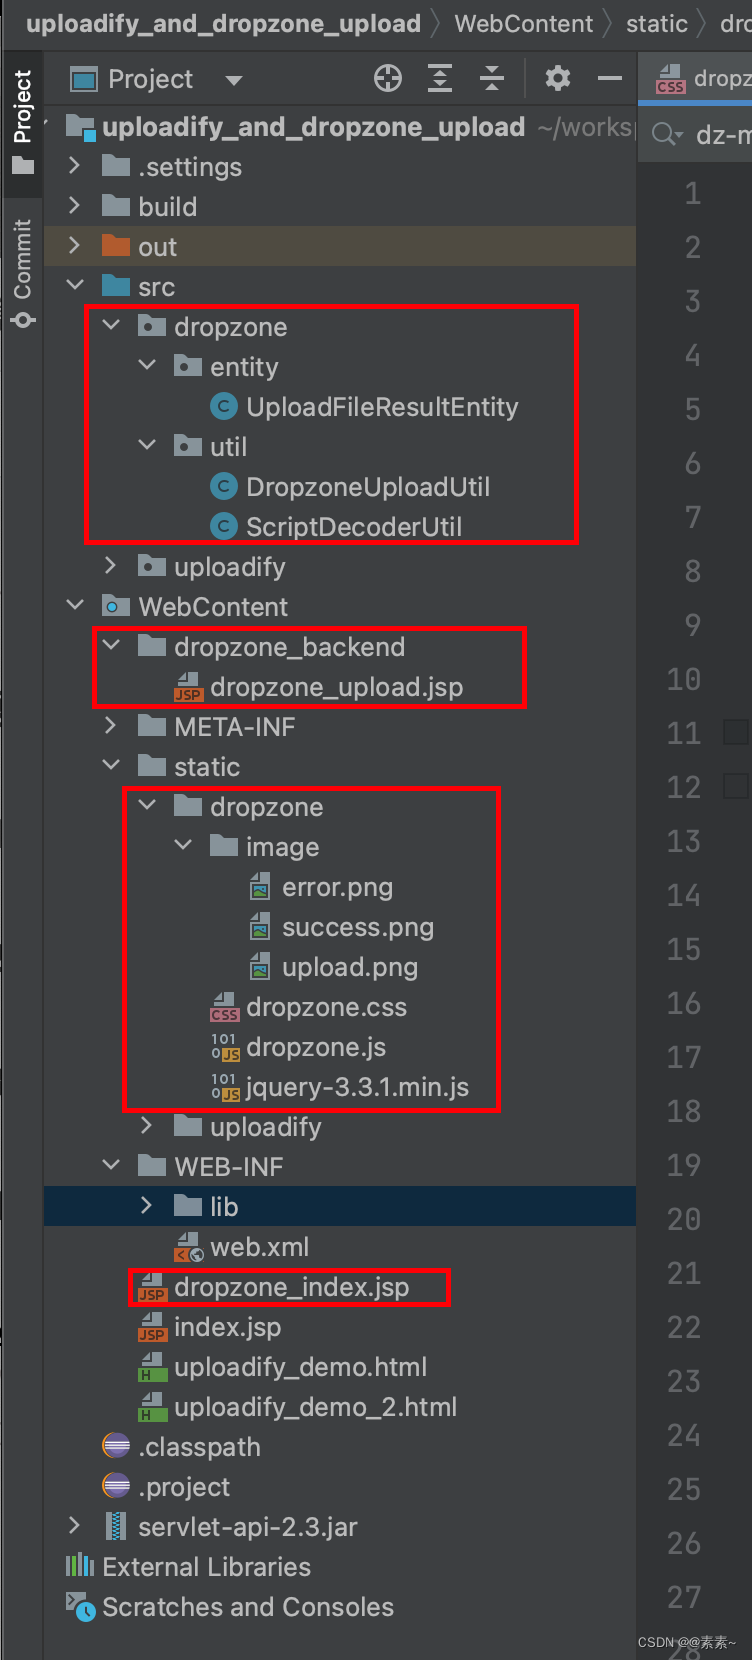
2.1 项目结构
- 如下:
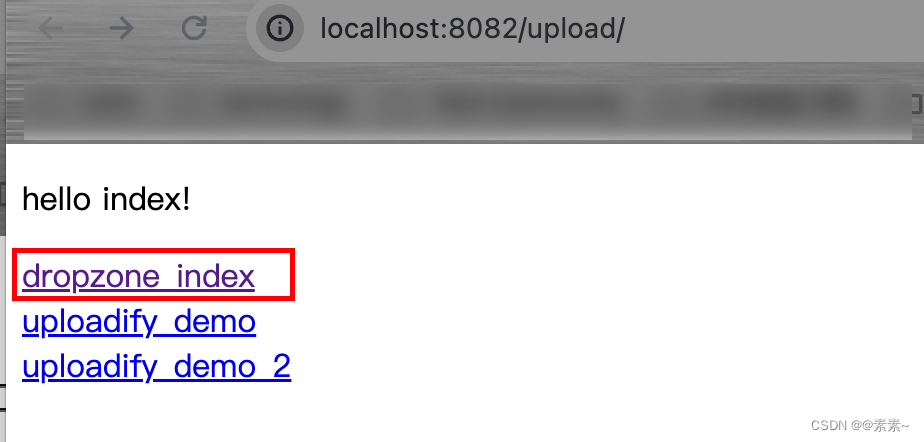
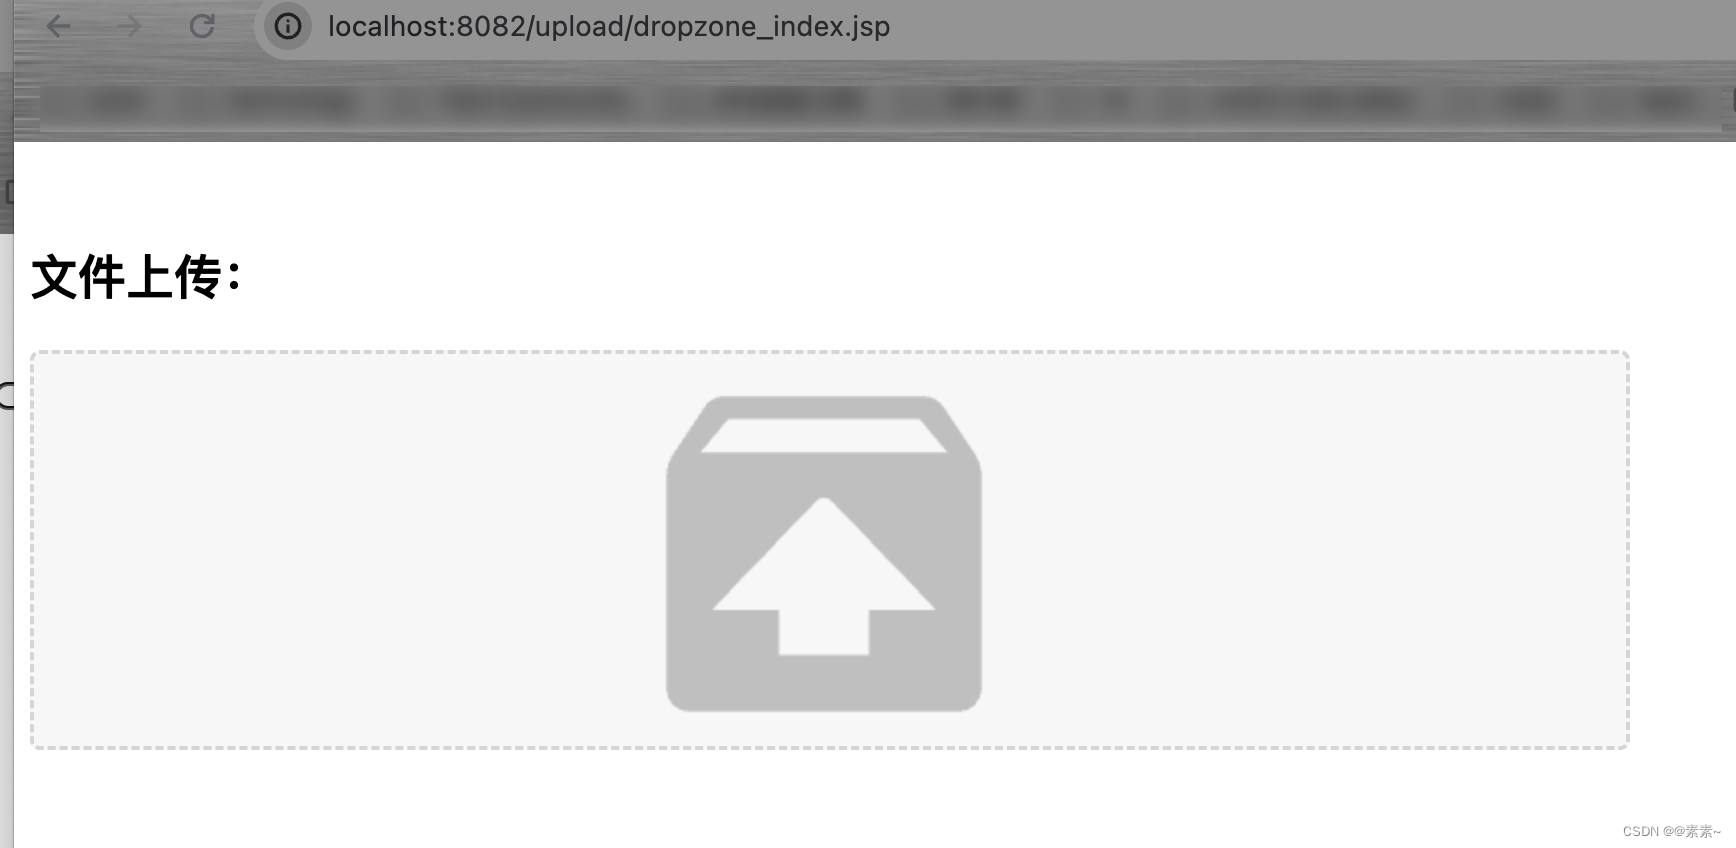
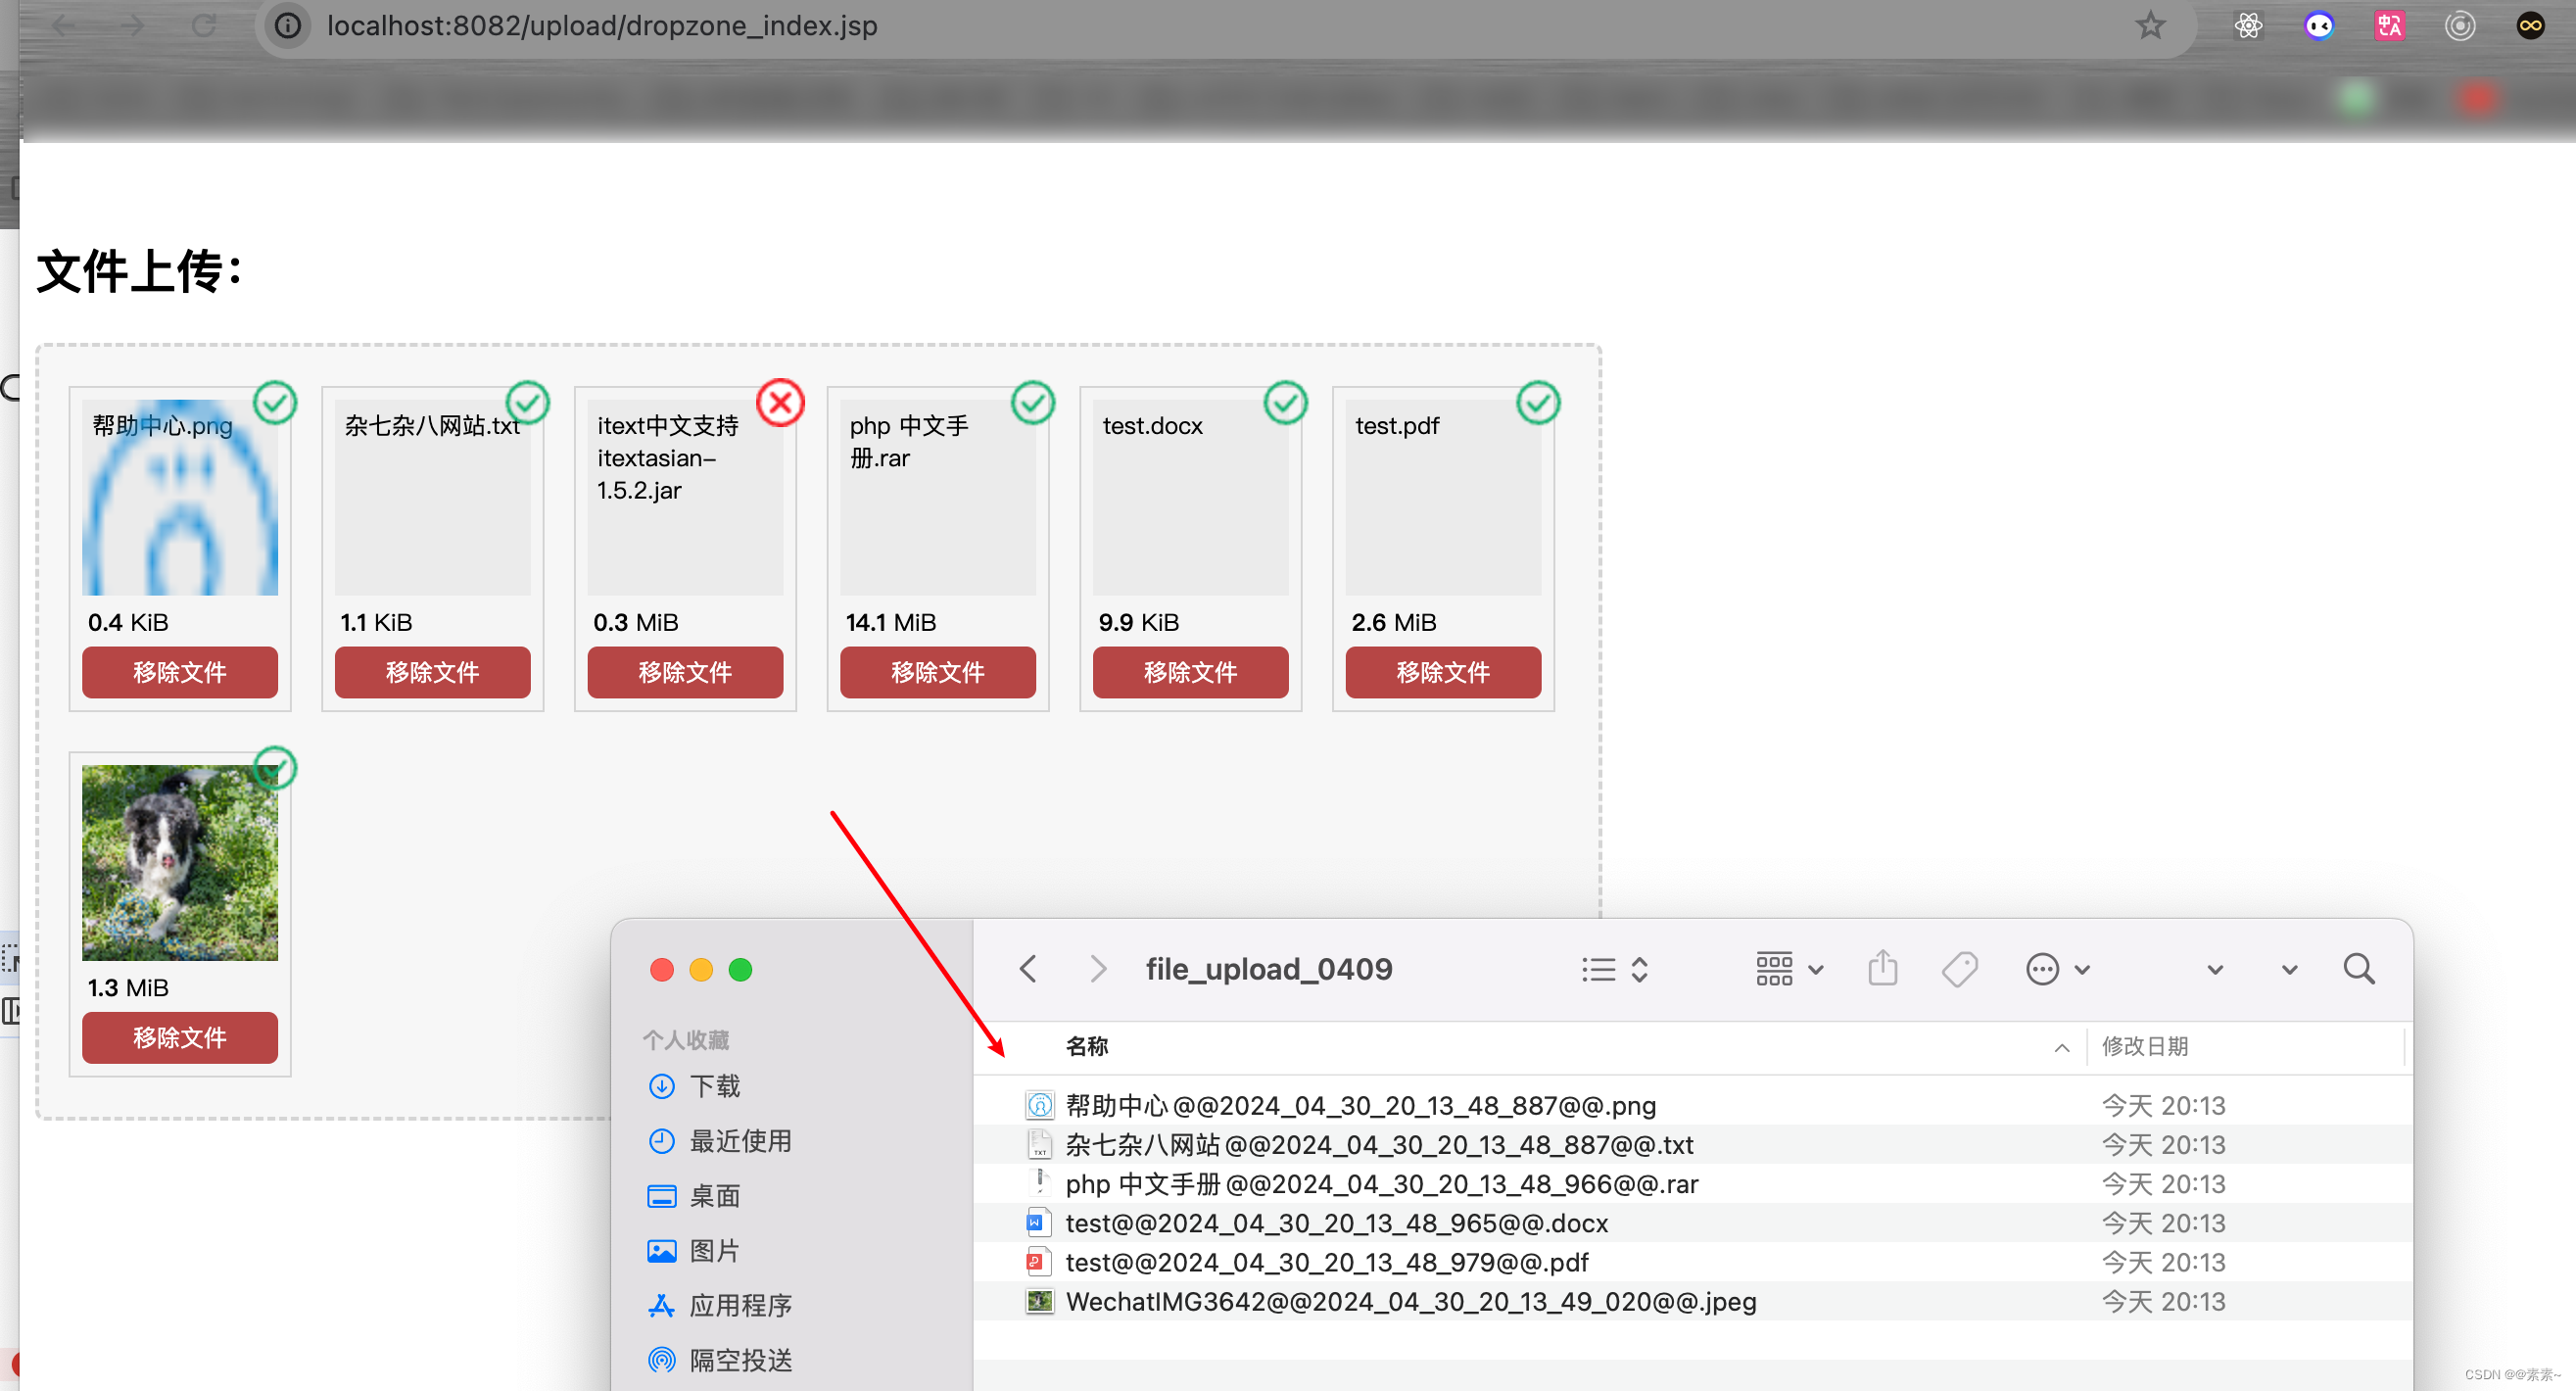
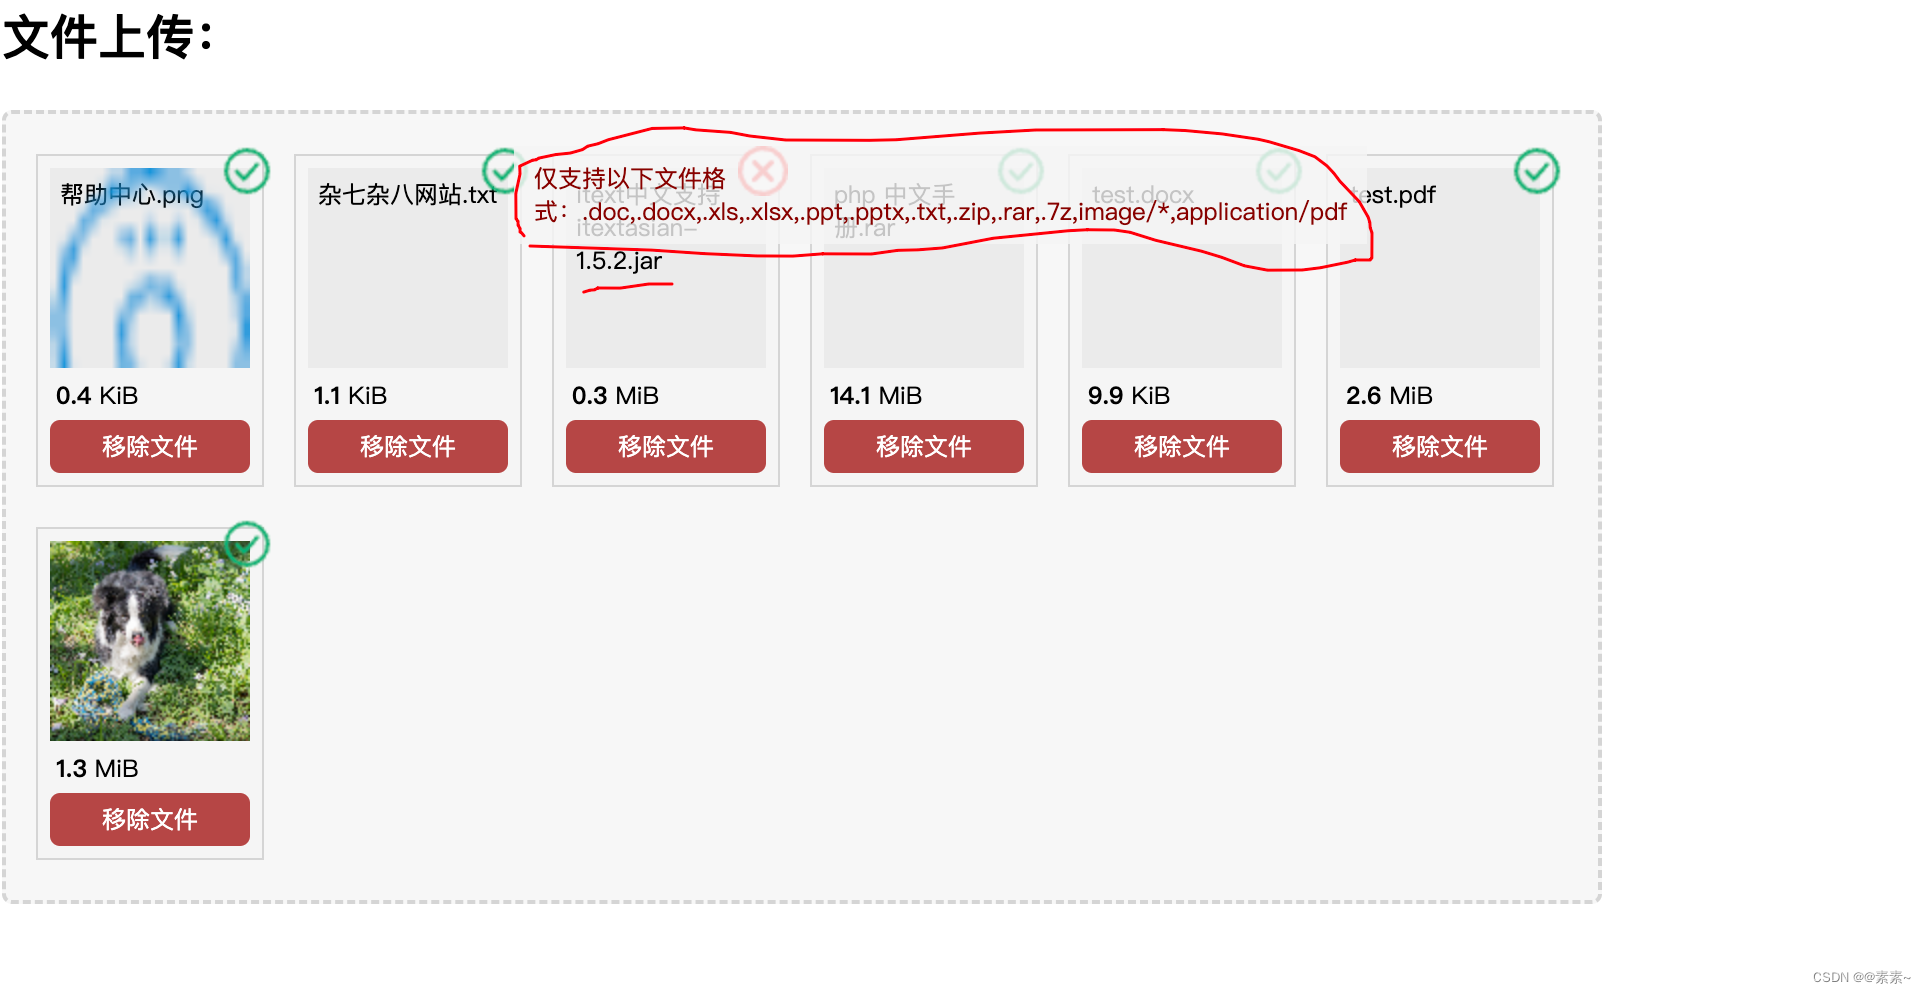
2.2 看效果
-
如下:
2.3 核心代码
-
dropzone_index.jsp
<%@ page language="java" contentType="text/html; charset=UTF-8"pageEncoding="UTF-8" %> <!DOCTYPE html PUBLIC "-//W3C//DTD HTML 4.01 Transitional//EN" "http://www.w3.org/TR/html4/loose.dtd"> <html> <head><meta http-equiv="Content-Type" content="text/html; charset=UTF-8"><title>dropzone上传插件测试</title><!-- jquery --><script type="text/javascript" src="${pageContext.request.contextPath }/static/dropzone/jquery-3.3.1.min.js"></script><!-- 注意:引入dropzone的js和css文件最好放在同一个目录,不然的话,会出现各种错误 --><script type="text/javascript" src="${pageContext.request.contextPath }/static/dropzone/dropzone.js"></script><link rel="stylesheet" type="text/css" href="${pageContext.request.contextPath }/static/dropzone/dropzone.css"><style type="text/css">#dropzoneUploadForm {min-height: 200px;width: 800px;}</style><script type="text/javascript">/* Dropzone上传插件配置 */var IsServerError = false;//服务器获取配置出错var fileList = new Array();var fileUploadingList = new Array();var fileUploadedPathsArray = new Array();//已上传的文件在服务器的路径集合;用于遇到异常时删除已上传的文件。(相当于回滚)var uploadFileArray = new Array();var xmlHttpRequestArray = new Array();Dropzone.options.dropzoneUploadForm = { //此处的"dropzoneUploadForm" 是dropzone的HTML元素ID的驼峰命名,比如<form id="my-form"></form>,那么此处应该写:Dropzone.options.myFormparamName: "myFile", //与后端实体里的 private FormFile myFile;对应,如果实体没有就不匹配,也可以放到下面的 "sending" 中params: { // 可传公共参数key1: "value11",key2: "value2"},maxFiles: 25, //最大上传数量maxFilesize: 20, // MB 单个文件大小上限filesizeBase: 1000,acceptedFiles: ".doc,.docx,.xls,.xlsx,.ppt,.pptx,.txt,.zip,.rar,.7z,image/*,application/pdf",addRemoveLinks: true,clickable: true,autoProcessQueue: true, // true:自动上传,一次性上传parallelUploads个文件,上传成功后后面排队的其他队伍也会继续排队上传。false:关闭自动上传, 手动调度 ,但每次需要点击“上传”按钮才会触发上传,排队的其他文件不会自动上传。parallelUploads: 2, //最大并行处理量(一次同时上传的个数,不设置的话,默认:2个)/* 插件消息翻译 */dictInvalidFileType: '仅支持以下文件格式:.doc,.docx,.xls,.xlsx,.ppt,.pptx,.txt,.zip,.rar,.7z,image/*,application/pdf',dictFileTooBig: '上传失败:文件大小超出最大20M',dictMaxFilesExceeded: '上传失败:上传文件超出最大数量25',dictCancelUpload: '取消上传',dictRemoveFile: '移除文件',dictCancelUploadConfirmation: '确认取消上传',dictResponseError: "文件上传失败!",dictDefaultMessage: "<span class='bigger-150 bolder'><i class='icon-caret-right red'></i>拖动文件</span>上传\ <span class='smaller-80 gre'>(或者点击上传)</span> <br /> \ <i class='upload-icon icon-cloud-upload blue icon-3x'></i>",/* 上传缩略图预览模板 */previewTemplate: ' <div id="viewer" class="dz-preview dz-file-preview"> <div class="dz-details" onClick="viewFile(this)" name=""> <div style="display:none;" class="fileId"></div> <div class="dz-filename"><span data-dz-name></span></div> <div class="dz-size" data-dz-size></div> <img data-dz-thumbnail /> </div> <div class="dz-progress"><span class="dz-upload" data-dz-uploadprogress></span></div> <div class="dz-success-mark"><span>?</span></div> <div class="dz-error-mark"><span>?</span></div> <div class="dz-error-message"><span data-dz-errormessage>""</span></div> </div> ',/*accept: function(file, done) {fileList_Accepted.push(file)done();}, */init: function () {/* var self = this;// 非自动上传。点击上传按钮开始ajax上传this.element.querySelector("button#uploadBtn").addEventListener("click", function(e) {e.preventDefault();e.stopPropagation();self.processQueue();}); *//*var accept = this.getAcceptedFiles();//所有接受的文件(合法)var reject = this.getRejectedFiles();//所有拒绝的文件(非法)var uploading = this.getQueuedFiles();//所有上传中的文件var queued = this.getRejectedFiles(); //所有排队中的文件*/var this_ = this;fileList = this.getAcceptedFiles();//所有接受的文件(合法)this.on("addedfile", function (file) { //新添加的文件,每添加一个新文件都会触发一次该函数,可以使用alert测试一下//alert("addedfile:"+file.name)//fileList.push(file);})this.on("canceled", function (file, response) { //当取消文件上传式调用//单个文件点击“取消上传”并确认后执行该函数,将该文件从上传列队中移除。for (var i in uploadFileArray) {if (uploadFileArray[i].name.trim() == file.name.trim()) {var xmlHttpRequest = xmlHttpRequestArray[i];xmlHttpRequest.abort();}}})this.on("sending", function (file, xmlHttpRequest, formData) { //文件上传前调用console.log(xmlHttpRequest);uploadFileArray.push(file);xmlHttpRequestArray.push(xmlHttpRequest);// 每个文件需要传后台不同的参数的话,可在此处处理formData.append('fileName',escape(escape(file.name))); // fileName 如果实体里有对应的属性,直接映射上,不管有没有会都会放入request参数里})this.on("uploadprogress", function (file, progress, bytesSent) {//文件上传监听器(file:文件、progress:上传进度n%、bytesSent:)})this.on("complete", function (file, response) {//当上传完成,成功或者出现错误时调用.//alert("complete:"+response)})this.on("success", function (file, response) { //文件已经成功上传,获得服务器返回信息作为第二个参数//每个文件上传成功后有以下处理//1.该文件会自动将UI拼接到上传区域,我们需要将文件的服务器路径隐藏到该UI中。为移除等操作提供便利。IsServerError = JSON.parse(JSON.parse(response).error)var File_PhysicalPath = "";var list = JSON.parse(JSON.parse(response).uploadFileResultClientList)for (var k in list) {var file0 = list[k];//alert(file0.fileName.trim()+":"+file.name+"\n"+file0.fileSize+":"+file.size)if (file0.fileName.trim() == file.name && file0.fileSize == file.size) {File_PhysicalPath = file0.physical_path;}}$(".dz-filename span").each(function () {if ($(this).text().trim() == file.name.trim()) {$(this).parent().parent().find(".fileId").text(File_PhysicalPath);fileUploadedPathsArray.push(File_PhysicalPath);}})});this.on("queuecomplete", function (file, response) { //当上传队列中的所有文件上传完成时调用.//alert("任务完成!")if (IsServerError) {alert("服务器获取文件夹配置失败!即将回滚上传操作");//若提示该警告,请查看com.nbc.demok.io.Upload.multi_upload()方法中的PropertiesUtils.getProperty("")获取配置是否为空。为空的话,请及时在配置文件中添加该配置//1.后台:遇到服务器异常,删除已上传的服务器上的文件var filePaths = "";for (var i in fileUploadedPathsArray) {var path = fileUploadedPathsArray[i];if (path != "") {filePaths = (filePaths == "") ? path : (filePaths + "¤¤¤¤¤" + path);}}if (filePaths.trim() != "") {removeFilesFromServer(filePaths);//服务器:移除所有未遇到错误之前的刚刚上传了的文件}//2.前端:移除所有显示的附件this.removeAllFiles(true);}});this.on("removedfile", function (file) { //删除单一文件//alert("removedfile:"+file.name+"\npath:"+$(file.previewElement).find(".fileId").text())//文件在服务器上的路径var filePath = $(file.previewElement).find(".fileId").text().trim();//删除文件操作有以下步骤://1.使用ajax删除在服务器上的该文件if (filePath != "") {removeFilesFromServer(filePath);}//2.删除文件在前端的显示this.removeFile(file);});this.on("error", function (file, errorMessage) { //不接受该文件(非定义的可接受类型)或上传失败//alert("error:"+file.name+" "+errorMessage+"\nIsServerError:"+IsServerError)//this.removeFile(file);});}};function removeFilesFromServer(filePaths) {var path = $("#basePath").val();if (path == undefined) {alert("获取工程根目录出错");//请查看页面是否有id="basePath"的输入框,并且该输入框存放项目根目录return;}$.ajax({type: "POST",timeout: 60000,dataType: "json",url: path + "/dropzone_backend/dropzone_upload.jsp?method=remove", //后台url请求,处理传递的参数async: false,data: {filePaths: escape(escape(filePaths))},beforeSend: function (xhr) {$("#loading_").css("display", "block"); // 数据加载成功之前,使用loading组件(使用加载中的图片,显示图片gif即可)},success: function (data) {//ajax请求成功执行该函数$("#loading_").css("display", "none"); //关闭加载中图片//alert("删除成功,数量:"+data.count+"个")},error: function (XMLHttpRequest, textStatus, errorThrown) {$("#loading_").css("display", "none") //if (textStatus == "timeout") {alert(" 请求超时,可能是网络较慢,请重新加载")} else {alert("XMLHttpRequest.status:" + XMLHttpRequest.status + "\n" + "XMLHttpRequest.readyState:" + XMLHttpRequest.readyState + "\n"+ "textStatus:" + textStatus);}}});}function viewFile(obj) {var filePath = $(obj).find(".fileId").text();if (filePath.trim().length > 0) {p = filePath.split(".");var suffix = "." + p[p.length - 1]; //后缀为 [.doc .docx .xls .xlsx .ppt .pptx]可以转pdf在线浏览//alert(suffix);var IsOffice = false;var arr = new Array(".doc", ".docx", ".xls", ".xlsx", ".ppt", ".pptx")for (var i in arr) {if (suffix == arr[i].trim()) {IsOffice = true;}}if (IsOffice) {Open_Office_File(filePath)} else {Open_Not_Office_File(filePath);}}}function Open_Office_File(path) {alert("查看文件处理:" + path)}function Open_Office_File(path) {alert("查看文件处理:" + path)}</script></head> <body><input type="hidden" id="basePath" value="<%=request.getContextPath()%>"/> <br><h2>文件上传:</h2> <%-- 想优化的话,将 dropzone_backend/dropzone_upload.jsp 换成自己的后端action 接口即可 --%> <form id="dropzoneUploadForm" action="dropzone_backend/dropzone_upload.jsp" class="dropzone"><%-- <button id="uploadBtn" class="btn btn-success"> 确认上传 </button>--%> </form></body> </html> -
dropzone_upload.jsp
<%@ page language="java" contentType="text/html; charset=UTF-8"pageEncoding="UTF-8" %> <%@page import="dropzone.util.DropzoneUploadUtil" %> <%String method = (request.getParameter("method") == null) ? "" : request.getParameter("method").trim();method = ("".equals(method)) ? "post" : method;if ("post".equals(method)) {// 上传附件DropzoneUploadUtil.dropzoneUploadFile(request, response);} else if ("remove".equals(method)) {// 删除附件DropzoneUploadUtil.dropzoneRemoveFile(request, response);}%> -
DropzoneUploadUtil.java
package dropzone.util;import com.google.gson.Gson;
import dropzone.entity.UploadFileResultEntity;
import org.apache.commons.fileupload.FileItem;
import org.apache.commons.fileupload.FileItemFactory;
import org.apache.commons.fileupload.disk.DiskFileItemFactory;
import org.apache.commons.fileupload.servlet.ServletFileUpload;
import org.json.JSONException;
import org.json.JSONObject;
import javax.servlet.http.HttpServletRequest;
import javax.servlet.http.HttpServletResponse;
import java.io.File;
import java.io.IOException;
import java.io.PrintWriter;
import java.text.SimpleDateFormat;
import java.util.ArrayList;
import java.util.Iterator;
import java.util.List;/*** 使用dropzone插件上传*/
public class DropzoneUploadUtil {public static String uploadFilePath = "/Users/susu/file_test/file_upload/file_upload_0409";/*** 上传附件* @param request* @param response* @throws IOException* @throws JSONException*/public static void dropzoneUploadFile(HttpServletRequest request, HttpServletResponse response) throws IOException, JSONException {String physical_path = "";List<UploadFileResultEntity> uploadFileResultClientList = new ArrayList<>();List<UploadFileResultEntity> uploadFileResultServerList = new ArrayList<>();Gson gson = new Gson();JSONObject json = new JSONObject();FileItemFactory factory = new DiskFileItemFactory();ServletFileUpload upload = new ServletFileUpload(factory);SimpleDateFormat fmt = new SimpleDateFormat("yyyy_MM_dd_HH_mm_ss_SSS");String date = fmt.format(System.currentTimeMillis());upload.setHeaderEncoding("UTF-8");try {List items = upload.parseRequest(request);Iterator iter = items.iterator();while (iter.hasNext()) {FileItem item = (FileItem) iter.next();if (!item.isFormField()) {String OriginalName = item.getName().substring(item.getName().lastIndexOf("\\") + 1);String fileName = OriginalName.substring(0, OriginalName.lastIndexOf(".")) + "@@" + date + "@@" + item.getName().substring(item.getName().lastIndexOf("."), item.getName().length());File f = new File(uploadFilePath);if (!f.exists()) {f.mkdirs();}
//                        server_path = request.getScheme() + "://" + request.getServerName() + ":" + request.getServerPort() + "/temp/" + fileName;physical_path = uploadFilePath + "/" + fileName;File uploadedFile = new File(physical_path);System.out.println("physical_path:" + physical_path);item.write(uploadedFile);uploadFileResultServerList.add(new UploadFileResultEntity(fileName, uploadedFile.length(), physical_path, ""));uploadFileResultClientList.add(new UploadFileResultEntity(OriginalName, uploadedFile.length(), physical_path, ""));}}} catch (Exception e) {e.printStackTrace();}response.setContentType("text/text;charset=utf-8");PrintWriter out = response.getWriter();json.put("error", false);json.put("uploadFileResultServerList", gson.toJson(uploadFileResultServerList));json.put("uploadFileResultClientList", gson.toJson(uploadFileResultClientList));out.print(json);out.flush();out.close();}/*** 删除附件(删除服务器上的附件)* @param request* @param response*/public static void dropzoneRemoveFile(HttpServletRequest request,HttpServletResponse response){JSONObject json = new JSONObject();String filePathsStr = (request.getParameter("filePaths") == null) ? "" : request.getParameter("filePaths").trim();String[] filePathsArray = null;try {if (!filePathsStr.equals("")) {if (filePathsStr.indexOf("¤¤¤¤¤") > 0) {filePathsArray = filePathsStr.split("¤¤¤¤¤");} else {filePathsArray = new String[1];filePathsArray[0] = filePathsStr;}int deleteCount = removeFile(filePathsArray);json.put("count", deleteCount);}PrintWriter p = response.getWriter();p.println(json);  //response ajax data,InputThinPCAccount2.js receive this "flag"。p.flush();p.close();} catch (JSONException e) {throw new RuntimeException(e);} catch (IOException e) {throw new RuntimeException(e);}}public static int removeFile(String[] paths) {int deleteCount = 0;for (String filePath : paths) {filePath = ScriptDecoderUtil.unescape(ScriptDecoderUtil.unescape(filePath));File file = new File(filePath);if (!file.exists()) {System.out.println("系统找不到指定的路径:" + filePath);} else if (!file.delete()) {System.out.println("删除附件失败:" + filePath);} else {deleteCount++;}}return deleteCount;}}
2.4 参考
- 在下面项目上进行修改并测试,如下:
dropzone上传插件demo.
3. 附项目下载
- 上面测试效果的完整项目,拿来即用的话可以下载,下载如下:
使用uploadify插件(php版和Java版) 与 Dropzone.js插件分别实现附件上传的demo .
4. 可能遇到问题
4.1 idea中导入eclipse项目
- 如遇到此问题,可看下面的文章:
idea中导入eclipse的javaweb项目——tomact服务(保姆级别).
这篇关于实操——使用uploadify插件(php版和Java版) 与 Dropzone.js插件分别实现附件上传的文章就介绍到这儿,希望我们推荐的文章对编程师们有所帮助!


