本文主要是介绍树莓派科学小实验4B--05_跑马灯,希望对大家解决编程问题提供一定的参考价值,需要的开发者们随着小编来一起学习吧!
小实验目录
树莓派科学小实验
001 点亮第一盏LED灯
002 点亮LED灯组
003_开关控制LED灯
004_获取温湿度
005_跑马灯(ws2812b))
文章目录
- 小实验目录
- 前言
- 一、实验元件
- 二、 ws2812b原理
- 三、 代码部分:
- 1)导入并安装ws2812的库
- 2)设定公共部分
前言
由于未知的原因,在一阵青烟中,我的树莓派4B主板和接口板都报销了。 直到今天我才接到高价从京东购买的新板子(做硬件开发真的很费钱啊!)新年第一烧,希望今年能红红火火的!
长话短说,回归正题:这个实验依然从github上导入所需的库文件。
https://github.com/rpi-ws281x/rpi-ws281x-python
提示:以下是本篇文章正文内容,下面案例可供参考
一、实验元件
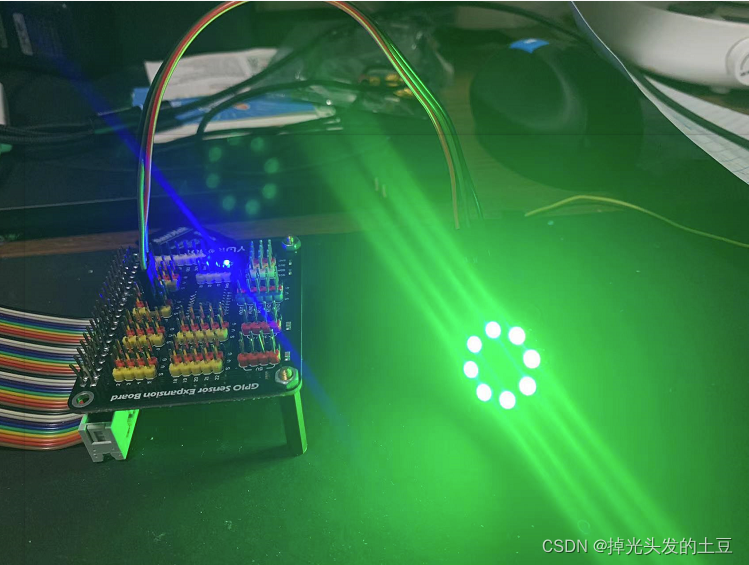
带有8颗RGB灯珠的WS2812元器件板

GPIO扩展板一块 or 面包板一块

二、 ws2812b原理
这里是引用的2812原理说明,实际连接中使用3.3v的输出即可
 大致的接线图如下:
VCC: 3.3v 从树莓派的3.3v供电GPIO接出
GND: 接在了树莓派的共地接口上
控制脚:接在了IO12上(这里是需要接在PWM脚上,因为后面我们需要调整频率)
每一个灯珠都是串联在一起的。从DI到DO 在VCC和GND间需要一个滤波电容(100MF)

对于ws2812b可以从github上下载现成的库,没有必要去重新底层应用,我们可以直接调用。
三、 代码部分:
1)导入并安装ws2812的库
sudo pip install rpi_ws281x
2)设定公共部分
中文标准的部分是需要根据实际需要修改的,其他的可改可不改
# LED strip configuration:
LED_COUNT = 8        # 设定灯珠的数量,我的灯珠只有8颗.
LED_PIN = 12          #设定控制脚连接的位置(我的是12脚,注意这里需要使用PWM,如果是10脚将需要使用SPI控制)
LED_FREQ_HZ = 800000  # 设定PWM的频率(就是灯珠的频率,800KHZ)
LED_DMA = 10          # DMA channel to use for generating signal (try 10)
LED_BRIGHTNESS = 255  # Set to 0 for darkest and 255 for brightest
LED_INVERT = False    # True to invert the signal (when using NPN transistor level shift)
LED_CHANNEL = 0       # set to '1' for GPIOs 13, 19, 41, 45 or 53
3)定义一个函数用来点亮
color:RGB格式的颜色值。
strip:初始化后的灯组
def colorWipe(strip, color, wait_ms=50):"""Wipe color across display a pixel at a time."""for i in range(strip.numPixels()):strip.setPixelColor(i, color)strip.show()time.sleep(wait_ms / 1000.0)
4)定义一个渐变色的函数
def rainbow(strip, wait_ms=20, iterations=1):"""Draw rainbow that fades across all pixels at once."""for j in range(256 * iterations):for i in range(strip.numPixels()):strip.setPixelColor(i, wheel((i + j) & 255))strip.show()time.sleep(wait_ms / 1000.0)
def rainbowCycle(strip, wait_ms=20, iterations=5):"""Draw rainbow that uniformly distributes itself across all pixels."""for j in range(256 * iterations):for i in range(strip.numPixels()):strip.setPixelColor(i, wheel(((i * 256 // strip.numPixels()) + j) & 255))strip.show()time.sleep(wait_ms / 1000.0)
5)定义一个跑马灯的函数
def theaterChaseRainbow(strip, wait_ms=50):"""Rainbow movie theater light style chaser animation."""for j in range(256):for q in range(3):for i in range(0, strip.numPixels(), 3):strip.setPixelColor(i + q, wheel((i + j) % 255))strip.show()time.sleep(wait_ms / 1000.0)for i in range(0, strip.numPixels(), 3):strip.setPixelColor(i + q, 0)完整的测试用例:
# NeoPixel library strandtest example
# Author: Tony DiCola (tony@tonydicola.com)
#
# Direct port of the Arduino NeoPixel library strandtest example.  Showcases
# various animations on a strip of NeoPixels.
import timefrom rpi_ws281x import Color, PixelStrip, ws# LED strip configuration:
LED_COUNT = 40         # Number of LED pixels.
LED_PIN = 18           # GPIO pin connected to the pixels (must support PWM!).
LED_FREQ_HZ = 800000   # LED signal frequency in hertz (usually 800khz)
LED_DMA = 10           # DMA channel to use for generating signal (try 10)
LED_BRIGHTNESS = 255   # Set to 0 for darkest and 255 for brightest
LED_INVERT = False     # True to invert the signal (when using NPN transistor level shift)
LED_CHANNEL = 0
LED_STRIP = ws.SK6812_STRIP_RGBW
# LED_STRIP = ws.SK6812W_STRIP# Define functions which animate LEDs in various ways.
def colorWipe(strip, color, wait_ms=50):"""Wipe color across display a pixel at a time."""for i in range(strip.numPixels()):strip.setPixelColor(i, color)strip.show()time.sleep(wait_ms / 1000.0)def theaterChase(strip, color, wait_ms=50, iterations=10):"""Movie theater light style chaser animation."""for j in range(iterations):for q in range(3):for i in range(0, strip.numPixels(), 3):strip.setPixelColor(i + q, color)strip.show()time.sleep(wait_ms / 1000.0)for i in range(0, strip.numPixels(), 3):strip.setPixelColor(i + q, 0)def wheel(pos):"""Generate rainbow colors across 0-255 positions."""if pos < 85:return Color(pos * 3, 255 - pos * 3, 0)elif pos < 170:pos -= 85return Color(255 - pos * 3, 0, pos * 3)else:pos -= 170return Color(0, pos * 3, 255 - pos * 3)def rainbow(strip, wait_ms=20, iterations=1):"""Draw rainbow that fades across all pixels at once."""for j in range(256 * iterations):for i in range(strip.numPixels()):strip.setPixelColor(i, wheel((i + j) & 255))strip.show()time.sleep(wait_ms / 1000.0)def rainbowCycle(strip, wait_ms=20, iterations=5):"""Draw rainbow that uniformly distributes itself across all pixels."""for j in range(256 * iterations):for i in range(strip.numPixels()):strip.setPixelColor(i, wheel(((i * 256 // strip.numPixels()) + j) & 255))strip.show()time.sleep(wait_ms / 1000.0)def theaterChaseRainbow(strip, wait_ms=50):"""Rainbow movie theater light style chaser animation."""for j in range(256):for q in range(3):for i in range(0, strip.numPixels(), 3):strip.setPixelColor(i + q, wheel((i + j) % 255))strip.show()time.sleep(wait_ms / 1000.0)for i in range(0, strip.numPixels(), 3):strip.setPixelColor(i + q, 0)# Main program logic follows:
if __name__ == '__main__':# Create NeoPixel object with appropriate configuration.strip = PixelStrip(LED_COUNT, LED_PIN, LED_FREQ_HZ, LED_DMA, LED_INVERT, LED_BRIGHTNESS, LED_CHANNEL, LED_STRIP)# Intialize the library (must be called once before other functions).strip.begin()print('Press Ctrl-C to quit.')while True:# Color wipe animations.colorWipe(strip, Color(255, 0, 0))  # Red wipecolorWipe(strip, Color(0, 255, 0))  # Blue wipecolorWipe(strip, Color(0, 0, 255))  # Green wipecolorWipe(strip, Color(0, 0, 0, 255))  # White wipecolorWipe(strip, Color(255, 255, 255))  # Composite White wipecolorWipe(strip, Color(255, 255, 255, 255))  # Composite White + White LED wipe# Theater chase animations.theaterChase(strip, Color(127, 0, 0))  # Red theater chasetheaterChase(strip, Color(0, 127, 0))  # Green theater chasetheaterChase(strip, Color(0, 0, 127))  # Blue theater chasetheaterChase(strip, Color(0, 0, 0, 127))  # White theater chasetheaterChase(strip, Color(127, 127, 127, 0))  # Composite White theater chasetheaterChase(strip, Color(127, 127, 127, 127))  # Composite White + White theater chase# Rainbow animations.rainbow(strip)rainbowCycle(strip)theaterChaseRainbow(strip)
效果:


这篇关于树莓派科学小实验4B--05_跑马灯的文章就介绍到这儿,希望我们推荐的文章对编程师们有所帮助!


