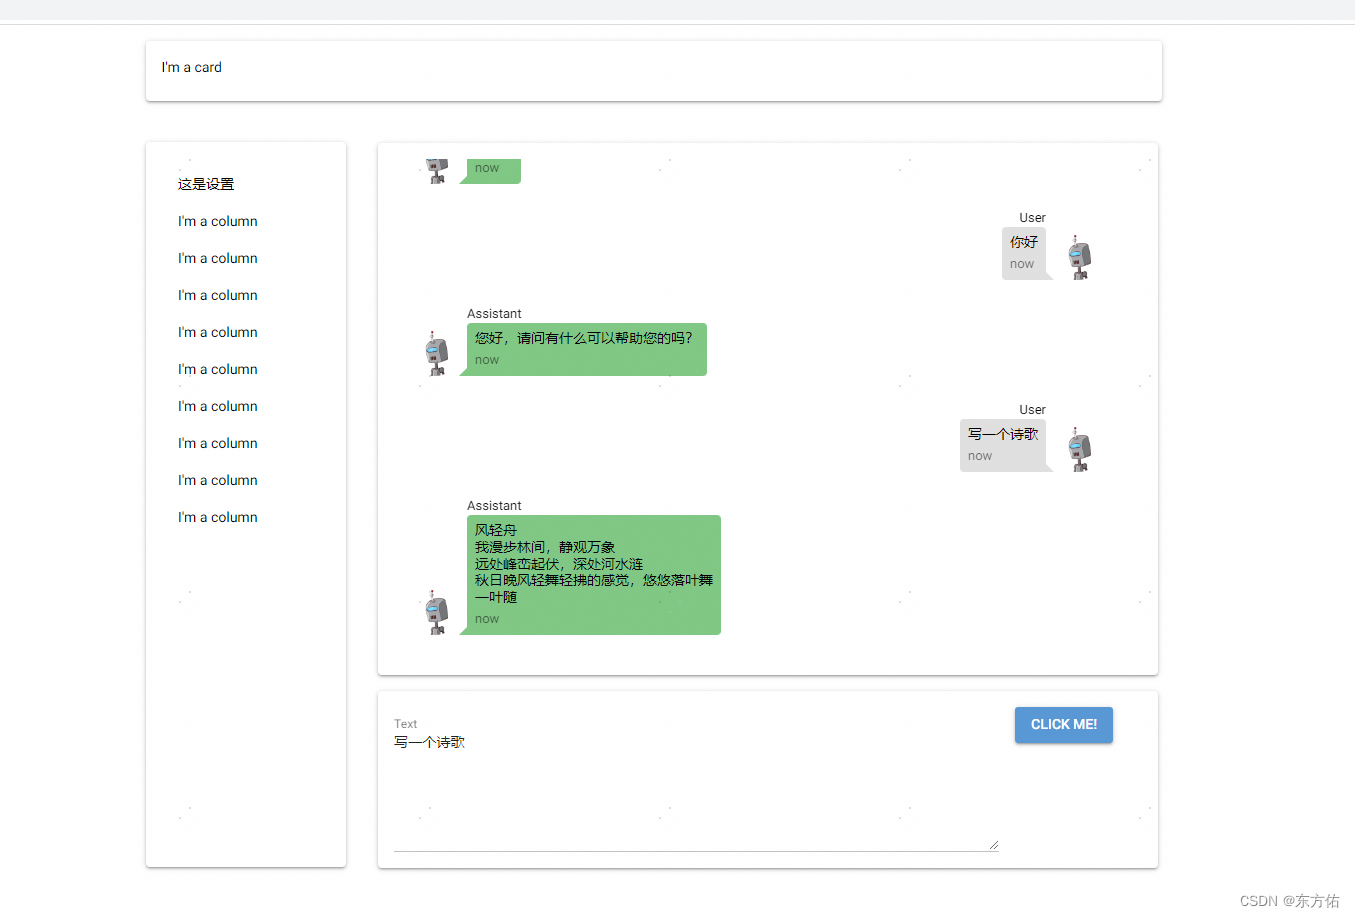
本文主要是介绍给rwkv-pytorch 写个chat ui demo,希望对大家解决编程问题提供一定的参考价值,需要的开发者们随着小编来一起学习吧!
rwkv-pytorch 项目地址
rwkv-pytorch
from nicegui import uimessage_dict = {1: [{"name":"Assistant","text":"你好"}]}
current_name = 1
import aiohttpasync def get_text_async(text="Hello, how are you?"):# 定义API的URLurl = "http://127.0.0.1:8000/generate/"# 定义要发送的数据data = {"text": text}# 发送POST请求async with aiohttp.ClientSession() as session:async with session.post(url, json=data) as response:# 解析响应内容res = await response.json()print(res)return res["response"].split("\n\n")[1][11:]async def send_message_async(text,name):# 获取输入文本input_text = text.value# 将响应消息添加到消息字典message_dict[current_name].append({"name": "User", "text": text.value})# 刷新聊天窗口chat_win_refresh.refresh()# 发送消息并等待响应response_text = await get_text_async(name+":"+input_text+"\n\nAssistant:")# 将响应消息添加到消息字典message_dict[current_name].append({"name":"Assistant","text":response_text})# 刷新聊天窗口chat_win_refresh.refresh()def basic_left_layout():with ui.column():ui.label("这是设置")ui.label('I\'m a column')ui.label('I\'m a column')ui.label('I\'m a column')ui.label('I\'m a column')ui.label('I\'m a column')ui.label('I\'m a column')ui.label('I\'m a column')ui.label('I\'m a column')ui.label('I\'m a column')@ui.refreshable
def chat_win_refresh():with ui.scroll_area().style("height: {}px; width: {}px;".format(500, 725)) as area:for history in message_dict[current_name]:if history["name"]=="User":ui.chat_message(history["text"],name=history["name"],stamp='now',avatar='https://robohash.org/ui',sent=True).style("margin-right: 1px;margin-left: auto;")else:ui.chat_message(history["text"],name=history["name"],stamp='now',avatar='https://robohash.org/ui', sent=False).style("margin-left: 1px;")area.scroll_to(percent=1)def basic_right_layout_children():with ui.column().style("margin-top: 5px;"):with ui.card().style("width:780px; margin-top: 5px;"):chat_win_refresh()with ui.card().style("width:780px;"):with ui.row():text = ui.textarea(label='Text', placeholder='start typing').style("width:605px;")# button 可以是一个图片表示区别机器方可ui.button('Click me!', on_click=lambda: send_message_async(text,"User"))def basic_main_layout():with ui.column().style("margin:auto;"):with ui.card().style("height: {}px; width: {}px;".format(60, 1016)):ui.label("I'm a card")with ui.row():with ui.card().style("height: {}px; width: {}px;margin-top: 25px;".format(725, 200)):with ui.scroll_area().style("height: {}px; width: {}px;".format(800, 200)):basic_left_layout()# with ui.card().style("height: {}px; width: {}px;".format(1000, 800)):with ui.scroll_area().style("height: {}px; width: {}px;".format(1000, 816)):basic_right_layout_children()basic_main_layout()
ui.run(host="127.0.0.1", port=808)
服务
from fastapi import FastAPI, HTTPException
from pydantic import BaseModel
import torch
from src.model import RWKV_RNN
from src.sampler import sample_logits
from src.rwkv_tokenizer import RWKV_TOKENIZERapp = FastAPI()# 定义请求体模型
class MessageRequest(BaseModel):text: str# 定义响应体模型
class MessageResponse(BaseModel):response: str# 初始化模型和分词器
def init_model():args = {'MODEL_NAME': 'weight/RWKV-x060-World-1B6-v2-20240208-ctx4096','vocab_size': 65536,'device': "cpu",'onnx_opset': '12',}device = args['device']assert device in ['cpu', 'cuda', 'musa', 'npu']if device == "musa":import torch_musaelif device == "npu":import torch_npumodel = RWKV_RNN(args).to(device)tokenizer = RWKV_TOKENIZER("asset/rwkv_vocab_v20230424.txt")return model, tokenizer, devicemodel, tokenizer, device = init_model()# 生成文本的函数
def generate_text(input_text):# 设置续写的初始字符串和参数batch_size = 1TEMPERATURE = 2.5TOP_P = 0.1LENGTH_PER_TRIAL = 50encoded_input = tokenizer.encode([input_text] * batch_size)token = torch.tensor(encoded_input).long().to(device)state = torch.zeros(batch_size, model.state_size[0], model.state_size[1]).to(device)with torch.no_grad():token_out, state_out = model.forward_parallel(token, state)out = token_out[:, -1]for step in range(LENGTH_PER_TRIAL):token_sampled = sample_logits(out, TEMPERATURE, TOP_P)token = torch.cat((token, token_sampled.unsqueeze(1)), 1)with torch.no_grad():out, state = model.forward(token_sampled, state)decoded_sequences = tokenizer.decode(token.cpu().tolist())return decoded_sequences[-1]# 定义路由
@app.post("/generate/", response_model=MessageResponse)
async def create_message(message_request: MessageRequest):try:response_text = generate_text(message_request.text)return MessageResponse(response=response_text)except Exception as e:raise HTTPException(status_code=500, detail=str(e))# 运行FastAPI应用
if __name__ == "__main__":import uvicornuvicorn.run(app, host="0.0.0.0", port=8000)
简单的请求
import requests# 定义API的URL
url = "http://127.0.0.1:8000/generate/"# 定义要发送的数据
data = {"text": "你好,这是一个测试。"}# 发送POST请求
response = requests.post(url, json=data)# 打印响应内容
print(response.json()["response"])
这篇关于给rwkv-pytorch 写个chat ui demo的文章就介绍到这儿,希望我们推荐的文章对编程师们有所帮助!


