本文主要是介绍uiautomation、pytest、schedule实现桌面程序自动化(初级)02,希望对大家解决编程问题提供一定的参考价值,需要的开发者们随着小编来一起学习吧!
一:安装uiAutomation
前置条件:安装python、pycharm
命令行安装
Pip install uiautomation==2.0.17 #指定版本
二:安装辅助工具:inspect.exe和、Accessibility Insights For Windows定位元素工具
辅助工具介绍
步骤中提到了一个工具 --- 「Inspect.exe」 ,该工具是一个图形用户界面 (GUI) 应用程序,可用于收集用于提供程序和客户端开发和调试的 UI 自动化信息,它包含在 Windows SDK 中。
Inspect(Inspect.exe)是一个基于Windows的工具,允许您选择任何UI元素并查看元素的可访问性数据。您可以查看Microsoft UI自动化属性和控制模式,以及Microsoft活动辅助功能属性。Inspect还允许您测试UI自动化树中自动化元素的导航结构,以及Microsoft活动辅助功能层次结构中的可访问对象。
(1)步骤1:安装windows sdk
Windows SDK - Windows 应用开发 | Microsoft Developer
点击下载安装程序-下载
 步骤2:打开
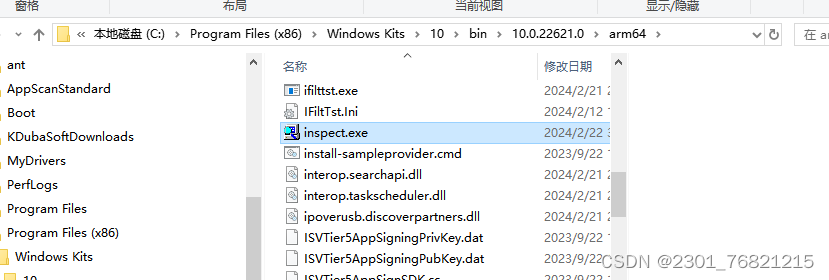
目录:C:\Program Files (x86)\Windows Kits\10\bin\10.0.22621.0\x64
默认安装路径:

有windows要求,我的是windows10 专业版 不支持
C:\Users\admin>pip install PyTimer
元素定位工具 inspect:
下载:
pip install schedule
schedule任务调度模块
可以按照秒、时、分、日期或者自定义事件执行事件
步骤四:安装定位工具推荐
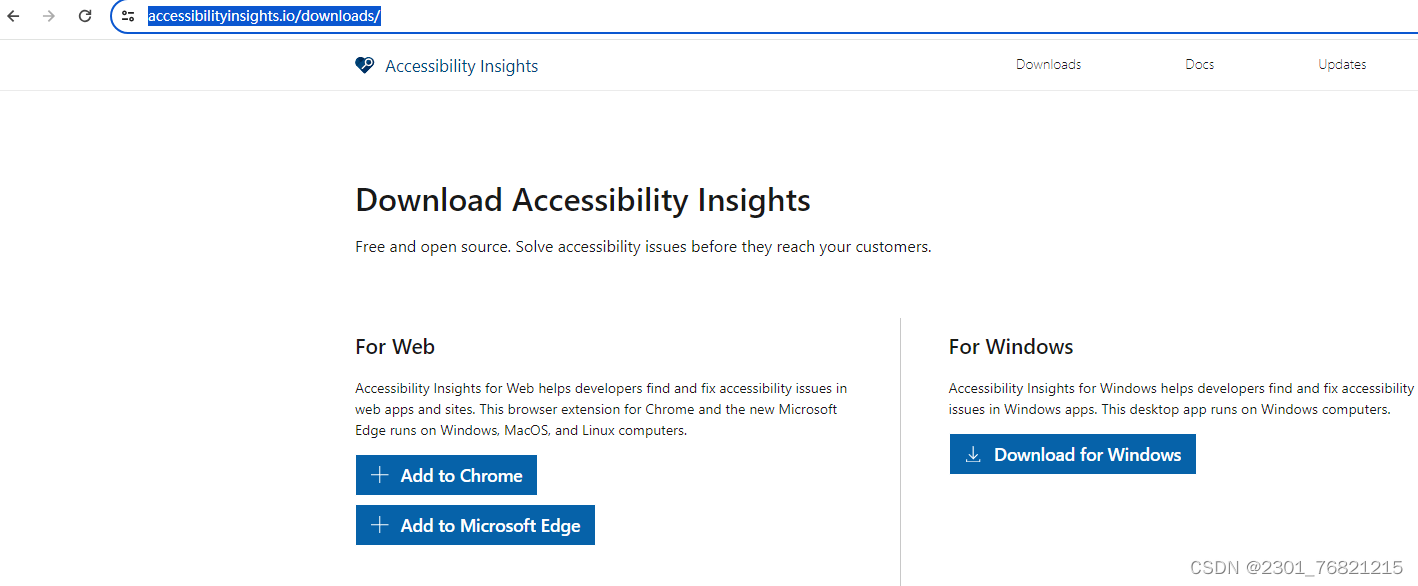
Accessibility Insights For Windows
下载:Accessibility Insights Downloads

四:实战代码
UIautomation进行简单的桌面程序自动化
- 读取excel数据,实现一个方法使用多个数据
-
from xToolkit import xfileimport yamlclass GetData(object):# pip install xToolkit -i https://mirrors.aliyun.com/pypi/simple/# from xToolkit import xfile# 获取用户数据 20230718补充 最简单 一句代码# 注意:xtoolkit只支持xls,不支持xlsxdef get_data_excel(self, datafile):# 读取excel数据,并将数据转换为exceldataMsg = xfile.read(datafile).excel_to_dict()return dataMsg# 获取修改用户资料页面元素def editinfo_page_element(self):pass# 获取登录页面元素# 读取yaml文件# 1、大小写敏感## 2、使用缩进表示层级关系## 3、缩进的空格数目不重要,只要相同层级的元素左侧对齐即可,通常开头缩进两个空格## 4、不支持Tab键制表符缩进,只使用空格缩进## 5、字符后缩进一个空格,如冒号,逗号,短横杆(-)等## 6、"—“表示YAML格式,一个文件的开始,用于分隔文件间## 7、” # ”表示注释 (yaml文件只有行注释)def getDateyaml(self, page_file):with open(page_file, 'r', encoding='utf-8') as f:element = yaml.safe_load(f)return element
2、uiautomation、pytest、Schedule定时器的使用
使用代码:
"""
@Time  :2024/3/2811:46@Auth  :@File  :MMAutomation.py
"""
import pytest
import pyautogui
import schedule
from datetime import datetimefrom model.Get_Data import GetData
import os
import subprocess
import uiautomation
import time
from threading import Timeruiautomation.uiautomation.DEBUG_SEARCH_TIME = True
uiautomation.uiautomation.SetGlobalSearchTimeout(20)  # 设置全局搜索超时时间
# 全局变量,用于跟踪任务执行的次数
task_count = 0
max_task_count = 5  # 设置任务最多执行5次class TestProject():def openWindow(self):try:windowName = "MiniTool MovieMaker 7.3.0 - (Ultimate)"self.MMWindow = uiautomation.WindowControl(searchDepth=1, Name=windowName)  # 定位窗体# 判断程序窗口是否存在if self.MMWindow.Exists(maxSearchSeconds=1):print(self.MMWindow)else:print("窗口不存在")path = r"C:\\Program Files\\7.3MiniTool MovieMaker7.3\\bin\\MiniTool MovieMaker.exe"subprocess.Popen(path)time.sleep(10)self.MMWindow = uiautomation.WindowControl(searchDepth=1, Name=windowName)  # 定位窗体# self.MMWindow.MoveToCenter()  # 窗体居中显示self.MMWindow.SetActive()  # 激活窗口# self.MMWindow.SetTopmost(True)  # 程序置顶显示return self.MMWindowexcept Exception as exx:raise (str(exx))bathP = os.path.abspath(os.path.join(os.getcwd(), ".."))filePath = os.path.join(bathP, r"data\ExportData.xls")exportMsg = GetData().get_data_excel(filePath)print(exportMsg)# 导出# 操作步骤 点击导出-输入文件名-输入导出地址-选择格式-选择分辨率-选择帧率-导出@pytest.mark.parametrize("exportMsg", exportMsg)def test_Export(self, exportMsg):# MMWindow=self.MMWindow()self.openWindow()exportButton = self.MMWindow.ButtonControl(AutomationId="btnExport", desc="点击导出")  # 导出print("导出", exportButton)if exportButton.Exists() == True:exportButton.Click(waitTime=0.1)time.sleep(2)self.MMWindow.Refind()exportWindow = self.MMWindow.WindowControl(Name="Export", desc="导出窗口", searchDepth=1)if exportWindow.Exists() == True:print("进入导出界面")else:print("未正确获取导出界面", exportWindow)# 输入导出文件名FileName = exportMsg["FileName"]  # 文件名exportPath = exportMsg["saveToPath"]  # 文件保存路径Format = exportMsg["cboFormat"]  # 选择格式Resolution = exportMsg["cmbResolution"]  # 选择分辩率FameRate = exportMsg["cmbFameRate"]  # 帧率fameRateDesc = exportMsg["fameRateDesc"]  # 帧率描述formatDesc = exportMsg["formatdesc"]  # 格式描述print("导出名字:{} \n 文件保存路径:{},选择格式:{}\n选择分辩率:{}\n帧率描述:{}\n帧率{}" \.format(FileName, exportPath,Resolution,Format,fameRateDesc, FameRate))try:## 获取EditControl支持的ValuePattern,并用Pattern设置控件文本为"输入文件名exportWindow.EditControl(foundIndex=1, desc="name").GetValuePattern().SetValue(FileName)# 输入导出路径# searchDepth 搜索第一个满足条件的控件 foundIndex: exportWindow在导出窗体下editcontrol控件的第二个,fondindex的索引从1exportWindow.EditControl(foundIndex=2, desc="saveTo").GetValuePattern().SetValue(exportPath)except uiautomation.comtypes.COMError as ex:# 如果遇到COMError, 一般是没有以管理员权限运行Python, 或者这个控件没有实现pattern的方法(如果是这种情况,基本没有解决方法)pass# 格式cboFormat = exportWindow.ComboBoxControl(AutomationId="cboFormat", desc="格式", searchDepth=1)formatList = ["MP4"]cboFormat.Click(waitTime=1)cboFormat.ListItemControl(Name=Format, searchDepth=1, desc=formatDesc).Click(waitTime=0.1)# 像素time.sleep(1)cmbResolution = exportWindow.ComboBoxControl(AutomationId="cmbResolution", desc="像素")cmbResolution.Click(waitTime=1)cmbResolution.ListItemControl(Name=Resolution, searchDepth=1).Click(waitTime=0.1)# 帧率cmbFameRate = exportWindow.ComboBoxControl(AutomationId="cmbFameRate", desc="帧率", searchDepth=1)cmbFameRate.Click(waitTime=1)# 选择帧率cmbFameRate.ListItemControl(Name="MovieMaker.ExportModule.ViewModels.FameRateConfig", foundIndex=int(FameRate),desc=fameRateDesc) \.Click(waitTime=1)# 点击导出exportMedia = exportWindow.ButtonControl(AutomationId="btnExport", ClickablePoint="{x:1425 y:750}",desc="导出")exportMedia.Click(waitTime=1)# 正在导出if exportWindow.TextControl(Name="Exporting...", desc="正在导出。。").Exists() == True:print("正在导出中")# ExportResult(self): 关闭导出完成窗口self.ExportResult(exportWindow)# 导出成功后关闭导出def ExportWindowCloseTask(self):global task_counttask_count += 1print('执行次数', task_count)print("现在执行导出的任务")exportResultWindow = self.MMWindow.WindowControl(AutomationId="exportResultWindow", desc="导出完成")if exportResultWindow.Exists() == True:print("导出")exportResultWindow.ButtonControl(AutomationId="buttonClose", desc="关闭导出窗口").Click(waitTime=1)else:e = datetime.now()exportTimeing = e.strftime("%Y-%m-%d %H:%M:%S")print("未导出完成,正在导出,现在时间", exportTimeing)if task_count > max_task_count:print("达到了最大执行次数,停止任务")print("导出超时")self.MMWindow.CaptureToImage("exportImage.png")schedule.clear("ExportWindowCloseTask")def ExportResult(self, exportWindow):# 导出成功后关闭导出窗口,定时执行导出关闭界面任务taskTime = 1  ## CloseTask=schedule.every(taskTime).minutes.do(self.ExportWindowCloseTask)#每隔5分钟定时执行,满足条件后停止任务TaskClose = schedule.every(10).seconds.do(self.ExportWindowCloseTask)  # 间隔5秒执行任务now = datetime.now()startTime = now.strftime("%Y-%m-%d %H:%M:%S")print("开始时间", str(startTime))while True:exportResultWindow = self.MMWindow.ButtonControl(AutomationId="exportResultWindow", desc="导出结果窗口",searchDepth=1)if not exportWindow.Exists() and not exportResultWindow.Exists():EndT = datetime.now()EndTime = EndT.strftime("%Y-%m-%d %H:%M:%S")print("结束时间", EndTime)print('执行时间', (EndT - now).total_seconds())self.MMWindow.CaptureToImage("exportImageOK" + EndTime + ".png")  # 截图# 清空任务,关闭任务schedule.clear()schedule.CancelJob()break# 如导出窗口存在,继续执行schedule.run_pending()time.sleep(1)# 关闭程序,回收对象,释放资源
"""
def __del__(self):
self.MMWindow.ButtonControl(Name="暂停").Click()#例如音乐暂停
self.MMWindow.ButtonControl(Name="关闭").Click()#单击关闭按钮
self.MMWindow.GetWindowPattern().Close()#关闭当前程序
"""if __name__ == '__main__':path = r"C:\Program Files\MiniTool MovieMaker\bin\Launcher.exe"# tp = TestProject()# # tp.testImport()# tp.TestExport()pytest.main(['-vs', 'TestExportHF.py'])
这篇关于uiautomation、pytest、schedule实现桌面程序自动化(初级)02的文章就介绍到这儿,希望我们推荐的文章对编程师们有所帮助!


