本文主要是介绍UE5 HLSL 详细学习笔记,希望对大家解决编程问题提供一定的参考价值,需要的开发者们随着小编来一起学习吧!
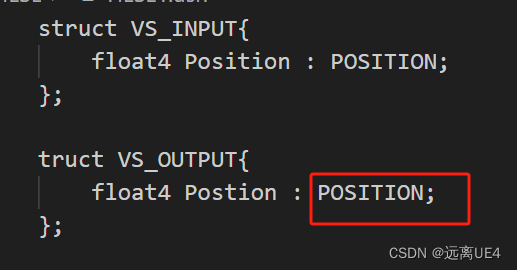
这里的POSITION是变量Position的语义,告诉寄存器,此变量的保存位置,通常语义用于着色器的输入和输出,以冒号“:”的方式进一步说明此变量,COLOR也类似

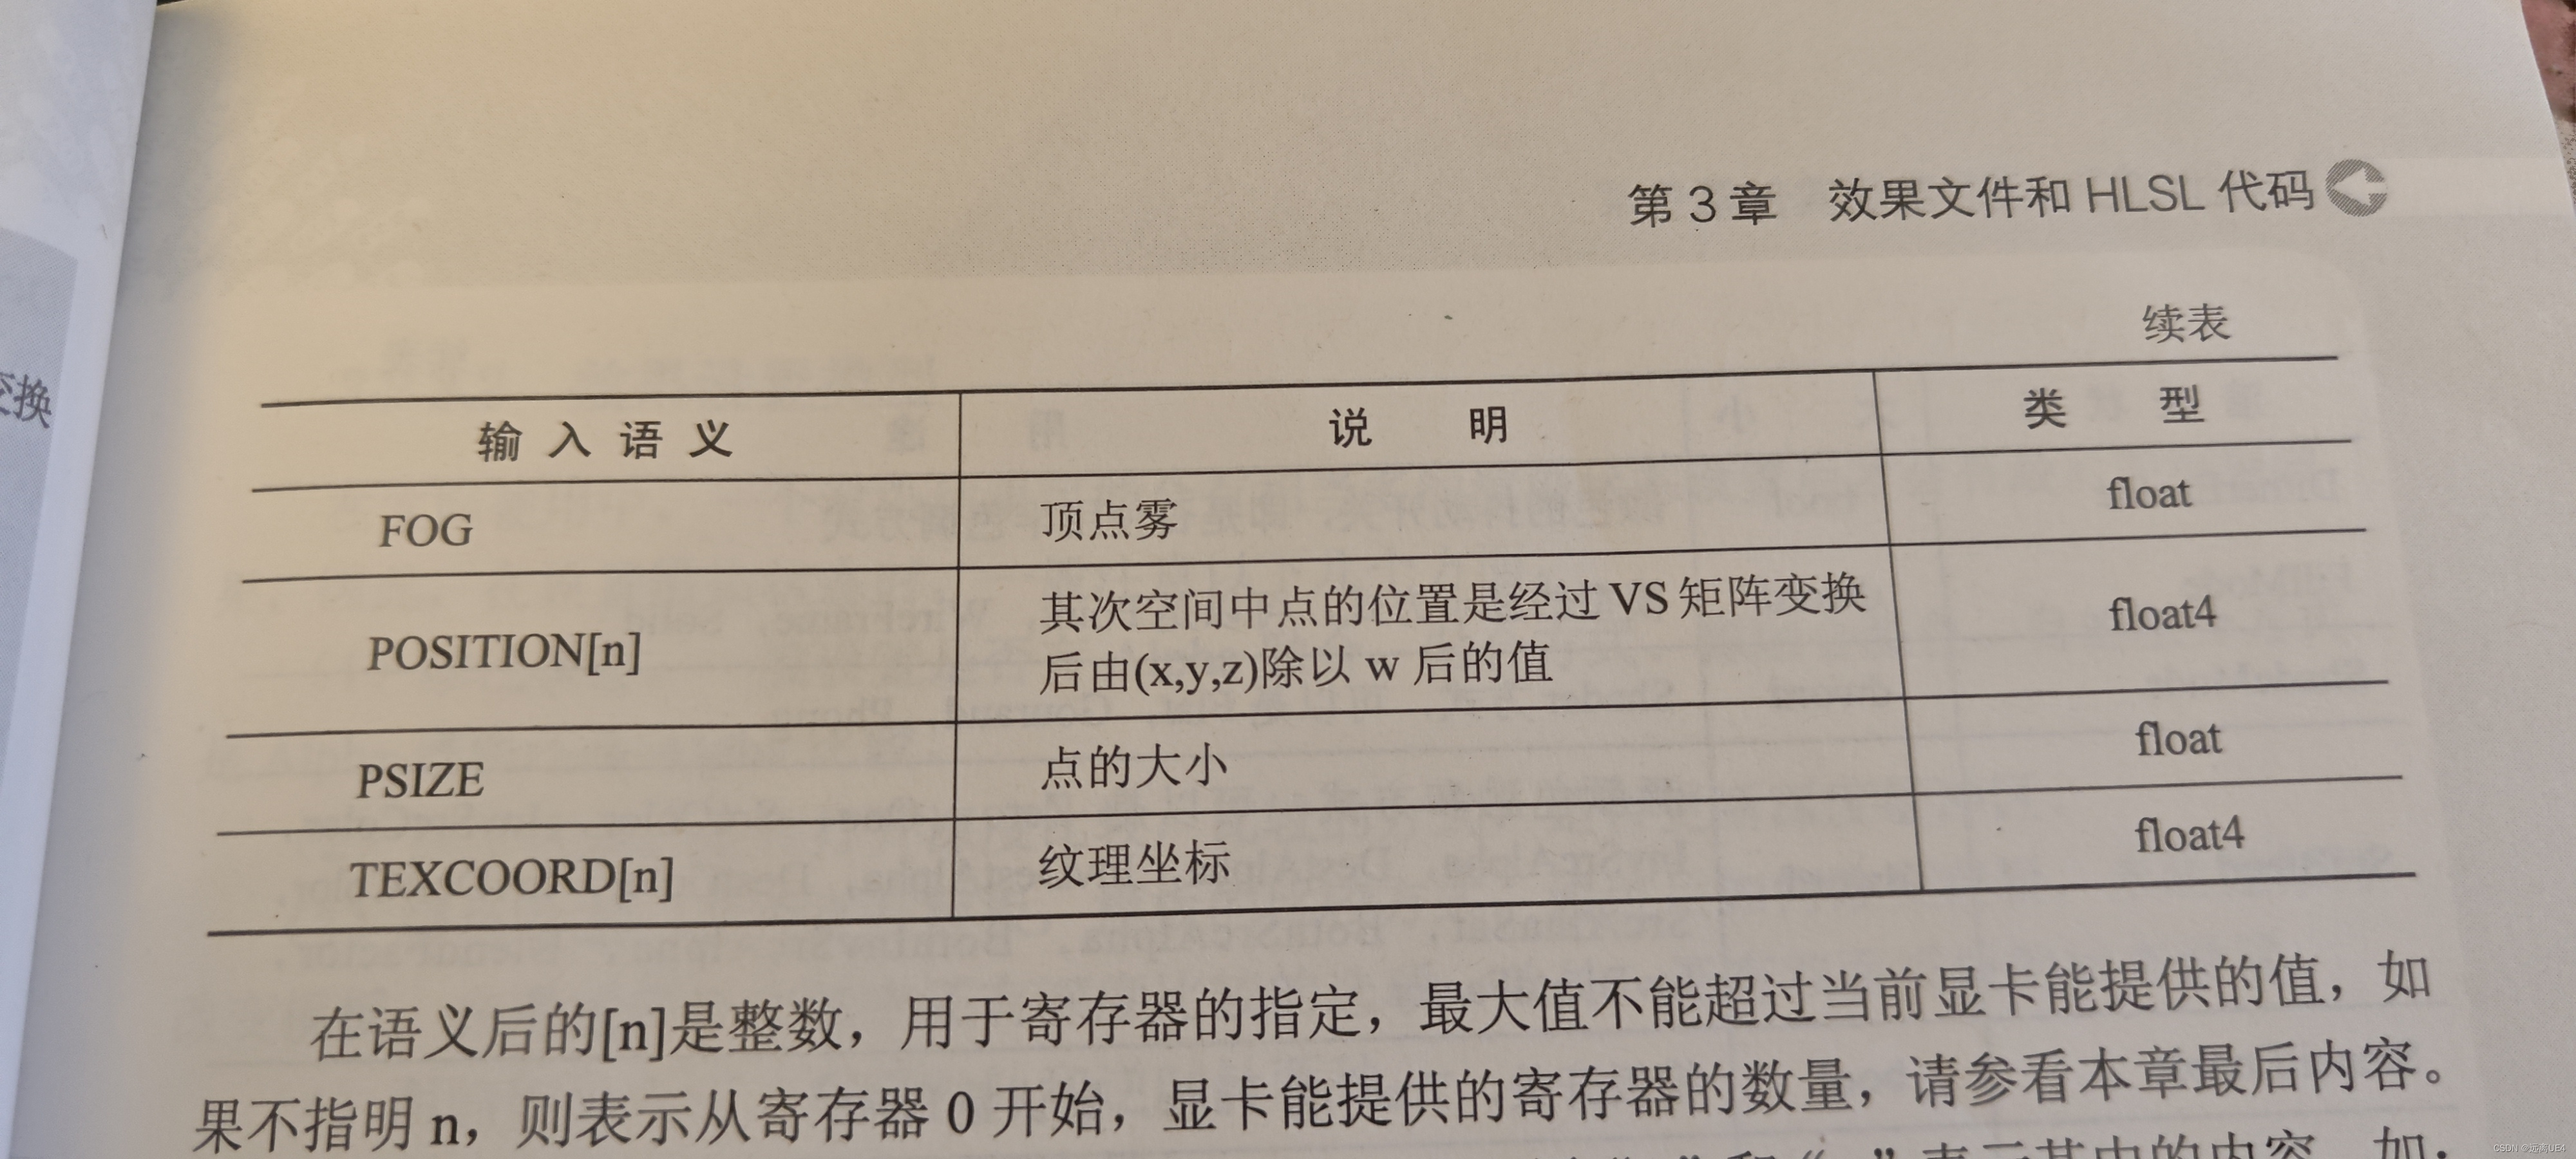
还有什么语义呢?

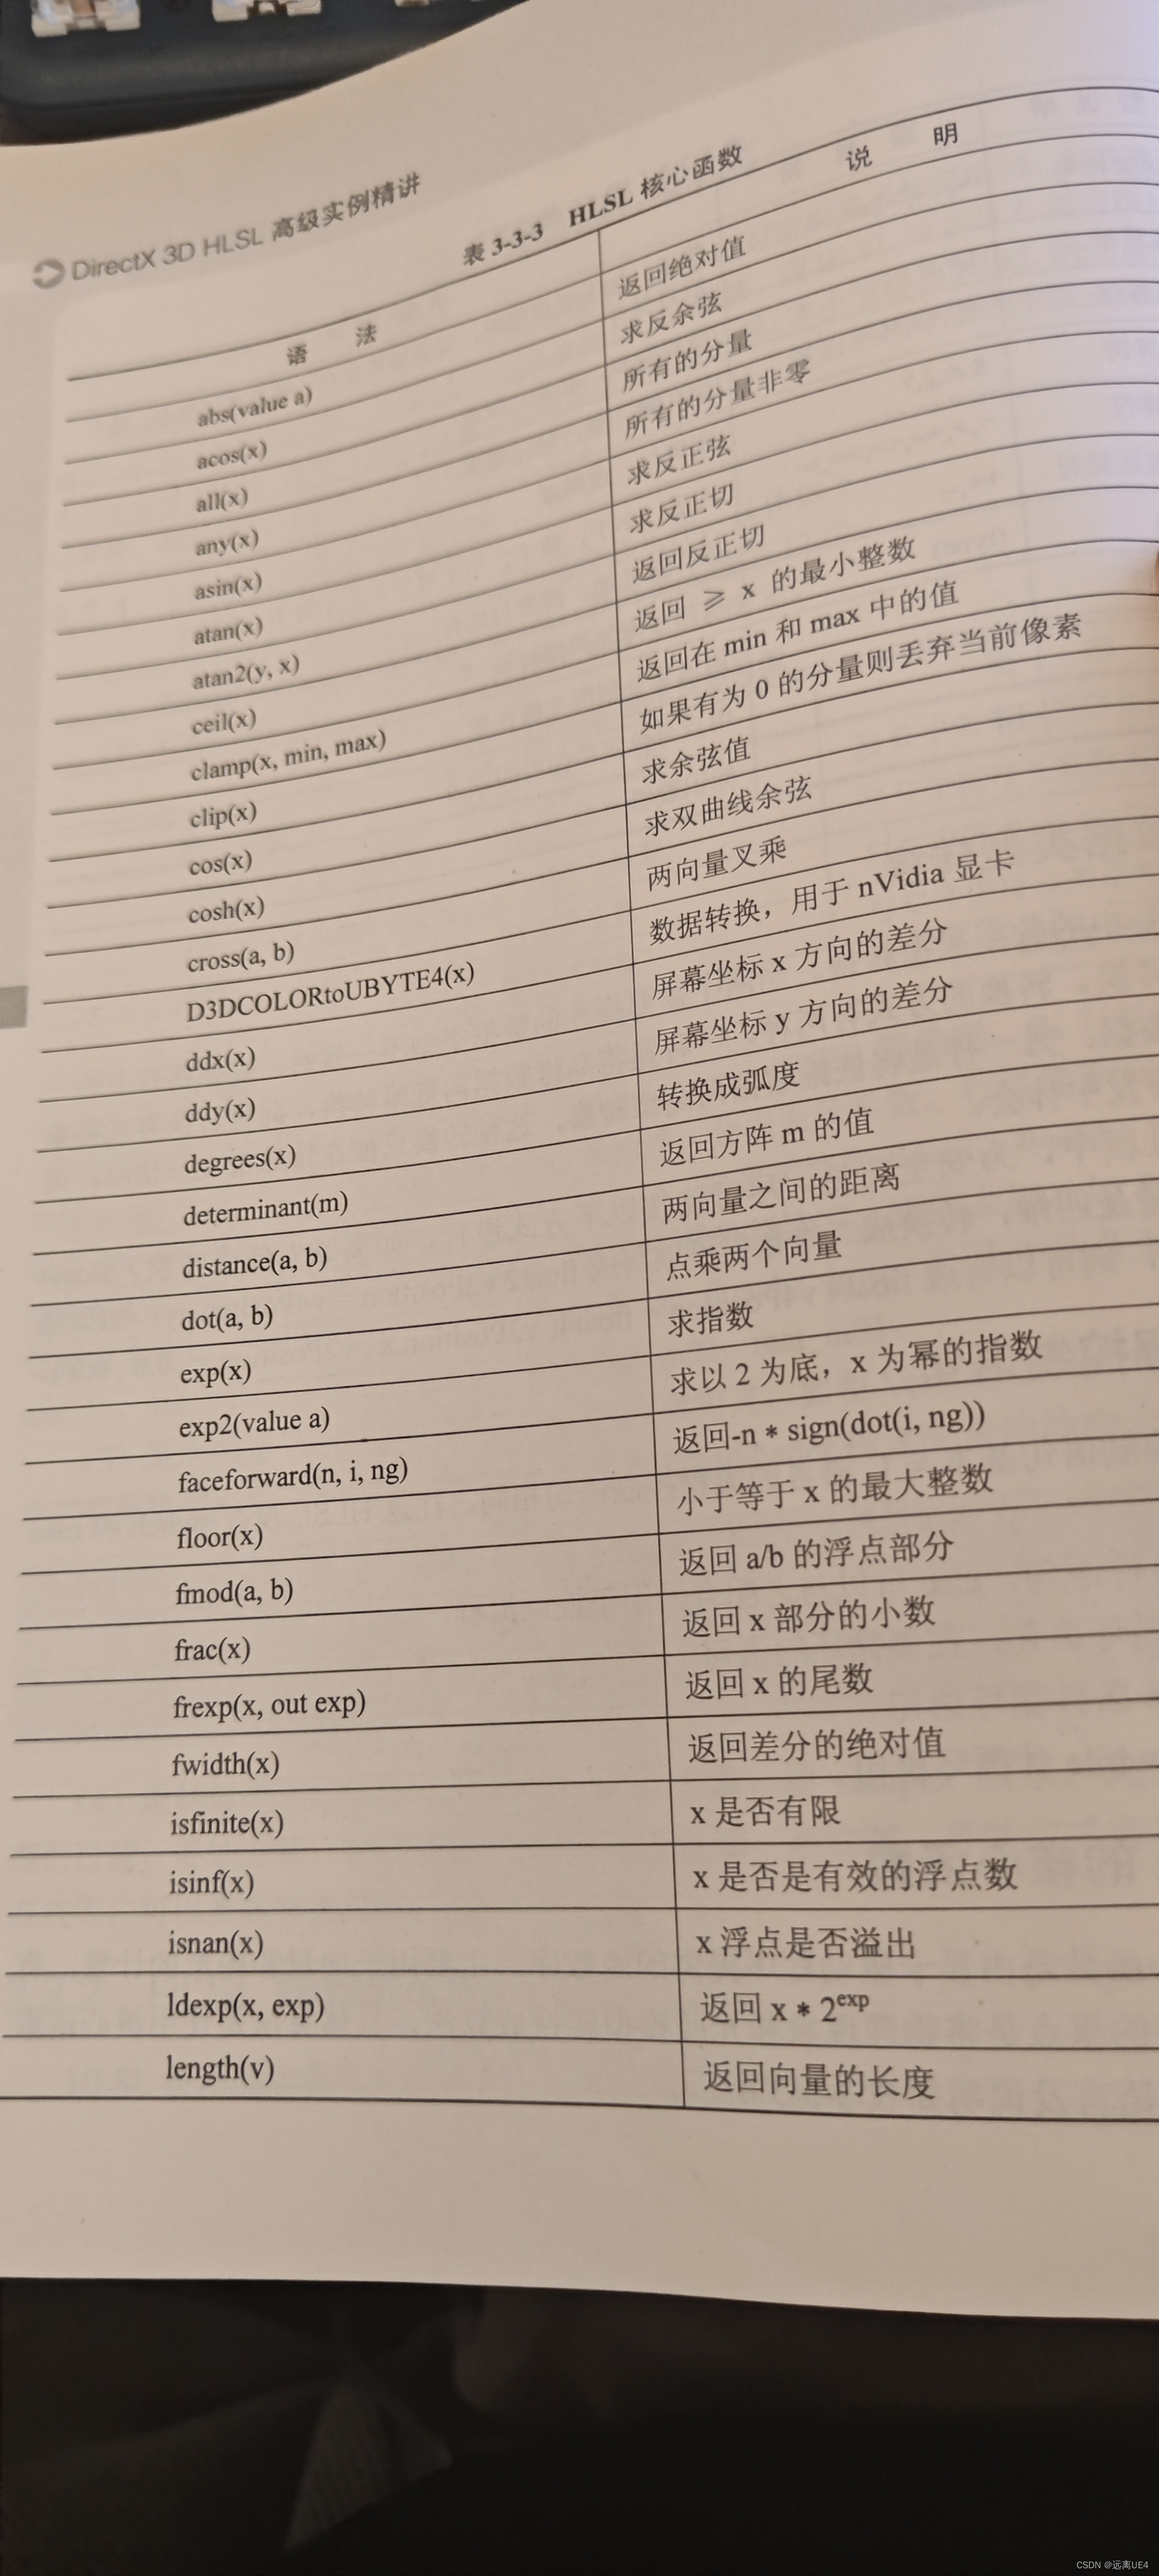
HLSL核心函数:

float3 Pixels = Texture2DSample(Tex, TexSampler, myUV);
for(int i = 0; i < n; i++) {Pixels += Texture2DSample(Tex, TexSampler, myUV + float2(offset, 0));Pixels += Texture2DSample(Tex, TexSampler, myUV + float2(-offset, 0));Pixels += Texture2DSample(Tex, TexSampler, myUV + float2(0, offset));Pixels += Texture2DSample(Tex, TexSampler, myUV + float2(0, -offset));Pixels += Texture2DSample(Tex, TexSampler, myUV + float2(offset, -offset));Pixels += Texture2DSample(Tex, TexSampler, myUV + float2(-offset, offset));Pixels += Texture2DSample(Tex, TexSampler, myUV + float2(offset, offset));Pixels += Texture2DSample(Tex, TexSampler, myUV + float2(-offset, -offset));
}
Pixels /= 8 + 1;return Pixels;
模糊
float2 myUV = floor(uv * 20) / 20;
float3 Pixels = Texture2DSample(Tex, TexSampler, myUV);return Pixels;
像素化
float2 PixelsUV = floor(UV * GridNumber) / GridNumber;
float X = frac(UV.x * GridNumber);
float Y = frac(UV.y * GridNumber);
if((X < (Outline / GridNumber) || X > 1 - (Outline / GridNumber)) || (Y < (Outline / GridNumber) || Y > 1 - (Outline / GridNumber))){return float3(0, 0 , 0);
}
float3 Pixels = Texture2DSample(Tex, TexSampler, PixelsUV);
float Offset = 1 / GridNumber;
for(int i = 0; i < AverBounds; i++){Pixels += Texture2DSample(Tex, TexSampler, PixelsUV + float2(i * Offset, 0));Pixels += Texture2DSample(Tex, TexSampler, PixelsUV + float2(-Offset * i, 0));Pixels += Texture2DSample(Tex, TexSampler, PixelsUV + float2(0, i * Offset));Pixels += Texture2DSample(Tex, TexSampler, PixelsUV + float2(0, -Offset * i));Pixels += Texture2DSample(Tex, TexSampler, PixelsUV + float2(Offset * i, Offset * i));Pixels += Texture2DSample(Tex, TexSampler, PixelsUV + float2(Offset * i, -Offset * i));Pixels += Texture2DSample(Tex, TexSampler, PixelsUV + float2(-Offset * i, Offset * i));Pixels += Texture2DSample(Tex, TexSampler, PixelsUV + float2(-Offset * i, -Offset * i));
}
Pixels /= 8 * AverBounds + 1;return Pixels;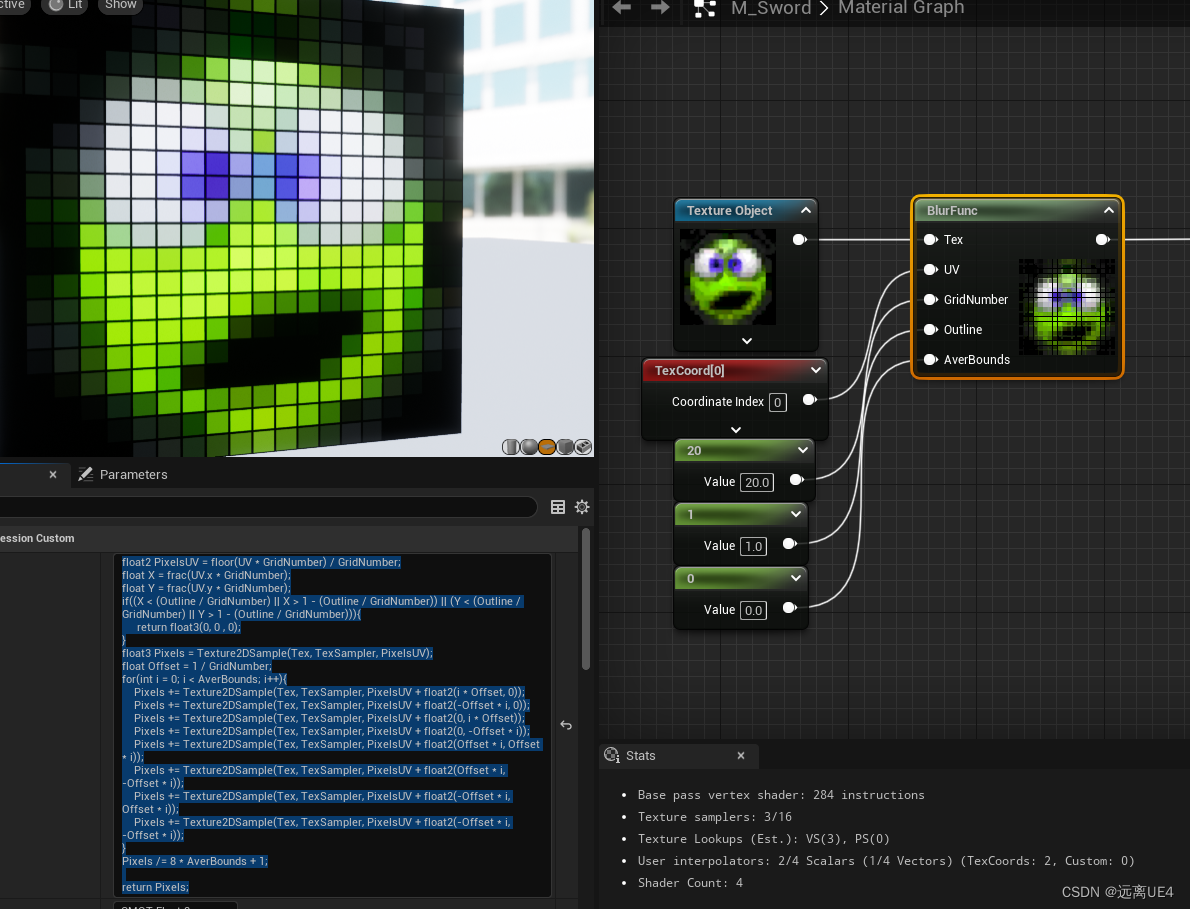

像素化 + 模糊

struct Ns{float Noise(float2 uv, float2 Random, float RandomSeed) {return frac(sin(dot(uv, Random)) * RandomSeed);}
};
Ns n;
uv = floor(uv * noiseNumber);
return n.Noise(uv, Random, RandomSeed) < 0.5 ? 1 : 0;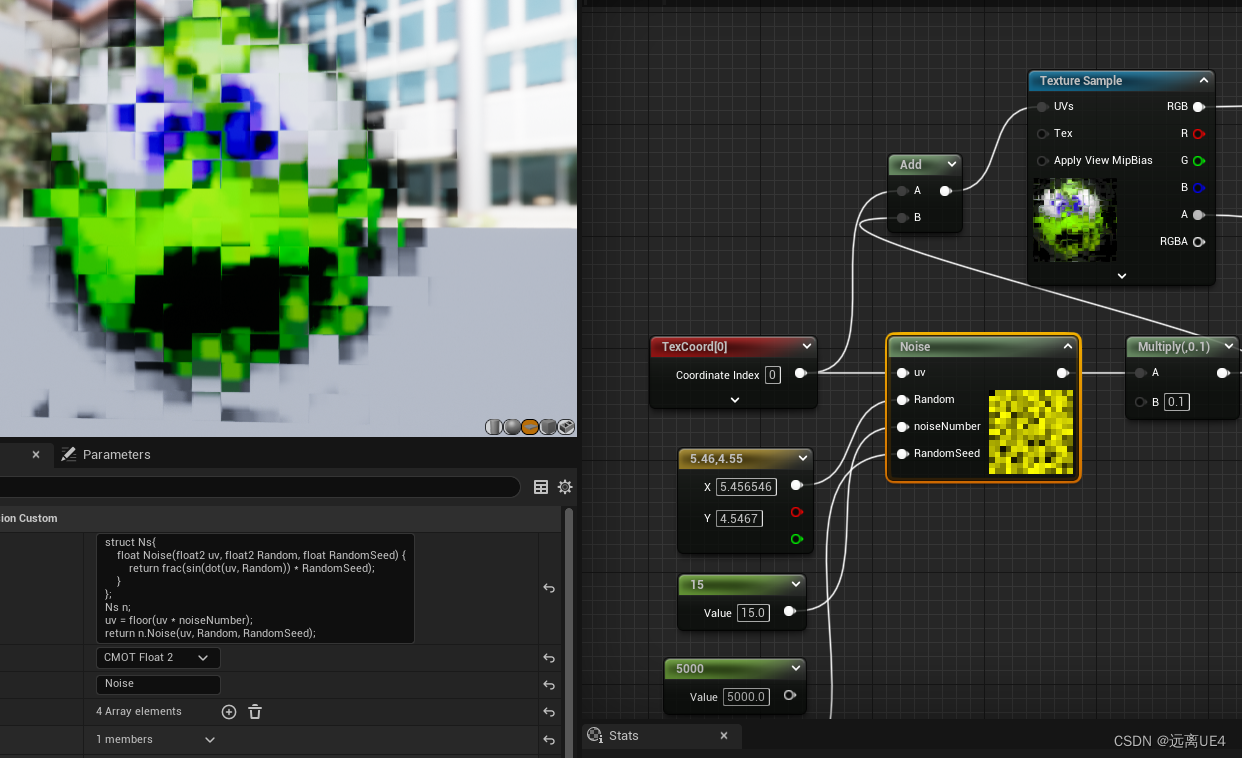
struct Ns{float Noise(float2 uv, float2 Random, float RandomSeed) {return frac(sin(dot(uv, Random)) * RandomSeed);}
};
Ns n;
uv = floor(uv * noiseNumber);
return n.Noise(uv, Random, RandomSeed);
噪点
原理主要是先对UV里面所有内容进行dot,一个是每个uv的长度和方向合在一起具有唯一性与一个点位进行点乘就有随机数,但是这个随机数有个问题就是相邻的可能颜色很像,而噪点是黑白随机分配,不是一部分聚集在一起呈黑色,其他呈白色

float accumdens = 0;
LocCamVec = normalize(mul(Parameters.CameraVector, (float3x3)LWCToFloat(GetPrimitiveData(Parameters).WorldToLocal)));
for(int i = 0; i < MaxSteps; i++){float cursample = PseudoVolumeTexture(Tex, TexSampler, saturate(CurPos) + sin(Time * CloudSpeed) *  CloudSpeedIntensity, XYFrames, NumFrames).r;accumdens += cursample * StepSize;CurPos += -LocCamVec * StepSize;
}
return accumdens;
RayMarching做体积效果
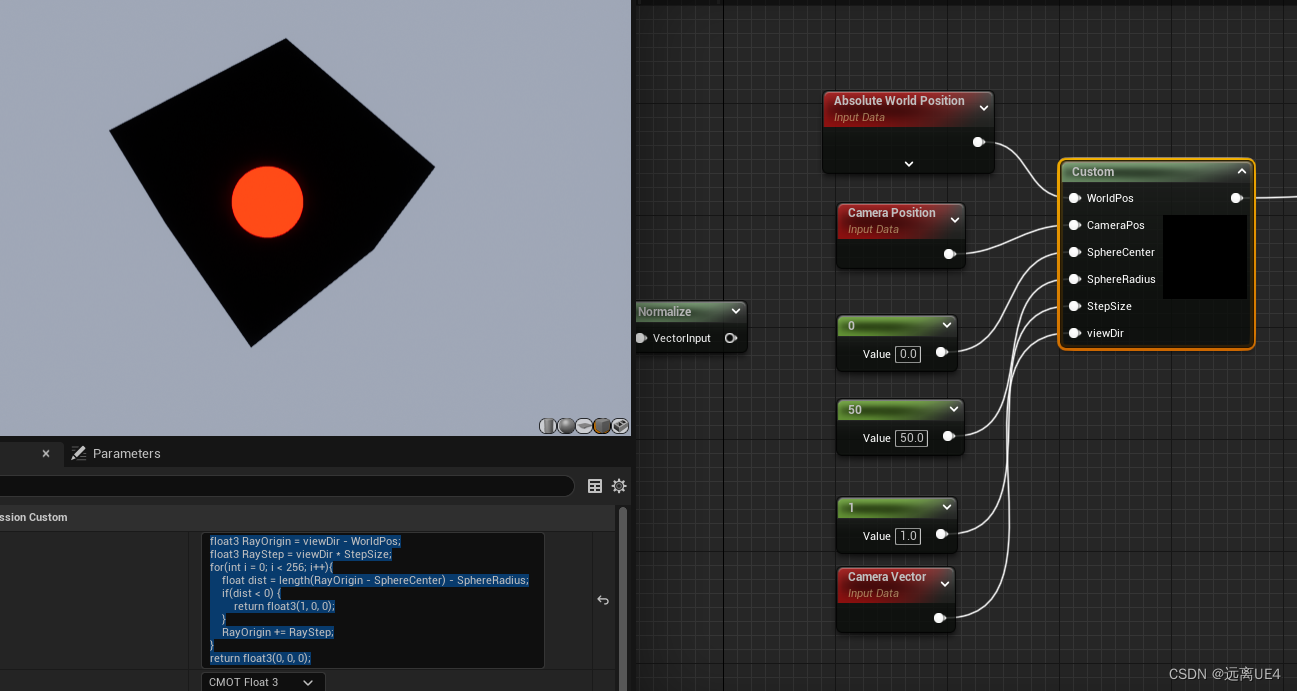
float3 RayOrigin = viewDir - WorldPos;
float3 RayStep = viewDir * StepSize;
for(int i = 0; i < 256; i++){float dist = length(RayOrigin - SphereCenter) - SphereRadius;if(dist < 0) {return float3(1, 0, 0);}RayOrigin += RayStep;
}
return float3(0, 0, 0);


首先reflect(i, n)函数是以i为入射向量,n为法线向量的反射向量 float3 Reflection = reflect(LightDir, normal);
float3 RayOrigin = 1 - (viewDir - WorldPos);
float3 LightDir = normalize(LightPos);
float3 RayStep = viewDir * -StepSize;
for(int i = 0; i < 256; i++){float3 normal = normalize(RayOrigin - SphereCenter);float Diffuse = max(dot(normal, LightDir), 0);float3 Reflection = reflect(LightDir, normal);float Specular = pow(max(dot(Reflection, -viewDir),0), 128);float dist = length(RayOrigin - SphereCenter) - SphereRadius;if(dist < 0.01) {return float3(1, 0, 0) * Diffuse + (Specular) * LightColor;}OpacityMask = 1;RayOrigin += RayStep;
}
OpacityMask = 0;
return float3(0, 0, 0);
拿到了反射向量,就计算反射和射向相机的向量的点积来计算当点的高光亮度,如果刚好射到相机,那么就高亮越亮,反之,越暗
struct NoiseRotate {float2 RotateUV(float2 uv, float Angle) {float2x2 RotateMatrix = float2x2(cos(Angle), sin(Angle), -sin(Angle), cos(Angle));return  mul(uv - 0.5, RotateMatrix) + 0.5;}
};NoiseRotate NR;UV = (UV - 0.5) * Size + 0.5;float UsingAngle = pow(length(UV - 0.5), sin(time));
UsingAngle = sin(UsingAngle) * 10;
float noiseUV = sin(atan2(UV.x - 0.5, UV.y - 0.5)) * length(UV - 0.5);float3 Image = Texture2DSample(Tex, TexSampler, NR.RotateUV(UV, UsingAngle + time));
return Image;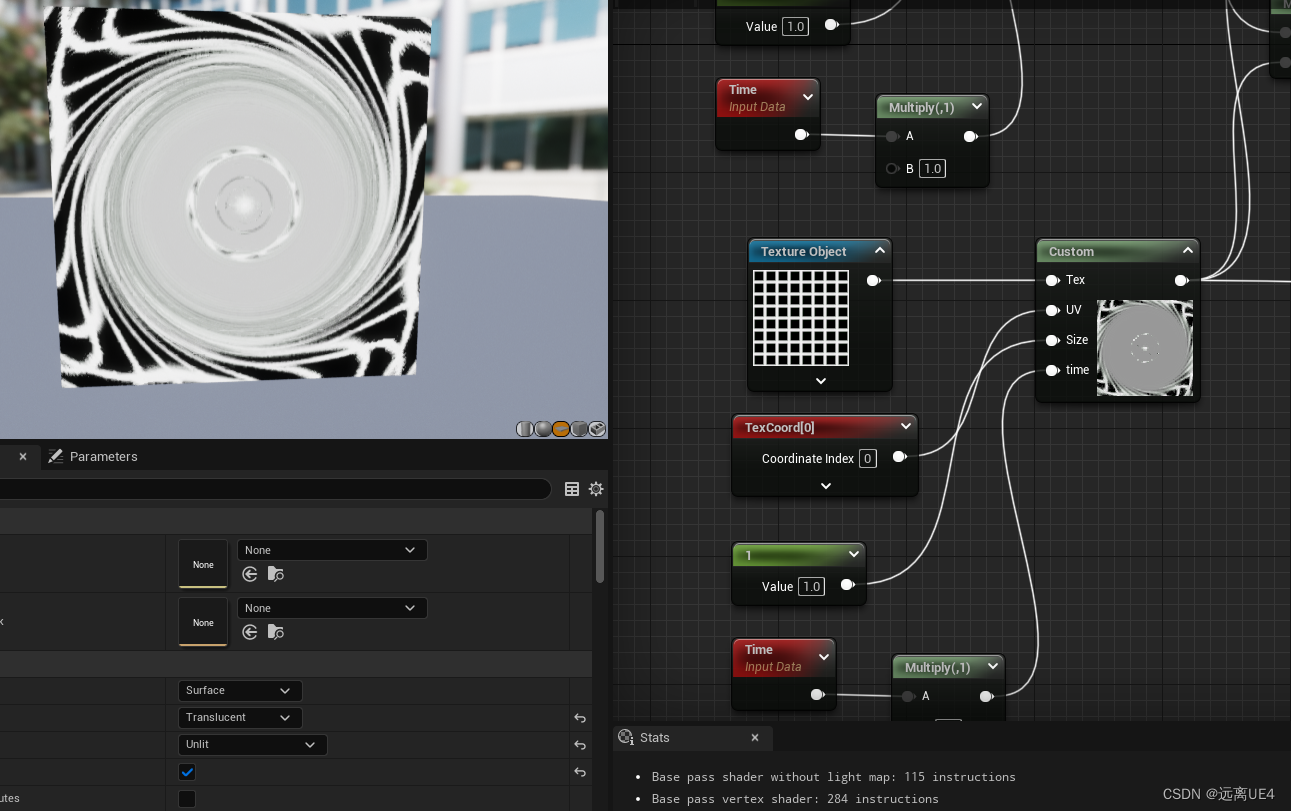
利用旋转矩阵实现RotateUV的函数
然后根据离中心位置的距离,旋转的角度不同,做出该效果
这篇关于UE5 HLSL 详细学习笔记的文章就介绍到这儿,希望我们推荐的文章对编程师们有所帮助!


